Live-Cell Multiped Assays for Chemogenomic Libraries: A Comprehensive Guide from Screening to Validation
This article provides a comprehensive overview of live-cell multiplexed assays tailored for chemogenomic library screening.
Live-Cell Multiped Assays for Chemogenomic Libraries: A Comprehensive Guide from Screening to Validation
Abstract
This article provides a comprehensive overview of live-cell multiplexed assays tailored for chemogenomic library screening. It covers foundational principles of chemogenomic libraries and multiplexed imaging, details methodological pipelines combining high-throughput drug screening with single-cell transcriptomics and live-cell imaging, offers practical troubleshooting for assay optimization, and presents rigorous validation frameworks comparing different viability and cytotoxicity readouts. Designed for researchers, scientists, and drug development professionals, this guide aims to enhance the accuracy and information content of pre-clinical drug discovery by enabling the simultaneous measurement of multiple cellular health parameters to distinguish specific target modulation from non-specific cytotoxic effects.
Chemogenomic Libraries and Live-Cell Multiplexing: Foundational Concepts and Exploratory Screening
Defining Chemogenomic Libraries and Their Role in Target Deconvolution
Chemogenomic libraries are carefully curated collections of small molecules, each with annotated biological activities against specific protein targets or target families [1]. These libraries serve as a bridge between phenotypic drug discovery and target-based approaches by providing a set of compounds with known mechanisms of action that can be used to probe biological systems [2] [3]. Unlike traditional diverse compound libraries used in high-throughput screening, chemogenomic libraries are designed with target coverage in mind, often focusing on spanning the druggable genome or specific protein families implicated in disease [4].
The fundamental premise of chemogenomic screening is the "guilt-by-association" concept – if multiple compounds targeting the same protein produce similar phenotypic outcomes, this provides strong evidence that the phenotype is mediated through that particular target or pathway [5]. This approach has gained significant traction in recent years, with initiatives such as the EUbOPEN project aiming to assemble an open-access chemogenomic library covering more than 1,000 proteins with well-annotated compounds [5]. The ultimate goal of Target 2035 is to expand these collections to cover the entire druggable proteome [5].
Table 1: Key Characteristics of Prominent Chemogenomic Libraries
| Library Name | Size (Compounds) | Key Features | Primary Applications |
|---|---|---|---|
| MIPE 4.0 (NIH) | 1,912 | Small molecule probes with known mechanism of action | Phenotypic screening, target deconvolution [2] |
| LSP-MoA | Information Missing | Optimally targets the liganded kinome | Kinase-focused phenotypic profiling [2] |
| Microsource Spectrum | 1,761 | Bioactive compounds for HTS or target-specific assays | General bioactive screening [2] |
| C3L (Comprehensive anti-Cancer Library) | 1,211 | Covers 1,386 anticancer proteins | Precision oncology, patient-specific vulnerability identification [4] |
| Custom Network Pharmacology Library | 5,000 | Integrates drug-target-pathway-disease relationships | Systems pharmacology, morphological profiling [1] |
The Role of Chemogenomic Libraries in Target Deconvolution
The Target Deconvolution Challenge in Phenotypic Screening
Phenotypic drug discovery (PDD) has re-emerged as a promising approach for identifying novel therapeutics, particularly for complex diseases where target biology is poorly understood or where disease heterogeneity indicates multiple contributing target pathways [4]. In PDD, compounds are screened based on their ability to induce a desired phenotypic change in physiologically relevant model systems, without prior knowledge of specific molecular targets [6]. While this approach benefits from evaluating compounds in more disease-relevant contexts, it creates a significant subsequent challenge: target deconvolution, the process of identifying the molecular target(s) responsible for the observed phenotype [6].
Target deconvolution is essential for understanding a compound's mechanism of action, optimizing lead compounds, predicting potential toxicity, and developing biomarkers for clinical development [6]. Traditional target deconvolution methods can be time-consuming and often require specialized techniques such as affinity purification, photoaffinity labeling, or protein stability assays [6].
Chemogenomic Libraries as a Deconvolution Strategy
Chemogenomic libraries offer a powerful alternative or complementary approach to traditional target deconvolution methods. By screening libraries of compounds with known targets, researchers can immediately generate hypotheses about which targets might be responsible for observed phenotypes based on shared targets among active compounds [5] [1]. This approach is particularly effective when using compounds with narrow target selectivity, as the phenotypic readout can be more confidently linked to specific molecular targets [5].
The utility of chemogenomic libraries for target deconvolution depends heavily on the quality of annotation and the polypharmacology of the library compounds [2]. Ideally, compounds should have well-characterized target profiles with minimal off-target interactions. However, most drug-like compounds interact with multiple molecular targets, with an average of six known targets per compound [2]. This polypharmacology can complicate target deconvolution, as phenotypic effects may result from combined modulation of multiple targets rather than a single primary target.
Table 2: Quantitative Comparison of Library Polypharmacology Using PPIndex [2]
| Library | PPindex (All Targets) | PPindex (Without 0-target bin) | PPindex (Without 0 & 1-target bins) |
|---|---|---|---|
| DrugBank | 0.9594 | 0.7669 | 0.4721 |
| LSP-MoA | 0.9751 | 0.3458 | 0.3154 |
| MIPE 4.0 | 0.7102 | 0.4508 | 0.3847 |
| DrugBank Approved | 0.6807 | 0.3492 | 0.3079 |
| Microsource Spectrum | 0.4325 | 0.3512 | 0.2586 |
The PPindex (polypharmacology index) provides a quantitative measure of library target specificity, with larger values indicating more target-specific libraries [2]. As shown in Table 2, libraries vary significantly in their polypharmacology profiles, which influences their utility for different applications. Libraries with higher PPindex values (closer to a vertical slope) are more target-specific and generally more useful for target deconvolution [2].
Live-Cell Multiplexed Assays for Chemogenomic Screening
Assay Principle and Development
Live-cell multiplexed assays represent a significant advancement for phenotypic screening of chemogenomic libraries, as they enable real-time monitoring of compound effects on multiple cellular parameters in physiologically relevant conditions [5]. These assays typically utilize fluorescent dyes and high-content imaging to simultaneously track changes in various cellular health indicators over extended time periods [5] [7].
The development of these assays requires careful optimization of dye concentrations to ensure robust detection while minimizing interference with cellular functions. For example, in the HighVia Extend protocol, the DNA-staining dye Hoechst33342 is used at 50 nM, which provides sufficient signal for nuclear detection without significant cytotoxicity [5]. Similarly, mitochondrial stains like MitotrackerRed and tubulin dyes such as BioTracker 488 Green Microtubule Cytoskeleton Dye are optimized to non-cytotoxic concentrations that maintain signal integrity over 72-hour experiments [5].
Key Cellular Parameters Measured
Live-cell multiplexed assays for chemogenomic library screening typically monitor several essential cellular health parameters:
Nuclear Morphology: Changes in nuclear size, shape, and texture serve as sensitive indicators of cellular stress, apoptosis, and necrosis [5]. Specific morphological changes like pyknosis (nuclear condensation) and nuclear fragmentation can distinguish between different cell death mechanisms [5].
Mitochondrial Health: Mitochondrial mass, membrane potential, and morphology provide insights into metabolic status and early apoptosis [5]. Reduction in mitochondrial content often precedes other markers of cytotoxicity.
Cytoskeletal Integrity: Microtubule network organization assessed through tubulin staining can reveal compounds that directly or indirectly affect cytoskeletal dynamics [5] [7].
Cell Membrane Integrity: Permeability dyes can detect late-stage cell death, but earlier indicators come from morphological changes [5].
Cell Cycle Status: Through analysis of nuclear morphology and intensity, these assays can infer cell cycle distributions and identify compounds causing cell cycle arrest [5].
Experimental Protocol: HighVia Extend Live-Cell Multiplexed Screening
The HighVia Extend protocol represents an optimized live-cell multiplexed approach for annotating chemogenomic libraries based on comprehensive cellular phenotyping [5] [7]. This protocol enables continuous monitoring of compound effects over 48-72 hours, capturing kinetic responses that provide insights into mechanism of action.
Detailed Step-by-Step Methodology
Cell Preparation and Plating
Cell Line Selection: Select appropriate cell lines based on biological context. Common choices include:
Cell Seeding:
- Harvest and count cells using standard procedures
- Seed cells in optically clear, tissue culture-treated microplates (96-well or 384-well format)
- Optimal seeding density: 2,000-5,000 cells/well (384-well) to achieve 50-70% confluency at time of treatment
- Allow cells to adhere for 24 hours under standard culture conditions (37°C, 5% CO₂)
Compound Treatment and Staining
Compound Library Preparation:
- Prepare compound stocks in DMSO at recommended concentrations (typically 10 mM)
- Perform serial dilutions in cell culture medium to achieve final screening concentrations (usually 1-10 μM)
- Include controls: DMSO vehicle (negative control), reference compounds with known mechanisms (positive controls)
- Reference compounds should cover multiple mechanisms: camptothecin (topoisomerase inhibitor), staurosporine (multikinase inhibitor), JQ1 (BET bromodomain inhibitor), paclitaxel (tubulin stabilizer) [5]
Multiplexed Staining Solution Preparation:
- Prepare staining solution in pre-warmed culture medium containing:
- 50 nM Hoechst33342 (nuclear stain)
- MitotrackerRed at optimized concentration (mitochondrial stain)
- BioTracker 488 Green Microtubule Cytoskeleton Dye at optimized concentration (tubulin stain)
- Optional: MitotrackerDeepRed for additional mitochondrial parameters [5]
- Note: Dye concentrations should be validated for each cell type to ensure optimal signal-to-noise ratio without cytotoxicity
- Prepare staining solution in pre-warmed culture medium containing:
Compound Treatment and Staining:
- Remove culture medium from plated cells
- Add compound solutions in multiplexed staining medium
- Incubate under standard culture conditions for duration of experiment
Image Acquisition and Analysis
Time-lapse Image Acquisition:
- Use high-content imaging systems with environmental control (37°C, 5% CO₂)
- Acquire images at multiple time points (e.g., 0, 6, 12, 24, 48, 72 hours)
- Capture multiple fields per well to ensure statistical robustness
- Use appropriate filter sets for each fluorescent channel [7]
Image Analysis and Feature Extraction:
- Segment individual cells based on nuclear staining
- Extract morphological features for each cellular compartment:
- Nuclear: area, perimeter, intensity, texture, shape descriptors
- Cytoplasmic: area, organelle distribution, texture
- Whole cell: size, shape, spatial relationships
- Quantify intensity-based features for each channel [5] [7]
Machine Learning Classification:
- Train supervised machine learning algorithms using reference compounds
- Classify cells into phenotypic categories:
- Healthy
- Early apoptotic
- Late apoptotic
- Necrotic
- Mitotic
- Other compound-specific phenotypes [5]
- Generate time-dependent IC₅₀ values for each compound
Table 3: Research Reagent Solutions for Live-Cell Multiplexed Screening
| Reagent Category | Specific Examples | Function | Optimized Concentration |
|---|---|---|---|
| Nuclear Stains | Hoechst33342 | DNA labeling, nuclear morphology assessment | 50 nM [5] |
| Mitochondrial Stains | MitotrackerRed, MitotrackerDeepRed | Mitochondrial mass and health assessment | Cell type-specific optimization required [5] |
| Cytoskeletal Stains | BioTracker 488 Green Microtubule Cytoskeleton Dye | Microtubule network visualization | Cell type-specific optimization required [5] |
| Viability Indicators | AlamarBlue | Metabolic activity measurement | According to manufacturer protocol [5] |
| Reference Compounds | Camptothecin, Staurosporine, JQ1, Paclitaxel | Assay validation and training set | Dose-response from nM to μM range [5] |
Data Analysis and Interpretation
Phenotypic Profiling and Target Hypothesis Generation
The analysis of live-cell multiplexed screening data involves both quantitative dose-response assessment and qualitative morphological profiling. Time-dependent IC₅₀ values provide information on compound potency and kinetics, while morphological profiles offer insights into potential mechanisms of action [5].
For target deconvolution, the key analysis step involves identifying shared targets among compounds that produce similar phenotypic profiles. This can be achieved through:
Phenotypic Clustering: Group compounds based on similarity in their multiparameter phenotypic profiles [1]
Target Enrichment Analysis: Identify molecular targets that are statistically overrepresented among active compounds [4] [1]
Pathway Mapping: Connect enriched targets to biological pathways using resources like KEGG or Gene Ontology [1]
Integration with Chemogenomic Annotations
The power of chemogenomic library screening is fully realized when phenotypic data is integrated with comprehensive compound-target annotations. This integration enables:
- Cross-validation of phenotypic effects across multiple compounds targeting the same protein
- Identification of off-target effects when compounds with different primary targets produce similar phenotypes
- Discovery of polypharmacology when single compounds engage multiple targets to produce complex phenotypes [2] [1]
Advanced computational approaches, including network pharmacology and systems biology modeling, can further enhance target deconvolution by placing results in the context of broader biological networks [1].
Applications in Precision Oncology
The application of chemogenomic library screening combined with live-cell multiplexed assays has shown particular promise in precision oncology, where patient-specific therapeutic vulnerabilities can be identified through phenotypic profiling [4].
In a pilot screening study using the C3L (Comprehensive anti-Cancer small-Compound Library) against patient-derived glioblastoma stem cells, researchers identified highly heterogeneous phenotypic responses across patients and glioblastoma subtypes [4]. This approach enabled the identification of patient-specific vulnerabilities that might not be evident through genomic analysis alone, highlighting the power of phenotypic screening with target-annotated compound libraries for personalized medicine approaches [4].
The integration of these phenotypic profiles with genomic and transcriptomic data creates multidimensional datasets that can reveal novel therapeutic opportunities and biomarkers for patient stratification, ultimately accelerating the development of personalized cancer therapies.
Core Principles of Live-Cell Multiplexed Assays for Cellular Health
Live-cell multiplexed assays represent a transformative approach in biomedical research, enabling real-time, simultaneous observation of multiple biological processes within living cells. Unlike endpoint assays that provide only static snapshots, live-cell multiplexing preserves spatial and temporal context, which is crucial for understanding complex, dynamic cellular responses to chemogenomic libraries [8] [9]. This methodology allows researchers to monitor cellular health parameters—including viability, proliferation, morphology, and functional phenotypes—continuously over time while maintaining physiological conditions. The core principle underpinning these assays is the non-perturbing, parallel acquisition of multiple data streams from the same cell population, thereby generating rich, kinetically-resolved datasets from each experimental well while reducing cell manipulation artifacts [9].
For research involving chemogenomic libraries, where thousands of chemical or genetic perturbations are screened for functional impact, live-cell multiplexing provides unprecedented efficiency. By interrogating multiple health parameters simultaneously, researchers can distinguish subtle, compound-specific phenotypes and capture transient biological events that would be missed by traditional single-timepoint assays [8]. The integration of advanced fluorescence imaging, environmental control, and automated analysis creates a powerful platform for understanding how genetic and chemical perturbations influence cellular homeostasis, signaling networks, and ultimately, viability.
Core Technical Principles
Multiplexing Design Strategies
Successful live-cell multiplexing requires strategic combination of detection modalities that minimize interference while maximizing information content. The three primary design strategies each offer distinct advantages for specific applications.
Spectral Multiplexing utilizes fluorophores with non-overlapping emission spectra to simultaneously detect multiple targets. This approach is ideal for capturing rapid biological processes but faces physical limitations in live cells due to available laser lines and filter configurations. Current instrumentation typically enables 4-6 color simultaneous detection, though careful panel design is essential to minimize spectral bleed-through and autofluorescence [10] [9]. For cellular health assessment, a typical spectral multiplex might combine stains for viability (propidium iodide, red), apoptosis (Annexin V, green), mitochondrial membrane potential (TMRM, orange), and nuclear morphology (Hoechst, blue).
Temporal Multiplexing acquires measurements of the same parameter at multiple time points, capturing dynamic processes like cell migration, division, or death. This approach is particularly valuable for understanding the sequence of cellular events following perturbation by chemogenomic library elements. Modern live-cell analysis systems facilitate continuous monitoring over days or weeks while maintaining optimal environmental conditions (37°C, 5% CO₂) [9]. The key advantage is observing the kinetics of cellular responses rather than just their endpoint, revealing whether a compound induces rapid necrosis or delayed apoptosis, for instance.
Morphological and Spatial Multiplexing extracts multiple parameters from high-content image data, including cell size, shape, texture, and subcellular organization. Advanced algorithms can quantify subtle changes in cellular architecture that indicate specific health states, such as neurite fragmentation in neurotoxicity or mitochondrial fragmentation in metabolic stress. When combined with fluorescent biosensors, this approach can correlate structural changes with functional readouts across entire cell populations [11].
Table 1: Comparison of Live-Cell Multiplexing Strategies
| Strategy | Key Principle | Maximumplexity | Temporal Resolution | Ideal Applications |
|---|---|---|---|---|
| Spectral | Simultaneous detection via distinct fluorophores | 4-6 colors with standard systems | Seconds to minutes | Protein co-localization, multiple pathway activities |
| Temporal | Repeated measurement of same parameters | Limited only by experiment duration | Minutes to hours | Cell migration, division dynamics, death kinetics |
| Morphological | Computational extraction of multiple features from images | Dozens of parameters | Minutes to hours | Phenotypic screening, toxicology profiling, mechanism of action |
Fluorescence Probes and Biosensors for Live-Cell Applications
The expanding toolkit of fluorescent probes and genetically-encoded biosensors enables specific interrogation of diverse cellular health parameters in living cells. Environmentally-sensitive dyes whose fluorescence properties change in response to local conditions (e.g., membrane potential, pH, ion concentration) are particularly valuable as they provide functional information beyond mere localization [11]. For example, the dye Nile Red exhibits emission spectrum shifts based on lipid membrane polarity, enabling discrimination of different organelle membranes based on their distinct lipid compositions [11].
Genetically-encoded biosensors, including FRET-based reporters and fluorophore-activating proteins, permit monitoring of signaling activity, second messengers, and metabolic states in real time. Recent advances in RNA imaging, such as fluorescent oligonucleotide probes, CRISPR-dCas systems, and fluorogenic RNA aptamers, now enable multiplexed observation of RNA localization and dynamics alongside protein and organelle readouts [8]. This is particularly relevant for chemogenomic library screening, where compounds may simultaneously affect transcription, translation, and post-translational processes.
When designing multiplexed assays, careful consideration must be given to probe compatibility, including potential spectral overlap, chemical interactions, and physiological impacts. Optimal probe concentrations must provide sufficient signal while minimizing perturbation to native cellular functions—a balance particularly crucial for long-term kinetic experiments.
Instrumentation and Environmental Control
Maintaining cellular viability and normal physiology during extended imaging requires precise environmental control integrated with sensitive detection capabilities. Modern live-cell analysis systems incorporate incubator-like conditions directly within imaging platforms, maintaining constant temperature (37°C), humidity, and gas composition (typically 5% CO₂) [9]. These systems utilize non-perturbing image acquisition protocols, including reduced light exposure, confocal optical sectioning to minimize out-of-focus light, and compact spinning disk technology to decrease phototoxicity while maintaining image clarity [11] [9].
Advanced instrumentation typically includes:
- High-quality objectives with long working distances for observing thick samples (e.g., 3D spheroids)
- Multiple laser lines (405, 488, 561, 640 nm) for broad fluorophore compatibility
- Sensitive detectors (sCMOS cameras) capable of detecting low fluorescence signals with minimal noise
- Automated focus maintenance systems to compensate for thermal drift during long-term experiments
- Parallel processing capabilities for high-throughput screening of chemogenomic libraries
These technical features collectively enable the repeated, non-destructive monitoring of cellular health parameters that defines effective live-cell multiplexed assays.
Experimental Protocols
Protocol: Multiplexed Viability, Cytotoxicity, and Apoptosis Assay
This protocol enables simultaneous assessment of three key cellular health parameters in real time, providing comprehensive insight into compound mechanisms from chemogenomic libraries.
Materials and Reagents
- Cell culture medium appropriate for cell line
- Cell viability dye (e.g., CellTracker Green, 1 mM stock in DMSO)
- Cytotoxicity dye (e.g., propidium iodide, 1.5 mM stock in water)
- Apoptosis biosensor (e.g., Annexin V-Cy5 conjugate)
- 96-well or 384-well microplates (tissue culture treated, optical bottom)
- Live-cell imaging system with environmental control (e.g., Incucyte CX3 or SX5)
Procedure
- Cell Seeding: Harvest and count cells. Seed at optimized density (typically 3,000-10,000 cells/well for 96-well plates, 1,000-3,000 cells/well for 384-well plates) in 50-200 µL complete medium. Include control wells (vehicle, positive controls for viability, cytotoxicity, and apoptosis).
- Cell Adhesion: Incubate plates for 4-24 hours (depending on cell type) at 37°C, 5% CO₂ to allow cell attachment and recovery.
- Compound Addition: Prepare chemogenomic library compounds in appropriate solvent at required concentrations. Add to test wells, maintaining consistent solvent concentration across all wells (typically <0.1% DMSO final).
- Dye Preparation and Addition:
- Prepare working dye solution containing viability dye (1:1000 dilution), cytotoxicity dye (1:2000 dilution), and apoptosis biosensor (1:500 dilution) in pre-warmed culture medium.
- Add 10% volume of dye working solution to each well (e.g., 10 µL to 100 µL existing medium).
- Gently mix by orbital shaking (100-200 rpm for 1 minute).
- Image Acquisition:
- Place plate in pre-equilibrated live-cell imaging system.
- Program acquisition settings: 2-4 hour intervals for 24-72 hours.
- Configure channels: Brightfield (morphology), FITC (viability, 488ex/520em), TRITC (cytotoxicity, 549ex/566em), Cy5 (apoptosis, 649ex/666em).
- Set exposure times to maximize signal while minimizing phototoxicity (typically 100-500 ms per channel).
- Data Analysis:
- Use integrated software to segment cells and quantify fluorescence intensity per well over time.
- Normalize signals to initial timepoint and vehicle controls.
- Calculate viability index (viability-positive cells / total cells), cytotoxicity index (cytotoxicity-positive cells / total cells), and apoptosis index (apoptosis-positive cells / total cells).
Troubleshooting Notes
- High background fluorescence may indicate excessive dye concentration; titrate dyes in preliminary experiments.
- If cytotoxicity signals saturate quickly, reduce cytotoxicity dye concentration or increase imaging frequency to capture earlier events.
- For adherent cells with weak signals, consider extracellular matrix coatings to improve attachment and health.
Protocol: Multiplexed Organelle Health Assessment
This protocol leverages the environmental sensitivity of Nile Red to simultaneously monitor multiple organelles and their interactions in living cells, providing insights into subcellular targets of chemogenomic library compounds.
Materials and Reagents
- Nile Red stock solution (1 mM in DMSO)
- Organelle-specific markers (optional for validation: MitoTracker Green, ER-Tracker Red, LysoTracker Deep Red)
- Phenol red-free cell culture medium
- 35 mm glass-bottom dishes or 96-well optical bottom plates
- Spinning disk confocal microscope with environmental chamber
- Deep convolutional neural network (DCNN) for image analysis (pre-trained or custom-trained)
Procedure
- Cell Preparation: Seed cells in glass-bottom dishes at 30-50% confluence in phenol red-free medium. Incubate for 12-24 hours until properly attached.
- Staining Solution: Prepare Nile Red working solution in pre-warmed phenol red-free medium at 100 nM final concentration.
- Staining Protocol: Replace medium with Nile Red working solution. Incubate for 20 minutes at 37°C, 5% CO₂. Do not wash—Nile Red requires no wash steps for effective organelle staining [11].
- Image Acquisition:
- Place dish on pre-warmed microscope stage with environmental control (37°C, 5% CO₂).
- Using spinning disk confocal microscope with extended resolution (~143 nm), acquire images with two emission channels: 617/73 nm (yellow channel) and 685/40 nm (red channel) with 473 nm or 488 nm excitation [11].
- Capture z-stacks (0.5 µm steps) encompassing entire cell volume at 5-15 minute intervals depending on process dynamics.
- Image Analysis via DCNN:
- Input both intensity images (average of yellow and red channels) and ratiometric images (red-to-yellow ratio) into pre-trained DCNN [11].
- The network will segment up to 15 subcellular structures based on morphological features and spectral ratios that reflect membrane lipid polarity.
- Validate segmentation accuracy using ground truth images from cells co-stained with organelle-specific markers if needed.
- Quantitative Analysis:
- Extract organelle-specific parameters: morphology (size, shape), dynamics (movement, interactions), and spectral ratios (membrane composition).
- Track organelle interactions over time, quantifying contact duration and frequency.
- Monitor changes in response to compound addition from chemogenomic libraries.
Technical Notes
- Nile Red emission spectrum exhibits red shifts in polar environments and blue shifts in nonpolar environments, enabling discrimination of organelles with similar morphology but different membrane compositions [11].
- The ratiometric measurement (red-to-yellow ratio) serves as an intrinsic "optical fingerprint" for each organelle type, remaining consistent across different microscopes, cell types, and imaging conditions [11].
- For complex systems like living tissues, transfer learning can adapt pre-trained networks to new biological contexts with minimal additional training.
Table 2: Organelle-Specific Spectral Signatures with Nile Red Staining
| Organelle | Red:Yellow Ratio Range | Morphological Features | Cellular Health Indicators |
|---|---|---|---|
| Mitochondria | 0.5-0.7 | Tubular, networked | Fragmentation indicates stress |
| Golgi Apparatus | 0.8-1.0 | Perinuclear, stacked | Dispersal suggests toxicity |
| Endoplasmic Reticulum | 0.6-0.8 | Reticular, nuclear envelope | Expansion in unfolded protein response |
| Lysosomes | 1.2-1.5 | Punctate, spherical | Increased size/number in autophagy |
| Lipid Droplets | 1.5-2.0 | Spherical, high contrast | Accumulation in metabolic stress |
| Plasma Membrane | 0.9-1.1 | Continuous boundary | Blebbing in apoptosis |
Visualization and Data Analysis
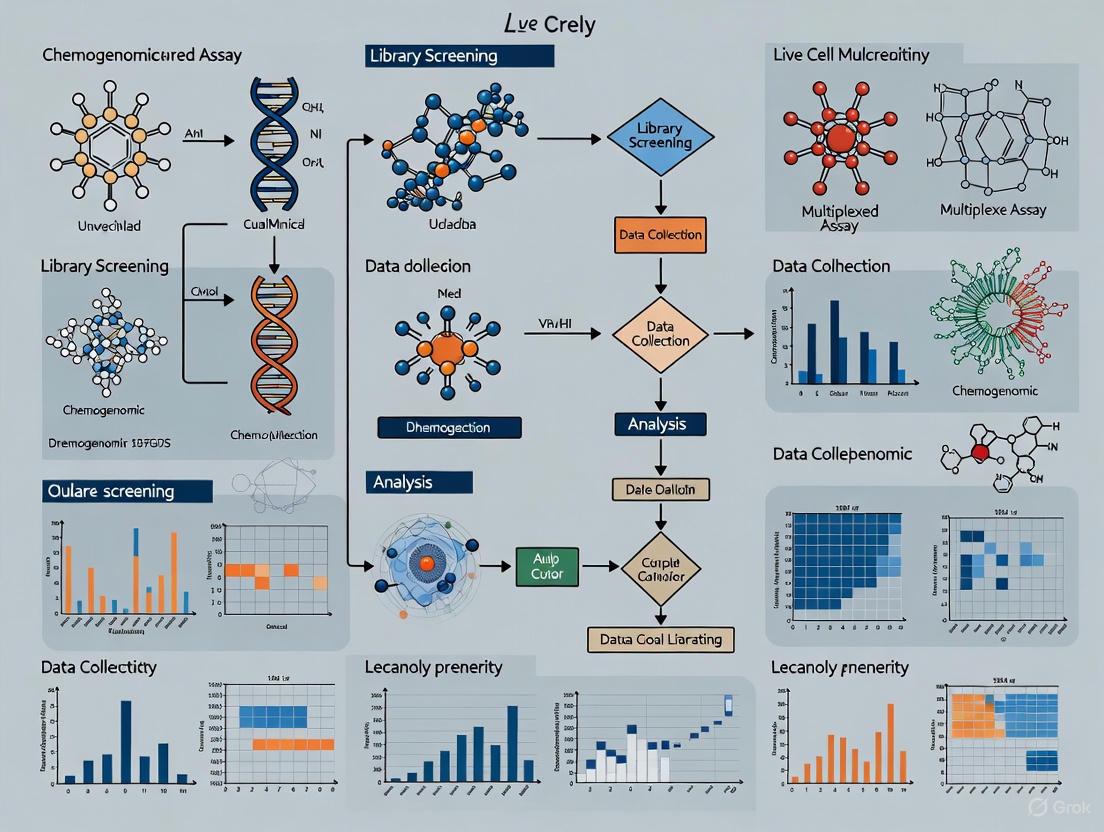
Workflow Diagram: Live-Cell Multiplexed Assay for Cellular Health
Live-Cell Multiplexed Assay Workflow
Diagram: Multiplexed Cellular Health Assessment Strategy
Multiplexed Cellular Health Assessment Strategy
The Scientist's Toolkit: Essential Research Reagents and Materials
Table 3: Essential Reagents and Materials for Live-Cell Multiplexed Assays
| Category | Specific Examples | Key Function | Application Notes |
|---|---|---|---|
| Viability Probes | Propidium iodide, CellTracker Green, Calcein AM | Assess membrane integrity and enzymatic activity | Combine with death markers for distinction between mechanisms |
| Apoptosis Detectors | Annexin V conjugates, caspase substrates (NucView 488), mitochondrial membrane potential dyes (TMRM) | Identify programmed cell death pathways | Temporal sequence reveals primary versus secondary apoptosis |
| Organelle-Specific Dyes | MitoTracker (mitochondria), ER-Tracker (ER), LysoTracker (lysosomes), Nile Red (multiple membranes) | Monitor organelle health and interactions | Nile Red enables multiplexed organelle imaging without wash steps [11] |
| Biosensors | Genetically-encoded Ca²⁺ indicators (GCaMP), H₂O₂ sensors (HyPer), kinase activity reporters (AKAR) | Monitor signaling and second messengers | Enable functional assessment beyond morphological changes |
| RNA Imaging Tools | Molecular beacons, CRISPR-dCas systems, fluorogenic RNA aptamers | Track RNA localization and dynamics | Emerging capability for multiplexed RNA/protein correlation [8] |
| Live-Cell Media | Phenol red-free formulation, low riboflavin content, HEPES buffering | Reduce background fluorescence and maintain pH outside CO₂ control | Essential for optimal signal-to-noise in fluorescence imaging |
| Microplates | Black-walled, optical bottom (µClear), tissue culture treated | Enable high-resolution imaging while preventing well-to-well crosstalk | 96-well and 384-well formats standard for screening |
| Environmental Control | Incubator-based imaging systems, stage top chambers, CO₂-independent media | Maintain physiological conditions during extended imaging | Critical for data relevance and cell health during long experiments |
Live-cell multiplexed assays represent a powerful paradigm for assessing cellular health in the context of chemogenomic library screening. By simultaneously monitoring multiple parameters in real time while maintaining physiological conditions, these approaches capture the complexity of cellular responses to genetic and chemical perturbations. The core principles of spectral, temporal, and spatial multiplexing, combined with advanced fluorescence probes and biosensors, enable researchers to move beyond simplistic viability assessments to comprehensive health profiling. The protocols and methodologies outlined provide a foundation for implementing these approaches, with particular attention to the practical considerations of probe compatibility, environmental control, and image analysis. As these technologies continue to evolve, particularly with the integration of artificial intelligence for image analysis and the development of novel biosensors, live-cell multiplexed assays will play an increasingly central role in understanding how chemogenomic libraries influence cellular homeostasis and identifying compounds with therapeutic potential.
Within the framework of a broader thesis on live-cell multiplexed assays for chemogenomic libraries research, the precise annotation of compound effects on fundamental cellular processes is paramount. The integration of key cellular health parameters—viability, cytotoxicity, apoptosis, and cell cycle status—into a single, multiplexed experimental workflow provides a powerful tool for deconvoluting the mechanisms of action (MoA) of small molecules. Such multiplexing allows researchers to distinguish specific, on-target effects from general, off-target cytotoxicity early in the screening process [5]. This application note details the methodologies and protocols for simultaneously quantifying these essential parameters, leveraging live-cell imaging and flow cytometry to generate a comprehensive phenotypic profile of compound libraries, thereby enhancing the quality and reliability of chemogenomic research.
Key Parameters and Their Significance in Chemogenomics
In chemogenomic library screening, it is critical to move beyond simple viability readouts to a multi-dimensional characterization of cell state. This enables the differentiation of compounds suitable for further mechanistic studies from those causing non-specific cell damage. The following table summarizes the core parameters and their biological significance.
Table 1: Key Measurable Parameters for Chemogenomic Compound Annotation
| Parameter | Biological Significance | Primary Assay Readouts | Interpretation in Chemogenomics |
|---|---|---|---|
| Viability | Overall metabolic activity and cell health [12]. | Tetrazolium reduction (MTT, MTS), Resazurin reduction (AlamarBlue) [12]. | General indicator of compound tolerance; low viability may suggest overt toxicity. |
| Cytotoxicity | Direct damage leading to cell death and loss of membrane integrity [13]. | Dye exclusion (DAPI, Propidium Iodide), Release of intracellular components [13] [14]. | Identifies compounds that cause rapid, non-specific cell lysis or necrosis. |
| Apoptosis | Programmed, regulated cell death [13] [14]. | Caspase activation (YO-PRO-3), Phosphatidylserine externalization (Annexin V), Mitochondrial membrane potential (DiOC6(3)) [13] [14]. | Suggests a specific, potentially on-target, mechanism of action. |
| Cell Cycle | Distribution of cells across cell cycle phases (G1, S, G2/M) [15] [5]. | DNA content quantification (Propidium Iodide, Hoechst) [15] [5]. | Reveals compound-induced arrest or disruption of proliferation. |
The interplay of these parameters provides a systems-level view of compound activity. For instance, a compound might induce a G2/M cell cycle arrest without immediate apoptosis, a phenotype characteristic of tubulin-targeting agents like paclitaxel [5]. Multiplexed assays capture these nuanced, time-dependent relationships, offering initial functional annotation for chemogenomic library compounds.
Multiplexed Assay Workflow for Live-Cell Analysis
The following diagram illustrates the integrated workflow for a live-cell multiplexed assay, combining the key parameters into a single, continuous protocol.
Figure 1: Workflow for a live-cell multiplexed screen. Cells are treated with compounds and stained with fluorescent dyes for continuous imaging. Automated image analysis and machine learning are used to classify cells into phenotypic categories based on key parameters over time [7] [5].
Detailed Experimental Protocols
Protocol: High-Content Live-Cell Multiplexed Screening
This protocol, adapted from Tjaden et al., is designed for a 48-hour live-cell imaging assay to evaluate viability, cytotoxicity, apoptosis, and cell cycle effects [7] [5].
I. Materials and Reagent Setup
- Cells: Adherent cell lines (e.g., HeLa, U2OS, HEK293T).
- Dyes:
- Hoechst 33342 (50 nM): Nuclear stain for viability and cell cycle.
- Mitotracker Red/DeepRed (20-50 nM): Mitochondrial mass and membrane potential.
- BioTracker 488 Tubulin Dye (1:1000): Microtubule cytoskeleton integrity.
- YO-PRO-3 (1:1000): Caspase activity marker for early apoptosis [13].
- Controls: DMSO (vehicle control), Staurosporine (1 µM, apoptosis inducer), Paclitaxel (100 nM, mitotic arrest inducer).
II. Staining and Image Acquisition
- Cell Preparation: Seed cells in a 96-well or 384-well imaging-compatible microplate at an optimal density for 48-hour growth.
- Compound Treatment: Add chemogenomic library compounds at desired concentrations. Include positive and vehicle controls.
- Live-Cell Staining: Add the pre-optimized dye cocktail (Hoechst 33342, Mitotracker, Tubulin Dye) directly to the culture medium.
- Image Acquisition: Place the plate in a pre-warmed high-content imaging system (e.g., Yokogawa CQ1). Acquire images at multiple sites per well every 4-6 hours for 48 hours using appropriate laser/filter sets for each dye.
III. Data Analysis and Phenotype Classification
- Image Analysis: Use high-content analysis software (e.g., CellPathfinder) to perform automated cell segmentation based on the nuclear (Hoechst) and cytoplasmic (Tubulin) channels.
- Feature Extraction: Quantify features for each cell:
- Machine Learning Classification: Employ a pre-trained classifier to gate cells into distinct phenotypic categories based on the extracted features:
- Healthy: Normal nucleus, high Mitotracker signal.
- Early Apoptotic: Nuclear condensation (pyknosis), YO-PRO-3 positive.
- Late Apoptotic/Necrotic: Nuclear fragmentation, loss of membrane integrity.
- Mitotic: Condensed chromosomes, absent nuclear envelope [5].
Protocol: Multiparametric Viability and Apoptosis Assay by Flow Cytometry
This protocol uses a triple-stain approach to dissect the stages of cell death, compatible with automated, high-throughput workflows [13].
I. Materials and Reagent Setup
- Staining Solution:
- DAPI (1 µg/mL): Vital dye for membrane integrity.
- DiOC6(3) (20 nM): Dye for mitochondrial membrane potential (ΔΨm).
- YO-PRO-3 (1:1000): Indicator of caspase-mediated PANX1 channel opening.
- Controls: As in Protocol 4.1.
II. Staining and Acquisition
- Cell Treatment: Treat cells in culture flasks or plates for the desired duration (e.g., 24 hours).
- Cell Harvesting: Collect both adherent and floating cells. Wash with PBS and centrifuge.
- Staining: Resuspend cell pellet in pre-warmed culture medium containing the triple-dye cocktail.
- Incubation: Incubate for 20-30 minutes at 37°C protected from light.
- Flow Cytometry: Analyze samples immediately on a flow cytometer. Use DAPI (UV laser), DiOC6(3) (488 nm laser, FITC channel), and YO-PRO-3 (488 nm laser, PE-Texas Red channel).
III. Data Analysis
- Gating Strategy:
- Exclude doublets and debris based on FSC-A/SSC-A.
- Identify viable cells as DAPI⁻ DiOC6(3)ʰⁱᵍʰ YO-PRO-3⁻.
- Identify early apoptotic cells as DAPI⁻ DiOC6(3)ˡᵒʷ YO-PRO-3⁺.
- Identify late apoptotic/necrotic cells as DAPI⁺ [13].
- Quantification: Report the percentage of cells in each population. Dose-response curves can be generated for IC50 calculation of healthy cell loss.
Table 2: Interpretation of Flow Cytometry Triple-Stain Results
| DAPI | DiOC6(3) | YO-PRO-3 | Interpreted Cell Status |
|---|---|---|---|
| - | High | - | Viable: Healthy, intact membrane, functional mitochondria. |
| - | Low | + | Early Apoptotic: Caspase active, PANX1 channels open, ΔΨm lost. |
| - | High | + | Caspase Active / ΔΨm Intact: Early commitment to apoptosis. |
| + | Low | +/- | Late Apoptotic/Necrotic: Loss of plasma membrane integrity. |
The Scientist's Toolkit: Research Reagent Solutions
Successful implementation of these multiplexed assays relies on a carefully selected toolkit of reagents and software.
Table 3: Essential Research Reagents and Materials
| Item Category | Specific Examples | Function in Assay |
|---|---|---|
| Viability/Cytotoxicity Dyes | Hoechst 33342, DAPI, Propidium Iodide [16] [13] | Assess nuclear morphology and plasma membrane integrity. |
| Apoptosis Markers | YO-PRO-3, Annexin V conjugates [13] [14] | Detect caspase activation and phosphatidylserine externalization. |
| Organelle & Function Probes | Mitotracker Red/DeepRed, DiOC6(3), BioTracker Tubulin Dyes [5] [13] | Evaluate mitochondrial health and cytoskeletal integrity. |
| Cell Cycle Stains | Propidium Iodide (after fixation), Hoechst 33342 (live) [15] [5] | Quantify DNA content for cell cycle phase distribution. |
| Analysis Software | CellPathfinder, FCS Express (with MultiCycle AV) [7] [15] | Perform image analysis, cell cycle modeling, and data visualization. |
Signaling Pathways and Phenotypic Outcomes
The measurable parameters described are the phenotypic endpoints of complex, interconnected signaling pathways. The following diagram summarizes the key relationships and how they are detected in a multiplexed assay.
Figure 2: Signaling pathways from compound exposure to assay readout. A chemogenomic compound can perturb one or more core cellular processes, leading to detectable phenotypic changes. These phenotypes are quantified using specific fluorescent dyes to assign a final readout, enabling mechanistic insight into the compound's activity [5] [13].
The Critical Need for Multiplexing in Phenotypic Screening
Phenotypic drug discovery (PDD) has re-emerged as a powerful strategy for identifying novel therapeutics, particularly for complex diseases involving multiple molecular abnormalities [17]. However, a significant challenge in phenotypic screening lies in the functional annotation of identified hits and the deconvolution of their mechanisms of action (MoA) [18] [17]. Multiplexing—the simultaneous measurement of multiple parameters from a single biological sample—addresses this challenge directly. It provides a more comprehensive and biologically relevant understanding of a compound's effect on cellular systems by contextualizing primary readouts with data on cell health and other critical functions [19]. Within chemogenomic libraries, which consist of small molecules designed to modulate a wide array of specific protein targets, multiplexing is indispensable for distinguishing targeted effects from non-specific cytotoxicity and for associating phenotypic outcomes with molecular targets [18] [17].
The Multiplexing Advantage in Phenotypic Screening
Multiplexing cell-based assays transforms phenotypic screening from a simple observation of an endpoint into a rich, multi-dimensional investigation. The key benefits are:
- Context for Mechanistic Interpretation: Measuring multiple parameters simultaneously, such as a primary phenotypic readout alongside viability and cytotoxicity markers, helps confirm that an observed effect is real and specific, not an artifact of general cell death [19]. For example, a decrease in a reporter signal could indicate either specific pathway inhibition or general toxicity; a multiplexed assay can distinguish between these possibilities.
- Data Normalization and Enhanced Accuracy: By measuring parameters like cell viability in the same well as the primary assay, researchers can normalize their data, reducing well-to-well variability and improving the accuracy and reliability of the results [19]. This eliminates the need for replicate plating, which can introduce new variables.
- Efficient Use of Resources: Multiplexing conserves precious compounds from chemogenomic libraries and saves time and materials by extracting more information from a single experimental run [19].
Multiplexed Experimental Protocol for Live-Cell Analysis
The following protocol details a live-cell, multiplexed assay suitable for profiling chemogenomic library compounds, integrating key cellular health parameters with high-content morphological profiling.
Materials and Reagents
Table 1: Essential Research Reagent Solutions
| Item | Function/Description |
|---|---|
| CellTiter-Fluor Cell Viability Assay [19] | A fluorescent assay that measures a conserved protease activity as a marker of viable cell count. Ideal for multiplexing as it does not quench luminescent signals. |
| Caspase-Glo 3/7 Assay [19] | A luminescent assay for detecting caspase-3/7 activation, key biomarkers of apoptosis. |
| MultiTox-Fluor Multiplex Cytotoxicity Assay [19] | A single-reagent addition that provides two spectrally distinct fluorescent signals to measure both viable and dead cell populations concurrently. |
| Alexa Fluor tyramide reagents [20] | Fluorescent dyes used in signal amplification techniques like Tyramide Signal Amplification (TSA), enabling highly sensitive detection of low-abundance targets in multiplexed imaging. |
| Invitrogen SuperBoost or Aluora Spatial Amplification Kits [20] | Kits designed for enzyme-mediated signal amplification in multiplexed imaging, facilitating the covalent attachment of fluorophores for robust multi-round staining. |
| Cell Painting Assay Reagents [18] [17] | A set of multiplexed fluorescent dyes (e.g., labeling nuclei, cytoplasm, mitochondria) used to create a morphological profile of cells based on over 1,700 extractable features. |
Step-by-Step Workflow
This workflow outlines a sequential, same-well multiplexing approach to profile compounds from a chemogenomic library.
Step 1: Cell Plating and Compound Treatment
- Plate appropriate cells (e.g., U2OS osteosarcoma cells or other disease-relevant cell lines) in multiwell plates suitable for high-content imaging [18] [17].
- Treat cells with compounds from the chemogenomic library and include appropriate controls (e.g., DMSO vehicle, positive controls for cytotoxicity/apoptosis). Incubate for the desired treatment period.
Step 2: Viability and Cytotoxicity Measurement (Fluorescent)
- Prepare the CellTiter-Fluor Reagent at 5X concentration and add it directly to the culture wells [19].
- Incubate for 30 minutes at 37°C.
- Measure the fluorescence (e.g., 405 nmEx/495–505 nmEm) using a multi-mode microplate reader or high-content imager. This signal is proportional to the number of viable cells.
Step 3: Apoptosis Measurement (Luminescent)
- Directly add an equal volume of Caspase-Glo 3/7 Reagent to the same wells [19].
- Mix contents gently and incubate to allow the luminescent signal to develop.
- Measure the luminescence. The signal is proportional to caspase-3/7 activity.
Step 4: Live-Cell Multiplexed Imaging and Cell Painting (Optional)
- For a more detailed morphological profile, perform live-cell staining using the Cell Painting protocol or a simplified version with a multiplexed viability/apoptosis stain [18].
- Acquire high-content images using a microscope (e.g., CellInsight CX7 or similar) [18] [20].
- Use automated image analysis software (e.g., CellProfiler) to extract morphological features related to nuclear morphology, cytoskeletal structure, and mitochondrial health [18] [17].
Step 5: Data Integration and Analysis
- Normalize the primary assay data (e.g., reporter signal, phenotypic hit) to the viability measurement from Step 2 to account for cytotoxic effects [19].
- Integrate data from all endpoints to classify compound effects. A true phenotypic hit should show a specific change in the primary readout without concomitant signs of apoptosis or cytotoxicity.
Figure 1: Sequential same-well multiplexing workflow for live-cell analysis.
Data Presentation and Analysis from Multiplexed Assays
Multiplexed assays generate rich, quantitative datasets. The tables below demonstrate how to structure this data for clear interpretation and comparison across compounds.
Table 2: Multiplexed Viability, Cytotoxicity, and Apoptosis Data for Candidate Compounds
| Compound ID | Viability (RFU) | Cytotoxicity (RFU) | Caspase-3/7 Activity (RLU) | Normalized Phenotypic Readout | Interpretation |
|---|---|---|---|---|---|
| Ctrl (Vehicle) | 10,500 | 800 | 5,000 | 1.00 | Baseline |
| Ctrl (Toxic) | 1,200 | 15,000 | 85,000 | N/A | 100% Cytotoxicity |
| Cmpd A | 9,800 | 950 | 6,200 | 0.15 | Specific Phenotypic Hit |
| Cmpd B | 2,100 | 12,500 | 78,000 | 0.02 | General Cytotoxicity |
| Cmpd C | 10,200 | 1,100 | 5,500 | 1.10 | Inactive |
RFU: Relative Fluorescence Units; RLU: Relative Luminescence Units. The normalized phenotypic readout is calculated by dividing the primary assay signal by the viability signal and normalizing to the vehicle control.
Table 3: Key Morphological Features from High-Content Imaging for Mechanism Hypotheses
| Morphological Feature | Cell Object | Associated Cellular Response | Change with Compound A |
|---|---|---|---|
| Nuclear Size & Intensity | Nucleus | Early apoptosis, necrosis [18] | Increased size, decreased intensity |
| Mitochondrial Morphology | Cytoplasm | Metabolic health, stress [18] | More fragmented |
| Actin Cytoskeleton Texture | Cell | Cell adhesion, structural integrity [18] | Less organized |
| Cell-Cell Adhesion | Cell | Functional viability, signaling | Decreased |
Integrating Chemogenomic Libraries and Network Pharmacology
To effectively deconvolute the mechanisms of action revealed by multiplexed phenotypic screens, the data must be integrated with a systems pharmacology framework.
- Chemogenomic Library Design: A well-constructed chemogenomic library of ~5,000 small molecules represents a diverse panel of drug targets involved in a wide spectrum of biological effects and diseases [17]. The compounds are often selected based on chemical scaffolds to maximize structural diversity and coverage of the druggable genome.
- Network Pharmacology Platform: Heterogeneous data sources—including drug-target interactions from ChEMBL, pathways from KEGG, gene ontologies (GO), disease ontologies (DO), and morphological profiling data from assays like Cell Painting—can be integrated into a high-performance graph database (e.g., Neo4j) [17]. This creates a system pharmacology network linking compounds to their targets, biological pathways, and resulting phenotypic outcomes.
Figure 2: Network pharmacology integrates multiplexed data for MoA deconvolution.
Multiplexing is no longer an optional enhancement but a critical requirement for rigorous and informative phenotypic screening, especially when employing sophisticated chemogenomic libraries. By concurrently measuring viability, cytotoxicity, apoptotic activity, and complex morphological profiles, researchers can filter out non-specific hits, normalize their data, and generate high-quality, biologically relevant results. When this multiplexed data is further integrated into a network pharmacology platform, it dramatically accelerates the process of target identification and mechanism of action deconvolution, ultimately paving a faster and more reliable path to new therapeutic discoveries.
The shift from single time point analysis to kinetic profiling represents a fundamental advancement in the evaluation of chemogenomic libraries using live-cell multiplexed assays. Traditional single time point measurements offer a static snapshot, potentially missing critical dynamic cellular responses such as the rapid onset of apoptosis or slow-developing stress pathways [5]. Kinetic profiling, by contrast, involves the continuous monitoring of live cells over extended periods, capturing the full temporal dynamics of compound-induced phenotypes. This approach is particularly vital for annotating chemogenomic compounds (CGCs), where distinguishing primary target effects from secondary, off-target cytotoxicity is essential for robust target validation [21] [5]. The integration of live-cell imaging with multiplexed fluorescent readouts and machine learning-based interpretation provides a powerful tool kit to uncover the complex biological effects of small molecules, moving beyond a mere description of what happens to a comprehensive understanding of when and how it happens [21].
Experimental Protocol: A Multiplexed Live-Cell Workflow
This protocol details a versatile high-content live-cell imaging approach, optimized for kinetic profiling of chemogenomic libraries. The method enables simultaneous tracking of multiple cell health parameters in living cells over time, providing a comprehensive, time-dependent characterization of small molecule effects [5].
Materials and Equipment
Research Reagent Solutions
The following table details the essential reagents and their functions within the assay system [5].
Table 1: Key Research Reagent Solutions
| Reagent Name | Function and Application in the Assay |
|---|---|
| Hoechst 33342 | A cell-permeable DNA stain used to label nuclei. Enables analysis of nuclear morphology, cell count, and classification into phenotypic populations (e.g., healthy, pyknotic, fragmented). |
| BioTracker 488 Green Microtubule Cytoskeleton Dye | A live-cell compatible, taxol-derived fluorescent probe that labels the microtubule network. Used to monitor changes in cytoskeletal morphology and integrity. |
| Mitotracker Red / Mitotracker Deep Red | Cell-permeable dyes that accumulate in active mitochondria based on mitochondrial membrane potential. Serves as an indicator of mitochondrial health and mass. |
| alamarBlue HS Cell Viability Reagent | A resazurin-based solution used as an orthogonal endpoint assay to measure cell viability and metabolic activity. |
| Reference Compound Set (e.g., Camptothecin, Staurosporine, JQ1, Torin) | A training set of compounds with known mechanisms of action (e.g., apoptosis inducers, kinase inhibitors) used for assay validation and as a benchmark for machine learning model training. |
Essential Equipment
- High-Content Imaging System: An automated, environmentally controlled microscope (e.g., from PerkinElmer, Molecular Devices, or Yokogawa) capable of maintaining 37°C and 5% CO₂ for long-term live-cell imaging.
- Multi-well Tissue Culture Plates: 96-well or 384-well microplates with optical-grade glass bottoms suitable for high-resolution microscopy.
- Cell Culture Facility: Standard equipment including a biosafety cabinet, CO₂ incubator, and centrifuge.
Step-by-Step Procedure
Cell Seeding and Culture:
- Seed an appropriate number of cells (e.g., HeLa, U2OS, HEK293T, or MRC9) into the wells of the microplate. The seeding density should allow for ~70-80% confluency at the time of imaging to facilitate single-cell analysis while avoiding overcrowding.
- Incubate the plate for 24 hours under standard culture conditions (37°C, 5% CO₂) to allow for cell attachment and resumption of normal growth.
Compound Treatment and Staining:
- Prepare working concentrations of the chemogenomic library compounds and reference molecules in pre-warmed cell culture medium.
- Remove the cell culture medium from the wells and replace it with the compound-containing medium.
- Simultaneously, add the multiplexed dye cocktail to the medium. The optimized, low-cytotoxicity concentrations are [5]:
- 50 nM Hoechst 33342
- Recommended concentration of BioTracker 488 Microtubule Dye
- Recommended concentration of Mitotracker Red
- Critical Note: The low dye concentrations are crucial to prevent phototoxicity and interference with normal cellular functions during extended live-cell imaging.
Live-Cell Image Acquisition (Kinetic Phase):
- Place the microplate into the environmental chamber of the high-content imager, maintaining constant 37°C and 5% CO₂.
- Program the acquisition software to image multiple sites per well at regular intervals (e.g., every 4-6 hours) for the desired duration (e.g., 24-72 hours).
- Use appropriate excitation/emission filters for each fluorescent channel (Hoechst/DAPI, BioTracker 488/FITC, Mitotracker Red/TRITC).
Image and Data Analysis:
- Feature Extraction: Use image analysis software to extract quantitative morphological features from the acquired images. Key features include nuclear size and intensity (from Hoechst), cytoskeletal structure (from BioTracker 488), and mitochondrial mass and distribution (from Mitotracker) [5].
- Cell Classification: Employ a supervised machine-learning algorithm to gate cells into distinct phenotypic categories based on the extracted features. Categories typically include "healthy," "early apoptotic," "late apoptotic," "necrotic," and "lysed" [5].
- Data Interpretation: Analyze the kinetic profiles of cell population distributions and calculate time-dependent IC₅₀ values for the tested compounds. The primary readout is the count of healthy cells over time, normalized to DMSO-treated controls.
Protocol Optimization and Validation
- Dye Compatibility and Cytotoxicity: Prior to large-scale screening, validate that the chosen dye concentrations and combinations do not adversely affect cell viability over the entire assay duration, as confirmed by orthogonal viability assays like alamarBlue [5].
- Machine Learning Training Set: Assemble a diverse set of reference compounds with known mechanisms of action to train the cell classification algorithm. This ensures the model can accurately recognize a wide spectrum of cytotoxic phenotypes [5].
- Fluorescence Interference Controls: Include control wells to identify compounds that auto-fluoresce or form precipitates, which can interfere with image analysis. An additional gating step to classify "high intensity objects" can help mitigate this risk [5].
Data Presentation and Analysis
Effective presentation of the complex, multi-dimensional data generated from kinetic profiling is essential for clear communication of findings.
Summarizing Quantitative Data in Tables
Tables should be used to present precise numerical values and summaries, allowing for direct comparison of key parameters across different compounds or conditions [22] [23]. They are ideal for displaying exact IC₅₀ values, maximum effect sizes, and population distributions at specific time points.
Table 2: Kinetic Cytotoxicity Profiles of Reference Compounds
| Compound (Mechanism) | Time-dependent IC₅₀ (µM) | Maximal Reduction in Healthy Cells (%) | Phenotypic Classification at 48h (%) | ||||
|---|---|---|---|---|---|---|---|
| 24 h | 48 h | 72 h | Healthy | Early Apoptotic | Necrotic | ||
| Digitonin (Membrane Permeabilization) | <0.1 | <0.1 | <0.1 | >95 | 5 | 10 | 85 |
| Staurosporine (Multikinase Inhibitor) | 0.05 | 0.02 | 0.01 | 90 | 10 | 70 | 10 |
| Camptothecin (Topoisomerase Inhibitor) | 0.5 | 0.1 | 0.08 | 88 | 12 | 75 | 8 |
| Torin (mTOR Inhibitor) | 5.0 | 2.5 | 1.5 | 70 | 30 | 50 | 15 |
| JQ1 (BET Bromodomain Inhibitor) | >10 | 8.5 | 5.0 | 50 | 50 | 40 | 5 |
Note: This table exemplifies how to structure time-course data for easy comparison. The data is compiled from the assay validation experiments described in the protocol [5].
Guidelines for Table Construction:
- Tables must be numbered sequentially and have a clear, descriptive title above the table [22] [23].
- Column headings should be brief and descriptive, including units of measurement where applicable [22].
- The table body should be organized to facilitate comparison, with like elements reading down the columns [22]. Numerical data with decimals should be aligned by the decimal point [23].
- Avoid vertical lines and use horizontal lines sparingly to maintain a clean and readable format [23].
Visualizing Trends with Figures
Figures, particularly graphs, are most effective for illustrating trends, patterns, and relationships within the data over time [22] [24]. The kinetic data from this protocol is best visualized using line graphs.
- Line Graphs are the preferred method to display the temporal dynamics of healthy cell count or the progression of different phenotypic populations (e.g., apoptotic, necrotic) for each compound [23] [25].
- Bar Graphs can be used at a specific endpoint to compare the final effects of multiple compounds side-by-side [23].
- Formatting Figures: Ensure figures are simple and clear. Eliminate unnecessary grid lines, borders, and 3-D effects. Axes must be clearly labeled, including units. When multiple data sets are plotted on one graph, use different line styles (solid, dashed, dotted) and place a legend within the axis boundaries. For publications, use color carefully, ensuring sufficient contrast and that meaning is not lost when printed in black and white [26] [23].
Workflow and Pathway Visualization
The following diagrams, generated with Graphviz, illustrate the core experimental workflow and data processing pipeline.
Experimental Workflow
Data Processing Logic
Methodological Pipelines and Advanced Applications in High-Throughput Screening
The discovery of effective cancer therapies is significantly hampered by tumor heterogeneity and the variable drug responses that occur between patients and even within individual tumors. Conventional drug sensitivity and resistance testing (DSRT) provides bulk viability readouts but fails to capture the complex transcriptional heterogeneity underlying drug responses at the cellular level. Similarly, traditional single-cell RNA sequencing (scRNA-Seq) offers deep insights into cellular heterogeneity but has been limited by cost and throughput when applied to multiple drug perturbation conditions. The integration of high-throughput DSRT with 96-plex scRNA-Seq represents a transformative approach that bridges this critical methodological gap, enabling high-throughput pharmacotranscriptomic profiling at single-cell resolution. This integrated pipeline allows researchers to simultaneously screen numerous drug treatments while capturing the full spectrum of cellular responses, thereby uncovering mechanisms of action, resistance pathways, and potential synergistic drug combinations that would remain invisible to conventional screening methods. Framed within the broader context of live-cell multiplexed assays for chemogenomic libraries research, this pipeline provides an unparalleled resource for precision oncology by linking phenotypic drug responses to their underlying transcriptional mechanisms across diverse cell populations.
Integrated Experimental Workflow
The integrated pipeline combines two powerful methodologies: drug sensitivity and resistance testing (DSRT) and multiplexed single-cell RNA sequencing (scRNA-Seq) using live-cell barcoding technology. This approach enables the systematic investigation of drug responses across multiple cancer models at single-cell resolution. The workflow begins with the preparation of patient-derived cancer cells or cell lines, proceeds through drug perturbation and barcoding, and culminates in pooled library preparation and sequencing followed by sophisticated computational analysis [27].
Core Technological Components
The pipeline leverages several advanced technologies that work in concert to enable high-throughput pharmacotranscriptomic profiling:
Live-Cell Barcoding: This critical step utilizes antibody-oligonucleotide conjugates targeting ubiquitously expressed surface proteins (B2M and CD298) to label cells from different treatment conditions with unique hashtag oligos (HTOs) before pooling. This approach allows for sample multiplexing and significantly reduces technical batch effects and processing costs [27] [28].
Combinatorial Indexing: The 96-plex capability is achieved through a combinatorial barcoding system using 12 column and 8 row barcodes, enabling unique identification of each well in a 96-well plate format. This design allows for substantial scaling of experimental throughput without proportionally increasing sequencing costs [27].
Droplet-Based scRNA-Seq: The pipeline employs droplet-based single-cell sequencing platforms (such as 10X Genomics Chromium) that enable 3'-end counting protocols with unique molecular identifiers (UMIs). This approach provides high cell throughput while maintaining cost efficiency for large-scale perturbation studies [29] [28].
Experimental Protocols
Drug Sensitivity and Resistance Testing (DSRT)
Cell Preparation and Plating
- Extract viable single cells from patient-derived HGSOC samples or cell lines (JHOS2, Kuramochi, Ovsaho) and culture in ex vivo conditions at early passages (≤P5) to maintain phenotypic identity [27].
- Plate cells in 384-well plates at optimized densities (500-2,000 cells/well depending on proliferation rates) using automated liquid handling systems to ensure consistency.
- Include control wells (DMSO vehicle controls, positive cytotoxicity controls) in each plate for quality assessment and data normalization.
Compound Library and Treatment
- Prepare a compound library comprising 45 drugs covering 13 distinct mechanisms of action (MOAs) relevant to ovarian cancer pathophysiology [27].
- Implement 9-point dose-response curves with 10,000-fold concentration ranges to capture complete pharmacological profiles.
- Incubate cells with compounds for 72-96 hours depending on cell doubling times to ensure adequate exposure to drug effects.
Viability Assessment and Data Processing
- Measure cell viability using ATP-based luminescence assays (CellTiter-Glo) or similar methodologies.
- Calculate Drug Sensitivity Scores (DSS) that integrate the complete dose-response curve into a single metric, with a cutoff of 12.2 (75th percentile of DSS distribution) defining significant responses [27].
- Normalize data using the GR (normalized growth rate inhibition) method to account for differential proliferation rates across cell lines [30].
96-Plex scRNA-Seq Workflow
Drug Treatment and Barcoding
- Treat HGSOC cells (JHOS2, PDC2, PDC3) for 24 hours with 45 drugs at concentrations above the half-maximal effective concentration (EC50) based on DSRT results to ensure transcriptional responses [27].
- Prepare antibody-oligonucleotide conjugates (Hashtag Oligos, HTOs) targeting β2-microglobulin (B2M) and CD298 surface proteins with 20 unique barcode sequences (12 column barcodes + 8 row barcodes) [27].
- Label cells in each well with a unique pair of HTOs for subsequent sample demultiplexing after pooling.
Sample Processing and Library Preparation
- Pool all 288 samples (96 conditions × 3 biological replicates) after barcoding into a single cell suspension.
- Process pooled samples using the 10X Genomics Chromium platform according to manufacturer's protocols to generate single-cell gel beads-in-emulsion (GEMs) [27].
- Perform reverse transcription, cDNA amplification, and library construction with incorporation of cell barcodes and UMIs.
- Sequence libraries on Illumina platforms targeting 50,000 reads per cell to ensure adequate transcript coverage.
Computational Analysis Pipeline
- Demultiplex cells to their original samples using HTO information with tools like Seurat or similar frameworks.
- Perform quality control to remove low-quality cells (<200 genes/cell, >10% mitochondrial reads) and doublets.
- Conduct standard scRNA-Seq analysis including normalization, highly variable gene selection, dimensionality reduction (PCA, UMAP), and clustering (Leiden algorithm) [27].
- Execute advanced analyses including gene set variation analysis (GSVA), differential expression testing, and trajectory inference to uncover drug-induced transcriptional programs.
Table 1: Key Experimental Parameters for 96-Plex scRNA-Seq Pipeline
| Parameter | Specification | Purpose/Rationale |
|---|---|---|
| Cell Input | 3 HGSOC models (JHOS2, PDC2, PDC3) | Representative models covering cell lines and patient-derived cells |
| Drug Conditions | 45 drugs + DMSO control | Comprehensive coverage of 13 MOA classes |
| Replicates | 3 biological replicates per condition | Ensure statistical robustness |
| Treatment Duration | 24 hours | Capture early transcriptional responses |
| Sequencing Depth | 50,000 reads/cell | Balance cost and transcript detection sensitivity |
| Cell Recovery | Median 122-140 cells/well | Sufficient for robust population analysis |
| Barcoding Efficiency | 40-50% double HTO labeling | Account for variable CD298 expression and drug effects |
Research Reagent Solutions
The successful implementation of the integrated DSRT and scRNA-Seq pipeline relies on carefully selected reagents and materials that ensure reproducibility and data quality.
Table 2: Essential Research Reagents and Materials
| Category | Specific Reagents/Materials | Function | Technical Notes |
|---|---|---|---|
| Cell Culture | Patient-derived HGSOC cells, JHOS2, Kuramochi, Ovsaho cell lines | Disease-relevant models | Use early passages (≤P5) to maintain phenotypic identity [27] |
| Compound Library | 45 drugs covering 13 MOA classes (PI3K-AKT-mTOR inhibitors, Ras-Raf-MEK-ERK inhibitors, CDK inhibitors, etc.) | Pharmacological perturbation | Include clinical and investigational compounds; use EC50 concentrations for scRNA-Seq [27] |
| Barcoding Reagents | Anti-B2M and anti-CD298 antibody-oligonucleotide conjugates (Hashtag Oligos) | Sample multiplexing | 20 unique barcodes enable 96-plex experimental design; assess labeling efficiency for each experiment [27] [28] |
| scRNA-Seq Platform | 10X Genomics Chromium Single Cell 3' Reagent Kit | Library preparation | Compatible with 3'-end counting protocols with UMIs; optimized for droplet-based sequencing [29] |
| Sequencing | Illumina sequencing platforms | Transcriptome profiling | Target 50,000 reads/cell for adequate transcript detection across multiplexed samples [27] |
| Analysis Tools | Seurat, Scanpy, Demuxlet, GSVA packages | Computational analysis | Specialized tools for demultiplexing, quality control, and pathway analysis [27] [28] |
Data Analysis and Interpretation
Quality Control and Data Integration
The initial analysis phase focuses on quality assessment and data integration across the multiplexed experimental conditions. Following sequencing, the 96-plex scRNA-Seq pipeline typically recovers approximately 36,000 high-quality cells across 288 samples, with a median of 122-140 cells per well, providing sufficient coverage for robust statistical analysis [27]. Demultiplexing accuracy is verified through the double HTO labeling strategy, with successful cell retention rates of 40-50% across different HGSOC models. This slight variation can be attributed to differential expression of the target surface proteins (particularly CD298) and potential compound effects on the antibody-oligonucleotide conjugates [27].
Uniform Manifold Approximation and Projection (UMAP) visualization reveals both sample-specific clustering and treatment-induced convergence patterns, highlighting the complex interplay between baseline transcriptional states and drug responses. Validation of epithelial ovarian cancer origin is confirmed through expression of established markers including PAX8, CD24, EPCAM, KRT8, and KRT18, while cancer stem cell populations can be identified through CD44 and ROR1 expression [27].
Clustering Analysis and Response Heterogeneity
Leiden clustering identifies 13 distinct transcriptional clusters that demonstrate heterogeneous composition patterns with important biological implications:
- Cells treated with PI3K-AKT-mTOR, Ras-Raf-MEK-ERK, and multikinase inhibitors primarily cluster by model of origin, suggesting that responses to these pathway inhibitors are strongly influenced by baseline cellular context [27].
- In contrast, cells treated with epigenetic modifiers (BET inhibitors, HDAC inhibitors) and CDK inhibitors form distinct clusters that transcend model boundaries, indicating conserved transcriptional responses to these drug classes across different genetic backgrounds [27].
- Heterogeneous distribution of cell cycle phases across all clusters and treatments suggests complex relationships between drug mechanisms and proliferation states that would be obscured in bulk analyses [27].
Pathway Analysis and Mechanism Discovery
Gene set variation analysis (GSVA) applied to the single-cell data reveals drug-induced pathway activities that provide mechanistic insights into both intended on-target effects and unexpected off-target consequences. In the HGSOC application, this approach uncovered a previously unknown resistance mechanism wherein a subset of PI3K-AKT-mTOR inhibitors induced activation of receptor tyrosine kinases (including EGFR) through upregulation of caveolin-1 (CAV1) [27]. This discovery was only possible through single-cell resolution analysis, as the subpopulation-specific response was masked in bulk measurements. Furthermore, this mechanistic insight directly informed therapeutic strategy, suggesting that synergistic combinations of PI3K-AKT-mTOR inhibitors with EGFR targeting agents could mitigate this resistance pathway in CAV1- and EGFR-expressing tumors [27].
Signaling Pathways and Mechanisms
The integrated DSRT-scRNA-Seq pipeline enables comprehensive mapping of drug-induced signaling pathway alterations, revealing both intended on-target effects and compensatory mechanisms that may limit therapeutic efficacy.
Application Notes
Implementation Considerations
Successful implementation of the integrated pipeline requires careful consideration of several technical factors:
Experimental Design: The 96-plex format enables screening of 45 drugs across multiple models with appropriate replicates, but requires strategic plate layout to balance conditions and minimize positional effects. Including DMSO controls in multiple wells across the plate is essential for normalizing technical variability [27].
Cell Quality and Viability: Maintain cell viability above 85% throughout the processing pipeline, as dead cells can contribute to background noise in scRNA-Seq data. Implement viability staining (e.g., YOYO-1) during live-cell assays to quantify cell health before fixation [30].
Barcoding Optimization: Titrate antibody-oligonucleotide conjugates to achieve optimal labeling without inducing cellular stress. The double HTO approach (targeting both B2M and CD298) provides redundancy to account for potential drug-induced modulation of surface protein expression [27].
Sequencing Depth: Target 50,000 reads per cell provides cost-effective coverage for transcript detection while maintaining budget constraints for large-scale studies. Deeper sequencing may be beneficial for specific applications requiring detection of low-abundance transcripts [27].
Troubleshooting Guide
Table 3: Common Technical Challenges and Solutions
| Challenge | Potential Causes | Solutions |
|---|---|---|
| Low cell recovery after barcoding | Drug-induced cytotoxicity; insufficient surface protein expression; suboptimal HTO conjugation | Include viability markers; validate HTO labeling efficiency; test alternative surface protein targets |
| Poor demultiplexing efficiency | Uneven HTO distribution; excessive background signal; sequencing depth issues | Optimize HTO concentrations; implement background subtraction algorithms; ensure adequate sequencing depth for HTO detection |
| High doublet rates | Overloading during single-cell capture; incomplete dissociation | Optimize cell concentration for capture; improve dissociation protocol; utilize computational doublet detection tools |
| Batch effects across plates | Technical variability in processing; temporal differences in experiment execution | Implement sample randomization; process controls across all batches; utilize batch correction algorithms |
Adaptation to Other Cancer Types
While developed and validated in HGSOC models, the integrated pipeline can be adapted to other cancer types with appropriate modifications:
Solid Tumors: The pipeline is directly applicable to other solid tumors, though dissociation protocols may require optimization to maintain cell viability while achieving single-cell suspensions. For particularly challenging samples, nuclear sequencing (snRNA-Seq) provides an alternative approach when full cell dissociation proves problematic [29].
Hematological Malignancies: For blood cancers, the live-cell barcoding approach can be modified to target lineage-specific surface markers more relevant to hematopoietic cells, potentially improving barcoding efficiency in these systems [28].
Co-clinical Applications: The pipeline shows particular promise for co-clinical studies where patient-derived cells are screened alongside clinical treatment, enabling direct correlation of ex vivo drug responses with patient outcomes to validate predictive biomarkers [27].
The integration of DSRT with 96-plex scRNA-Seq represents a significant advancement in high-throughput pharmacotranscriptomic profiling, enabling unprecedented resolution in mapping drug responses across heterogeneous cell populations. This pipeline successfully addresses critical limitations of conventional screening approaches by simultaneously capturing phenotypic drug sensitivity and underlying transcriptional mechanisms at single-cell resolution. The application of this approach to HGSOC has demonstrated its power to uncover novel resistance mechanisms and inform rational combination therapies, particularly through the discovery of CAV1-mediated EGFR activation following PI3K-AKT-mTOR inhibition. As the field moves toward increasingly personalized cancer medicine, this integrated methodology provides a robust framework for comprehensively evaluating drug responses in patient-derived models, ultimately accelerating the discovery of more effective therapeutic strategies for complex and heterogeneous malignancies. The continued refinement of multiplexed screening approaches, combined with emerging technologies in spatial transcriptomics and live-cell imaging, promises to further enhance our ability to decipher and target the molecular complexity of cancer.
Live-Cell Barcoding Techniques for High-Throughput Pharmacotranscriptomics
Pharmacotranscriptomics has emerged as a powerful discipline that combines drug perturbation with transcriptome-wide profiling to understand molecular mechanisms of drug action [31]. This approach represents a distinct class of drug screening that complements traditional target-based and phenotype-based methods by providing a comprehensive view of gene expression changes in response to compound treatment [31]. The integration of live-cell barcoding techniques has revolutionized this field by enabling massive parallelization of drug screening campaigns, significantly reducing costs while increasing throughput and resolution.
Recent technological advances have made it feasible to conduct high-throughput transcriptomic profiling of hundreds to thousands of drug treatments in a single experiment [32] [33]. These approaches are particularly valuable for understanding complex drug responses in heterogeneous systems such as cancer, where variable treatment outcomes often result from genetic, transcriptomic, epigenetic, and phenotypic differences at the single-cell level [32] [34]. Live-cell barcoding addresses this challenge by allowing researchers to track individual cellular responses within complex populations, providing unprecedented insights into drug resistance mechanisms and heterogeneous treatment effects [34].
Key Technological Platforms
Multiplexed Single-Cell RNA-Seq Pharmacotranscriptomics Pipeline
A cutting-edge pipeline for high-throughput pharmacotranscriptomic profiling utilizes live-cell barcoding with antibody-oligonucleotide conjugates [32]. This approach combines drug screening with 96-plex single-cell RNA sequencing, dramatically increasing throughput while reducing costs compared to traditional methods. The technique employs antibody-oligonucleotide conjugates targeting surface proteins such as β2 microglobulin (B2M) and CD298, which serve as unique identifiers for individual samples that are pooled prior to scRNA-Seq [32]. This method has been successfully applied to profile primary high-grade serous ovarian cancer (HGSOC) cells treated with 45 drugs spanning 13 distinct mechanisms of action, revealing heterogeneous transcriptional landscapes and previously uncharacterized drug resistance mechanisms [32].
In practice, this pipeline involves treating cells with compounds for 24 hours using concentrations above the half-maximal effective concentration (EC50) based on prior drug sensitivity testing. Following treatment, cells in each well are labeled with unique pairs of anti-B2M and anti-CD298 antibody-oligono conjugates (Hashtag oligos or HTOs) from a set of 20 (12 for columns and 8 for rows of a 96-well plate) before sample pooling for multiplexed scRNA-Seq [32]. This approach has demonstrated robust performance across multiple patient-derived cancer models, successfully demultiplexing transcriptomic profiles of 36,016 high-quality cells across 288 samples with a median of 122-140 cells per well [32].
DRUG-Seq for Miniaturized High-Throughput Transcriptome Profiling
DRUG-Seq (Digital RNA with pertUrbation of Genes) represents an alternative platform designed specifically for high-throughput drug discovery applications [33]. This method captures transcriptional changes detected in standard RNA-seq at approximately 1/100th the cost, enabling profiling of hundreds of compounds across multiple doses in 384- and 1536-well formats [33]. By forgoing RNA purification and employing a multiplexing strategy with unique molecular indices (UMIs), DRUG-seq simplifies multi-well processing to direct lysis and reverse transcription steps, drastically cutting library construction time and costs.
The technical workflow incorporates barcodes into reverse transcription primers, allowing cDNAs from individual wells to be labeled and pooled after first-strand synthesis [33]. The template switching property of reverse transcriptase adds poly(dC) after first-strand cDNA synthesis, enabling binding of a template switching oligo for pre-amplification by PCR. Following tagmentation and amplification, libraries are size-selected and sequenced with custom primers [33]. Despite lower read depths (2 million reads/well) compared to standard RNA-seq, DRUG-seq detects a median of 11,000 genes and reliably identifies differentially expressed genes under compound perturbation.
ZipSeq for Spatially-Resolved Pharmacotranscriptomics
ZipSeq provides an innovative approach for spatial transcriptomics in live cells using patterned illumination and photocaged oligonucleotides to serially print barcodes onto live cells within intact tissues [35]. This method utilizes a photo-uncaging system that allows light-based printing of DNA barcodes onto cell surfaces through antibody conjugation or lipid insertion [35]. A double-stranded "anchor strand" containing a photocaged overhang sequence is attached to cells, and following local illumination with 365 nm light to release the cages, a "Zipcode" strand can hybridize to the exposed sequence.
This technology enables real-time mapping of single-cell transcriptomes with spatial context, which is particularly valuable for understanding microenvironment-specific drug responses [35]. ZipSeq has been successfully applied to map gene expression in wound healing models, lymph node sections, and tumor microenvironments, revealing spatially segregated transcriptional programs associated with specific histological structures [35].
Table 1: Comparison of High-Throughput Pharmacotranscriptomics Platforms
| Platform | Throughput | Cost per Sample | Key Applications | Strengths |
|---|---|---|---|---|
| Multiplexed scRNA-Seq [32] | 96-plex | Moderate | Heterogeneous drug responses in cancer, mechanism of action studies | Single-cell resolution, detection of rare cell populations |
| DRUG-Seq [33] | 384-1536 well | $2-4 | Large-scale compound screening, dose-response studies | Cost-effective, miniaturized format, whole transcriptome coverage |
| ZipSeq [35] | Region-specific | Variable | Spatial pharmacotranscriptomics, microenvironment drug responses | Spatially resolved, real-time mapping, preserves tissue context |
Experimental Protocols
Protocol: Multiplexed scRNA-Seq for Pharmacotranscriptomic Profiling
Cell Preparation and Drug Treatment
- Culture Conditions: Maintain patient-derived cancer cells or cell lines in appropriate medium. For primary cells, use early passages to avoid loss of phenotypic identity [32].
- Drug Treatment: Prepare drug plates with compounds diluted in appropriate vehicle (typically DMSO). Include vehicle controls in each plate.
- Treatment Conditions: Treat cells for 24 hours using drug concentrations above the half-maximal effective concentration based on prior drug sensitivity testing [32]. Use a minimum of two biological replicates per treatment condition.
Live-Cell Barcoding and Sample Multiplexing
- Antibody-Oligo Conjugate Preparation: Prepare antibody-oligonucleotide conjugates targeting ubiquitously expressed surface proteins (e.g., anti-B2M and anti-CD298) [32].
- Cell Labeling: Following drug treatment, label cells in each well with unique pairs of Hashtag oligos (HTOs) from a set of 20 (12 for columns and 8 for rows of a 96-well plate).
- Cell Pooling: After labeling, pool all samples into a single tube for simultaneous processing.
- Cell Viability Assessment: Assess cell viability using appropriate methods (e.g., trypan blue exclusion) and aim for >80% viability before proceeding to single-cell partitioning.
Single-Cell RNA Sequencing
- Single-Cell Partitioning: Load pooled cell suspension into appropriate single-cell partitioning system (e.g., 10X Genomics Chromium).
- Library Preparation: Follow manufacturer's protocol for scRNA-Seq library preparation with modifications to include HTO amplification.
- Sequencing: Sequence libraries on an appropriate Illumina platform with sufficient depth (typically 20,000-50,000 reads per cell).
Data Analysis
- Cell Demultiplexing: Assign cells to their original samples based on HTO counts using tools such as Seurat or similar packages.
- Quality Control: Filter out low-quality cells based on metrics including unique molecular identifier (UMI) counts, genes detected per cell, and mitochondrial percentage.
- Differential Expression Analysis: Identify drug-induced transcriptional changes using appropriate statistical methods accounting for multiple testing.
- Pathway Analysis: Perform gene set enrichment analysis to identify biological pathways affected by drug treatments.
Protocol: DRUG-Seq for High-Throughput Compound Screening
Plate Preparation and Compound Treatment
- Cell Seeding: Seed cells in 384-well or 1536-well plates using automated liquid handling systems.
- Compound Transfer: Transfer compounds from source plates to assay plates using acoustic dispensing or pin tools.
- Treatment Conditions: Treat cells with 8-point dose responses (e.g., 10 μM to 3.2 nM) for 12 hours to balance detection of compound effectiveness and material loss due to toxicity [33]. Include appropriate controls (DMSO, positive controls).
DRUG-Seq Library Preparation
- Cell Lysis: Directly lyse cells in culture wells without RNA purification.
- Reverse Transcription: Perform reverse transcription using primers containing well-specific barcodes and unique molecular indices (UMIs) [33].
- cDNA Pooling: Pool cDNAs from all wells after first-strand synthesis.
- Template Switching: Utilize template switching activity of reverse transcriptase to add universal sequences for amplification.
- Library Amplification: Amplify libraries via PCR and tagment using transposase-based fragmentation.
- Size Selection: Perform size selection to remove primer dimers and large fragments.
Sequencing and Data Analysis
- Sequencing: Sequence libraries on Illumina platforms with a target of 2 million reads per well.
- Read Alignment: Align reads to reference genome and assign to genes.
- UMI Counting: Count UMIs to generate digital gene expression counts.
- Dose-Response Modeling: Fit dose-response curves to identify significant gene expression changes.
- Compound Clustering: Cluster compounds based on transcriptional signatures to infer mechanisms of action.
The Scientist's Toolkit: Essential Research Reagents
Table 2: Key Research Reagent Solutions for Live-Cell Barcoding
| Reagent/Category | Specific Examples | Function/Application |
|---|---|---|
| Antibody-Oligo Conjugates | Anti-B2M and anti-CD298 antibody-oligonucleotide conjugates [32] | Cell surface recognition and barcode delivery for sample multiplexing |
| Hashtag Oligos (HTOs) | 12x8 set for 96-well plate formatting [32] | Unique sample identifiers for multiplexed scRNA-Seq |
| Photocaged Oligonucleotides | NPOM-caged anchor strands with 16 bp overhang [35] | Spatially-controlled barcode application in ZipSeq |
| Reverse Transcription Primers | Primers with well-specific barcodes and UMIs [33] | Source-specific cDNA labeling in DRUG-Seq |
| Template Switching Oligos | TSO for cDNA amplification [33] | Enabling full-length cDNA amplification without purification |
| Viability Markers | Lignoceric acid conjugates, fluorescent antibodies [35] | Assessment of cell health during live-cell processing |
Signaling Pathways and Workflow Visualization
Key Signaling Pathways in Pharmacotranscriptomic Responses
Studies utilizing live-cell barcoding have identified several critical signaling pathways that mediate drug responses in cancer. In high-grade serous ovarian cancer, a subset of PI3K-AKT-mTOR inhibitors induced activation of receptor tyrosine kinases such as EGFR through upregulation of caveolin 1 (CAV1) [32]. This drug resistance feedback loop could be mitigated by synergistic targeting of both PI3K-AKT-mTOR and EGFR pathways, particularly in tumors with CAV1 and EGFR expression [32].
Other pathways frequently identified in pharmacotranscriptomic screens include Ras-Raf-MEK-ERK signaling, cell cycle regulators (CDK, PLK, CHK), epigenetic modifiers (HDAC, BET inhibitors), DNA damage response pathways (PARP inhibitors), and apoptotic regulators (BCL-2, IAP, SMAC mimetics) [32]. The ability to simultaneously monitor these diverse pathways at single-cell resolution enables comprehensive understanding of complex drug responses and resistance mechanisms.
Experimental Workflow Visualization
Diagram 1: Overall workflow for multiplexed pharmacotranscriptomic screening
Diagram 2: Drug resistance mechanism and intervention strategy
Applications in Chemogenomic Library Research
Live-cell barcoding techniques provide powerful tools for phenotypic screening of chemogenomic libraries, addressing the critical challenge of functional annotation of identified hits [18]. The integration of high-content imaging with multiplexed transcriptomics enables comprehensive characterization of compound effects on cellular health, including nuclear morphology, cytoskeletal organization, cell cycle status, and mitochondrial function [18] [7]. This multi-dimensional profiling helps distinguish specific pharmacological effects from non-specific toxicity, improving the selection of high-quality chemical probes for target validation.
In practice, live-cell barcoding facilitates the screening of focused chemogenomic libraries containing compounds with narrow target selectivity, such as chemical probes targeting specific enzymes or signaling proteins [18]. By combining morphological profiling with transcriptomic readouts, researchers can establish connections between phenotypic changes and specific molecular targets, accelerating the identification of novel therapeutic agents and mechanism-of-action studies.
The application of these technologies to patient-derived tumor samples enables personalized testing at single-cell resolution, potentially identifying patient-specific drug sensitivities and resistance mechanisms [32]. This approach is particularly valuable for cancers characterized by significant heterogeneity, such as high-grade serous ovarian cancer, where interpatient and intrapatient variability presents major therapeutic challenges [32].
Live-cell barcoding techniques have transformed high-throughput pharmacotranscriptomics by enabling massively parallel screening of drug responses with single-cell resolution. The integration of multiplexed scRNA-Seq, DRUG-Seq, and spatially-resolved methods like ZipSeq provides researchers with a powerful toolkit for comprehensive drug mechanism studies, resistance profiling, and chemogenomic library annotation. As these technologies continue to evolve and decrease in cost, they are poised to become standard approaches in drug discovery pipelines, particularly for complex diseases like cancer where heterogeneity drives variable treatment outcomes. The continued refinement of these platforms, combined with advanced computational methods for analyzing high-dimensional transcriptomic data, will further accelerate the identification of novel therapeutic agents and personalized treatment strategies.
Multiplexed Live-Cell Imaging in 2D and 3D Culture Systems
Multiplexed live-cell imaging combines fluorescent labeling with kinetic microscopy to simultaneously monitor multiple cellular processes over time, offering a powerful tool for phenotypic screening in chemogenomic research. This approach enables the study of dynamic cellular responses to genetic or chemical perturbations in their native state, preserving crucial biological context often lost in endpoint assays [36] [37]. For researchers investigating chemogenomic libraries—collections of well-characterized small molecules—this technology provides a multifaceted view of compound effects on cell health, function, and morphology, allowing for more accurate functional annotation of identified hits [18] [7].
The application of these imaging strategies across both traditional two-dimensional (2D) monolayers and more physiologically relevant three-dimensional (3D) culture systems, such as patient-derived organoids (PDOs), presents unique technical considerations. While 2D cultures offer simplicity and consistency for high-throughput screening, 3D models better recapitulate the complex genomic profiles, architecture, and intratumoral heterogeneity of native tissues [36]. This application note details standardized protocols and analytical frameworks for implementing multiplexed live-cell imaging in both systems within the context of chemogenomic library screening.
The Scientist's Toolkit: Essential Reagents for Multiplexed Imaging
Selecting appropriate reagents is crucial for designing successful multiplexed live-cell imaging experiments. The table below categorizes key fluorescent tools based on their target readouts, which are essential for comprehensive chemogenomic compound profiling.
Table 1: Key Research Reagent Solutions for Live-Cell Multiplexed Imaging
| Cellular Target / Process | Example Reagents | Primary Function | Typical Live-Cell Time Frame |
|---|---|---|---|
| Viability (Live Cells) | Calcein AM | Cell-permeant dye converted to fluorescent calcein by intracellular esterases in live cells [38]. | Short-term (minutes to hours) [37] |
| Viability (Dead Cells) | SYTOX Green Nucleic Acid Stain | Cell-impermeant dye that selectively stains nuclei of dead cells with compromised membranes [37]. | Short- to long-term (24+ hours) [37] |
| Apoptosis | Annexin V Red Dye, CellEvent Caspase-3/7 Green Detection Reagent | Detects phosphatidylserine externalization or activated executioner caspases, respectively [36] [37]. | Long-term (overnight to 48-72 hours) [37] |
| Cytotoxicity | Cytotox Green Dye | Measures loss of plasma membrane integrity [36]. | Compatible with kinetic measurements [36] |
| Nuclear Morphology | Hoechst 33342, HCS NuclearMask Blue Stain | Cell-permeant dyes that label DNA, enabling analysis of nuclear structure and cell count [7] [37]. | End-point or long-term [37] |
| Mitochondrial Health | TMRM, MitoTracker Red | Indicators of mitochondrial membrane potential (TMRM) or mass/ localization (MitoTracker) [38] [37]. | Short-term (TMRM) or long-term (MitoTracker) [37] |
| Cytoskeleton (Tubulin) | Tubulin Tracker Green | Labels microtubule networks for assessment of cytoskeletal morphology [37]. | Short-term [37] |
Quantitative Profiling of Compound Effects
Multiplexed imaging generates rich, quantitative data on various parameters of cell health and morphology. The following table summarizes key quantitative readouts used to characterize the effects of compounds from chemogenomic libraries, enabling the distinction between specific on-target effects and general cytotoxicity [18].
Table 2: Key Quantitative Readouts for Phenotypic Screening of Chemogenomic Libraries
| Phenotypic Category | Specific Measurable Parameters | Significance in Compound Profiling |
|---|---|---|
| Cell Viability & Death | - ATP levels (e.g., CellTiter-Glo)- Proportion of Calcein AM-positive cells- Proportion of SYTOX Green-positive cells [36] [37] | Distinguishes cytotoxic compounds; endpoint ATP assays are common but preclude further sample use [36]. |
| Apoptosis & Necrosis | - Annexin V signal intensity- Caspase 3/7 activity (CellEvent reagent fluorescence)- Cytotox dye intensity [36] [37] | Identifies the mechanism of cell death; kinetic imaging can reveal the sequence of apoptotic events. |
| Nuclear Morphology | - Nuclear size and texture- Chromatin condensation- Nuclear fragmentation [18] [7] | An excellent indicator for early apoptosis and necrosis; used for cell classification in machine learning workflows [18]. |
| Cytoskeletal Integrity | - Tubulin network organization- Actin filament structure [18] [37] | Reveals non-specific compound effects interfering with basic cellular functions and structures [18]. |
| Mitochondrial Function | - Mitochondrial membrane potential (TMRM intensity)- Mitochondrial mass and localization [18] [38] [37] | Indicates metabolic health and can identify compounds that induce oxidative stress. |
| Morphology in 3D | - Organoid number and size- Changes in brightfield morphology over time [36] | Provides unique kinetic data on growth and structural disintegration in a more physiologically relevant model [36]. |
Experimental Protocols
Protocol 1: Multiplexed Imaging for Compound Annotation in 2D Cultures
This protocol is adapted from a high-content multiplex screen designed to annotate compounds from chemogenomic libraries based on their effects on cellular phenotypes, including nuclear morphology, tubulin structure, and mitochondrial health [18] [7].
Key Materials
- Cells: Adherent cell lines relevant to the research context (e.g., cancer lines).
- Reagents:
- Equipment:
Detailed Workflow
Procedure
- Cell Plating: Seed cells at an optimized density in complete medium and incubate for 24 hours to allow for complete attachment and recovery [7].
- Compound Treatment: Prepare compound dilutions in pre-warmed medium. Gently add compounds to assigned wells. Include DMSO vehicle controls, ensuring the final concentration does not exceed toxic levels (typically ≤0.1%) [36] [7].
- Staining: Simultaneously with compound addition, replace the medium with the prepared staining solution containing the multiplexed fluorescent dyes [7].
- Image Acquisition:
- Transfer the plate to the pre-equilibrated chamber of the live-cell imaging system.
- Configure the automated acquisition protocol to capture brightfield and fluorescence (e.g., DAPI, GFP, RFP, Cy5) images from multiple sites per well at regular intervals (e.g., every 4 hours) for the desired duration (e.g., 48 hours) [18] [7] [37].
- Data Analysis:
Protocol 2: Assessing Drug Responses in Patient-Derived Organoids (PDOs)
This protocol describes a method to plate 3D PDO models and kinetically assess drug effects using an automated live-cell imaging system, providing a more translational model for chemogenomic screening [36].
Key Materials
- Biologicals: Intact Patient-Derived Organoids (PDOs).
- Reagents:
- Basement Membrane Extract (BME), thawed at 4°C.
- Organoid culture media, ice-cold and pre-warmed.
- Organoid wash buffer: 1x PBS with 10 mM HEPES, 1x Glutamax, 5 mM EDTA, and 10 μM Y-27632.
- Fluorescent dyes: e.g., Annexin V Red for apoptosis, Cytotox Green for cytotoxicity.
- Drug/Treatment agents.
- Equipment:
- Pre-warmed 96-well plates.
- Wide-bore pipette tips.
- Centrifuge.
- Live-cell imaging system (e.g., Cytation 5) [36].
Detailed Workflow
Procedure
- Harvesting PDOs:
- Aspirate media from PDO cultures and add ice-cold organoid wash buffer.
- Gently pipette to disrupt the BME dome and transfer the suspension to a conical tube. Incubate on ice for 10 minutes.
- Centrifuge at 350 x g for 5 minutes at 4°C. Carefully aspirate the supernatant [36].
- Plating PDOs in a 96-well Plate:
- Resuspend the PDO pellet in a calculated volume of ice-cold organoid culture media. Count PDOs to achieve a density of 25-50 PDOs per 5μL dome [36].
- Mix the PDO suspension with an equal volume of BME using wide-bore tips to avoid bubbles.
- Seed 5μL domes into the center of each pre-warmed well, plating only the inner 60 wells to minimize edge effects.
- Place the lid on the plate and gently invert it. Incubate at 37°C for 20 minutes to allow the domes to solidify [36].
- Treatment and Staining:
- After solidification, treat each well with 100μL of organoid culture media containing the compatible fluorescent dyes (e.g., Annexin V Red, Cytotox Green). Add PBS to the outer empty wells to reduce evaporation. Incubate overnight [36].
- The next day (Day 0), add 100μL per well of drugs prepared at 2x concentration in pre-warmed media [36].
- Image Acquisition and Analysis:
- Place the plate in the live-cell imager. Acquire brightfield and fluorescence images at regular intervals (e.g., every 4-6 hours) over several days.
- Analyze images using software that can calculate parameters such as PDO number, area, and fluorescence intensity through masking algorithms. Z-plane projections may be used for 3D analysis [36].
Visualization and Data Analysis
Advanced computational tools are essential for processing the complex, high-dimensional data generated by multiplexed imaging. Platforms like SPACEc, a streamlined Python workflow, integrate image processing, cell segmentation, and spatial analysis into a single, scalable environment [39]. For lower-plex data, commercial software like Phenoplex provides user-friendly interfaces for deep learning-based cell detection, phenotyping, and spatial analysis [40].
Key analytical steps include:
- Cell Segmentation & Phenotyping: Accurately identifying individual cells and assigning phenotypic labels based on marker expression [39] [40].
- Spatial Analysis: Quantifying cell-cell interactions, neighborhood relationships, and spatial context to understand tissue architecture and cellular microenvironments [39].
- Interactive Data Exploration: Using linked graphs and image overlays to verify phenotyping results and generate hypotheses [40].
The application of these imaging and analysis technologies to both 2D and 3D systems provides a robust framework for characterizing chemogenomic libraries, bridging the gap between high-throughput screening and physiologically relevant disease models.
Fluorescent Dye Panels for Simultaneous Health Assessment
Within chemogenomic library research, accurately identifying the phenotypic impact of small molecules is paramount. A significant challenge lies in differentiating specific, on-target effects from non-specific cellular damage, which can lead to false positives or misinterpreted results in drug discovery pipelines [5]. Phenotypic screening, while powerful for identifying active compounds without prior knowledge of their mechanism of action, often lacks the detailed mechanistic insight needed for hit validation [5]. Functional annotation of identified hits is a common subsequent hurdle.
The development of live-cell multiplexed assays represents a transformative approach to this problem. These assays enable the real-time, simultaneous monitoring of multiple key indicators of cellular health in response to chemogenomic library compounds (CGCs) [5]. By employing carefully selected panels of fluorescent dyes, researchers can move beyond single-endpoint viability measurements to a comprehensive, time-dependent characterization of compound effects. This provides essential annotation for CGCs, helping to delineate generic cytotoxic effects from target-specific phenotypes and thereby assessing a compound's suitability for further mechanistic studies [5]. This application note details the protocols and reagents for implementing such a multiplexed fluorescent dye panel for simultaneous health assessment in live cells.
Multiplexed Assay Design and Rationale
Core Principles of Live-Cell Multiplexing
Multiplexed live-cell imaging offers several critical advantages over fixed-cell endpoint assays or single-parameter live-cell reads. It allows for the observation of dynamic processes and interactions between different cellular compartments in their natural, living state, providing more physiologically relevant results [41]. In the context of profiling chemogenomic libraries, this means one can visually record the kinetics of cellular responses, such as the onset of apoptosis versus necrosis, or track progressive changes in cell cycle distribution or mitochondrial health [5]. This kinetic information is invaluable for differentiating primary from secondary target effects.
However, multiplexing with live cells introduces complexity. Key considerations include:
- Fluorophore Selection: Dyes must be compatible with live specimens, photostable for long-term imaging, and have minimal toxicity [41]. The choice of fluorescent dyes for multiplexed live-cell analysis is still somewhat limited by broad emission spectra, making it challenging to find excitation/detection schemes with high specificity for more than a few labels [41].
- Physiological Conditions: Cells must be maintained in near-physiological conditions (37°C, controlled CO2, humidity) throughout the experiment to ensure survival and true physiology without introducing stress-related artifacts [41].
- Spectral Overlap and Acquisition: The broad emission spectra of many fluorophores lead to crosstalk between detection channels. While narrow bandpass filters can reduce crosstalk, they also reduce sensitivity, which can be problematic for low-abundance targets in live cells. Increasing light intensity to compensate raises the risk of phototoxicity [41]. Sequential imaging with filter wheels can also create temporal offsets between channels, complicating the interpretation of fast dynamic processes [41].
The HighVia Extend Assay Workflow
The optimized "HighVia Extend" protocol is a prime example of a live-cell multiplexed assay designed for comprehensive compound characterization [5]. It classifies cells based on nuclear morphology—a robust indicator of cellular responses like early apoptosis and necrosis—and combines this with readouts of cytoskeletal morphology, cell cycle, and mitochondrial health [5]. This multi-dimensional characterization is captured in a single, time-resolved experiment.
The following workflow diagram outlines the key stages of this multiplexed assay, from initial cell preparation to final data analysis:
Fluorescent Dye Panel for Cellular Health
A core panel of fluorescent dyes is used to interrogate distinct yet interconnected aspects of cellular health. The table below summarizes the key dyes, their targets, and the specific biological information they provide in the context of the assay.
Table 1: Fluorescent Dye Panel for Multiplexed Cellular Health Assessment
| Dye Name | Cellular Target | Key Readout / Biological Significance | Example Concentration |
|---|---|---|---|
| Hoechst 33342 [5] | DNA (Nucleus) | Cell cycle phase, nuclear morphology (pyknosis, fragmentation), total cell count [5] | 50 nM [5] |
| BioTracker 488 Green Microtubule Dye [5] | Tubulin (Microtubules) | Cytoskeletal integrity, cell morphology, mitotic arrest [5] | Validated for no cytotoxicity [5] |
| MitoTracker Red/DeepRed [5] | Mitochondria | Mitochondrial mass, membrane potential (indicator of early apoptosis) [5] | Validated for no cytotoxicity [5] |
| Viability Dye (e.g., proprietary in LCM Assay) [42] | Cell Membrane (Live cells) | Relative number of live cells; identifies cytostatic/cytotoxic effects [42] | As per kit protocol [42] |
Dye Validation and Optimization
Crucially, the selected dyes and their concentrations must be rigorously validated to ensure they do not introduce artifacts. Studies have confirmed that Hoechst 33342 at concentrations below 170 nM, as well as Mitotracker Red and the BioTracker tubulin dye at their proposed assay concentrations, do not significantly impair cell viability over a 72-hour period [5]. Furthermore, combinations of these dyes also showed no adverse effects on viability, confirming their suitability for multiplexed live-cell use [5].
Experimental Protocol: HighVia Extend Assay
Materials and Reagents
Table 2: Essential Research Reagent Solutions
| Item | Function / Description | Example / Specification |
|---|---|---|
| Fluorescent Dyes | Labeling specific cellular structures for multiplexed imaging [5] | Hoechst 33342, MitoTracker Red, BioTracker 488 Microtubule Dye [5] |
| Cell Lines | Model systems for chemogenomic screening [5] | HeLa, U2OS, HEK293T, MRC9 (non-transformed fibroblast) [5] |
| Live-Cell Imaging Medium | Supports cell health during imaging; low autofluorescence [41] | Phenol-red free medium, buffered for ambient CO₂ |
| Reference Compounds | Training set for assay validation and machine learning [5] | Camptothecin, Staurosporine, JQ1, Paclitaxel, Digitonin [5] |
| Dye Drop Solutions [43] | Density-based reagent exchange to minimize cell loss [43] | Solutions with increasing iodixanol (OptiPrep) concentration [43] |
| 384-Well Imaging Plates | Vessel for high-throughput assay | Optically clear bottom, tissue culture treated |
Step-by-Step Procedure
Day 1: Cell Seeding
- Seed cells into 384-well imaging plates at an optimized density for ~60-80% confluence at the time of assay termination. Include control wells for background (no cells), vehicle (e.g., DMSO), and reference compounds.
- Incubate cells for 24 hours under standard culture conditions (37°C, 5% CO₂) to allow for adherence and recovery.
Day 2: Compound Treatment and Staining
- Prepare compound treatments. Using the chemogenomic library, treat cells with a range of concentrations (e.g., a 9-point dilution series). Include vehicle and reference compound controls.
- Prepare the multiplexed dye working solution in pre-warmed, phenol-red-free live-cell imaging medium. The final concentration of dyes should be: 50 nM Hoechst 33342, and manufacturer-recommended concentrations for MitoTracker Red and BioTracker 488 Microtubule Dye.
- Gently add the dye solution to all wells. For manual protocols or simple robots, the Dye Drop method is recommended to minimize cell disturbance [43]. This involves adding the slightly denser dye solution to the well's edge, allowing it to sink and displace the existing medium with high efficiency and minimal mixing.
- Return the plate to the incubator for 15-30 minutes to allow for dye loading.
Day 2-5: Time-Lapse Imaging
- Transfer the plate to a live-cell high-content imaging system housed within an environmental chamber maintaining 37°C, high humidity, and, if possible, 5% CO₂.
- Define imaging acquisition settings. Use appropriate excitation/emission filter sets for each dye. To mitigate crosstalk, consider using spectral phasor analysis if available, which allows for reliable unmixing of multiple colors without the sensitivity loss associated with narrow bandpass filters [41].
- Program a time-lapse experiment. Acquire images from multiple sites per well every 4-6 hours over a period of 48-72 hours. Use low exposure times and light intensities where possible to minimize photobleaching and phototoxicity.
Data Analysis and Interpretation
- Image Pre-processing: Correct for flat-field illumination and background fluorescence.
- Single-Cell Analysis: Use high-content analysis software to perform single-cell segmentation, typically using the nuclear (Hoechst) channel as the primary object. Subsequently, the cytoplasm can be defined as a ring around the nucleus or by using the tubulin signal.
- Feature Extraction: For each single cell, extract hundreds of morphological features (size, shape, intensity, texture) from each channel.
- Population Gating and Machine Learning: Train a supervised machine-learning algorithm using the reference compounds to gate cells into distinct populations (e.g., "healthy," "early apoptotic," "late apoptotic," "necrotic") based on the extracted features [5]. This gating can be performed using the entire cellular phenotype or, with high correlation, based on nuclear morphology alone [5].
- Dose-Response and Kinetic Analysis: Calculate time-dependent IC₅₀ values for the reduction of healthy cells and the increase in specific phenotypic populations. The following diagram illustrates the logical relationship between the measured parameters and the final cellular health assessment:
Troubleshooting and Technical Notes
- Fluorescent Compound Interference: Poorly soluble small molecules or compounds with intrinsic fluorescence (e.g., berzosertib, itraconazole) can create high background [5]. Include an additional gating step to classify all fluorescent objects as "nuclei" or "high-intensity objects" (which detects fluorescent compounds and precipitations) to minimize this risk [5].
- Cell Loss in Multi-Well Plates: Uneven loss of delicate cells (dying or mitotic) during washes is a major source of irreproducibility [43]. The Dye Drop method for reagent addition and exchange significantly mitigates this by avoiding aspiration and minimizing disturbance [43].
- Distinguishing Apoptotic and Mitotic Cells: Condensed nuclei in early apoptosis (pyknosis) can be challenging to distinguish from mitotic chromosomes based on morphology alone [5]. The context from other channels, such as tubulin staining showing a mitotic spindle, and kinetic information from the time-lapse data, can help differentiate these states.
Machine Learning for Automated Phenotype Classification
The drug discovery paradigm has shifted from a reductionist vision (one target—one drug) to a more complex systems pharmacology perspective (one drug—several targets), in part due to the number of failures of drug candidates in advanced clinical stages caused by lack of efficacy and clinical safety [1]. Phenotypic Drug Discovery (PDD) strategies have re-emerged as promising approaches for identifying novel therapeutics, particularly for complex diseases like cancers, neurological disorders, and diabetes, which are often caused by multiple molecular abnormalities [1]. A significant challenge in phenotypic screening is the functional annotation of identified hits, as these approaches do not rely on a priori knowledge of the molecular target [5]. Advanced technologies, including image-based high-content screening (HCS),
Table 1: Key Challenges in Phenotypic Screening and Proposed Solutions
| Challenge | Impact on Drug Discovery | Emerging Solution |
|---|---|---|
| Target Deconvolution | Delays hit-to-lead optimization; complicates MoA assessment [5]. | Chemogenomic libraries with annotated target selectivity [1] [5]. |
| Data Complexity | High-dimensional data from HCS is difficult to interpret manually [44]. | Machine learning for feature extraction and pattern recognition [44] [45]. |
| Off-target Effects | Misleading phenotypic readouts due to generic cytotoxicity [5]. | Multiplexed live-cell assays profiling cell health parameters [5]. |
Technologies for Image-Based Phenotypic Profiling
Cell Painting and High-Content Imaging
The Cell Painting assay is a high-content imaging-based high-throughput phenotypic profiling method. It uses up to six fluorescent dyes to stain up to eight cellular components, allowing the extraction of hundreds of morphological features that form a characteristic profile for each cell under a specific treatment [1]. In a typical workflow, U2OS osteosarcoma cells are plated in multiwell plates, perturbed with treatments, stained, fixed, and imaged. An automated image analysis using CellProfiler then identifies individual cells and measures morphological features (e.g., intensity, size, area shape, texture) for the cell, cytoplasm, and nucleus [1]. This generates a rich dataset where the comparison of cell profiles enables the grouping of compounds into functional pathways and the identification of disease signatures [1].
Live-Cell Multiplexed Assays for Cellular Health
While Cell Painting provides a detailed snapshot of cell morphology, live-cell multiplexed assays offer dynamic, real-time insights into cellular health, which is crucial for distinguishing specific on-target effects from general cytotoxicity in chemogenomic library research [5]. An optimized protocol, such as the HighVia Extend assay, enables time-dependent characterization of small molecules by monitoring:
- Nuclear morphology (using Hoechst33342) as an indicator for early apoptosis and necrosis.
- Microtubule cytoskeleton (using BioTracker 488 Green Microtubule Cytoskeleton Dye).
- Mitochondrial mass (using MitotrackerDeepRed), which is indicative of cytotoxic events like apoptosis [5]. This assay uses a supervised machine-learning algorithm to gate cells into distinct populations—"healthy," "early/late apoptotic," "necrotic," and "lysed"—based on the extracted features, providing a comprehensive viability profile [5].
Figure 1: Workflow of a live-cell multiplexed assay for phenotypic profiling, integrating specific research reagents.
Machine Learning for Image-Based Profiling and Classification
From Morphological Features to Predictive Models
The increase in imaging throughput and the development of new analytical frameworks have opened new avenues for data-rich phenotypic profiling [44]. Machine learning (ML) approaches are indispensable for analyzing the high-dimensional data generated by assays like Cell Painting and HighVia Extend. The primary goal is to extract meaningful patterns and build models that can predict a compound's mechanism of action (MoA) or classify its phenotypic impact automatically [44] [45]. The process involves several layers of computational processing, from chemical graph retrieval and descriptor generation to fingerprint construction and similarity analysis [45].
Key Machine Learning Workflows
Two primary ML workflows are prevalent in the field:
- Unsupervised or Semi-supervised Profiling: This involves processing the morphological feature vectors to create a "phenotypic fingerprint" for each treatment. Dimensionality reduction techniques (e.g., PCA, t-SNE) are then applied, and the resulting projections are clustered. Treatments clustering together are inferred to share a similar biological MoA [44].
- Supervised Classification: This uses a training set of treatments with known MoAs or toxicity labels to build a classifier (e.g., Random Forest, Support Vector Machine, or Deep Neural Network). This model can then predict the class (e.g., "apoptosis inducer," "mitotic inhibitor") of novel compounds based on their morphological profiles [5] [45]. As demonstrated in the HighVia Extend assay, a supervised algorithm can be trained on reference compounds to gate cells into distinct health categories automatically [5].
Figure 2: Core machine learning workflows for analyzing morphological profiles and predicting compound activity.
Application Notes: Protocol for Phenotypic Annotation of Chemogenomic Libraries
Protocol: HighVia Extend Live-Cell Multiplexed Profiling
This protocol is designed for the comprehensive annotation of chemogenomic library compounds by assessing their effects on fundamental cellular functions over time [5].
1. Cell Preparation and Plating:
- Use adherent cell lines relevant to the disease context (e.g., HeLa, U2OS, HEK293T, MRC9).
- Plate cells in multiwell imaging plates at an optimized density for confluency after 24-48 hours.
2. Compound Treatment and Staining:
- Treat cells with chemogenomic library compounds across a suitable concentration range (e.g., 1 nM - 10 µM), including DMSO as a negative control and reference compounds (e.g., camptothecin, staurosporine, paclitaxel) as positive controls for various MoAs.
- Prepare the live-cell staining solution:
- 50 nM Hoechst33342 (nuclear dye).
- MitotrackerRed at a pre-optimized, non-toxic concentration (mitochondrial dye).
- BioTracker 488 Green Microtubule Cytoskeleton Dye at a pre-optimized concentration.
- Add the staining solution directly to the media in the wells.
3. Image Acquisition:
- Place the plate in a live-cell imaging high-content microscope system maintained at 37°C and 5% CO₂.
- Image multiple fields per well across all fluorescent channels at regular intervals (e.g., every 4-6 hours) for a duration of 48-72 hours.
4. Image and Data Analysis:
- Use image analysis software (e.g., CellProfiler) to perform single-cell segmentation and feature extraction for each channel and time point.
- Extract features related to nuclear morphology (size, intensity, texture), cytoskeletal structure, and mitochondrial content and morphology.
- Input the single-cell data into a pre-trained machine learning classifier (e.g., Random Forest) to assign each cell to a population category: "healthy," "early apoptotic," "late apoptotic," "necrotic," or "lysed."
- Aggregate single-cell data per well to calculate time-dependent IC₅₀ values for the reduction of healthy cells and the induction of specific death phenotypes.
Table 2: Essential Research Reagent Solutions for Live-Cell Phenotypic Profiling
| Reagent / Solution | Function in the Assay | Key Considerations |
|---|---|---|
| Hoechst33342 | Cell-permeant DNA stain for visualizing nuclear morphology and cell counting [5]. | Use low concentrations (e.g., 50 nM) to avoid cytotoxicity during long-term live-cell imaging [5]. |
| BioTracker 488 Green Microtubule Cytoskeleton Dye | Live-cell compatible dye for labeling the microtubule network, revealing cytoskeletal integrity [5]. | Validated for minimal effect on cell viability at recommended concentrations over 72 hours [5]. |
| MitotrackerRed / MitotrackerDeepRed | Cell-permeant dyes that accumulate in active mitochondria, serving as indicators of mitochondrial mass and health [5]. | Changes in fluorescence intensity and pattern can indicate early apoptotic events [5]. |
| Reference Compound Set | Training set for machine learning classifier; benchmarks for assay performance [5]. | Should cover diverse MoAs (e.g., camptothecin, staurosporine, JQ1, torin, paclitaxel) [5]. |
Data Analysis and Integration with Chemogenomics
Building a System Pharmacology Network
To effectively deconvolute the MoA of hits from phenotypic screens, data can be integrated into a system pharmacology network. This involves building a graph database (e.g., using Neo4j) that connects molecules, their predicted or known protein targets (from databases like ChEMBL), pathways (from KEGG), diseases (from Disease Ontology), and the morphological profiles obtained from Cell Painting or related assays [1]. Such a network allows for the identification of proteins modulated by chemicals that correlate with observed morphological perturbations, thereby facilitating target identification [1].
Table 3: Key Quantitative Features for Phenotype Classification in a Multiplexed Assay
| Feature Category | Specific Measured Parameters | Associated Phenotype / Interpretation |
|---|---|---|
| Nuclear Morphology | Nuclear area, intensity, homogeneity, texture, presence of pyknosis or fragmentation [5]. | Pyknosis/Fragmentation: Apoptosis; enlarged nucleus: Cell cycle arrest. |
| Cytoskeletal Structure | Microtubule polymer density, cytoplasmic texture, cell shape descriptors [5]. | Disassembled microtubules: Cytotoxicity/on-target effect; hyperpolymerization: Mitotic arrest. |
| Mitochondrial Health | Mitochondrial mass (area/intensity), network granularity, perinuclear clustering [5]. | Loss of mass: Early apoptosis; increased granularity: Cellular stress. |
| Cell Count & Viability | Total object count, ratio of healthy to apoptotic/necrotic cells [5]. | Decreased healthy cells: Cytotoxicity; kinetics inform primary vs. secondary effects [5]. |
The Role of Chemogenomic Libraries
Chemogenomic libraries are crucial for bridging the gap between phenotypic screening and target identification. These libraries consist of well-characterized inhibitors with narrow, but not necessarily exclusive, target selectivity, covering a large diversity of the druggable proteome [5]. When a phenotypic screen is conducted using a chemogenomic library, the resulting morphological profile of a hit compound can be compared against the profiles of all other library members. If the hit's profile clusters with compounds known to inhibit a specific target (e.g., a kinase), this provides a strong hypothesis about its MoA [1] [5]. Initiatives like the EUbOPEN project aim to assemble open-access chemogenomic libraries covering over 1,000 proteins, further empowering this approach [5].
High-Grade Serous Ovarian Carcinoma (HGSOC) represents the most prevalent and lethal subtype of ovarian cancer, with approximately 225,000 new cases reported globally each year and a five-year survival rate of merely 49.1% [46] [47]. The clinical management of HGSOC encounters substantial challenges, primarily attributable to its intricate drug resistance mechanisms [46]. This drug resistance involves multiple biological processes, including tumor cell heterogeneity, microenvironment remodeling, gene mutations, and drug efflux [46]. The majority of HGSOC patients experience recurrence following initial treatment, with a recurrence rate as high as 70%, and the emergence of chemotherapy resistance significantly reduces survival rates [47]. Understanding these resistance mechanisms is therefore essential for developing novel therapeutic strategies to enhance patient prognosis and survival rates.
Biological Basis of Drug Resistance in HGSOC
Key Molecular Mechanisms of Resistance
The molecular characteristics of HGSOC display unique alterations at the genomic, transcriptomic, and epigenetic levels, which reflect distinct biological behaviors and varied treatment responses [47]. The drug resistance observed in HGSOC constitutes a complex process characterized by multifactorial interactions.
p53 Mutations: The p53 gene is mutated in over 96% of HGSOC cases [47]. These mutations not only result in the loss of its tumor suppressor function but may also confer new oncogenic functions ("gain-of-function") [47]. The mutated p53 protein loses its ability to regulate G1/S and G2/M checkpoints, permits tumor cell proliferation under DNA damage, and promotes resistance to chemotherapy and radiotherapy [47].
Tumor Microenvironment (TME) Alterations: The TME plays a critical role in drug resistance through multiple mechanisms. ScRNA-seq has revealed a specific cisplatin-resistant cell subpopulation (E0) linked to poor prognosis [47]. These E0 cells promote tumor growth through interactions with fibroblasts and endothelial cells while suppressing immune cell infiltration [47]. Additionally, EZH2 expression in cisplatin-resistant tumors is nearly twice that of normal tumors, particularly in HGSOC with deficiency of tumor-infiltrating lymphocytes [47].
Intratumoral Heterogeneity (ITH): High ITH in HGSOC results in diverse molecular characteristics at different stages, consequently affecting sensitivity and resistance to chemotherapy [47]. The composition and structure of the tumor microenvironment directly influence drug delivery efficiency, where abnormal extracellular matrix and tumor vasculature result in uneven drug distribution within the tumor, reducing effective drug concentration [47].
Molecular Subtypes and Clinical Implications
HGSOC comprises several molecular subtypes with distinct clinical behaviors:
Table 1: Molecular Subtypes of HGSOC and Their Characteristics
| Molecular Subtype | Key Characteristics | Prognosis | TME Features |
|---|---|---|---|
| Proliferative | Distinct gene expression patterns | Intermediate | Variable immune infiltration |
| Immunoreactive | High immune cell activity | More favorable | Increased immune cell infiltration |
| Stromal | Prominent stromal component | Poorer | High CAF activity, advanced stage at diagnosis |
| Differentiated | Specific differentiation markers | Intermediate | Variable stromal composition |
These molecular subtypes exhibit significant differences in gene expression, prognosis, and treatment response, suggesting the clinical necessity of developing personalized treatment strategies based on molecular subtyping [47].
Application Note: Live-Cell Multiplexed Assay for Profiling HGSOC Drug Resistance
HighVia Extend Protocol for Continuous Viability Assessment
The development of a modular live-cell high-content cellular viability assay provides comprehensive time-dependent characterization of small molecule effects on cellular health in a single experiment [5]. This protocol, optimized for HGSOC chemogenomic library research, enables real-time measurement over extended periods while capturing multiple cellular health parameters.
Protocol Workflow:
Cell Preparation and Plating
- Use HGSOC cell lines (e.g., HEK293T, U2OS, MRC9) seeded in appropriate multi-well plates
- Allow cells to adhere for 24 hours under standard culture conditions
Dye Optimization and Staining
- Prepare live-cell dye cocktail with optimized concentrations:
- Hoechst33342 (DNA stain): 50 nM (minimal concentration for robust nuclei detection without toxicity) [5]
- MitotrackerRed/MitotrackerDeepRed: For mitochondrial content and health assessment
- BioTracker 488 Green Microtubule Cytoskeleton Dye: For tubulin and cytoskeletal morphology
- Incubate cells with dye cocktail for 30-60 minutes before imaging
- Prepare live-cell dye cocktail with optimized concentrations:
Continuous Imaging and Analysis
- Acquire images at regular intervals (e.g., every 4-6 hours) over 72 hours
- Use high-content imaging system with appropriate filters for multi-channel detection
- Analyze cellular phenotypes using supervised machine-learning algorithm gating cells into five populations: healthy, early/late apoptotic, necrotic, and lysed [5]
Nuclear Phenotype Classification
- Implement secondary gating based on nuclear morphology alone: "healthy," "pyknosed," or "fragmented"
- Include additional layer to detect fluorescent compounds and precipitations that may interfere with assay readouts [5]
Figure 1: HighVia Extend workflow for continuous assessment of drug effects in HGSOC models.
Research Reagent Solutions
Table 2: Essential Research Reagents for HGSOC Drug Resistance Profiling
| Reagent/Category | Specific Examples | Function in Assay | Optimized Concentration |
|---|---|---|---|
| Nuclear Stains | Hoechst33342 | DNA staining for nuclear morphology and cell counting | 50 nM [5] |
| Mitochondrial Dyes | MitotrackerRed, MitotrackerDeepRed | Mitochondrial content and health assessment | Varies by specific dye |
| Cytoskeletal Dyes | BioTracker 488 Green Microtubule Cytoskeleton Dye | Tubulin and cytoskeletal morphology evaluation | Determined empirically |
| Reference Compounds | Camptothecin, JQ1, Torin, Digitonin, Staurosporine, Berzosertib, Milciclib, Paclitaxel | Assay validation and control references | IC50 values determined over time [5] |
| Viability Indicators | alamarBlue HS reagent | Orthogonal viability confirmation | Manufacturer's recommendation |
Experimental Results and Kinetic Profiling
The continuous format of the HighVia Extend assay facilitates assessment of time-dependent cytotoxic effects, capturing diverse cell death mechanisms with distinct kinetics [5]:
- Rapid cytotoxicity: Digitoxin (membrane permeabilization), staurosporine (multikinase inhibitor), and berzosertib (ATM/ATR inhibitor) display rapid induction
- Intermediate kinetics: Milciclib (CDK inhibitor), torin (mTOR inhibitor), and paclitaxel (tubulin-disassembly inhibitor) show intermediate responses
- Slower effects: JQ1 (BET bromodomain inhibitor) and ricolinostat exhibit slower and less pronounced cytotoxic effects
The population gating follows different kinetic profiles, enabling detailed understanding of drug resistance mechanisms in HGSOC models [5].
Advanced Analytical Approaches for Resistance Mechanism Elucidation
Data Analysis and Interpretation Framework
The application of single-cell RNA sequencing (scRNA-seq) technology has been crucial in revealing specific cisplatin-resistant cell subpopulations in HGSOC [47]. When integrated with live-cell multiplexed assay data, this provides powerful insights into resistance mechanisms.
Key Analytical Components:
Population Dynamics Analysis
- Track transitions between healthy, early/late apoptotic, necrotic, and lysed populations over time
- Calculate IC50 values at multiple time points to distinguish primary and secondary target effects [5]
Nuclear Morphometry Correlation
- Establish correlation between overall cellular phenotype and nuclear phenotype
- Compare calculated IC50 values between entire cellular phenotype gating and nuclear phenotype-only gating [5]
Compound Interference Detection
- Implement additional gating to detect fluorescent compounds and precipitations
- Classify objects as "nuclei" or "high intensity objects" to minimize assay interference risk [5]
Figure 2: Integrated analytical framework for elucidating HGSOC drug resistance mechanisms.
Target Validation and Therapeutic Implications
Comprehensive characterization of chemogenomic library compounds using this multiplexed approach allows for:
- Delineation of generic effects on cell functions and viability
- Assessment of compound suitability for subsequent phenotypic and mechanistic studies
- Identification of specific resistance subpopulations (e.g., E0 cisplatin-resistant cells)
- Discovery of biomarkers for treatment response prediction
The modular nature of the assay allows for expansion to include additional compound-safety assays and cellular stress reporter systems without requiring additional informatics capacities [5].
The integration of live-cell multiplexed assays with chemogenomic library screening represents a powerful approach for unraveling the complex drug resistance mechanisms in HGSOC. By providing comprehensive, time-dependent characterization of compound effects on multiple cellular health parameters, this methodology enables researchers to distinguish between target-specific and off-target effects, identify resistance subpopulations, and develop more effective therapeutic strategies. The continuous format particularly captures the kinetic profiles of diverse cell death mechanisms, offering insights essential for overcoming the clinical challenge of drug resistance in HGSOC. Future directions include expanding the modular capabilities of the assay and integrating multi-omics data for complete mechanistic understanding of HGSOC resistance pathways.
Troubleshooting and Optimization Strategies for Robust Multiplexed Assays
Assay Chemistry Compatibility and Signal Separation
In live-cell chemogenomic research, the ability to simultaneously interrogate multiple cellular targets and pathways is paramount for understanding compound mechanism of action. Assay chemistry compatibility and signal separation form the foundational challenge in these multiplexed experiments. The core objective is to design robust assay systems where multiple probes and dyes can function concurrently without cross-interference, while maintaining cell health throughout extended live-cell imaging. This requires careful balancing of dye concentrations, strategic selection of fluorophores with distinct spectral properties, and implementation of advanced computational unmixing techniques to deconvolve overlapping signals. The integrity of a chemogenomic screen hinges on this careful orchestration of chemical and biological components, enabling researchers to distinguish specific on-target effects from general cellular toxicity and other confounding phenotypes.
Core Principles of Multiplex Assay Design
Strategic Dye and Chromogen Selection
The selection of fluorescent dyes or chromogens is the first critical step in designing a compatible multiplex assay. For live-cell imaging, dyes must not only provide strong, specific signals but also remain non-toxic at the working concentrations for the duration of the experiment.
Research demonstrates that careful optimization of dye concentrations is essential for long-term live-cell viability. For instance, the DNA-staining dye Hoechst 33342 can be toxic at concentrations around 1 µM, but robust nuclear detection can be achieved at 50 nM, which maintains cell viability over 72 hours [5]. Similar validation should be performed for all dyes in a panel, both individually and in combination, to exclude synergistic toxic effects [5].
For chromogenic multiplexing (typically used in fixed tissue), color selection follows different principles. Lighter chromogen colors are often easier to visualize when multiple targets are present, and the sequence of application must be optimized to prevent stronger chromogens like DAB from occluding previously stained sites [48]. For spatially close targets, selecting chromogens that create a distinct third color when combined can be particularly valuable for identifying co-localization [48].
Fluorescence Signal Separation Technologies
Advanced signal separation technologies have dramatically improved the capacity for multiplexing in live cells. Traditional fluorescence microscopy is limited to three or four colors due to spectral overlap, but newer approaches overcome this limitation.
Fluorescence Lifetime Imaging Microscopy (FLIM) provides a separation mechanism orthogonal to spectral properties. By utilizing engineered variants of the fluorogen-activating protein FAST that bind the same fluorogen (HBR-2,5-DM) but exhibit distinct fluorescence lifetimes, researchers can separate signals from different cellular compartments (e.g., nucleus and cytoskeleton) even when they occupy the same spectral channel [49]. This approach is particularly valuable for resolving spatially overlapping labels in live cells.
Multispectral Imaging with Advanced Unmixing represents another powerful approach. Conventional linear unmixing algorithms struggle with the low signal-to-noise ratios typical of live-cell imaging, often producing unphysical negative values and channel misassignment [50]. The recently developed Richardson-Lucy Spectral Unmixing (RLSU) algorithm specifically addresses this limitation by incorporating Poisson noise statistics, enabling accurate unmixing of up to eight fluorophore species even at video-rate acquisition [50]. This iterative approach significantly outperforms linear unmixing, particularly for weak signals and highly overlapping fluorophores like eGFP and EYFP [50].
Table 1: Signal Separation Technologies for Multiplexed Assays
| Technology | Principle | Maximumplexing Capacity | Key Advantages | Best Applications |
|---|---|---|---|---|
| Traditional Widefield Fluorescence | Spectral separation using filter sets | 3-4 colors | Widely accessible, easy implementation | Fixed cells or short-term live imaging |
| Spectral Unmixing with Linear Unmixing | Computational separation based on reference spectra | 5-8 colors | Can separate fluorophores with overlapping spectra | High signal-to-noise ratio samples |
| FLIM (Fluorescence Lifetime Imaging) | Separation based on fluorescence decay kinetics | Limited only by distinguishable lifetimes | Unaffected by spectral overlap; quantitative | Live-cell imaging of interacting components |
| RLSU (Richardson-Lucy Spectral Unmixing) | Iterative unmixing incorporating Poisson noise | 7-8 colors demonstrated | Excellent performance with low-SNR live-cell data | Long-term live-cell imaging at video rates |
Experimental Protocols for Live-Cell Multiplexed Screening
HighVia Extend Protocol for Continuous Live-Cell Viability and Phenotypic Assessment
The HighVia Extend protocol represents a modular approach for comprehensive annotation of chemogenomic compound effects on cellular health [5]. This live-cell multiplexed assay simultaneously monitors cell viability, nuclear morphology, tubulin structure, and mitochondrial health over extended time periods.
Key Reagents and Materials:
- Cell lines: HeLa, U2OS, HEK293T, or MRC9 fibroblasts
- Live-cell dyes: Hoechst 33342 (50 nM), Mitotracker Red CMXRos (20-50 nM), BioTracker 488 Green Microtubule Cytoskeleton Dye (recommended concentration)
- Culture vessels: μClear black-walled 96- or 384-well plates suitable for high-content imaging
- Instrumentation: High-content imaging system with environmental control (e.g., CQ1 confocal microscope)
Staining and Imaging Workflow:
- Cell Preparation: Seed cells at appropriate density (e.g., 2,000-5,000 cells/well for 384-well format) and culture for 24 hours before compound addition.
- Compound Treatment: Add chemogenomic library compounds using precision liquid handling, including DMSO controls and reference compounds (e.g., camptothecin, staurosporine, paclitaxel).
- Dye Staining: Simultaneously add dye cocktail directly to media without washing. Incubate for 30-60 minutes before initial imaging.
- Image Acquisition: Acquire images every 2-4 hours for 48-72 hours using automated stage and focus maintenance. Maintain temperature at 37°C and CO₂ at 5% throughout.
- Image Analysis: Use supervised machine learning algorithms to gate cells into distinct phenotypic categories (healthy, early apoptotic, late apoptotic, necrotic, lysed) based on multiparametric features.
This continuous format captures the kinetics of diverse cell death mechanisms, distinguishing rapid inducers (e.g., staurosporine, digitonin) from slower-acting compounds (e.g., epigenetic inhibitors) [5].
Figure 1: Workflow for Continuous Live-Cell Multiplexed Screening
Six-Color Multiplex Assay Optimization for Digital PCR
While focused on digital PCR applications rather than live-cell imaging, the principles of 6-plex assay design from Stilla Technologies provide valuable insights for any multiplexing endeavor [51]. The systematic approach to assay validation translates well to other multiplexing contexts.
Optimization Protocol:
- Single-Plex Validation: Each primer/probe set must first be validated individually before multiplexing. This establishes baseline performance and identifies any non-specific amplification.
- Temperature Optimization: Evaluate a range of elongation temperatures to determine the optimal temperature that provides good separation between positive and negative populations for all probes simultaneously.
- Concentration Titration: Begin with low primer and probe concentrations (e.g., 0.125-0.25 μM) to minimize dimer formation, increasing gradually if needed.
- Interaction Analysis: Use in silico tools (OligoAnalyzer, Primer3) to evaluate homo- and hetero-dimer formation between all primers and probes in the multiplex set.
- Spillover Compensation: Using single-color controls, create a compensation matrix to correct for fluorescence spillover between channels.
This methodical approach to assay development ensures that each component works effectively both individually and within the complex multiplex environment [51].
Research Reagent Solutions for Multiplexed Assays
Table 2: Essential Reagents for Live-Cell Multiplexed Chemogenomic Screening
| Reagent Category | Specific Examples | Function in Multiplex Assay | Optimization Notes |
|---|---|---|---|
| Nuclear Stains | Hoechst 33342 (50 nM) | Labels DNA for cell counting, viability assessment, and nuclear morphology classification | Concentration must be balanced between signal intensity and cytotoxicity; 50 nM recommended [5] |
| Mitochondrial Probes | Mitotracker Red CMXRos, Mitotracker Deep Red | Assesses mitochondrial mass and membrane potential; indicator of apoptotic commitment | Can be combined with tubulin and nuclear stains without affecting viability [5] |
| Cytoskeletal Dyes | BioTracker 488 Green Microtubule Dye (taxol-derived) | Visualizes microtubule network integrity; identifies tubulin-binding compounds | Validated for live-cell use over 72 hours; non-toxic at recommended concentrations [5] |
| Viability Indicators | Propidium iodide, CellTracker dyes | Distinguishes live vs. dead cells; tracks cell proliferation over time | Must be spectrally separable from structural dyes in multiplex panel |
| Fluorogen-Activating Proteins | FAST variants with HBR-2,5-DM fluorogen | Enables FLIM multiplexing with identical spectral properties but distinct lifetimes | Engineered point mutations create distinct lifetime signatures for different cellular compartments [49] |
| Reference Compounds | Camptothecin, staurosporine, paclitaxel, JQ1, digitonin | Provide training set for machine learning classification; assay quality controls | Cover diverse MoAs: DNA damage, kinase inhibition, tubulin targeting, epigenetic modulation [5] |
Data Analysis and Machine Learning Approaches
Nuclear Morphology as a Primary Indicator of Cellular Health
Nuclear morphology serves as an excellent indicator for comprehensive cellular responses in chemogenomic screening. Studies demonstrate a strong correlation between overall cellular phenotype (healthy, apoptotic, necrotic) and nuclear phenotype (healthy, pyknotic, fragmented) [5]. This enables a simplified screening approach using primarily nuclear staining, which reduces assay complexity and potential dye interactions.
Machine learning algorithms can be trained on reference compounds to classify cells into distinct phenotypic categories based on nuclear features alone. The resulting classifications show high concordance with those based on full multiparametric assessment including cytoplasmic and organellar markers [5]. However, nuclear-only approaches may have limitations in distinguishing certain phenotypes, such as mitotic arrest versus apoptosis, both of which can present with condensed chromatin.
Addressing Fluorescent Compound Interference
A significant challenge in fluorescence-based multiplexing arises from compounds with inherent fluorescence or those that form precipitates causing high background. This can be addressed through an additional gating step that classifies all fluorescent objects as either legitimate cellular structures (nuclei) or "high intensity objects" representing compound interference [5]. Normalization of healthy cell counts against DMSO controls then corrects for this interference, though strongly fluorescent or precipitating compounds may still require orthogonal assessment.
Table 3: Quantitative Analysis of Reference Compound Effects in Multiplexed Screening
| Reference Compound | Primary Mechanism of Action | Time to 50% Viability Loss (hr) | Nuclear Phenotype Signature | Other Phenotypic Features |
|---|---|---|---|---|
| Digitonin | Membrane permeabilization | <2 | Rapid nuclear dissolution without fragmentation | Immediate loss of all cytoplasmic staining |
| Staurosporine | Broad-spectrum kinase inhibition | 4-8 | Chromatin condensation followed by fragmentation | Mitochondrial fragmentation; membrane blebbing |
| Camptothecin | Topoisomerase I inhibition | 12-24 | Gradual increase in fragmented nuclei | Cell cycle arrest in S-phase |
| Paclitaxel | Microtubule stabilization | 18-30 | Mitotic arrest with condensed chromosomes | Microtubule bundling; multipolar spindles |
| JQ1 | BET bromodomain inhibition | >48 | Mild nuclear enlargement | Cytostatic effect at lower concentrations |
| Torin | mTOR inhibition | 24-36 | Increased nuclear heterogeneity | Reduced cell size; vacuolization |
Successful implementation of multiplexed assays for chemogenomic research requires integrated consideration of chemistry compatibility and signal separation throughout experimental design. The strategic selection of compatible dye combinations, implementation of appropriate signal separation technologies, and application of robust computational unmixing algorithms together enable comprehensive compound annotation. The protocols and methodologies detailed herein provide a framework for developing multiplexed assays that can distinguish specific target engagement from general cellular toxicity, ultimately enhancing the quality and interpretability of chemogenomic screening data. As chemical biology continues to advance, further innovations in dye chemistry, imaging modalities, and computational analysis will continue to expand the multiplexing capacity available to researchers exploring the complex cellular effects of small molecule compounds.
In the context of live-cell multiplexed assays for chemogenomic library research, the reliability of experimental outcomes is paramount. Such assays often involve screening hundreds to thousands of chemical compounds across diverse cell lines to associate phenotypic responses with molecular targets [5] [52]. A major challenge in this field is that drug responses observed in vitro frequently fail to predict in vivo efficacy, a discrepancy often attributed to non-physiological cell culture conditions [53]. Variations in serum composition, passage number, and seeding density can significantly alter cellular metabolism, gene expression, and phenotype, leading to inconsistent and irreproducible results [54] [55]. This application note details optimized protocols for these three critical parameters, providing a framework for generating robust and reliable data in chemogenomic screening.
Serum Optimization: Moving Towards Physiological Relevance
The Challenge of Standard Media
Standard culture media (e.g., DMEM, RPMI) contain non-physiological nutrient levels, which can skew cellular metabolism and drug response. A prominent example is the glutaminase inhibitor CB-839, to which cancer cells are sensitive in standard media but resistant when cultured in serum-like media or in mouse tumors [53]. This highlights a critical limitation for drug discovery. Screenings performed in standard media may fail to identify compounds whose efficacy is modified by available nutrients, particularly those targeting metabolic pathways [53].
Protocol: Preparation and Use of Serum-Derived Medium (ftABS)
The following protocol describes the creation of a filtered, serum-derived medium that supports high-throughput screening while providing more physiologically relevant nutrient levels [53].
Materials:
- Adult Bovine Serum (ABS)
- 10 kDa molecular weight cut-off ultrafiltration filter
- Dialyzed Fetal Bovine Serum (FBS)
- L-cystine stock solution
- L-glutamine stock solution
Method:
- Ultrafiltration: Process ABS through a 10 kDa ultrafiltration filter to generate basal flow-through ABS (ftABSB). This step reduces protein content to prevent clogging of automated dispensers and improve cell attachment [53].
- Supplementation: Create complete medium by supplementing ftABSB with:
- 10% dialyzed FBS (as a source of growth factors).
- L-cystine to a final concentration of 25 µM.
- L-glutamine to a final concentration of 500 µM (an additional 400 µM beyond the ~100 µM present in ftABSB) [53].
- Cell Seeding and Culture: Seed cells directly into assay plates containing the final ftABS medium. Optimize the cell plating density for each cell line to ensure exponential proliferation over the desired assay duration (e.g., 3 days) without the need for medium changes [53].
Rationale: This formulation provides a complex nutrient milieu, including lipid species and low-abundance metabolites absent in defined synthetic media, while ensuring that key nutrients like glutamine and cystine are not depleted during the assay, which could confound results [53] [55].
Table 1: Key Metabolite Adjustments in Serum-Derived Medium
| Metabolite | Concentration in Standard Media (e.g., RPMI) | Concentration in ftABS Medium | Physiological Target (Human Plasma) |
|---|---|---|---|
| Glutamine | Typically high (e.g., 2-4 mM) | ~500 µM | ~500 µM [53] |
| Cystine | Typically high (e.g., 100-200 µM) | 25 µM | 25-100 µM [53] |
| Lipids & Low-Abundance Metabolites | Defined, limited profile | Complex, serum-derived profile | Complex in vivo profile [53] |
Passage Number: Controlling for Cellular Aging and Drift
The Impact of Passage Number on Cell Phenotype
The passage number, which records the number of times a culture has been subcultured, directly impacts a cell line's characteristics. High passage numbers are associated with alterations in:
- Morphology and Growth Rates: Slower proliferation, especially in finite cell lines as they approach senescence [54] [56].
- Genotype and Phenotype: Genetic instability in continuous lines and loss of differentiated properties in primary cells [54] [56].
- Gene Expression: Studies have identified thousands of genes differentially expressed between low and high passage cells [54].
- Drug Response: Signaling pathway activity, such as the PI3K/Akt pathway, can be regulated in a passage-dependent manner, potentially affecting drug sensitivity [54].
These changes occur due to evolutionary pressures in culture, where faster-growing, better-adapted subpopulations overgrow others, leading to a culture that may no longer represent the original material [54].
Protocol: Establishing and Managing Passage Number
Materials:
- Cryopreserved, low-passage cell stock
- Appropriate culture vessels and media
- Inverted microscope with digital camera
Method:
- Establish a Baseline: Begin experiments with well-characterized, low-passage cells obtained from a reliable biological resource center [54].
- Set a Passage Limit: From your frozen stock, establish a maximum passage number for experiments (e.g., 10-20 passages for continuous lines). All experiments for a single project should be conducted within this predefined window [56].
- Routine Monitoring:
- Morphology: Frequently observe and digitally record cell morphology. Changes in appearance can indicate problems or drift [54].
- Growth Curves: Periodically perform growth curve analyses to determine population doubling times and monitor for sudden changes in proliferation rates [54] [56].
- Marker Validation: For chemogenomic studies, establish baseline expression levels of key markers or receptors of interest and monitor them relative to passage number [56].
- Return to Stock: After reaching the predetermined passage limit, discontinue active cultivation and return to a fresh ampoule of your original low-passage stock for future experiments. This prevents continuous genotypic and phenotypic drift [56].
Table 2: Guidelines for Managing Passage Number and Population Doublings
| Cell Type | Key Characteristic | Recommended Practice | Primary Risk |
|---|---|---|---|
| Finite Cell Line | Limited lifespan; will senesce. | Carefully record Population Doubling (PD) number. | Loss of specialized function and eventual senescence. |
| Continuous Cell Line | Immortal; proliferates indefinitely. | Use passage number from the last thaw; set a passage limit. | Genetic instability and phenotypic heterogeneity over time. |
| All Cell Types | Potential to change with time. | Generate a large, characterized master cell bank to return to. | Genotypic and phenotypic drift, leading to irreproducible results. |
Seeding Density: Ensuring Exponential Growth and Metabolic Homeostasis
The Consequences of Improper Density
Incorrect cell seeding density is a major source of irreproducibility in cell-based assays [55]. If the density is too high, cells can rapidly deplete nutrients and accumulate metabolic waste products (e.g., lactate, ammonia), leading to a drastically shifting metabolic environment and contact inhibition. If the density is too low, paracrine signaling may be insufficient, and population-averaged readouts may lack statistical power. These factors can compromise assay robustness, as the cellular metabolic state directly influences the response to perturbations, especially for compounds targeting metabolism [55].
Protocol: Rational Optimization of Seeding Density
This protocol ensures that cells remain in a stable, exponential growth phase throughout the assay duration, minimizing metabolic stress.
Materials:
- Hemocytometer or automated cell counter
- 384-well assay plates (or other desired format)
- Inverted microscope
Method:
- Preliminary Growth Curve: For each cell line, perform a growth curve analysis in the specific assay plate format. Seed cells at a range of densities and measure cell number/confluence over the planned duration of your experiment (e.g., 72 hours) [54].
- Define the Optimal Range: From the growth curve, identify the seeding density that ensures:
- Cells are in the exponential growth phase for the entire assay.
- Cells do not exceed 70-80% confluence at the end of the assay to avoid contact inhibition and nutrient depletion [55].
- Validate Metabolite Stability (For Metabolic Assays): If studying metabolism or metabolic inhibitors, use targeted metabolomics (e.g., measurement of extracellular glutamine and lactate) to verify that nutrient levels remain stable and waste products do not accumulate to inhibitory levels under the chosen conditions [55].
- Application in Chemogenomic Screens: For multiplexed, high-content screening, the optimized density must also prevent over-confluency to allow for single-cell segmentation in image analysis and ensure even exposure to compounds across the well.
The Scientist's Toolkit: Essential Reagents for Live-Cell Multiplexed Assays
The following table details key reagents used in advanced, multiplexed live-cell assays for chemogenomic library profiling, as exemplified by the HighVia Extend and Dye Drop protocols [5] [30].
Table 3: Research Reagent Solutions for Live-Cell Multiplexed Screening
| Reagent / Solution | Function / Application | Example in Protocol |
|---|---|---|
| Iodixanol (OptiPrep) | Density reagent enabling sequential, minimal-displacement reagent changes in multi-well plates. | Dye Drop method for live-cell assays and immunofluorescence, minimizing cell loss [30]. |
| Hoechst 33342 | Cell-permeant DNA dye for nuclear staining and cell cycle analysis in live cells. | Used in HighVia Extend protocol for nuclear phenotyping (50 nM) [5]. |
| MitoTracker Dyes | Live-cell fluorescent probes that label mitochondria, serving as indicators of mitochondrial mass and health. | Included in HighVia Extend protocol to monitor cytotoxic events like apoptosis [5]. |
| BioTracker Microtubule Dyes | Live-cell permeable fluorescent dyes that label the microtubule cytoskeleton. | Used to assess compound effects on cytoskeletal morphology and identify tubulin interference [5]. |
| YOYO-1 | Cell-impermeant DNA dye used as a vital dye to identify dead cells with compromised membranes. | Employed in live-cell death kinetics studies with the Dye Drop method [30]. |
| Serum-Derived Medium (ftABS) | Physiologically relevant culture medium for improved predictive power in drug screening. | Used in screening to identify compounds with differential efficacy in standard vs. serum-derived media [53]. |
Workflow and Logical Pathway Diagrams
Integrated Workflow for Culture Optimization in Chemogenomic Screening
The following diagram illustrates the logical sequence and interdependencies of optimizing the three key culture parameters for a reliable live-cell multiplexed assay.
Decision Pathway for Troubleshooting Irreproducible Results
This diagram provides a logical framework for diagnosing and addressing common sources of variability in cell-based screening data.
In live-cell multiplexed assays for chemogenomic library research, the precise timing of compound exposure and signal readout is a critical determinant of data quality and biological relevance. Incorrect timing can lead to missed phenotypic effects, false negatives, or the capture of artifactual cellular responses. This application note provides a structured framework for determining these crucial windows across common assay types, enabling researchers to capture meaningful temporal data while maintaining cell viability throughout extended experimental durations.
The Impact of Timing on Assay Outcomes
The dynamic nature of living cells necessitates careful consideration of exposure and readout parameters. Viable cells with active metabolism convert substrates to detectable signals, but this ability rapidly diminishes when cells die [12]. Furthermore, maintaining optimal experimental conditions throughout the assay duration is essential for preserving normal cellular physiology and generating reliable data [57]. Assays measuring different phenotypic endpoints—from viability to morphological changes—exhibit distinct optimal windows for capturing biologically significant events, which must be aligned with compound mechanism of action and cellular response kinetics.
Quantitative Timing Guidelines for Common Assays
Table 1: Recommended Exposure and Readout Windows for Common Live-Cell Assays
| Assay Type | Typical Compound Exposure Range | Optimal Readout Window | Key Timing Considerations |
|---|---|---|---|
| MTT Viability Assay | 1-24 hours (endpoint) | 1-4 hours post-MTT addition [12] | Incubation time limited by cytotoxic detection reagents; signal proportional to viable cell number only within linear range [12] |
| Proliferation & Viability | 24-72 hours | Multiple timepoints (24, 48, 72h) | Duration depends on doubling time; avoid over-confluence which alters metabolism [12] |
| 3D Spheroid Screening | 24 hours - 7+ days | Days to weeks for growth curves | Enables assessment of compound penetration and delayed effects [58] |
| Angiogenesis (Tube Formation) | 4-18 hours | Every 2-6 hours during morphogenesis | Captures rapid morphological changes; submicromolar IC50 values can be observed [58] |
| Live-Cell Imaging | Minutes to days | Continuous or interval-based (5 min-24h) | Balance between temporal resolution and phototoxicity; maximize recovery time between images [57] |
Table 2: Assay-Specific Optimization Parameters
| Parameter | Viability/MTT | Phenotypic (Imaging) | 3D Models |
|---|---|---|---|
| Signal Incubation | 1-4 hours [12] | N/A | N/A |
| Linearity Period | Limited; varies by cell type | Sustained with proper conditions | Extended (days) |
| Critical Control Points | Solubilization step, metabolic state | Focus drift, environmental control | Compound penetration, gradient formation |
| Multiplexing Potential | Low (endpoint) | High with proper filter sets | Medium with optical sectioning |
Experimental Protocols for Timing Optimization
Protocol 1: MTT Tetrazolium Reduction Assay Timing
Principle: Metabolically active cells reduce yellow MTT to purple formazan crystals [12].
Reagent Preparation:
- MTT Solution: Dissolve MTT in Dulbecco's Phosphate Buffered Saline (DPBS), pH=7.4 to 5 mg/ml. Filter-sterilize through 0.2 µM filter and store protected from light at 4°C [12].
- Solubilization Solution: Prepare 40% (vol/vol) dimethylformamide (DMF) in 2% (vol/vol) glacial acetic acid. Add 16% (wt/vol) sodium dodecyl sulfate (SDS) and dissolve. Adjust to pH=4.7 [12].
Procedure:
- Plate cells in 96-well plates and incubate overnight for attachment
- Apply chemogenomic library compounds for predetermined exposure time (typically 24-72h)
- Add MTT solution to each well at final concentration of 0.2-0.5 mg/ml
- Incubate for 1-4 hours at 37°C ← Critical timing step
- Add solubilization solution and mix thoroughly to dissolve formazan crystals
- Measure absorbance at 570 nm with reference wavelength of 630 nm
Timing Considerations: The incubation period is limited by the cytotoxic nature of detection reagents which utilize cellular energy (reducing equivalents such as NADH) to generate signal. Longer incubation increases sensitivity up to a point, but eventually leads to cytotoxicity [12].
Protocol 2: Live-Cell Imaging for Phenotypic Screening
Principle: Continuous monitoring of cellular phenotypes without fixation [57].
Environmental Control:
- Maintain precise and stable control of temperature, humidity, CO2 levels
- Use stage top incubator compatible with microscope and culture vessels [57]
Image Acquisition Parameters:
- Minimize exposure time per image
- Maximize time between images for cell recovery
- Close field diaphragm to minimize exposure area
- Minimize intensity of excitation light
- Use longer wavelengths (green or red) instead of UV or blue light for fewer phototoxic effects [57]
Procedure:
- Plate cells in appropriate vessels compatible with live-cell imaging
- Establish stable environmental conditions on microscope stage
- Apply compounds and begin time-lapse acquisition immediately
- Set acquisition intervals based on phenotype kinetics (e.g., 5-30 minutes for morphology changes, 2-4 hours for proliferation)
- Continue imaging for duration determined by assay requirements (typically 24-72 hours)
Timing Considerations: Phototoxicity is a major concern; balance between signal-to-noise ratio and cell viability. Use highly sensitive camera to optimize signal-to-noise ratio with minimal light exposure [57].
Visualizing Timing Relationships in Live-Cell Assays
The Scientist's Toolkit: Essential Reagents and Materials
Table 3: Research Reagent Solutions for Timing-Optimized Assays
| Reagent/Material | Function | Timing Considerations |
|---|---|---|
| MTT Tetrazolium | Measures metabolic activity via formazan formation [12] | 1-4 hour incubation; cytotoxic at longer exposures [12] |
| Stage Top Incubator | Maintains physiological conditions on microscope stage [57] | Enables extended temporal imaging (hours to days) |
| Matrigel | 3D matrix for spheroid and angiogenesis assays [59] | Requires timing optimization for polymerization (30-60 min) |
| Hydrogels (GrowDex, PeptiMatrix) | Synthetic 3D culture matrices [59] | More reproducible timing for assay setup |
| Fluorescence Dyes (MitoTracker, Alexa Fluor) | Specific organelle and structure labeling [57] | Photostability determines usable imaging duration |
| Antioxidants (Vitamin C) | Reduces phototoxic effects during live imaging [57] | Extends viable imaging window |
Determining optimal exposure and readout windows requires careful consideration of assay mechanism, cellular response kinetics, and detection method limitations. By applying the structured framework presented here—including quantitative guidelines, optimized protocols, and appropriate reagent selection—researchers can significantly enhance the quality and biological relevance of their live-cell multiplexed assay data. The integration of these timing principles enables more accurate interpretation of compound effects throughout chemogenomic library screening campaigns.
In live cell multiplexed assays for chemogenomic library research, technical variability poses a significant threat to data quality and experimental reproducibility. The integrity of phenotypic screening data—which may assess everything from nuclear morphology and cytoskeletal organization to mitochondrial health—can be compromised by subtle technical artifacts [18]. This application note provides detailed methodologies and evidence-based protocols to mitigate three major sources of variability: pipetting inaccuracy, microplate edge effects, and cell loss during sample preparation. By implementing these standardized procedures, researchers can enhance the reliability of their data and improve the accuracy of hit selection in chemical probe development.
The Challenge of Edge Effects in Multiwell Plates
The edge effect, a phenomenon where cells in outer wells of multiwell plates exhibit altered growth and metabolic activity due to differential evaporation, is a frequently observed problem in plate-based assays [60]. This effect can introduce substantial artifacts if not properly controlled.
Table 1: Impact of Edge Effects on Cellular Metabolic Activity in 96-Well Plates
| Plate Manufacturer | Well Position | Reduction in Metabolic Activity | Spatial Extent of Effect |
|---|---|---|---|
| VWR | Outer wells | 35% lower than central wells | Extends inward up to 3 rows |
| VWR | Second row | 25% lower than central wells | |
| VWR | Third row | 10% lower than central wells | |
| Greiner | Outer wells | 16% lower than central wells | |
| Greiner | Second row | 7% lower than central wells | |
| Greiner | Third row | 1% lower than central wells |
Research indicates that simply rewrapping the plate in its original wrapping does not adequately prevent the edge effect [60]. The following experimental protocol provides a systematic approach to characterize and mitigate this issue in your laboratory context.
Experimental Protocol: Characterization and Mitigation of Edge Effects
Objective: To empirically determine the magnitude of edge effects in your specific experimental system and identify appropriate countermeasures.
Materials:
- 96-well plates from manufacturers of interest (e.g., VWR, Greiner)
- Appropriate cell culture medium
- Mammalian cells of interest
- MTS reagent or alternative viability assay
- Plate sealer or loose sealing wrapping
- Buffer solution (e.g., PBS)
Method:
- Plate Cells: Seed cells at standardized density across all wells of multiple 96-well plates. Include control wells with medium only.
- Experimental Groups:
- Group 1: Store plates in loosely sealed wrapping during incubation
- Group 2: Add sterile buffer between wells (inter-well spacing)
- Group 3: No special precautions (control)
- Incubation: Incubate plates for 72 hours under standard culture conditions.
- Viability Assessment: Add MTS reagent and measure metabolic activity after 2 hours incubation according to manufacturer's instructions.
- Data Analysis:
- Normalize data to central well values
- Compare variability between experimental groups
- Calculate coefficient of variation across the plate
Interpretation: Each laboratory must determine optimal conditions empirically, as plate manufacturers show significant differences in evaporation rates [60]. The addition of liquid between wells and proper plate sealing can significantly improve homogeneity, particularly for more susceptible plate types.
Mitigating Cell Loss in Paucicellular Samples
Cell loss during sample preparation is particularly problematic when working with limited cell numbers, as is often the case in primary cell screens or rare subpopulation analysis. Substantial sample loss can occur throughout the multistep workflow from cell collection to LC-MS/MS analysis [61].
Experimental Protocol: Minimizing Cell Loss During Sample Preparation
Objective: To maximize cell recovery and viability during preparation of paucicellular samples for downstream analysis.
Materials:
- Cell viability medium (e.g., RPMI, DMEM)
- Supplements (e.g., bovine serum albumin, fetal calf serum)
- Protease/phosphatase inhibitors (e.g., serine protease inhibitors)
- DNase
- Cold phosphate-buffered saline (PBS Na+/K+ at pH 7.4)
- Pre-cooled centrifuge capable of 300–500g
- Snap-freezing apparatus
Method:
- Cell Collection:
- Use cell viability medium with supplements (e.g., 10% FCS) for extended procedures like cell sorting
- Add protease/phosphatase inhibitors to prevent protein degradation
- Include DNase (0.1-0.5%) to avoid cell clumping from released DNA
- Maintain temperature at 4°C throughout to slow metabolic activities
Cell Washing:
- Wash cells in cold PBS Na+/K+ at pH 7.4 (137 mM NaCl, 2.7 mM KCl, 10 mM Na2HPO4, 1.8 mM KH2PO4)
- Centrifuge at 300–500g for 5 minutes at 4°C
- Limit to maximum of 3 washing rounds to minimize accidental pellet discarding
- Process fresh cell samples immediately or snap-freeze pellets for storage at -80°C
Cell Lysis:
- For mammalian cells, use gentle chemical lysis methods rather than mechanical approaches
- Employ non-ionic detergents in lysis buffers to disrupt phospholipid bilayers
- Avoid harsh mechanical methods that generate heat and cause protein denaturation
Critical Steps: The balance between adding protective proteins (e.g., FCS) and avoiding interference with downstream analysis requires careful optimization. While additional proteins enhance cell viability during processing, they may hinder subsequent protein detection [61]. Always include appropriate washing steps before protein digestion.
Optimized Workflow for Live Cell Multiplexed Assays
The following workflow integrates strategies for mitigating all three sources of technical variability in chemogenomic library screening:
Research Reagent Solutions for Variability Reduction
Table 2: Essential Materials for Minimizing Technical Variability
| Reagent/Material | Function | Optimization Guidelines |
|---|---|---|
| Greiner 96-well plates | Reduced edge effect | 16% metabolic activity reduction in outer wells vs. 35% with VWR [60] |
| Fetal Calf Serum (FCS) | Cell viability maintenance | Use at 10% concentration during long procedures; wash before lysis [61] |
| Protease/phosphatase inhibitors | Prevent protein degradation | Balance with downstream applications; serine inhibitors interfere with trypsinization [61] |
| DNase | Prevent cell clumping | Minimize concentration to avoid introducing extra proteins [61] |
| Bovine Serum Albumin (BSA) | Reduce proteolytic action | Use 0.1-0.5% w/v when enzyme concentration is overly digestive [62] |
| Soybean trypsin inhibitor | Neutralize trypsin activity | Apply 0.01-0.1% w/v to protect cells during dissociation [62] |
| Non-ionic detergents | Cell lysis | Disrupt phospholipid bilayers without protein denaturation [61] |
Data Presentation and Quality Assessment
Appropriate data visualization is essential for identifying technical variability in screening data. Continuous data from high-content imaging (e.g., cell area, fluorescence intensity) should be presented using graph formats that reveal the underlying distribution, such as box plots or kernel density estimates, rather than bar graphs that obscure distribution shape [63] [64]. Statistical graphics should communicate associations, location, dispersion, and tails to provide a complete picture of the data [64].
Technical variability from pipetting inaccuracy, edge effects, and cell loss represents a significant challenge in live cell multiplexed screening of chemogenomic libraries. Through empirical testing of plate types, implementation of gentle cell handling protocols, and standardized pipetting techniques, researchers can substantially improve data quality and reproducibility. The protocols outlined herein provide a framework for systematic optimization of these critical parameters, enabling more robust identification of phenotypic changes and enhancing the reliability of chemical probe characterization in target validation studies.
Dye Drop and Density Displacement Methods for Gentle Reagent Exchange
The Dye Drop and Deep Dye Drop assays are minimally disruptive, customizable methods that use sequential density displacement to collect multiplexed data with high reproducibility at low cost [65]. These assays address a critical challenge in high-throughput screening of live cells: the accurate performance of single-cell assays in 384-well plates, which is often limited by uneven cell loss during traditional wash steps, particularly for delicate, dying, or mitotic cells [43].
The core innovation lies in using a sequence of solutions where each solution is made slightly denser than the last by the addition of iodixanol (sold as OptiPrep), an inert liquid used in radiology. When added to a well, the denser solution flows gently to the bottom, displacing the previous solution with high efficiency and minimal mixing [65] [43]. This eliminates the need for pre-fixation mix and wash steps, which are a primary source of experimental variability and uneven cell loss [65]. This method is highly compatible with the Growth-Rate (GR) inhibition method for computing dose responses, allowing for the comparison of drug effects across cell lines with different doubling times [65] [43].
Key Principles and Comparative Advantages
The Density Displacement Principle
The foundational principle of the Dye Drop method is the sequential layering of reagents of increasing density. This process enables near-complete reagent exchange with minimal disturbance to the adherent cell layer. The method is compatible with both manual multichannel pipettes and simple automated liquid handlers, making it accessible to most laboratories [43].
Advantages Over Traditional Methods
- Minimized Cell Loss: By eliminating aspiration and violent mixing, the method ensures superior retention of fragile cell populations, such as those undergoing mitosis or cell death [43].
- Enhanced Reproducibility: It reduces operator-induced variability and errors from incomplete reagent exchange, common in conventional washing [43].
- Cost Efficiency: The method uses smaller reagent volumes (up to ~50% less) compared to standard protocols [43].
- Assay Flexibility: It serves as an excellent entry point for complex, multiplexed assays, including live-cell imaging and high-plex immunofluorescence like CyCIF [65] [43].
Table 1: Comparison of Dye Drop with Conventional Well-Wash Methods
| Feature | Dye Drop / Density Displacement | Conventional Wash Methods |
|---|---|---|
| Cell Disturbance | Minimal | High, especially for weakly adherent cells |
| Reproducibility | High, with low operator-dependence | Variable, high operator-dependence |
| Reagent Volume | Low (~50% of conventional) | Standard |
| Typical Cell Loss | Low and even | Variable and uneven |
| Complexity | Simple protocol | Requires careful technique to minimize loss |
Experimental Protocols
Protocol 1: Basic Dye Drop Viability Assay
This protocol is designed for a multiplexed cell viability and DNA content assay in a 384-well format [65].
Workflow Diagram: Basic Dye Drop Viability Assay
Materials & Reagents:
- Cells: Adherent cell lines of interest.
- Perturbagens: Small molecules, siRNAs, etc.
- Hoechst 33342: DNA-binding dye for nuclear labeling and cell cycle analysis.
- LIVE/DEAD Red (LDR):
- Iodixanol (OptiPrep): Density medium.
- Formaldehyde: Fixative.
- 384-well plate.
Procedure:
- Cell Plating and Treatment: Plate adherent cells in a 384-well plate and expose them to different perturbagens for a set duration [65].
- Live-Cell Staining: Prepare a staining solution containing Hoechst (to label all nuclei) and a LIVE/DEAD dye (to label dead cells) in a solution containing OptiPrep [65]. Add this solution to the wells.
- Density Displacement Fixation: Layer a denser solution containing formaldehyde and a higher concentration of OptiPrep into the wells. This solution flows to the bottom, displacing the staining solution and fixing the cells with minimal disturbance [65].
- Imaging and Analysis: Image the stained cells on a fluorescent microscope. Classify cells as live or dead based on Hoechst and LIVE/DEAD dye signal, and analyze DNA content from the Hoechst signal [65].
Protocol 2: Deep Dye Drop for Cell Cycle Analysis
This advanced protocol incorporates EdU labeling and antibody-based staining to gain detailed cell cycle and phase-specific protein data [65].
Workflow Diagram: Deep Dye Drop Cell Cycle Assay
Materials & Reagents (in addition to Basic Protocol):
- 5-Ethynyl-2´-deoxyuridine (EdU): A nucleoside analog incorporated into DNA during S-phase.
- Click-IT Reaction Cocktail: For fluorescent labeling of incorporated EdU.
- Antibodies: e.g., Anti-phospho-Histone H3 (Ser10) to identify M-phase cells.
- Permeabilization Buffer: e.g., containing Triton X-100.
- Blocking Buffer: e.g., containing BSA or serum.
Procedure:
- Cell Treatment and EdU Incorporation: After perturbagen treatment, incubate cells with a LIVE/DEAD dye and EdU prepared in an OptiPrep-containing solution. EdU is incorporated into newly synthesized DNA by cells in S-phase [65].
- Fixation: Fix the cells by layering in a denser fixative solution as in the basic protocol [65].
- Post-Fixation Processing: Permeabilize the cells to facilitate antibody access and block to prevent non-specific binding [65].
- Multiplexed Staining:
- Imaging and Analysis: Image on a fluorescent microscope. Classify cells into cell cycle phases based on a combination of DNA content (Hoechst), DNA synthesis (EdU), and M-phase marker (pH3) [65].
The Scientist's Toolkit: Essential Research Reagents
Table 2: Key Research Reagent Solutions for Dye Drop Assays
| Reagent / Solution | Function / Purpose | Example Usage in Protocol |
|---|---|---|
| Iodixanol (OptiPrep) | Inert density medium enabling gentle reagent exchange via sequential displacement. | Core component of all staining and fixation solutions. |
| Hoechst 33342 | Cell-permeable DNA dye for nuclear labeling, cell counting, and cell cycle analysis (DNA content). | Label all nuclei in both live (Dye Drop) and fixed (Deep Dye Drop) cells. |
| LIVE/DEAD Fixable Stains | Amine-reactive dyes that penetrate dead cells with compromised membranes; signal persists after fixation. | Distinguish live from dead cell populations in viability assays. |
| 5-Ethynyl-2’-deoxyuridine (EdU) | Thymidine analog incorporated during DNA synthesis; detected via click chemistry. | Label and identify S-phase cells in Deep Dye Drop assays. |
| Phospho-Histone H3 (pH3) Antibody | Marker of mitosis (M-phase); phosphorylated during chromosomal condensation. | Identify mitotic cells via immunofluorescence in Deep Dye Drop. |
| Formaldehyde | Cross-linking fixative that preserves cellular architecture. | Fix cells after live-cell staining; delivered via density displacement. |
Data Analysis and Integration with Chemogenomic Research
Single-Cell Phenotype Classification
The multiplexed nature of Deep Dye Drop allows for precise classification of single cells into specific cell cycle phases and viability status using the following markers [65]:
- Live/Dead Cells: Cells with high LIVE/DEAD dye signal and/or low DNA content are classified as dead.
- M-Phase: Cells with high phospho-Histone H3 (pH3) signal.
- S-Phase: Cells with high EdU signal.
- G1/G2: EdU-negative cells classified based on DNA content (integrated Hoechst intensity). G2 cells have approximately double the DNA content of G1 cells.
Growth Rate (GR) Metrics Calculation
Cell viability and cell count data from Dye Drop are ideal for calculating GR values, which normalize drug response to the inherent doubling time of the cell line [65] [43]. This allows for more accurate comparisons of drug effects across diverse cell panels, such as chemogenomic libraries. The data can be further decomposed into:
- GRstatic: Reflecting cytostatic effects (cell cycle arrest).
- GRtoxic: Reflecting cytotoxic effects (cell death) [65].
Table 3: Quantitative Cell Cycle Distribution from a Representative Dye Drop Experiment
| Cell Line | Treatment | Live Cells (%) | G1 (%) | S (%) | G2 (%) | M (%) | Dead (%) |
|---|---|---|---|---|---|---|---|
| AU-565 | DMSO Control | 95.2 | 45.1 | 31.5 | 17.3 | 1.3 | 4.8 |
| AU-565 | Neratinib (0.1 µM) | 87.5 | 58.7 | 18.4 | 9.8 | 0.6 | 12.5 |
| AU-565 | Neratinib (1 µM) | 65.3 | 72.1 | 5.2 | 3.1 | 0.2 | 34.7 |
Note: Data is illustrative, based on a large-scale dataset profiling 58 breast cancer cell lines treated with 67 kinase inhibitors [65].
Application in Chemogenomic Library Research
In the context of chemogenomic libraries, which consist of well-annotated inhibitors with narrow target selectivity, the Dye Drop method provides a robust framework for comprehensive annotation [5]. It helps delineate specific on-target effects from non-specific cytotoxic effects by providing multi-parametric data on cell health, viability, and cell cycle status. This is crucial for validating the suitability of chemogenomic compounds (CGCs) for detailed phenotypic and mechanistic studies, ensuring that observed phenotypes are not confounded by general cell damage or death [5].
The transition to multiplexed live-cell assays in chemogenomic research necessitates a rigorous approach to instrumentation and consumable selection. This application note details the critical parameters for configuring microscopy and plate reader systems to ensure the accuracy, reproducibility, and information content of data derived from high-throughput phenotypic screens. The guidance is framed within the context of profiling drug responses in complex models, such as patient-derived glioblastoma spheroids, where minimizing cell disturbance and standardizing measurements are paramount for identifying selective polypharmacology [58] [30].
The Scientist's Toolkit: Key Research Reagent Solutions
The following table catalogs essential materials and their functions for implementing robust live-cell multiplexed assays.
Table 1: Essential Research Reagents and Materials for Live-Cell Multiplexed Assays
| Item | Function/Application | Key Considerations |
|---|---|---|
| 384-Well Plates | Standard platform for high-throughput cell-based screening. | Opt for black-walled, clear-bottom plates for optical assays; ensure tissue culture treatment for optimal cell adhesion [30]. |
| Iodixanol (OptiPrep) | Density reagent for the Dye Drop method, enabling sequential, minimal-displacement reagent changes [30]. | Inert to live cells; allows creation of density gradients to displace solutions without aspirating or disturbing delicate cells [30]. |
| Vital Dyes (e.g., YOYO-1) | Live-cell staining to identify dead and dying cells within a population [30]. | Membrane-impermeant dyes that fluoresce upon binding nucleic acids in cells with compromised membranes. |
| Fluorescent Beads | Calibrants for converting arbitrary fluorescence units (a.u.) to absolute standard units (e.g., MEFL - Molecules of Equivalent Fluorescein) [66] [67]. | Essential for cross-experiment and cross-platform comparability of fluorescence data. |
| Reference Fluorophores (e.g., Fluorescein) | Calibrants for plate reader fluorescence measurements, enabling data reporting in concentration units [67]. | Used to build a calibration model that removes the effect of the measurement device's gain setting. |
| Constitutive Fluorescent Protein Strains | Biological controls for assessing fluorescence measurement system performance and dynamic range [66]. |
Instrument Configuration and Selection Criteria
Plate Selection and Assay Geometry
The choice of plate format and geometry directly impacts data quality, reagent costs, and cell viability. For high-content screening of adherent cells, 384-well plates are recommended as they provide an optimal balance between throughput and well-to-well variability.
- Minimizing Cell Loss: A significant challenge in multiplexed assays is the uneven loss of delicate cells (e.g., dying or mitotic cells) during wash steps. This can be mitigated by using plates with sound optical properties and by adopting no-wash protocols like Dye Drop, which uses sequential density displacement to exchange reagents with minimal disturbance [30].
- Reagent Volume and Cost: The Dye Drop method reduces reagent volumes by approximately 50% compared to conventional washing protocols, offering significant cost savings for large-scale chemogenomic profiling studies [30].
Filter and Optical Path Configuration
Proper configuration of excitation and emission filters is critical for signal specificity and sensitivity, especially in multiplexed experiments.
- Wavelength Selection: Filters must be selected to match the spectral profiles of the fluorophores used. For example, GFP and fluorescein require excitation in the blue spectrum (around 488 nm) and emission detection in the green spectrum (around 510 nm) [67].
- Signal-to-Noise Optimization: The use of narrow bandpass filters helps to minimize spectral bleed-through and autofluorescence, thereby improving the signal-to-noise ratio. For plate reader measurements, it is standard practice to acquire fluorescence at the peak emission wavelength as a reliable representative of the total fluorescent signal [67].
Gain and Signal Amplification
Gain (or voltage) settings on detectors (PMTs) control the amplification of the fluorescence signal. Inconsistent gain settings are a primary obstacle to the quantitative comparison of data across experiments.
- The Arbitrary Unit Problem: Fluorescence measurements are inherently relative and are affected by the instrument's gain setting. Data reported in arbitrary units (a.u.) are not directly comparable if acquired at different gain levels [66] [67].
- Calibration to Standard Units: To achieve gain-independent data, a calibration protocol must be implemented. This involves measuring standard calibrants (e.g., fluorescent beads or fluorescein solutions of known concentration) to create a calibration curve. This curve allows for the conversion of arbitrary instrument readings into absolute, standardized units such as MEFL (Molecules of Equivalent Fluorescein) per cell or concentration of reference fluorophore [66] [67]. Tools like FlopR and PLATERO automate this calibration for both flow cytometry and plate reader data [66] [67].
Table 2: Quantitative Comparison of Fluorescence Calibration Tools
| Tool Name | Platform | Primary Function | Calibrant | Key Output Units |
|---|---|---|---|---|
| FlopR | R | Normalization and calibration of plate reader and flow cytometry data. | Fluorescent beads, reference dyes | MEF (Molecules of Equivalent Fluorophore) |
| PLATERO | MATLAB | Calibration of plate reader fluorescence measurements with integrated Measurement System Analysis (MSA). | Fluorescein | Concentration (e.g., nM) |
| TASBE Flow Analytics | MATLAB | Calibration and analysis of flow cytometry data. | Fluorescent beads | MEFL |
Detailed Experimental Protocols
Protocol 1: Dye Drop Live-Cell Viability and DNA Replication Assay
This protocol is designed for multiplexed, high-content data collection in 384-well plates with minimal cell loss [30].
Workflow Diagram: Dye Drop Assay
Materials:
- Pre-treated black-walled, clear-bottom 384-well plates with adherent cells.
- Live-cell dye stock solutions (e.g., YOYO-1 for viability, EdU for DNA replication).
- Phosphate-Buffered Saline (PBS).
- Iodixanol (OptiPrep).
- Fixative (e.g., 4% Paraformaldehyde in PBS).
Method:
- Cell Preparation: Seed cells at an optimized density in 384-well plates and allow them to adhere. Treat with compounds from the chemogenomic library across a desired dose range (e.g., 9-point dilution series) [58] [30].
- Live-Cell Staining: After the treatment period, prepare a working solution of live-cell dyes in culture medium. Gently add the dye solution to the wells.
- Incubation: Incubate the plate for 30-60 minutes under standard culture conditions (37°C, 5% CO₂) to allow for dye incorporation.
- Dye Drop Fixation: a. Prepare a fixation solution by adding iodixanol to the fixative to achieve a density of ~1.5% more than the culture medium. b. Using a multichannel pipette, slowly add the dense fixative solution to the side of each well. The solution will drop to the bottom, displacing the culture medium and dye solution with minimal mixing and cell disturbance. Incubate for an appropriate fixation time.
- Dye Drop Wash: a. Prepare a wash buffer (e.g., PBS) with iodixanol added to a density ~1.5% more than the fixative. b. Add the dense wash buffer to the well, displacing the fixative. This step removes residual dye and fixative.
- Imaging: Replace the final wash with a suitable imaging buffer or PBS. Acquire images using a high-content microscope. The retained cells can then be analyzed for viability (YOYO-1 positivity), DNA replication (EdU incorporation), and morphological features.
Protocol 2: PLATERO Calibration of Plate Reader Fluorescence
This protocol provides a framework for converting arbitrary fluorescence units from a plate reader into standardized, gain-independent concentration units [67].
Workflow Diagram: PLATERO Calibration
Materials:
- Reference calibrant (e.g., Fluorescein, sodium salt).
- Dimethyl sulfoxide (DMSO) and assay buffer (e.g., PBS, pH 7.4).
- Black-walled 384-well plate (non-treated).
- Microplate reader with variable gain settings.
Method:
- Calibration Curve Preparation: a. Prepare a high-concentration stock solution of fluorescein in DMSO. Confirm its concentration by measuring absorbance at 492 nm and using the Beer-Lambert law (molar extinction coefficient for fluorescein is ~83,000 M⁻¹cm⁻¹ at 492 nm) [67]. b. Perform a series of dilutions in assay buffer to create calibrant solutions that span the expected fluorescence intensity range of your experimental samples.
- Plate Reader Measurement: a. Dispense the calibrant solutions and a blank (assay buffer) into the 384-well plate. b. Measure the fluorescence of the calibrants at multiple gain levels to characterize the gain-effect relationship. Use the appropriate excitation/emission filters for fluorescein (e.g., Ex: 485 nm, Em: 535 nm).
- Model Building: a. Input the calibrant concentration data and the corresponding raw fluorescence readings at different gains into the PLATERO software. b. PLATERO will generate a unified mathematical model that corrects for gain effects and converts arbitrary units into absolute concentration units.
- Experimental Data Calibration: a. In all subsequent experiments, include wells with non-fluorescent control cells to account for autofluorescence. b. Measure your experimental samples. c. Use the pre-computed PLATERO model to process the raw experimental data. The output will be fluorescence values expressed in standardized concentration units, enabling direct comparison across different experiments and instrument gain settings.
Data Analysis and Interpretation
Calibrated data from these protocols enables robust quantitative analysis. For chemogenomic profiling, dose-response data can be processed using the normalized growth rate (GR) inhibition method, which accounts for differences in cell line proliferation rates and improves the reproducibility of drug response metrics [30]. This allows for the distinction between cytotoxic (cell-killing) and cytostatic (growth-arresting) effects of compounds, revealing unexpected relationships between these phenotypes and drug mechanism of action [30]. The integration of single-cell data from multiplexed assays is crucial for uncovering heterogeneous responses within cell populations, a key consideration in complex models like patient-derived glioblastoma spheroids [58] [30].
Validation Frameworks and Comparative Analysis of Assay Performance
The integration of live-cell multiplexed assays into chemogenomic library research represents a significant advancement in drug discovery, enabling the simultaneous observation of multiple dynamic cellular processes. However, the full potential of this technology is only realized when the rich, high-content data it produces is rigorously validated against established functional outcomes. This application note details protocols and frameworks for correlating multiplex assay data with gold standard measures, ensuring that the phenotypic profiles captured are biologically meaningful and translatable to therapeutic contexts. By anchoring multiplex observations to functional benchmarks, researchers can confidently utilize these assays for critical applications such as compound mechanism-of-action studies and the identification of synthetic lethal interactions in cancer.
Key Validation Principles and Quantitative Benchmarks
Validation of live-cell multiplex data requires a multi-faceted approach that assesses both the technical performance of the assay and its biological relevance. Core principles include establishing a high correlation with gold standard viability assays, demonstrating operational robustness in high-throughput screening environments, and confirming that observed phenotypes are linked to critical functional pathways such as cell death or stress response.
Table 1: Key Validation Metrics for Live-Cell Multiplex Assays
| Validation Metric | Gold Standard Method | Target Performance | Application Context |
|---|---|---|---|
| Viability/IC50 | ATP-based assays (e.g., CellTiter-Glo) | Concordance (R² > 0.9) [68] | Acute drug response profiling |
| Phenotypic Specificity | Immunofluorescence / Western Blot | Functional knockout confirmation [68] | Genetic perturbation studies |
| Multiplex Reproducibility | Inter-laboratory correlation | Low variability (P < 0.001) [69] | Cross-site longitudinal studies |
| Dynamic Range | Endpoint imaging & sequencing | Linear cell number quantification [68] | Pooled screening (e.g., QMAP-Seq) |
A critical demonstration of this validation comes from the QMAP-Seq method, which was benchmarked against gold standard cell viability assays. The platform generated quantitative measures of acute drug response that were "precise and accurate" and "comparable to gold standard assays," confirming its reliability for high-throughput chemical-genetic interaction profiling [68]. Furthermore, successful validation requires that multiplex assays can detect known positive controls, such as the resistance to the cytotoxic compound YM155 conferred by knockout of the solute carrier SLC35F2 [68]. When deploying multiplex cytokine assays, it is essential to note that while absolute concentrations may vary significantly between platforms and laboratories (P < 0.001), the relative patterns of cytokine perturbation are often preserved and can be highly informative for longitudinal studies [69].
Detailed Experimental Protocols
Protocol 1: High-Content Live-Cell Multiplex Screening for Chemogenomic Annotation
This protocol describes a high-content screen to investigate cell viability and phenotypic features over time, enabling initial quality control and annotation of diverse compounds from chemogenomic libraries [70].
Materials & Reagents
- Cell Line: Appropriate mammalian cell line (e.g., A549 VIM-RFP for EMT studies [71]).
- Labeling: Endogenous fluorescent protein tags (e.g., VIM-RFP) or live-cell compatible dyes.
- Equipment: High-content imaging system with environmental control (e.g., CQ1 microscope), automated liquid handler.
Procedure
- Cell Preparation and Plating:
- Seed cells into assay-ready microplates using an automated liquid handler to ensure uniformity.
- Allow cells to adhere and recover for a minimum of 24 hours under standard culture conditions (37°C, 5% CO₂).
Compound Treatment:
- Prepare compound stocks from chemogenomic libraries in DMSO. Use a pin-tool or liquid handler to transfer compounds to assay plates, creating a desired concentration gradient (e.g., 4-point dose response).
- Include DMSO-only wells as vehicle controls and wells with compounds of known mechanism as experimental controls.
Live-Cell Imaging and Acquisition:
- Transfer plates to a live-cell imaging system equipped with environmental control (37°C, 5% CO₂, and humidity).
- Image cells every 4-6 hours over a 48-72 hour period. Acquire images in multiple channels as required (e.g., phase contrast for morphology, RFP for a specific marker like vimentin) [71] [70].
- Use low-excitation light and optimized exposure times to minimize phototoxicity throughout the extended time-lapse.
Image and Data Analysis:
- Export images for analysis with software such as CellPathfinder [70] or a custom Python package like M-TRACK [71].
- Extract high-dimensional data features, including cell count (viability), nuclear morphology, and texture features.
- Normalize cell counts in compound-treated wells to DMSO control wells to generate dose-response curves and calculate IC₅₀ values.
Protocol 2: QMAP-Seq for Quantitative Chemical-Genetic Phenotyping
This protocol leverages next-generation sequencing for pooled, high-throughput chemical-genetic profiling, validating multiplex phenotypes against a functional readout of cell abundance [68].
Materials & Reagents
- Pooled Cell Library: Barcoded cell lines comprising genetic perturbations (e.g., inducible CRISPR-Cas9 knockout cells).
- Spike-In Standards: 293T cells with unique sgNT barcodes for absolute quantification.
- Library Prep: i5 and i7 indexed primers, lysis buffer, PCR reagents.
Procedure
- Genetic Perturbation and Compound Treatment:
- Induce Cas9 expression in the pooled cell library (e.g., with doxycycline) to initiate knockout of target genes.
- At 96 hours post-induction, treat the pooled cells with compounds from the chemogenomic library at multiple doses in duplicate. Maintain DMSO-treated pools as controls.
Cell Lysis and Spike-In Addition:
- At the endpoint (e.g., 72 hours post-treatment), prepare crude cell lysates.
- For each sample, add a predetermined number of 293T spike-in cells, customized to cover the expected range of cell numbers for any given perturbation [68].
Library Preparation and Sequencing:
- Amplify the barcode regions from the lysates using a unique combination of i5 and i7 indexed primers for each of the 768 samples (or as required by the experimental design).
- Pool and purify the PCR products. Perform Illumina sequencing with a single read to sequence the sgRNA and cell line barcodes.
Bioinformatic Analysis and Validation:
- Demultiplex sequencing data based on i5 and i7 indexes.
- Count reads for each cell line-sgRNA pair and use the spike-in standards to generate a sample-specific standard curve.
- Interpolate the absolute cell number for each perturbation from the read count using the standard curve.
- Calculate the relative cell abundance for each genetic perturbation in the presence of a compound compared to the DMSO control. This relative abundance is a direct measure of compound sensitivity or resistance.
Workflow Visualization
The following diagram illustrates the integrated workflow for validating multiplex assays, from experimental setup to data correlation with gold standards.
Integrated Validation Workflow for Multiplex Assays
The Scientist's Toolkit: Essential Research Reagents and Materials
Table 2: Key Reagent Solutions for Live-Cell Multiplex Assay Validation
| Reagent/Material | Function in Validation | Specific Examples |
|---|---|---|
| Barcoded Cell Pools | Enables multiplexed testing of genetic perturbations in a single assay. | MDA-MB-231 with inducible Cas9 and sgRNAs targeting proteostasis factors [68]. |
| Fluorescent Biosensors | Marks specific cellular structures or states for live-cell tracking. | Endogenous VIM-RFP knock-in for monitoring mesenchymal transition [71]. |
| Spike-In Standards | Provides an internal standard for absolute quantification of cell number. | 293T cells with unique sgNT barcodes for QMAP-Seq [68]. |
| Environment-Sensitive Dyes | Reports on the local cellular environment; enables "one-to-many" staining. | Nile Red for staining multiple membrane-associated organelles based on lipid polarity [11]. |
| Validated Control Compounds | Serves as benchmarks for assay performance and phenotype annotation. | Compounds with known MoA from chemogenomic libraries (e.g., Staurosporine, Daunorubicin) [70]. |
Within modern drug discovery, particularly in the screening of chemogenomic libraries, the choice of cell viability assay is paramount. Researchers are often faced with a decision between traditional endpoint assays, which provide a snapshot at a single time point, and real-time live-cell imaging, which offers continuous, kinetic data from the same culture. Endpoint assays, such as CellTiter-Glo and resazurin reduction, have long been the workhorses of high-throughput screening, valued for their simplicity and scalability [72]. In contrast, live-cell imaging systems like the IncuCyte and xCELLigence have revolutionized analysis by allowing researchers to observe dynamic cellular processes—such as proliferation, death, and morphological changes—as they unfold within the stable environment of an incubator [73] [74]. This application note provides a detailed comparative analysis of these methodologies, framed within the context of chemogenomic library research. We present structured quantitative data, detailed protocols, and visualization tools to guide researchers in selecting and implementing the optimal strategy for their phenotypic screening campaigns. By leveraging the strengths of both approaches in a multiplexed format, scientists can gain deeper insights into compound mechanism of action, distinguish cytostatic from cytotoxic effects, and ultimately improve the predictive power of early-stage drug discovery.
Comparative Analysis of Methodologies
Key Characteristics and Applications
The table below summarizes the core attributes, advantages, and limitations of endpoint and real-time live-cell imaging assays.
Table 1: Comparative Analysis of Endpoint and Real-Time Live-Cell Imaging Assays
| Feature | Endpoint Assays | Real-Time Live-Cell Imaging |
|---|---|---|
| Data Type | Single-timepoint snapshot [72] | Continuous, kinetic data from the same culture over hours, days, or weeks [73] [74] |
| Throughput | Very high, easily scalable [68] | High, with systems capable of handling multiple microplates in parallel [9] [75] |
| Temporal Resolution | None; can miss transient events [75] | High; captures dynamic and transient processes (e.g., cell division, apoptosis) [73] [75] |
| Cell Microenvironment | Disrupted for measurement (e.g., lysis, reagent addition) [74] | Maintained in a physiologically relevant incubator environment throughout [73] [74] |
| Primary Readout | Metabolic activity (ATP content, reductase activity) or nucleus count [72] [76] | Cell confluence, morphology, fluorescence intensity, and motility [73] [76] |
| Key Advantage | Simplicity, low cost, and well-established protocols [72] | Reveals the entire story of cellular response, distinguishing cytostatic vs. cytotoxic effects [74] [76] |
| Key Limitation | May overestimate viability and lacks kinetic information [72] | Can struggle to evaluate contrasting cell densities at full confluency; higher initial instrument cost [72] |
Performance Data and Synergistic Use
Direct comparisons of the two methodologies reveal critical performance differences. In one study, endpoint assays like resazurin reduction and CellTiter-Glo showed a consistent overestimation of cell viability when compared directly to stained nuclei counts, which serve as a more direct measure of cell number [72]. This highlights a potential pitfall of relying solely on metabolic readouts.
Real-time systems such as the IncuCyte and xCELLigence are exceptionally effective at tracking the effects of drug treatment on cell proliferation at sub-confluent growth stages [72]. However, their ability to discern differences between drug-treated and control cells diminishes when cultures reach full confluency, as the readouts (e.g., confluence) saturate [72].
The limitations of each approach when used alone are effectively alleviated by using them in combination [72] [76]. This integrated strategy provides a more effective means to evaluate drug toxicity. For instance, live-cell imaging can visually represent overall cell health and integrity throughout an experiment, while the endpoint assay provides a final, quantifiable metric of viability, serving as an internal control to limit false-negative classifications of tested compounds [76].
Table 2: Quantitative Performance Comparison from a Synthetic Lethality Drug Study
| Assay Method | Reported Performance in Tracking Drug Effects | Best Use Case |
|---|---|---|
| Endpoint: Resazurin/CellTiter-Glo | Higher cell viabilities compared to nuclei counts [72] | High-throughput primary screening of metabolic activity. |
| Endpoint: Nuclei Enumeration | Direct cell count; used as a benchmark in the study [72] | Accurate quantification of absolute cell number. |
| Real-Time: IncuCyte/xCELLigence | Comparable to each other; effective at sub-confluent growth [72] | Kinetic assessment of proliferation and death in growing cultures. |
| Combined Approach | More effective evaluation of drug toxicity than either approach alone [72] | Comprehensive analysis for hit validation and mechanism deconvolution. |
Experimental Protocols
Protocol 1: Endpoint Cell Viability Assay for 96-Well Plates
This protocol is adapted for use following a live-cell imaging experiment, allowing for correlative analysis [76].
Cell Seeding and Treatment:
- Seed cells in a 96-well plate at a density optimized for 72-hour growth. Optimization is critical to prevent over-confluency, which can mask drug effects [76].
- Treat cells with the compounds of interest (e.g., chemogenomic library members). Automation via liquid handlers (e.g., Opentrons OT-2) is recommended to enhance reproducibility and throughput [76].
Incubation and Live-Cell Imaging (Optional):
- Incubate the plate for the desired duration (e.g., 72 hours) inside a live-cell imaging system (e.g., IncuCyte) to collect kinetic data on confluence and morphology [76].
Endpoint Viability Measurement:
- Following the kinetic imaging period, equilibrate the plate to room temperature.
- Following the manufacturer's instructions, add a volume of CellTiter-Glo reagent equal to the volume of cell culture medium present in each well.
- Shield the plate from light and incubate on an orbital shaker for 5-10 minutes to induce cell lysis and stabilize the luminescent signal.
- Record luminescence using a plate reader.
Protocol 2: Kinetic Live-Cell Multiplexed Assay for Phenotypic Screening
This protocol details a high-content, live-cell multiplex screen suitable for characterizing chemogenomic libraries, incorporating machine learning for analysis [77] [18] [21].
Cell Preparation and Seeding Optimization:
- Culture Cells: Culture adherent cells (e.g., U-2 OS, HEK293T) according to standard protocols. Use cells within a validated passage range (e.g., passage 5-35 for U-2 OS) [77].
- Optimize Seeding Density: This is a critical step. Seed cells across a range of densities (e.g., 1,000 to 2,500 cells/well in a 384-well plate) and monitor confluence over 48 hours. The optimal density should yield >40% confluence at the first imaging time point and <90% confluence at the final time point to ensure robust segmentation of individual cells [77].
Compound Treatment and Plate Layout:
- Prepare compound stocks and a "pick list" for automated liquid handling.
- Include reference compounds for key phenotypes (e.g., apoptosis, cytoskeletal disruption) to train machine learning algorithms later in the analysis [77] [18].
- Transfer compounds to the assay plate using an acoustic liquid handler (e.g., Echo 550). Include DMSO controls.
Image Acquisition:
- Place the assay plate in a live-cell imaging system with full environmental control (37°C, 5% CO₂).
- Acquire images at regular intervals (e.g., every 4-6 hours) over the assay duration (e.g., 48 hours). Use a combination of brightfield and fluorescence channels (if using fluorescent probes for organelles like mitochondria or tubulin) [77] [75].
- Critical Parameters: Maintain strict environmental control to minimize cellular stress. Optimize imaging intervals to capture key biological events without causing phototoxicity [9].
Data Analysis and Machine Learning:
- Use high-content analysis software (e.g., CellPathfinder) to extract quantitative features from the images. These include cell number, nuclear morphology, mitochondrial content, and cytoskeletal structure [77] [18].
- Train machine learning models (e.g., using SHapley Additive exPlanations/SHAP) on the reference compound data to classify the phenotypic effects of the test compounds from the chemogenomic library [21]. This allows for automated annotation of compounds based on their multiparametric impact on cellular health.
Figure 1: Workflow for a kinetic live-cell multiplexed assay, integrating machine learning for phenotypic classification.
The Scientist's Toolkit: Essential Research Reagents and Materials
Successful implementation of the described protocols requires a suite of specialized instruments, reagents, and software.
Table 3: Essential Research Reagents and Materials for Live-Cell Multiplexed Assays
| Item Category | Specific Examples | Function and Application |
|---|---|---|
| Live-Cell Imaging Systems | IncuCyte SX5, CX3; xCELLigence; Cellcyte X; Nikon Biostation CT [72] [9] [75] | Automated, kinetic image acquisition of cells maintained within a controlled incubator environment. The CX3 model features confocal imaging for 3D models. |
| Endpoint Viability Assays | CellTiter-Glo, Resazurin Reduction Assay [72] [76] | Provide a single-timepoint, quantifiable measure of cell viability based on ATP content or metabolic activity. |
| Fluorescent Probes & Reagents | Tubulin stains, mitochondrial dyes, viability/cytotoxicity probes (e.g., for apoptosis) [77] [9] | Enable multiplexed readouts of subcellular structure and cell health in live cells. |
| High-Content Analysis Software | CellPathfinder, IncuCyte Base Software [77] [9] | Quantitative analysis of live-cell imaging data, including cell segmentation, tracking, and feature extraction. |
| Automated Liquid Handlers | Opentrons OT-2, Echo 550 Acoustic Liquid Handler [77] [76] | Ensure precision, reproducibility, and throughput in cell seeding and compound transfer. |
| Specialized Labware | Black-walled, clear-bottom 384-well plates [77] | Optimal for high-resolution imaging and minimizing cross-talk in fluorescence assays. |
Integrated Data Analysis and Visualization
The power of a combined endpoint and live-cell approach lies in the integration of kinetic and endpoint data streams. Kinetic profiling reveals the temporal dynamics of drug response, showing whether a compound acts immediately or with delayed effect, and whether its impact is sustained or transient [75]. This temporal profile often varies between cell types and drug doses, providing rich information for understanding the mechanism of action.
When these kinetic data are combined with endpoint viability measures, researchers can confidently distinguish between cytotoxic compounds (which kill cells) and cytostatic compounds (which halt proliferation without causing death) [74] [76]. This is visually apparent when kinetic confluence curves show a decline for cytotoxic agents or a plateau for cytostatic agents, which is then confirmed by the final endpoint measurement.
Furthermore, the high-dimensional data extracted from live-cell imaging can be processed with machine learning models to create a "phenotypic fingerprint" for each compound in a chemogenomic library [18] [21]. These models can be trained on reference compounds with known mechanisms to automatically classify novel hits, annotating them based on their multiparametric effects on cellular health, such as induction of phospholipidosis, apoptosis, or cytoskeletal disruption [21].
Figure 2: Logical relationship showing how integrated data streams lead to robust biological conclusions and compound annotation.
Benchmarking Luminescent, Fluorescent, and Image-Based Viability Assays
Cell viability assessment is a foundational tool in cellular therapy manufacturing and drug discovery, serving as a critical quality attribute from initial research to final product release [78]. The emergence of live-cell multiplexed assays for chemogenomic library research demands a new level of assay sophistication, requiring detailed annotation of small molecules beyond simple cytotoxicity [5] [7]. These annotations must delineate specific on-target effects from non-specific impacts on fundamental cellular functions, a process vital for validating chemical probes and understanding their mechanism of action.
This application note provides a structured comparison of luminescent, fluorescent, and image-based viability assays, benchmarking their performance and providing detailed protocols tailored for research involving chemogenomic libraries.
Quantitative Benchmarking of Viability Assays
The selection of a viability assay is a critical decision, balancing factors such as sensitivity, dynamic range, throughput, and the need for multiplexing capabilities. The table below summarizes the key performance metrics of widely used assay types.
Table 1: Performance Comparison of Common Viability Assays
| Assay Type | Detection Method | Limit of Detection (LOD) | Dynamic Range | Throughput | Multiplexing Potential | Key Interferences |
|---|---|---|---|---|---|---|
| Luminescence (e.g., CellTiter-Glo) | ATP-dependent luciferase reaction [79] | <10 cells/well (in 384-well format) [79] | 6-8 orders of magnitude [80] | High | Low (endpoint, lyses cells) | Compound auto-luminescence |
| Fluorescence (e.g., alamarBlue) | Resazurin reduction to fluorescent resorufin [79] | Higher than CellTiter-Glo [79] | Moderate | High | Moderate (can be kinetic) [79] | Compound auto-fluorescence |
| Absorbance (e.g., MTT) | Formazan formation [79] | Higher than alamarBlue [79] | 2-3 orders of magnitude [80] | High | Low | Sample turbidity, color [80] |
| Image-Based (e.g., Hoechst/SYTOX) | Nuclear dyes & automated imaging [81] | Highly accurate for cell number [81] | Dependent on cell seeding density and imaging field | Medium | High (multi-parameter data) | Fluorescent compounds, debris [78] |
| Flow Cytometry (e.g., 7-AAD/PI) | DNA dye exclusion [78] | Accurate for fresh cellular products [78] | High (thousands of events) | Medium | High (with surface markers) [78] | Requires single-cell suspension [81] |
Beyond these core metrics, the sample type significantly influences assay performance. For instance, flow cytometry and automated image analysis have demonstrated high accuracy and consistency in measuring the viability of fresh cellular products [78]. However, when analyzing cryopreserved products, all methods can exhibit variability, with image-based and flow cytometry assays sometimes struggling with the increased debris and dead cells resulting from the freeze-thaw process [78].
Table 2: Functional Comparison for Assay Selection
| Characteristic | Luminescence | Fluorescence | Image-Based |
|---|---|---|---|
| Best Use Case | High-throughput toxicity screening, simple add-and-read protocols [79] | Kinetic monitoring, affordability, flexibility of Abs or FI detection [79] | In-depth mechanism of action (MoA) studies, multiparametric analysis [5] |
| Cost Factor | Higher kit costs [79] [80] | More affordable option [79] | Higher instrument costs |
| Workflow Complexity | Simple, homogenous "add-measure" protocol [80] | May require media replacement and stopping solution [79] | Complex setup and data analysis, but provides rich data [82] |
| Information Depth | Single parameter (metabolic activity via ATP) [79] | Single parameter (metabolic activity or membrane integrity) | Multiparametric (cell count, death, morphology, cell cycle) [5] [81] |
Experimental Protocols
The following section provides detailed methodologies for key viability assays, with an emphasis on protocols suitable for the characterization of chemogenomic libraries.
Protocol: Luminescent Cell Viability Assay (ATP-based)
Principle: This assay quantifies the presence of ATP, a marker of metabolically active cells, using a luciferase enzyme that produces a bioluminescent signal proportional to the ATP concentration [79] [83].
Materials & Reagents:
- CellTiter-Glo 2.0 Reagent (Promega, #G9241) [79]
- White-walled, tissue culture-treated microplates (e.g., Greiner Bio One, #655073) [79]
- Microplate reader with luminescence detection capability
Procedure:
- Cell Seeding: Seed cells in a white-walled 96- or 384-well plate at an optimal density (e.g., 50-50,000 cells/well for 96-well plates) in a final volume of 100 µL culture medium. Incubate overnight under standard conditions (37°C, 5% CO₂) [79].
- Compound Treatment: Apply compounds from your chemogenomic library at desired concentrations and incubate for the specified treatment period.
- Equilibration: Remove the plate from the incubator and allow it to equilibrate to room temperature for approximately 30 minutes.
- Reagent Addition: Add a volume of CellTiter-Glo Reagent equal to the volume of media present in each well (e.g., 100 µL for 100 µL of media).
- Mixing and Lysis: Shake the plate for 2 minutes on an orbital shaker (e.g., 200 rpm) to induce cell lysis [79].
- Signal Stabilization: Incubate the plate at room temperature for 10 minutes to stabilize the luminescent signal.
- Measurement: Read the plate using a luminescent microplate reader with an integration time of 0.5-1.0 seconds per well [79].
Figure 1: Workflow for luminescent ATP-based viability assay.
Protocol: Live-Cell Multiplexed Viability and Phenotypic Imaging Assay
Principle: This protocol uses a cocktail of live-cell fluorescent dyes to simultaneously track viability, nuclear morphology, mitochondrial health, and tubulin structure over time, providing a deep phenotypic profile for chemogenomic compound annotation [5] [7].
Materials & Reagents:
- Hoechst 33342 (50 nM): Live-cell permeable DNA stain for nuclear segmentation and cell counting [5].
- SYTOX Green (1 µM) or similar: Cell-impermeant DNA stain to label dead cells with compromised membranes [81].
- MitoTracker Red/Deep Red (e.g., 50-100 nM): Stains mitochondria, indicating organelle health [5].
- BioTracker 488 Microtubule Dye (e.g., 100 nM): Labels the tubulin cytoskeleton [5].
- Black-walled, clear-bottom, tissue culture-treated microplates
- Live-cell imaging system with environmental chamber (37°C, 5% CO₂)
Procedure:
- Cell Preparation: Seed cells in a black-walled, clear-bottom 96-well plate. Incubate overnight.
- Dye Loading: Replace the medium with fresh, pre-warmed medium containing the optimized, low concentrations of the dye cocktail (Hoechst 33342, SYTOX Green, MitoTracker, Tubulin Dye) [5].
- Baseline Imaging: Incubate the plate for 30-60 minutes in the dark at 37°C, 5% CO₂. Acquire the first set of images (Time = 0) using a high-content imaging system with appropriate filters.
- Compound Addition: Carefully add compounds from the chemogenomic library to the wells.
- Kinetic Imaging: Return the plate to the live-cell imager's environmental chamber. Acquire images at multiple time points (e.g., 3, 6, 24, 48 hours) post-treatment to capture kinetic responses [5].
- Image Analysis: Use image analysis software (e.g., CellPathfinder, CellProfiler) to extract features.
Figure 2: Workflow for live-cell multiplexed imaging assay.
Protocol: Flow Cytometry Viability Assay
Principle: This method uses DNA-binding dyes like 7-AAD or Propidium Iodide (PI), which are excluded by live cells but penetrate dead cells with compromised membranes, allowing for quantitative viability measurement and multiplexing with immunophenotyping [78].
Materials & Reagents:
- 7-AAD (BD Biosciences) or Propidium Iodide (ThermoFisher)
- Flow cytometry staining buffer (e.g., PBS with 1-2% FBS)
- BD FACSCanto or similar flow cytometer
Procedure:
- Cell Harvest: For adherent cells, dissociate using trypsin and wash. For suspension cells, collect and wash directly [78].
- Staining: Resuspend the cell pellet in flow cytometry buffer. Add 7-AAD or PI to the sample (e.g., 5-10 µL per 100 µL cell suspension) and incubate for 5-10 minutes at room temperature in the dark. Do not wash [78].
- Acquisition: Analyze the samples immediately on a flow cytometer. For 7-AAD, use an excitation wavelength of 488-562 nm and measure emission at >650 nm.
- Analysis: Gate on the cell population of interest based on forward and side scatter. The viable cell population is identified as 7-AAD/PI-negative.
The Scientist's Toolkit: Essential Research Reagents and Materials
Successful implementation of viability assays, particularly in complex multiplexed formats, requires careful selection of reagents and instruments.
Table 3: Key Research Reagent Solutions for Viability Assays
| Item | Function/Application | Example Products & Catalogs |
|---|---|---|
| ATP Assay Reagent | Luminescent quantification of viable cells via ATP content. | CellTiter-Glo 2.0 (Promega, #G9241) [79] |
| Redox Dye | Fluorescent (or colorimetric) indicator of metabolic activity. | alamarBlue (Thermo Fisher, #DAL1025) [79] |
| Viability Stains (Flow) | Membrane-impermeant DNA dyes for dead cell discrimination in flow cytometry. | 7-AAD (BD Biosciences), Propidium Iodide (Thermo Fisher) [78] |
| Viability Stains (Imaging) | A dye pair for all nucleated cells and dead cells in image-based assays. | Hoechst 33342 + SYTOX Green [81] |
| Phenotypic Dye Set | For multiplexed health assessment (mitochondria, tubulin). | MitoTracker Red, BioTracker 488 Tubulin Dye [5] |
| Microplates (Luminescence) | White plates to reflect and maximize luminescence signal. | Greiner Bio-One, #655073 [79] |
| Microplates (Imaging) | Black plates with clear bottom to minimize background and allow high-resolution imaging. | Greiner Bio-One, #655866 [79] |
| Automated Cell Counter | Image-based system for automated cell count and viability. | Cellometer (with AO/PI staining) [78] |
| High-Content Imager | Automated microscope for multiparametric, kinetic imaging. | ImageXpress PICO, CQ1 [81] [7] |
Integrated Data Analysis and Decision Pathways
Interpreting data from multiplexed assays requires an integrated approach. Advanced image analysis software like CellProfiler can extract hundreds of morphological features from Cell Painting or Cell Health assays [82]. Mapping these features to biological outcomes creates a "BioMorph" space, linking compound-induced morphology changes to specific cellular processes like DNA damage, apoptosis, or metabolic disruption [82]. This is crucial for deconvoluting the mechanism of action of compounds in a chemogenomic library.
The following decision pathway can help select the appropriate assay based on research goals.
Figure 3: Decision pathway for selecting a viability assay.
Assessing Cytostatic vs. Cytotoxic Effects with GR Metrics
Within modern drug discovery, accurately determining a compound's mechanism of action is as crucial as identifying its potency. This is particularly true in chemogenomic library screening, where understanding if a compound halts cell growth (cytostatic) or kills cells (cytotoxic) provides vital insights for downstream development [84]. Traditional metrics like IC₅₀, which measure the concentration that reduces cell viability by 50%, are inherently confounded by inherent cellular growth rates, potentially leading to misleading conclusions about a compound's true biological effect [85].
The Normalized Growth Rate Inhibition (GR) metrics framework was developed to overcome these limitations. By quantifying drug-induced growth rate inhibition while accounting for division rates, GR metrics provide a more accurate and biologically relevant distinction between cytostatic and cytotoxic effects [85]. This application note details the integration of GR metrics with live-cell multiplexed assays for the precise assessment of compound effects from chemogenomic libraries, providing protocols and data interpretation guidelines to enhance the quality and reliability of chemogenomic research.
Theoretical Foundation of GR Metrics
The Limitation of Conventional Metrics
Conventional drug response metrics, such as IC₅₀ and Emax, are calculated from endpoint viability measurements normalized to an untreated control. A fundamental flaw in this approach is its sensitivity to the number of cell divisions occurring during the assay. For example, a cytostatic drug will appear more potent in fast-growing cells than in slow-growing ones, not due to a change in the underlying biology, but simply as an artefact of the metric's calculation [85]. This dependency creates false correlations between cell genotype and observed drug sensitivity, obscuring true biological insights and complicating biomarker discovery.
The GR Metrics Solution
The GR method compensates for this confounder by comparing growth rates in the presence and absence of drug. The core formula for the normalized growth rate inhibition (GR value) at a concentration ( c ) and time ( t ) is: [ GR(c,t) = 2^{\frac{\log2(\frac{x(c,t)}{x0})}{\log2(\frac{x{ctrl}(t)}{x0})}} - 1 ] where ( x(c,t) ) is the cell count after treatment with concentration ( c ) for time ( t ), ( x0 ) is the cell count at the start of treatment, and ( x_{ctrl}(t) ) is the cell count of the untreated control at time ( t ) [85].
This formulation allows the GR value to capture a spectrum of drug effects:
- GR = 1: No effect relative to control.
- 0 < GR < 1: Partial growth inhibition.
- GR = 0: Complete cytostasis (no net growth over the experiment).
- GR < 0: Cytotoxicity (net loss of cells over the experiment).
From dose-response curves of GR(c) across a concentration range, summary metrics are derived:
- GR₅₀: Concentration where GR(c) = 0.5.
- GRmax: Lowest GR value measured, indicating the greatest effect.
- GRAOC: Area Over the Curve, analogous to AUC but for GR curves.
Table 1: Comparison of Drug Response Metrics
| Metric | Definition | Interpretation | Impact of Cell Growth Rate |
|---|---|---|---|
| IC₅₀ | Concentration yielding 50% of control cell count. | Potency measure. | Highly sensitive; faster growth lowers IC₅₀. |
| Emax | Viable cell fraction at highest tested concentration. | Efficacy measure. | Highly sensitive; faster growth lowers Emax. |
| GR₅₀ | Concentration yielding GR=0.5. | Potency per cell division. | Largely insensitive. |
| GRmax | Maximal GR effect (minimal GR value). | Efficacy per cell division. | Largely insensitive; negative value indicates cytotoxicity. |
Experimental Design and Workflow
The following section outlines a robust protocol for multiplexing viability and cytotoxicity assays to calculate GR metrics and distinguish cytostatic from cytotoxic effects.
Key Reagent Solutions
Multiplexing requires assays with compatible chemistries and distinct, non-overlapping signals.
Table 2: Essential Research Reagents for Multiplexed GR Assays
| Reagent / Assay | Function in Protocol | Key Feature for Multiplexing |
|---|---|---|
| RealTime-Glo MT Cell Viability Assay | Continuously monitors cell viability via luminescence. | Non-lytic, allows longitudinal reading from the same well. |
| MultiTox-Fluor Multiplex Cytotoxicity Assay | Simultaneously measures live-cell (GF-AFC protease activity) and dead-cell protease activity. | Provides two spectrally distinct fluorescent signals from a single addition. |
| CellTiter-Fluor Cell Viability Assay | Fluorescently measures viable cell number based on protease activity. | Ideal for multiplexing upstream of luminescent assays; no color quenching. |
| ApoTox-Glo Triplex Assay | Unifies viability, cytotoxicity, and caspase-3/7 activation (apoptosis) readouts. | Single-well triplex measurement for detailed mechanistic insight. |
| Dual-Luciferase Reporter Assay System | Measures experimental and control reporter activities (e.g., firefly and Renilla luciferase). | Controls for variables like transfection efficiency and general cell health [19]. |
Multiplexed Experimental Protocol for GR Metrics
Step 1: Plate Seeding and Baseline Readout
- Seed cells in assay plates. Include a separate set of plates for a time-zero (( T_0 )) measurement.
- Pre-incubate plates to allow cell attachment (e.g., 4-6 hours in a 37°C, 5% CO₂ incubator).
- Measure ( T0 ) value: For the ( T0 ) plates, add the cell viability reagent (e.g., RealTime-Glo or CellTiter-Glo) and record the luminescent signal. This provides the ( x_0 ) value for GR calculations.
Step 2: Compound Treatment and Incubation
- Treat cells with the chemogenomic library compounds across a desired concentration range. Include necessary controls:
- Negative control: Untreated cells (DMSO vehicle only).
- Positive control: 100% cytotoxic control (e.g., 1-2% Triton X-100 or 100 µM staurosporine) [42].
- Incubate plates for the desired assay duration (e.g., 72-96 hours). For real-time monitoring, add a non-lytic viability reagent like RealTime-Glo at this stage.
Step 3: Endpoint Multiplexing Readouts Perform sequential, non-destructive assays on the same well.
- Viability/Cytotoxicity Multiplex:
- Add the MultiTox-Fluor Reagent directly to the culture medium.
- Incubate for 1-2 hours and read fluorescence.
- Live-cell signal: Ex/~370 nm, Em/~490-505 nm.
- Dead-cell signal: Ex/~485 nm, Em/~520-530 nm.
- Caspase Activation Readout (Optional, for Mechanism):
- Add an equal volume of Caspase-Glo 3/7 Reagent.
- Mix and incubate for 30-60 minutes, then read luminescence.
- Final Viability Readout:
- If a lytic, more sensitive endpoint is required, add CellTiter-Glo 2.0 reagent to lyse cells and measure ATP content via luminescence.
The workflow for this multiplexed experimental design is outlined in the diagram below.
Data Calculation and Analysis
- Calculate Normalized Metrics: For each well, normalize the live-cell, dead-cell, and caspase signals to the negative (untreated) control.
- Determine GR Values: Use the GR formula provided in Section 2.2. The cell count ( x(c,t) ) can be derived from the final viability readout (e.g., CellTiter-Glo luminescence), ( x0 ) from the ( T0 ) measurement, and ( x_{ctrl}(t) ) from the negative control wells at the endpoint.
- Curve Fitting: Fit the GR values across the concentration series to a sigmoidal curve model (e.g., a modified Hill equation) to determine GR₅₀, GRmax, and GRAOC.
Data Interpretation and Distinguishing Drug Effects
The power of GR metrics lies in their quantitative interpretation of drug phenotype. The following diagram illustrates the logical decision process for classifying mode of action.
Integrating Multiplexed Data for Mechanistic Insight
The combination of GR metrics with multiplexed endpoint data provides a multi-faceted view of the drug's effect, confirming cytotoxicity and suggesting its mechanism.
- Confirming Cytotoxic Events: A true cytotoxic event (GRmax < 0) should be accompanied by a concomitant increase in the dead-cell signal and a decrease in the live-cell signal from the MultiTox-Fluor assay. A decrease in viability without an increase in cell death suggests potential assay interference or a cytostatic effect, warranting further investigation [19].
- Identifying Apoptosis: Cytotoxic compounds that also show a strong activation of caspase-3/7 are likely inducing apoptosis. This triplex data (viability, cytotoxicity, apoptosis) is powerful for elucidating a compound's mechanism of cell death.
Advantages in Chemogenomic Library Screening
Applying this GR-multiplexed approach to chemogenomic libraries delivers significant benefits:
- Reduced False Positives: In antagonist reporter assays, a cytotoxic compound can cause a "false-positive" drop in reporter signal. Multiplexing with a viability assay identifies these artifacts, ensuring that reported inhibition is genuine [42] [19].
- Improved Consistency: The NDR metric, which shares similar principles with GR in accounting for growth and background noise, has been shown to improve consistency between replicate screens and across different cell seeding densities and assay time points, reducing technical variability [86].
- Biological Relevance: GR metrics stabilize after approximately one cell division, enabling more reliable drug sensitivity estimation in slow-growing cells, such as primary patient-derived models [85].
Integrating GR metrics with live-cell multiplexed assays provides a robust, information-rich framework for profiling chemogenomic libraries. This approach moves beyond simple potency measurements to deliver a nuanced view of a compound's phenotypic effect, clearly distinguishing cytostatic from cytotoxic mechanisms and providing early insights into cell death pathways. By adopting these protocols, researchers can deconvolute screening hits with greater accuracy and confidence, ultimately improving the success rate of early drug discovery.
Accuracy and Reproducibility in Complex Matrices like Serum
The analysis of biological samples in drug discovery and biomarker identification increasingly relies on complex biological fluids such as serum. These matrices present significant challenges for achieving accurate and reproducible results due to their inherent complexity, dynamic range of protein concentrations, and potential interference factors. Within the broader context of live cell multiplexed assays for chemogenomic libraries research, maintaining data integrity when working with serum is particularly crucial, as these libraries contain carefully annotated chemical compounds used for phenotypic screening and target identification [5].
Serum represents one of the most challenging biological matrices for analytical techniques. Its composition includes high-abundance proteins that can constitute over 99% of the total protein mass, effectively masking the signals from low-abundance proteins that often hold the greatest clinical and biological significance [87]. This matrix effect, combined with factors such as ion suppression in mass spectrometry and non-specific binding in assay systems, creates a demanding environment where both accuracy and reproducibility can be compromised. For researchers utilizing chemogenomic libraries in phenotypic screening, these challenges are amplified, as the reliable annotation of compound effects on cellular health depends on minimizing variability introduced during sample processing and analysis [5].
This application note provides a comprehensive framework for addressing these challenges through optimized sample preparation methodologies, validation strategies for complex matrices, and integrated protocols that bridge serum analysis with live-cell multiplexed assays for chemogenomic research.
Comparative Analysis of Sample Preparation Methods
The selection of an appropriate sample preparation method is the most critical factor determining the accuracy and reproducibility of serum proteomics data. A direct comparison of six widely used serum proteomic sample preparation workflows reveals significant differences in their performance characteristics, particularly regarding quantitative accuracy and depth of protein coverage [87].
Table 1: Performance Metrics of Serum Sample Preparation Methods
| Method | Protein Identifications | Quantitative Accuracy | Reproducibility (Median CV%) | Optimal Application |
|---|---|---|---|---|
| In-gel digestion (IGD) | Moderate | Variable | ~20% | Targeted analysis, specific protein bands |
| SP3 | High | Good | Close to or below 20% | Whole proteome analysis |
| Top 14 Abundant Protein Depletion | High | Good for mid-abundance | Close to or below 20% | Reducing high-abundance protein effects |
| IPA/TCA precipitation | Moderate | Limited | ~20% | Protein precipitation, albumin removal |
| PreOmics ENRICH-iST | High | Superior for low-abundance | Close to or below 20% | Low-abundance protein detection |
| Seer Proteograph XT | >2000 | Superior | Close to or below 20% | Comprehensive biomarker discovery |
The data reveals that methods specifically designed for low-abundance protein detection, particularly PreOmics ENRICH-iST and Seer Proteograph XT, demonstrate superior quantitative accuracy while maintaining reproducibility with median coefficients of variation (CV%) close to or below 20% across technical replicates [87]. This level of reproducibility is essential for meaningful comparative studies in chemogenomic research, where subtle phenotypic changes must be reliably attributed to specific compound-target interactions rather than methodological variability.
Experimental Protocols for Serum Processing
Protocol for Serum Proteomic Sample Preparation
Materials Required:
- Pooled human serum
- High Select Top14 Abundant Protein Depletion Resin mini columns (Thermo Fisher Scientific)
- ENRICH-iST Kits (PreOmics)
- Seer Proteograph XT kits
- Ammonium bicarbonate (ABC), DL-dithiothreitol (DTT), iodoacetamide (IAA)
- Formic acid (FA), trichloroacetic acid (TCA)
- Acetonitrile (ACN), isopropanol (IPA)
- Sequencing grade-modified trypsin
Procedure:
- Sample Pre-treatment: Aliquot pooled human serum and subject to centrifugation at 10,000 × g for 10 minutes to remove particulate matter.
- Protein Depletion (Top14 Method):
- Equilibrate Top14 Abundant Protein Depletion Resin mini columns with binding buffer.
- Apply clarified serum to column and collect flow-through containing depleted proteins.
- Wash column with binding buffer and combine flow-through fractions.
- Concentrate depleted proteins using appropriate molecular weight cut-off filters.
- Protein Enrichment (PreOmics ENRICH-iST):
- Add functionalized paramagnetic beads to depleted serum samples.
- Incubate with shaking for 30 minutes at room temperature to allow low-abundance protein binding.
- Wash beads repeatedly with optimized wash buffers to remove non-specifically bound proteins.
- Elute bound proteins using low-pH elution buffer.
- Protein Digestion:
- Reduce proteins with 10 mM DTT for 30 minutes at 56°C.
- Alkylate with 25 mM IAA for 30 minutes in the dark at room temperature.
- Digest with trypsin (1:50 enzyme-to-protein ratio) overnight at 37°C.
- Acidify with formic acid to stop digestion.
- Peptide Clean-up:
- Desalt peptides using C18 solid-phase extraction columns.
- Dry peptides completely using vacuum centrifugation.
- Reconstitute in appropriate LC-MS compatible buffer for analysis.
Validation Protocol for Quantitative Accuracy
Spike-in Linear Range Assessment:
- Prepare control group of human pooled serum without any spiked-in proteins.
- Spike seven proteins with diverse physicochemical properties at four different concentrations (e.g., 4, 2, 1, and 0.5 ng/μL) [87].
- Process spiked samples through each preparation method in technical replicates (n=3-4 per spiked level).
- Analyze using LC-MS/MS with consistent instrumentation and parameters across all methods.
- Perform linear regression analysis for each spiked protein across the different concentrations to assess quantitative accuracy.
Reproducibility Assessment:
- Calculate the median coefficient of variation (CV%) for protein group intensities across technical replicates.
- Determine inter-assay variability by repeating experiments on different days with freshly prepared reagents.
- Assess lot-to-lot consistency using different batches of consumables where applicable.
Workflow Integration with Live-Cell Multiplexed Assays
The integration of optimized serum processing with live-cell multiplexed assays creates a powerful platform for evaluating compounds from chemogenomic libraries under physiologically relevant conditions. The continuous live-cell multiplexed assay classifies cells based on nuclear morphology, which serves as a sensitive indicator for cellular responses such as early apoptosis and necrosis [5]. This basic readout, combined with the detection of other general cell damaging activities of small molecules, provides comprehensive time-dependent characterization of compound effects on cellular health in a single experiment.
Table 2: Research Reagent Solutions for Integrated Serum and Live-Cell Analysis
| Reagent Category | Specific Products | Function | Application Notes |
|---|---|---|---|
| Serum Preparation Kits | PreOmics ENRICH-iST, Seer Proteograph XT | Low-abundance protein enrichment | Superior quantitative accuracy for biomarker discovery |
| Cell Viability Dyes | AlamarBlue HS reagent | Metabolic activity assessment | Non-toxic for long-term live-cell imaging |
| Nuclear Stains | Hoechst 33342 (50 nM) | Nuclear morphology assessment | Minimal toxicity at optimized concentration |
| Mitochondrial Stains | Mitotracker Red, Mitotracker Deep Red | Mitochondrial health assessment | Compatible with live-cell extended imaging |
| Cytoskeletal Dyes | BioTracker 488 Green Microtubule Cytoskeleton Dye | Microtubule structure visualization | Taxol-derived, specific binding |
| Cell Lines | HEK293T, U2OS, MRC9 fibroblasts | Model systems for validation | Diverse cellular contexts for assay robustness |
Workflow for Integrated Serum and Live-Cell Analysis
Quality Control and Validation Strategies
Rigorous quality control measures are essential throughout the integrated workflow to ensure both accuracy and reproducibility. For serum processing, documentation of validation data and performance metrics should include spike-in recovery rates, with excellent systems achieving recovery rates within ±10% when challenged with serum spiked with known analyte concentrations [88]. Additional parameters include clear guidance on sample preparation and dilution ranges, stability data confirming assay performance across storage durations, and compatibility with commonly used detection platforms [89].
In the live-cell assay component, several optimization steps are critical:
- Dye Concentration Optimization: Determine minimal concentrations that provide robust detection without cellular toxicity (e.g., 50 nM for Hoechst 33342) [5].
- Viability Assessment: Confirm that dye combinations do not significantly impair cell viability over the experimental time course (e.g., 72 hours).
- Kinetic Profiling: Capture time-dependent cytotoxic effects using continuous assay formats to distinguish between primary and secondary target effects.
- Interference Mitigation: Implement additional gating protocols to detect fluorescent compounds or precipitations that may interfere with readouts.
For the chemogenomic library context, comprehensive characterization of each compound's effects on general cell functions enables better distinction between target-specific and non-specific effects, improving the quality of library annotations [5].
Implementation in Drug Discovery Workflows
The integration of robust serum processing methods with live-cell multiplexed assays creates a powerful platform for phenotypic screening in drug discovery. This approach is particularly valuable for:
- Clinical Biomarker Validation: Confirming candidate biomarkers identified in serum samples using physiologically relevant cellular models.
- Mechanistic Studies: Elucidating compound mechanisms of action by correlating serum protein changes with specific phenotypic responses in live cells.
- Toxicity Profiling: Assessing compound effects on cellular health parameters using the continuous live-cell assay format.
- Target Deconvolution: Utilizing chemogenomic libraries with well-annotated compounds to identify molecular targets responsible for observed phenotypic effects.
The superior biological relevance of live cell painting compared to traditional fixed-cell methods provides additional kinetic data and a simpler workflow, offering drug discovery groups a scalable approach for phenotypic profiling in live cells [90]. This is especially valuable when working with complex matrices like serum, where maintaining physiological relevance is crucial for translational research.
Method Performance and Application Relationships
Accuracy and reproducibility in complex matrices like serum are achievable through the implementation of optimized sample preparation methods, rigorous validation protocols, and integrated workflows that connect serum analysis with physiologically relevant cellular models. Methods specifically designed for challenging matrices, such as PreOmics ENRICH-iST and Seer Proteograph XT, demonstrate that superior quantitative accuracy can be maintained without sacrificing reproducibility, even for low-abundance proteins [87]. When combined with live-cell multiplexed assays for chemogenomic library research, these approaches create a powerful platform for biomarker discovery, compound screening, and mechanistic studies that maintain biological relevance while ensuring data integrity. As scientific standards continue to emphasize reproducibility as a benchmark for research credibility [89], the adoption of these integrated methodologies will be essential for advancing translational research and drug discovery programs.
Essential Assay Controls for Data Normalization and Interpretation
In the context of live-cell multiplexed assays for chemogenomic libraries research, functional annotation of identified hits is a central challenge. While chemogenomic compounds (CGCs) offer improved target specificity, the potential for non-specific effects caused by compound toxicity or interference with basic cellular functions remains a significant concern [5]. Accurate data interpretation, therefore, depends on robust assay controls that enable researchers to distinguish between specific on-target effects and generic cell-damaging activities. Normalization of functional biological data is a key component in the workflow for performing and/or subsequent analysis of raw data to ensure accurate and consistent interpretation of results [91]. This application note details the essential controls and methodologies for normalizing data within a live-cell multiplexed assay framework, providing a standardized approach for comparing datasets and improving assay reproducibility.
Core Concepts: Normalization and Controls
Data normalization is required whenever making statistical comparisons between different samples, such as various cell types, genetic modifications, or compound treatments. The data must be normalized to a common shared parameter for a correct comparison [91]. In cellular assays, this can be applied on several levels, including cell number, genomic DNA, and total cellular protein.
Incorporating well-characterized reference compounds with known mechanisms of action as controls is crucial for annotating the biological quality of CGCs. These controls help delineate generic effects on cell functions from target-specific phenotypes [5].
Essential Control Compounds and Their Profiles
A panel of reference compounds should be used to train the assay and provide a benchmark for classifying the effects of uncharacterized CGCs. The following table summarizes a recommended set of control compounds.
Table 1: Essential Control Compounds for Assay Annotation and Normalization
| Control Compound | Primary Mechanism of Action (MoA) | Expected Phenotypic Profile in Live-Cell Assay | Utility in Data Interpretation |
|---|---|---|---|
| Digitonin [5] | Cell membrane permeabilization [5] | Rapid induction of cytotoxicity; necrotic phenotype. | Positive control for acute, non-specific cell death. |
| Staurosporine [5] | Multikinase inhibitor [5] | Rapid induction of apoptosis. | Positive control for apoptotic cell death kinetics. |
| Camptothecin [5] | Topoisomerase inhibitor [5] | Induces apoptotic cell death over time [5]. | Reference for DNA damage-induced apoptosis. |
| Paclitaxel [5] | Tubulin-disassembly inhibitor [5] | Cytotoxic response with intermediate kinetics; disrupts microtubule cytoskeleton. | Control for mitotic arrest and cytoskeletal perturbations. |
| Berzosertib [5] | ATM/ATR inhibitor [5] | Rapid cytotoxic response. | Control for DNA damage checkpoint inhibition. |
| JQ1 [5] | BET bromodomain inhibitor [5] | Slower and less pronounced cytotoxic effects. | Example of a targeted epigenetic inhibitor with delayed phenotype. |
| Torin [5] | mTOR inhibitor [5] | Cytotoxic response with intermediate kinetics. | Control for pathway-specific inhibition. |
| DMSO (Vehicle) | Solvent control | Baseline cellular morphology and health. | Essential for normalizing treated well data to an untreated baseline. |
Experimental Protocol: HighVia Extend Live-Cell Multiplexed Assay
This protocol describes a modular live-cell high-content viability assay, expanded to assess effects on cell cycle, tubulin, mitochondrial health, and membrane integrity over time [5].
Materials and Reagent Solutions
Research Reagent Solutions
- Cell Lines: HeLa, U2OS, HEK293T, MRC9 fibroblasts (validate in your system of choice) [5].
- Live-Cell Fluorescent Dyes:
- Hoechst 33342 (50 nM): DNA stain for nuclear segmentation and cell cycle analysis [5].
- BioTracker 488 Green Microtubule Cytoskeleton Dye: Taxol-derived dye for labeling tubulin and assessing cytoskeletal morphology [5].
- MitotrackerRed / MitotrackerDeepRed: For measuring mitochondrial mass and health [5].
- Viability Dye (e.g., proprietary dye from HighVia protocol): For detecting loss of membrane integrity (necrosis) [5].
- Control Compounds: Prepare stocks as per Table 1. Include DMSO as a vehicle control.
- Equipment: High-content imaging system with environmental control for live-cell imaging, 96- or 384-well microplates.
Staining and Imaging Workflow
Step-by-Step Procedure
- Cell Seeding: Seed cells at an optimized density in microplates and culture for 24 hours to ensure proper attachment and uniformity. Using an integrated system that automates the acquisition of brightfield images after seeding provides visual feedback and quality control of cell seeding conditions, which improves live-cell assay reproducibility [91].
- Compound Treatment: Treat cells with CGCs and the panel of control compounds from Table 1. Include DMSO vehicle controls and untreated controls on every plate.
- Dye Staining: Prepare a staining solution containing the optimized, low-concentration live-cell dyes (Hoechst 33342 at 50 nM, BioTracker 488, MitotrackerRed/DeepRed, viability dye). Add the solution to the wells.
- Live-Cell Imaging: Incubate the plate for 30-60 minutes and then place it in the high-content imager with environmental control (37°C, 5% CO₂). Acquire images from multiple channels at the first time point (e.g., 4-6 hours post-treatment).
- Kinetic Imaging: Repeat the imaging process at defined intervals (e.g., 24, 48, and 72 hours) to capture time-dependent cytotoxic effects [5].
Data Analysis, Normalization, and Interpretation
Image Analysis and Cell Classification
- Cell Segmentation: Use the nuclear stain (Hoechst) to identify individual cells. The cytoskeletal and cytoplasmic signals can be used for cytoplasm segmentation.
- Feature Extraction: Extract morphological features from each channel (nuclear size and shape, texture; cytoskeletal structure; mitochondrial mass and morphology).
- Cell Population Gating: Use a supervised machine-learning algorithm to gate cells into distinct populations based on the extracted features [5]. The recommended classifications are:
- Healthy
- Early Apoptotic (characterized by nuclear pyknosis)
- Late Apoptotic (characterized by nuclear fragmentation)
- Necrotic (positive for viability dye)
- Lysed
Data Normalization Workflow
The following diagram outlines the critical steps for transforming raw image data into normalized, interpretable results.
Normalization Calculations
The most robust normalization for cellular assays uses cell number. The integrated system is optimized to automate and simplify the acquisition of brightfield images, and specialized software then calculates the cell number in each microplate well [91].
Cell Number Normalization:
- For each well, normalize the count of cells in a specific phenotypic class (e.g., "Healthy") to the total cell count in that well at the first time point, or to the cell count from a brightfield image acquired pre-treatment.
- To enable plate-to-plate and experiment-to-experiment comparisons, further normalize the data from treated wells to the average of the DMSO vehicle control wells.
- Formula:
Normalized Healthy Cells (%) = (Healthy Cell Count_Treated / Total Cell Count_Treated) / (Average Healthy Cell Count_DMSO / Average Total Cell Count_DMSO) * 100
Handling Fluorescent Interference: Compounds with intrinsic fluorescence or that form precipitates can interfere with analysis. To mitigate this, include an additional gating step to classify all fluorescent objects as "nuclei" or "high-intensity objects," which can detect fluorescent compounds and precipitates [5]. Wells with excessive interference should be flagged and excluded from analysis.
Concluding Remarks
The implementation of the essential assay controls and normalization protocols described herein is critical for the accurate functional annotation of chemogenomic libraries. The use of a standardized reference compound panel, combined with a multiplexed live-cell assay and rigorous data normalization to cell number, provides a comprehensive assessment of a compound's effects on cellular health. This approach allows researchers to filter out compounds with undesirable non-specific toxicity, thereby de-risking subsequent phenotypic and mechanistic studies and accelerating the drug discovery process.
Conclusion
Live-cell multiplexed assays represent a paradigm shift in the functional annotation of chemogenomic libraries, moving beyond simple viability metrics to a multi-parametric, kinetic understanding of drug action. By integrating foundational knowledge, robust methodological pipelines, careful troubleshooting, and rigorous validation, researchers can effectively deconvolute specific on-target effects from general cell health perturbations, thereby reducing false positives in antagonist screens and illuminating complex mechanisms like feedback-driven drug resistance. The future of this field lies in the wider adoption of scalable, high-content methods like Dye Drop and live-cell barcoding, coupled with advanced machine learning, to build comprehensive, reproducible datasets. This will accelerate the development of more effective, personalized therapies by providing a deeper, single-cell resolution view of pharmacological responses in clinically relevant models.
References
- 1. Development of a chemogenomics library for phenotypic ... [https://pmc.ncbi.nlm.nih.gov/articles/PMC8611952/]
- 2. How polypharmacologic is each chemogenomics library? [https://pmc.ncbi.nlm.nih.gov/articles/PMC7052528/]
- 3. Applications of chemogenomic library screening in drug ... [https://www.semanticscholar.org/paper/Applications-of-chemogenomic-library-screening-in-Jones-Bunnage/f59a4a07b8ffd964953ba7cef762b614ac1c7526]
- 4. Chemogenomic library design strategies for precision ... [https://pmc.ncbi.nlm.nih.gov/articles/PMC10359939/]
- 5. Image-Based Annotation of Chemogenomic Libraries for ... [https://pmc.ncbi.nlm.nih.gov/articles/PMC8878468/]
- 6. The Deconvolution Revolution: Strategies for Target ... [https://momentum.bio/content/the-deconvolution-revolution-strategies-for-target-identification/]
- 7. High-content live-cell multiplex screen for chemogenomic ... [https://www.sciencedirect.com/science/article/pii/S2666166722006712]
- 8. Multiplexed RNA imaging and in situ profiling in living cells [https://pubs.rsc.org/en/content/articlehtml/2025/sc/d5sc06220a]
- 9. Live Cell Imaging & Analysis [https://www.sartorius.com/en/products/live-cell-imaging-analysis]
- 10. Designing a multicolor flow cytometry protocol [https://www.abcam.com/en-us/technical-resources/guides/flow-cytometry-guide/designing-a-multicolor-protocol]
- 11. Fast segmentation and multiplexing imaging of organelles ... [https://www.nature.com/articles/s41467-025-57877-5]
- 12. Cell Viability Assays - Assay Guidance Manual - NCBI Bookshelf [https://www.ncbi.nlm.nih.gov/books/NBK144065/]
- 13. Quantification of cellular viability by automated microscopy ... [https://pmc.ncbi.nlm.nih.gov/articles/PMC4496231/]
- 14. Protocol for Apoptosis Assay by Flow Cytometry Using ... [https://pmc.ncbi.nlm.nih.gov/articles/PMC4943750/]
- 15. Flow Cytometry Cell Cycle Analysis [https://denovosoftware.com/cell-cycle/]
- 16. Cell Viability Assays for Flow Cytometry [https://www.thermofisher.com/us/en/home/life-science/cell-analysis/flow-cytometry/flow-cytometry-assays-reagents/cell-viability-assays-flow-cytometry.html]
- 17. Development of a chemogenomics library for phenotypic ... [https://jcheminf.biomedcentral.com/articles/10.1186/s13321-021-00569-1]
- 18. Image-Based Annotation of Chemogenomic Libraries for ... [https://pubmed.ncbi.nlm.nih.gov/35209227/]
- 19. Multiplexing Cell Based Assays Get More Biologically ... [https://www.promega.com/resources/pubhub/multiplexing-cell-based-assays-get-more-biologically-relevant-data/]
- 20. Multiplexed Tissue Staining with Signal Amplification [https://www.thermofisher.com/us/en/home/references/protocols/cell-and-tissue-analysis/protocols/multiplexed-tyramide-tissue-staining.html]
- 21. A machine learning and live-cell imaging tool kit uncovers ... [https://www.sciencedirect.com/science/article/pii/S2451945623003227]
- 22. Figures and Charts - UNC Writing Center [https://writingcenter.unc.edu/tips-and-tools/figures-and-charts/]
- 23. Tables and Figures - Engineering | USU - Utah State University [https://engineering.usu.edu/students/ewc/writing-resources/tables-figures]
- 24. Presenting Research Data Effectively Through Tables and ... [https://paperpal.com/blog/researcher/presenting-research-data-effectively-through-tables-and-figures]
- 25. Utilizing tables, figures, charts and graphs to enhance the ... [https://pmc.ncbi.nlm.nih.gov/articles/PMC10394528/]
- 26. Text has enhanced contrast - ACT rules [https://act-rules.github.io/rules/09o5cg/]
- 27. A multiplex single-cell RNA- Seq ... | Nature Chemical Biology [https://www.nature.com/articles/s41589-024-01761-8?error=cookies_not_supported&code=701efbf8-0ad3-4bd1-855a-4e739f101c02]
- 28. Multiplexing Methods for Simultaneous Large‐Scale Transcriptomic... [https://pmc.ncbi.nlm.nih.gov/articles/PMC8425911/]
- 29. Navigating single-cell RNA-sequencing: protocols, tools ... [https://pmc.ncbi.nlm.nih.gov/articles/PMC12085826/]
- 30. Multiplexed and reproducible high content screening of live ... [https://www.nature.com/articles/s41467-022-34536-7]
- 31. Advances in high-throughput drug screening based on ... [https://www.sciencedirect.com/science/article/pii/S2090123225006897]
- 32. A multiplex single-cell RNA-Seq pharmacotranscriptomics ... [https://www.nature.com/articles/s41589-024-01761-8]
- 33. DRUG-seq for miniaturized high-throughput transcriptome ... [https://www.nature.com/articles/s41467-018-06500-x]
- 34. Cellular barcoding tracks heterogeneous clones through ... [https://pmc.ncbi.nlm.nih.gov/articles/PMC10339273/]
- 35. ZipSeq : Barcoding for Real-time Mapping of Single Cell ... [https://pmc.ncbi.nlm.nih.gov/articles/PMC7891292/]
- 36. Multiplexed Live-Cell Imaging for Drug Responses in ... [https://pmc.ncbi.nlm.nih.gov/articles/PMC11256050/]
- 37. Live-Cell Imaging | Thermo Fisher Scientific - US [https://www.thermofisher.com/us/en/home/life-science/cell-analysis/cellular-imaging/fluorescence-microscopy-and-immunofluorescence-if/microscopy-reagents-and-media/live-cell-imaging-reagents.html]
- 38. Different Ways to Add Fluorescent Labels [https://www.thermofisher.com/us/en/home/life-science/cell-analysis/cell-analysis-learning-center/molecular-probes-school-of-fluorescence/imaging-basics/labeling-your-samples/different-ways-to-add-fluorescent-labels.html]
- 39. SPACEc: a streamlined, interactive Python workflow for ... [https://www.nature.com/articles/s41467-025-65658-3]
- 40. Phenoplex - Multiplex software for multiplex users in spatial ... [https://visiopharm.com/research-pathology-image-analysis-software/phenoplex-for-multiplexed-spatial-biology-images/]
- 41. Considerations for Multiplex Live Cell Imaging [https://www.leica-microsystems.com/science-lab/life-science/considerations-for-multiplex-live-cell-imaging/]
- 42. Live Cell Multiplex (LCM) Assay [https://indigobiosciences.com/product/live-cell-multiplex-assay/]
- 43. Multiplexed and reproducible high content screening of live ... [https://pmc.ncbi.nlm.nih.gov/articles/PMC9663587/]
- 44. Machine learning and image-based profiling in drug ... [https://www.sciencedirect.com/science/article/pii/S2452310018300027]
- 45. Machine learning in chemoinformatics and drug discovery [https://pmc.ncbi.nlm.nih.gov/articles/PMC6078794/]
- 46. Unveiling drug resistance pathways in high-grade serous ... [https://pubmed.ncbi.nlm.nih.gov/40370464/]
- 47. Unveiling drug resistance pathways in high-grade serous ... [https://www.frontiersin.org/journals/immunology/articles/10.3389/fimmu.2025.1556377/full]
- 48. How to choose chromogen colors for multiplex [https://www.leicabiosystems.com/us/articles/ls-articles/tips-tricks-to-multiplexing-how-to-choose-chromogen-colors-for-multiplex-and/]
- 49. Fluorescence Lifetime-Based Separation of FAST-Labeled ... [https://pubmed.ncbi.nlm.nih.gov/41080448/]
- 50. Multispectral live-cell imaging with uncompromised ... [https://www.nature.com/articles/s41566-025-01745-7]
- 51. Guidelines for 6-color multiplex assay design for optimized ... [https://www.stillatechnologies.com/digital-pcr/naica-system-analysis/guidelines-for-6-color-multiplex-assay-design-for-optimized-performance-with-crystal-digital-pcr/]
- 52. Multivariate chemogenomic screening prioritizes new ... [https://www.nature.com/articles/s42003-023-04435-8]
- 53. Screening in serum-derived medium reveals differential ... [https://pmc.ncbi.nlm.nih.gov/articles/PMC10581593/]
- 54. Passage Number Effects in Cell Lines [https://www.atcc.org/resources/technical-documents/passage-number-effects-in-cell-lines]
- 55. Rational cell culture optimization enhances experimental ... [https://www.nature.com/articles/s41598-018-21050-4]
- 56. Cell line passage numbers explained [https://www.culturecollections.org.uk/training-and-support/cell-line-passage-numbers-explained/]
- 57. Live Cell Imaging | Experiment Requirements [https://ibidi.com/content/338-the-live-cell-imaging-experiment]
- 58. Phenotypic Screening of Chemical Libraries Enriched by ... [https://pmc.ncbi.nlm.nih.gov/articles/PMC7919753/]
- 59. The Complete Guide to Cell-Based Assays [https://www.sptlabtech.com/the-complete-guide-to-cell-based-assays]
- 60. A global problem. The trouble with culturing cells in 96-well ... [https://www.sciencedirect.com/science/article/pii/S2405580821000819]
- 61. Proteomics for Low Cell Numbers: How to Optimize ... [https://pmc.ncbi.nlm.nih.gov/articles/PMC8419858/]
- 62. Optimization Techniques: General Guidelines [https://www.worthington-biochem.com/tools-resources/tissue-dissociation-guide/optimization-techniques-general-guidelines]
- 63. Scientific Data Presentation: a Picture Is Worth a Thousand ... [https://www.aje.com/arc/scientific-data-presentation-picture-worth-thousand-words]
- 64. Graphical Summaries | Introduction to Data Science [https://dept.stat.lsa.umich.edu/~kshedden/introds/topics/graphical_summaries/]
- 65. Overview | Deep Dye Drop Microsite - GitHub Pages [https://labsyspharm.github.io/dye-drop-microsite/overview/]
- 66. FlopR: An Open Source Software Package for Calibration ... [https://pmc.ncbi.nlm.nih.gov/articles/PMC7506944/]
- 67. PLATERO: A calibration protocol for plate reader green ... [https://www.frontiersin.org/journals/bioengineering-and-biotechnology/articles/10.3389/fbioe.2023.1104445/full]
- 68. Quantitative and multiplexed chemical-genetic ... [https://www.nature.com/articles/s41467-020-19553-8]
- 69. Multisite Comparison of High-Sensitivity Multiplex Cytokine ... [https://pmc.ncbi.nlm.nih.gov/articles/PMC3147360/]
- 70. High-content live-cell multiplex screen for chemogenomic ... [https://pubmed.ncbi.nlm.nih.gov/36317177/]
- 71. Live-cell imaging and analysis reveal cell phenotypic ... [https://pmc.ncbi.nlm.nih.gov/articles/PMC7473671/]
- 72. A Comparison of Real-Time and Endpoint Cell Viability ... [https://www.sciencedirect.com/science/article/pii/S247255522207294X]
- 73. Live-cell imaging [https://www.axionbiosystems.com/live-cell-imaging]
- 74. Explore beyond the Confines of Endpoint Assays with Live ... [https://www.labmanager.com/explore-beyond-the-confines-of-endpoint-assays-with-live-cell-imaging-and-analysis-22429]
- 75. Live Cell in Vitro and in Vivo Imaging Applications [https://pmc.ncbi.nlm.nih.gov/articles/PMC3864231/]
- 76. Automation, live-cell imaging, and endpoint cell viability for ... [https://journals.plos.org/plosone/article?id=10.1371/journal.pone.0287126]
- 77. High-content live-cell multiplex screen for chemogenomic ... [https://pmc.ncbi.nlm.nih.gov/articles/PMC9617200/]
- 78. Assessment and Comparison of Viability Assays for ... [https://pmc.ncbi.nlm.nih.gov/articles/PMC10872314/]
- 79. cell count detection Viable | BMG LABTECH assays [https://www.bmglabtech.com/en/application-notes/viability-assays-a-comparison-of-luminescence-fluorescence-and-absorbance-based-assays-to-determine-viable-cell-counts/]
- 80. Absorbance vs. Luminescence : Differences & Choosing the... Assays [https://byonoy.com/journal/resources-absorbance-vs-luminescence-assays/]
- 81. Comparing automated cell imaging with conventional ... [https://pmc.ncbi.nlm.nih.gov/articles/PMC11441402/]
- 82. From pixels to phenotypes: Integrating image-based ... [https://pmc.ncbi.nlm.nih.gov/articles/PMC10916876/]
- 83. Luciferase Reporters | Thermo Fisher Scientific - US [https://www.thermofisher.com/us/en/home/life-science/protein-biology/protein-biology-learning-center/protein-biology-resource-library/pierce-protein-methods/luciferase-reporters.html]
- 84. Applications of chemogenomic library screening in drug ... [https://www.nature.com/articles/nrd.2016.244]
- 85. Growth rate inhibition metrics correct for confounders in ... [https://pmc.ncbi.nlm.nih.gov/articles/PMC4887336/]
- 86. A normalized drug response metric improves accuracy and ... [https://www.nature.com/articles/s42003-020-0765-z]
- 87. Impact of Sample Preparation Strategies on the ... [https://pmc.ncbi.nlm.nih.gov/articles/PMC12418494/]
- 88. Conformational change-based electrochemical biosensor ... [https://pubs.rsc.org/en/content/articlelanding/2025/ra/d5ra06247k]
- 89. Why Polyclonal-Based ELISA Kits Offer Superior ... [https://perkvalleynow.com/news/2025/nov/26/why-polyclonal-based-elisa-kits-offer-superior-reproducibility-for-complex-sample-analysis/]
- 90. SBI2 poster 2025 - Key Considerations for Live Cell ... [https://www.saguarobio.com/blogs/resources/sbi2-poster-2025-key-considerations-for-live-cell-painting-screens-a-reference-guide]
- 91. How Normalizing Biological Data Works [https://www.labmanager.com/how-normalizing-biological-data-works-1969]