Cell Painting and Chemogenomic Libraries: A Comprehensive Guide to Phenotypic Drug Discovery
This article provides a comprehensive overview of Cell Painting assay applications in chemogenomic library screening for drug discovery professionals and researchers.
Cell Painting and Chemogenomic Libraries: A Comprehensive Guide to Phenotypic Drug Discovery
Abstract
This article provides a comprehensive overview of Cell Painting assay applications in chemogenomic library screening for drug discovery professionals and researchers. It covers foundational principles of image-based phenotypic profiling, detailed methodological protocols for screening chemogenomic libraries, advanced troubleshooting and optimization strategies including recent innovations like Cell Painting PLUS, and validation approaches through multi-omics integration. The content synthesizes current best practices and emerging trends to enable more effective implementation of phenotypic screening strategies that bridge the gap between target-agnostic discovery and mechanistic understanding.
Understanding Cell Painting and Chemogenomic Libraries: Foundations of Modern Phenotypic Screening
Phenotypic drug discovery (PDD), which identifies compounds based on their ability to alter disease phenotypes in living systems, has experienced a notable resurgence in therapeutic development [1] [2]. This approach has evolved from screening few compounds in animals to testing millions in cellular models, proving particularly valuable when understanding the exact molecular target of a compound is not a prerequisite for discovering effective and safe therapeutics [1]. Notably, epidemiological analyses reveal that approximately 7–18% of FDA-approved drugs lack a defined molecular target, with several anti-cancer drugs functioning through unexpected off-target effects [1].
High Content Screening (HCS) technologies represent a powerful phenotypic screening strategy that uses microscopy as a readout, enabling multiple parameters to be measured at single-cell level simultaneously [1] [2]. These technologies capture cellular complexity and heterogeneity in response to various perturbations—such as genetic modifications, environmental stressors, or small molecule treatments—with cellular morphology serving as a central readout intricately linked to cell physiology, health, and function [1]. A pivotal advancement came in 2004 when Perlman et al. demonstrated that microscopy images could be used in a relatively unbiased manner to group drug treatments based on similar impacts on cell morphology, launching the field of image-based profiling [1] [2].
Cell Painting has emerged as the most popular image-based profiling assay, first described in 2013 and later named in a 2016 protocol [1] [3]. This multiplexed staining approach generates a holistic "painting" of the cell that reflects its phenotypic state and responses to perturbations [1]. Unlike conventional targeted assays that measure specific expected phenotypic responses, Cell Painting enables untargeted generation of broad phenotypic profiles at single-cell resolution, supporting identification of compounds or genetic perturbations with similar mechanisms of action (MoA) [4].
Principles and Significance of Cell Painting
Core Conceptual Framework
Cell Painting operates on the fundamental principle that changes in cellular morphology and internal organization indicate functional perturbations [4]. The assay leverages morphological profiling, which involves quantifying hundreds to thousands of features from each experimental sample in a relatively unbiased way [3]. Significant changes in subsets of profiled features serve as a "fingerprint" characterizing sample conditions, allowing comparisons among perturbations without intensive customization typically required for problem-specific assay development [3].
This approach differs fundamentally from conventional screening assays, which typically quantify a small number of features selected for known association with specific biology of interest [3]. Morphological profiling casts a wider net, offering discovery potential unconstrained by existing knowledge while potentially improving efficiency since a single experiment can be mined for multiple biological processes or diseases [3].
Key Applications in Drug Discovery and Biological Research
Cell Painting profiles have demonstrated utility across diverse applications:
- Mechanism of Action (MoA) Elucidation: Clustering small molecules by phenotypic similarity helps identify mechanisms of action or targets of unannotated compounds based on similarity to well-annotated references [3] [5].
- Functional Gene Analysis: Matching unannotated genes to known genes based on similar phenotypic profiles reveals biological functions of genetic perturbations [3].
- Disease Signature Reversion: Identifying phenotypic signatures associated with disease enables screening for compounds that revert signatures back to "wild-type" states [3].
- Library Enrichment: Selecting efficient screening sets that maximize phenotypic diversity while eliminating compounds without measurable effects [3].
- Toxicology Prediction: Generating bioactivity profiles for industrial chemicals and pharmaceuticals to predict potential toxicity [1] [4].
Table 1: Key Applications of Cell Painting in Research and Drug Discovery
| Application Area | Specific Use Cases | Significance |
|---|---|---|
| Compound Characterization | MoA determination, target identification, polypharmacology detection | Reduces late-stage attrition by early detection of undesirable off-target effects |
| Functional Genomics | Gene function annotation, pathway analysis, variant impact assessment | Links genetic perturbations to phenotypic outcomes in systematic manner |
| Drug Repurposing | Disease signature reversion, identification of new therapeutic indications | Accelerates therapeutic development by finding new uses for existing compounds |
| Chemical Safety Assessment | Bioactivity profiling, toxicity prediction, hazard assessment | Provides mechanistically informative data for regulatory decision-making |
| Library Design | Phenotypic diversity optimization, screening set enrichment | Improves screening efficiency and cost-effectiveness |
Evolution of Cell Painting Protocol
Standard Cell Painting Protocol
The original Cell Painting assay employs six fluorescent stains imaged across five channels to visualize eight cellular components [1] [3]. The standard staining panel includes:
- Hoechst 33342: Labels nuclear DNA (imaged in Channel 1)
- Concanavalin A, Alexa Fluor 488 conjugate: Labels endoplasmic reticulum (imaged in Channel 2)
- SYTO 14: Labels nucleoli and cytoplasmic RNA (imaged in Channel 2 with ER stain)
- Phalloidin, Alexa Fluor 568 conjugate: Labels F-actin cytoskeleton (imaged in Channel 3)
- Wheat Germ Agglutinin, Alexa Fluor 555 conjugate: Labels Golgi apparatus and plasma membrane (imaged in Channel 3 with actin stain)
- MitoTracker Deep Red: Labels mitochondria (imaged in Channel 4) [1] [3] [6]
This combination was deliberately selected to be inexpensive and straightforward to implement using conventional sample preparation and imaging equipment, relying solely on dyes rather than more costly antibodies [1] [3].
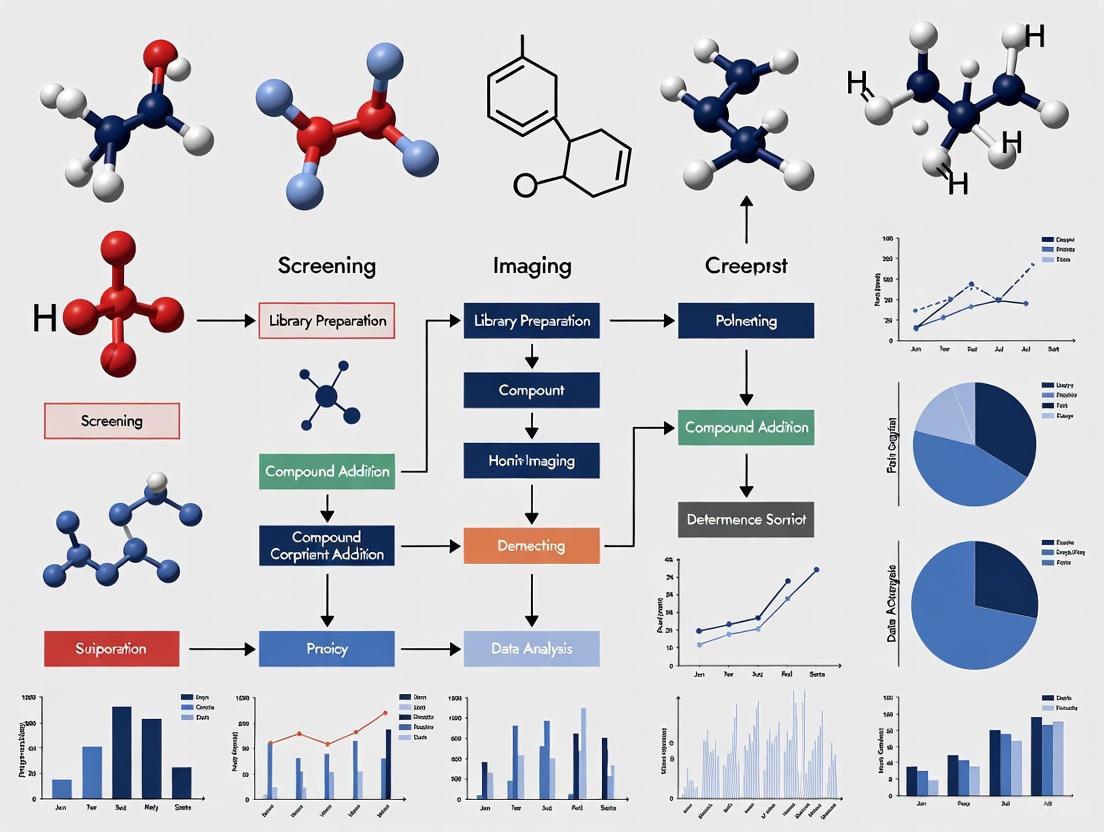
Figure 1: Standard Cell Painting workflow. Cells are plated, perturbed, stained with multiplexed dyes, imaged automatically, and analyzed to extract morphological profiles.
Protocol Versions and Optimization
The Cell Painting protocol has evolved through several optimized versions:
- Original Protocol (2013): First described by Gustafsdottir et al. establishing the core staining approach [1] [2]
- V2 (2016): Published by Bray et al. establishing the "Cell Painting" moniker with minor adjustments to stain concentrations [1]
- V3 (2022): Developed by the JUMP-CP Consortium using quantitative optimization with a positive control plate of 90 compounds covering 47 diverse MoAs, including reduced reagent costs and enhanced signal-to-noise ratios [1]
Table 2: Evolution of Cell Painting Protocol Versions
| Protocol Version | Year | Key Improvements | Staining Changes |
|---|---|---|---|
| Original | 2013 | Initial description of multiplexed staining approach | Six dyes in five channels capturing eight organelles |
| V2 | 2016 | Established name "Cell Painting"; minor adjustments | Optimized dye concentrations for cost and performance |
| V3 | 2022 | Quantitative optimization for reproducibility and cost | Reduced phalloidin concentration; increased SYTO 14; eliminated media removal steps |
| Cell Painting PLUS | 2025 | Iterative staining-elution cycles; expanded multiplexing | Added lysosomes; separate imaging of all dyes; nine organelles captured |
Cell Painting PLUS: Expanding Multiplexing Capacity
A recent breakthrough, Cell Painting PLUS (CPP), significantly expands the flexibility, customizability, and multiplexing capacity of the original method [4]. This innovative approach uses iterative staining-elution cycles to multiplex at least seven fluorescent dyes labeling nine different subcellular compartments, including the addition of lysosomes [4].
Key advantages of CPP include:
- Enhanced Organelle Specificity: All dyes captured in separate imaging channels, unlike standard Cell Painting which merges signals in the same channel
- Customization Flexibility: Ability to select and combine various fluorescent dyes tailored to specific research questions
- Improved Phenotypic Profiles: More precise insights into cellular processes due to spectral signal separation [4]
The CPP method employs an optimized elution buffer that efficiently removes staining signals while preserving subcellular morphologies, enabling multiple rounds of staining and imaging on the same samples [4].
Figure 2: Cell Painting PLUS iterative workflow. Multiple staining-elution cycles enable expanded multiplexing beyond original protocol limitations.
The Scientist's Toolkit: Essential Research Reagents and Materials
Successful implementation of Cell Painting requires carefully selected reagents and instrumentation optimized for morphological profiling.
Table 3: Essential Research Reagent Solutions for Cell Painting
| Reagent/Equipment Category | Specific Examples | Function in Assay |
|---|---|---|
| Fluorescent Dyes | Hoechst 33342, MitoTracker Deep Red, SYTO 14, Phalloidin conjugates, Concanavalin A conjugates, Wheat Germ Agglutinin conjugates | Label specific cellular compartments for multiparameter morphological analysis |
| Cell Lines | U2OS (osteosarcoma), A549 (lung carcinoma), MCF-7 (breast cancer) | Provide cellular context for profiling; chosen based on experimental goals and morphological properties |
| Staining Kits | Image-iT Cell Painting Kit | Pre-optimized reagent combinations ensuring reproducibility and ease of use |
| High-Content Imaging Systems | CellInsight CX7 LZR Pro, ImageXpress Confocal HT.ai | Automated microscopy systems capable of high-throughput imaging of multi-well plates |
| Image Analysis Software | CellProfiler, IN Carta, MetaXpress | Extract morphological features from images; identify cells and measure size, shape, texture, intensity |
| Data Analysis Tools | Custom computational workflows, Equivalence Score algorithms | Process high-dimensional morphological data; identify patterns and similarities among perturbations |
Computational Analysis and Data Processing
Feature Extraction and Morphological Profiling
Automated image analysis pipelines identify individual cells and measure approximately 1,500 morphological features per cell, including various measures of size, shape, texture, intensity, and spatial relationships between cellular structures [3] [6]. These measurements form rich phenotypic profiles suitable for detecting subtle phenotypes that might escape visual detection [3] [6].
The computational workflow typically involves:
- Image Processing: Segmentation of cells and cellular compartments
- Feature Extraction: Calculation of morphological measurements
- Data Normalization: Batch effect correction and standardization against controls
- Profile Comparison: Similarity assessment among perturbations [1]
Advanced Analytical Approaches
Recent computational advances have enhanced Cell Painting data analysis:
- Equivalence Scores: Multivariate metrics that highlight relevant deviations from negative controls based on cell image morphology, enabling efficient large-scale comparison of treatment effects [7]
- Deep Learning Approaches: Machine learning methods increasingly surpass classical approaches in extracting biologically useful information from Cell Painting images [1]
- Multi-Modal Integration: Combining morphological profiles with other data types (transcriptomics, proteomics) to enhance biological insights [1] [4]
Large-scale public datasets like the JUMP-Cell Painting Consortium dataset (containing images and profiles for over 135,000 compounds and genetic perturbations) provide resources for method development and benchmarking [4] [5] [7].
Applications in Chemogenomic Library Screening
Cell Painting plays an increasingly important role in chemogenomic library screening, which integrates chemical and genetic perturbation studies to elucidate compound mechanisms and gene function.
Benchmark Datasets and Consortium Efforts
The JUMP Cell Painting Consortium created a benchmark dataset (CPJUMP1) featuring approximately 3 million images of cells treated with matched chemical and genetic perturbations [5]. This carefully designed resource includes:
- 160 genes and 303 compounds with known relationships
- Multiple perturbation modalities: CRISPR knockout, ORF overexpression, and compound treatment
- Multiple experimental conditions: Two cell types (U2OS and A549) at two time points [5]
This dataset enables benchmarking of computational methods for identifying similarities between chemical and genetic perturbations, a crucial task for MoA elucidation and functional genomics [5].
Phenotypic Profiling in Toxicity Assessment
Cell Painting has been applied to generate bioactivity profiles for over 1,000 industrial chemicals in human cells, with data incorporated into the U.S. EPA CompTox Chemicals Dashboard [4] [1]. The OASIS Consortium is further benchmarking phenomics, transcriptomics, and proteomics data against in vivo rat and human data to increase confidence in the physiological relevance of cellular responses measured by Cell Painting [4].
Cell Painting has evolved substantially since its introduction in 2013, growing from a specialized staining protocol to a comprehensive platform for image-based phenotypic profiling. Future directions likely include:
- Enhanced Multiplexing: Approaches like Cell Painting PLUS that further expand the number of simultaneously imaged cellular parameters
- Integration with Multi-Omics: Combining morphological profiling with transcriptomic, proteomic, and metabolomic data for more comprehensive cellular characterization
- Advanced Machine Learning: Application of deep learning and representation learning to extract more biologically meaningful information from images
- Standardized Large-Scale Screening: Expansion of public datasets and consortium efforts to increase screening throughput and data accessibility
Cell Painting represents a powerful addition to the drug discovery and functional genomics toolkit, enabling researchers to capture complex phenotypic responses to perturbations in an unbiased, information-rich manner. Its continued evolution promises to further bridge the gap between cellular phenotype and underlying molecular mechanisms, accelerating therapeutic discovery and safety assessment.
Chemogenomic libraries are systematically assembled collections of small molecules designed to interact with a defined set of biological targets, most commonly proteins, within the human proteome. Their primary purpose is to enable the functional exploration of biological systems by providing well-annotated chemical tools that modulate protein activity. In the context of modern phenotypic drug discovery, particularly when integrated with high-content technologies like the Cell Painting assay, these libraries serve as essential resources for bridging the gap between observed cellular phenotypes and their underlying molecular mechanisms of action (MoA) [8] [9].
The resurgence of phenotypic screening has created a critical need for better-annotated chemical libraries. Unlike traditional target-based screening, phenotypic discovery does not rely on prior knowledge of a specific drug target. Instead, it identifies compounds based on their ability to induce a observable change in a disease-relevant cell model. Chemogenomic libraries diminish the subsequent challenge of functional annotation by consisting of compounds with narrow or exclusive target selectivity, thereby facilitating the deconvolution of phenotypic readouts and the identification of the specific targets responsible for the observed cellular effects [9]. The strategic use of multiple compounds targeting the same protein but with diverse chemical scaffolds and additional activities further increases confidence in linking a phenotype to a specific target [9].
Purpose and Strategic Application in Drug Discovery
Core Objectives
The deployment of chemogenomic libraries in drug discovery serves several interconnected strategic purposes:
- Target Identification and Mechanism Deconvolution: A primary application is the identification of proteins modulated by chemicals that are linked to specific morphological perturbations and observable phenotypes in cellular systems. By integrating drug-target-pathway-disease relationships with morphological profiles from assays like Cell Painting, researchers can construct system pharmacology networks to assist in target identification [8].
- Hit Discovery for Understudied Proteins: Initiatives like Target 2035, led by the Structural Genomics Consortium (SGC), aim to develop a pharmacological tool for every human protein by 2035. This open-science movement seeks to transform hit-finding into a computationally enabled, data-driven endeavor, using chemogenomic libraries to generate chemical modulators for historically understudied proteins [10].
- Drug Repurposing and Predictive Toxicology: Chemogenomic screening can reveal new therapeutic uses for existing drugs, either indirectly when a clinical agent modulates a target or pathway hit, or directly when the drug itself is a hit in a phenotypic screen. Furthermore, these libraries can be used to classify the toxic mechanisms of new compounds by comparing their effects against reference databases of known toxicological signatures [11].
Application in Phenotypic Screening
The workflow below illustrates how a chemogenomic library is typically applied in a phenotypic screening campaign, such as one utilizing the Cell Painting assay, to progress from hit finding to target identification.
Composition and Design Principles
The composition of a high-quality chemogenomic library is the result of a meticulous design process aimed at maximizing biological relevance and utility in screening.
Content Selection and Curation
The selection of compounds for a chemogenomic library involves several critical filters to ensure the quality and interpretability of screening results:
- Selectivity and Permeability: Compounds are chosen based on key parameters including selectivity, permeability, and solubility. Predictive algorithms are employed when experimental values are not available [11].
- Avoidance of Promiscuous Compounds: Compounds with promiscuous activity resulting from 'false-positive' pharmacology, such as highly lipophilic molecules that may cause nonspecific aggregation, are typically excluded from the library [11].
- Structural Diversity: A key design principle is the inclusion of different chemical templates with the same annotated on-target pharmacology. This provides greater confidence that a putative target arising from a phenotypic screen represents a real hit, as multiple distinct chemotypes producing the same phenotype strengthens the association [11].
- Scaffold-Based Organization: Molecules within the library can be systematically organized using software like ScaffoldHunter, which decomposes each molecule into representative scaffolds and fragments in a stepwise fashion. This creates a hierarchical relationship from the full molecule down to its core ring structure, facilitating the analysis of structure-activity relationships [8].
Representative Library Composition
The following table summarizes the key characteristics of various chemogenomic libraries and initiatives, illustrating their scale and strategic focus.
Table 1: Representative Chemogenomic Libraries and Initiatives
| Library/Initiative | Reported Size | Key Characteristics & Purpose | Source/Developer |
|---|---|---|---|
| Research-Grade Library | ~5,000 compounds | Represents a large panel of drug targets; designed for phenotypic screening and system pharmacology networks [8]. | Academic Research [8] |
| EUbOPEN Project Library | >1,000 proteins | Aims to provide well-annotated chemogenomic compounds and chemical probes as open-access tools [9]. | EUbOPEN Consortium [9] |
| Target 2035 | Entire human proteome | Global initiative to develop a pharmacological tool for every human protein by 2035 [10] [9]. | Structural Genomics Consortium (SGC) & Collaborators [10] |
| DNA-Encoded Library (DEL) | Billions of compounds | Enables screening of ultra-large chemical spaces by linking each compound to a unique DNA barcode [12]. | Amgen, Industry [12] |
Target Coverage and Limitations
Scope of the Druggable Genome
Despite their utility, it is crucial to understand that even the best chemogenomic libraries interrogate only a fraction of the human genome. A comprehensive analysis reveals that current libraries cover approximately 1,000 to 2,000 distinct protein targets [13]. This aligns with studies of the "druggable genome," which estimate that only a subset of the ~20,000 human protein-coding genes are amenable to modulation by small molecules [13]. This means a significant portion of the proteome remains unexplored by conventional chemogenomic approaches.
Visualization of Target Coverage
The following diagram illustrates the relationship between the human proteome, the druggable genome, and the portion currently covered by chemogenomic libraries, highlighting the significant opportunity for expansion.
This limited coverage presents a inherent constraint. When a phenotypic screen using a standard chemogenomic library yields a hit, the MoA may be elucidated if the compound's target is among the ~1,000-2,000 covered. However, if the phenotype is induced through interaction with a protein outside this covered set, target deconvolution becomes substantially more challenging, often requiring orthogonal genetic or proteomic approaches [13].
Experimental Protocols for Library Annotation and Screening
High-Content Phenotypic Annotation Protocol
To ensure the reliability of chemogenomic library screening data, comprehensive annotation of each compound's effects on general cell functions is essential. The following protocol, adapted from a published high-content imaging study, provides a methodology for multi-parametric cellular health assessment [9].
- Objective: To characterize the time-dependent effects of small molecules on cellular health, delineating specific effects from generic cytotoxicity.
- Cell Lines: Human cell lines such as U2OS (osteosarcoma), HeLa, HEK293T (embryonic kidney), and MRC9 (non-transformed fibroblasts) are suitable.
- Staining Dye Optimization:
- Nuclear Stain: Use Hoechst33342 at a low concentration (e.g., 50 nM) to ensure robust nuclei detection without cytotoxicity.
- Mitochondrial Stain: Use Mitotracker Red (e.g., 50 nM) or Mitotracker Deep Red to monitor mitochondrial mass and health.
- Microtubule Stain: Use a taxol-derived tubulin dye (e.g., BioTracker 488 Green Microtubule Cytoskeleton Dye) to assess cytoskeletal integrity.
- Validation: Confirm that dye combinations at working concentrations do not impair cell viability over the desired experimental timeframe (e.g., 72 hours) using orthogonal viability assays like alamarBlue.
- Continuous Live-Cell Imaging:
- Plate cells in multi-well imaging plates.
- Perturb cells with library compounds and control agents (e.g., Staurosporine for apoptosis, Digitonin for necrosis).
- Incubate plates in a live-cell imaging system maintained at 37°C and 5% CO₂.
- Acquire images automatically at regular intervals (e.g., every 4-6 hours) over a period of 48-72 hours.
- Image Analysis and Machine Learning Classification:
- Use automated image analysis software (e.g., CellProfiler) to identify individual cells and extract morphological features.
- Employ a supervised machine-learning algorithm to gate cells into distinct phenotypic categories based on the multiplexed readouts:
- Healthy
- Early Apoptotic (characterized by pyknotic nuclei)
- Late Apoptotic (characterized by fragmented nuclei)
- Necrotic
- Lysed
- Data Output: Generate time-dependent IC₅₀ values and kinetic profiles for cytotoxic effects, allowing differentiation between rapid, direct cytotoxicants and compounds with slower, more specific mechanisms.
Network Pharmacology Integration Protocol
This protocol outlines the construction of a knowledge graph to integrate heterogeneous data sources, facilitating target and mechanism identification from phenotypic screening hits [8].
- Data Collection:
- Compound and Target Data: Extract bioactivity data (IC₅₀, Ki, EC₅₀) from public databases like ChEMBL.
- Pathway Data: Integrate pathway maps from the Kyoto Encyclopedia of Genes and Genomes (KEGG).
- Gene Ontology and Disease: Incorporate functional annotations from the Gene Ontology (GO) resource and disease classifications from the Human Disease Ontology (DO).
- Morphological Profiles: Incorporate morphological profiling data from public repositories like the Broad Bioimage Benchmark Collection (BBBC022 - Cell Painting dataset).
- Data Integration in a Graph Database:
- Utilize a high-performance NoSQL graph database such as Neo4j.
- Create node types for:
Molecule,Scaffold,Protein,Pathway,Biological Process, andDisease. - Establish relationships between nodes (e.g.,
Molecule-TARGETS->Protein,Protein-PART_OF->Pathway).
- Querying and Analysis:
- Traverse the network to connect a hit compound from a phenotypic screen to its known protein targets, the biological pathways those targets are involved in, and the diseases associated with those pathways.
- Perform enrichment analyses (GO, KEGG, DO) on sets of proteins targeted by compounds that induce a similar morphological profile to identify statistically overrepresented biological processes, pathways, and diseases.
The Scientist's Toolkit: Essential Research Reagents and Materials
The successful execution of chemogenomic library screens relies on a suite of specialized instruments and reagents. The following table details key solutions for setting up a screening platform.
Table 2: Essential Research Reagent Solutions for Screening
| Item | Function/Description | Key Considerations |
|---|---|---|
| Liquid Handling Workstation | Automated sampling, mixing, and dispensing of liquids in microplates. | Scale (workstation vs. integrated robot), volume range, software usability, footprint [11]. |
| Multi-mode Microplate Reader | Detector for HTS; measures fluorescence, luminescence, absorbance, polarization. | Sensitivity, support for 384/1536-well plates, simultaneous dual-emission detection, high Z' factor [11]. |
| High-Content Imager (HCS) | Automated microscope for multiparametric imaging of cell morphology and subcellular structures. | Image quality, acquisition speed, environmental control (for live-cell), analysis software capabilities [11]. |
| Assay-Optimized Microplates | Sample carrier for assays and cell culture. | Black/opaque walls: fluorescence (low background). White walls: luminescence (signal enhancement). Clear bottom: microscopy & colorimetry. Coated surfaces (e.g., PDL): enhance cell adhesion [11]. |
| Validated Live-Cell Dyes | Fluorescent probes for multiplexed live-cell imaging of cellular structures. | Hoechst33342: nuclei. Mitotracker Red/Deep Red: mitochondria. BioTracker 488 Microtubule Dye: cytoskeleton. Must be non-toxic at working concentrations [9]. |
| Chemogenomic Library | Curated collection of biologically annotated small molecules. | Quality of annotation (target, purity, solubility), structural diversity, coverage of relevant target classes [8] [9]. |
Cell Painting is a high-content, image-based assay used for cytological profiling that employs multiplexed fluorescent dyes to label different cellular components [6]. The goal is to "paint" as much of the cell as possible to capture a comprehensive image of the whole cell, enabling detailed morphological analysis [6]. This technique captures the specific biological state of a cell, which is influenced by factors such as metabolism, genetic and epigenetic state, and environmental cues [6].
Chemogenomic libraries represent collections of selective small pharmacological molecules that can modulate protein targets across the human proteome and be involved in phenotype perturbation [14]. These libraries, typically consisting of 5,000 or more small molecules, represent a large and diverse panel of drug targets involved in diverse biological effects and diseases [14]. The synergy between these two technologies arises from Cell Painting's ability to detect subtle phenotypic changes induced by the chemical perturbations in chemogenomic libraries, providing a powerful system for target identification and mechanism deconvolution.
The integration of Cell Painting with chemogenomic library screening represents a shift from traditional reductionist drug discovery (one target—one drug) to a more complex systems pharmacology perspective (one drug—several targets) [14]. This approach is particularly valuable for complex diseases like cancers, neurological disorders, and diabetes, which are often caused by multiple molecular abnormalities rather than a single defect [14].
Cell Painting Methodology and Workflow
Staining Protocol and Cellular Components
The Cell Painting assay uses six fluorescent dyes imaged in five channels to reveal eight broadly relevant cellular components or organelles [3]. The standardized staining protocol involves the following components:
Table: Cell Painting Staining Reagents and Targets
| Cellular Component | Fluorescent Dye | Function in Profiling |
|---|---|---|
| Nucleus | Hoechst 33342 | Reveals nuclear shape, size, and texture [6] |
| Mitochondria | MitoTracker Deep Red | Captures mitochondrial distribution and network [6] |
| Endoplasmic reticulum | Concanavalin A/Alexa Fluor 488 conjugate | Shows ER structure and organization [6] |
| Nucleoli & cytoplasmic RNA | SYT0 14 green fluorescent nucleic acid stain | Identifies RNA distribution and nucleolar organization [3] |
| F-actin cytoskeleton | Phalloidin/Alexa Fluor 568 conjugate | Visualizes actin organization and cell shape [6] |
| Golgi apparatus & plasma membrane | Wheat-germ agglutinin/Alexa Fluor 555 conjugate | Reveals Golgi complex and membrane structure [3] |
This multiplexed approach allows researchers to extract approximately 1,500 morphological features from each stained and imaged cell, including various measures of size, shape, texture, intensity, and spatial relationships between organelles [3] [6]. The richness of this data enables detection of subtle phenotypes that might not be obvious to the naked eye.
Experimental Workflow
The general workflow for Cell Painting assay follows a standardized protocol:
- Cell Plating: Cells are plated in multiwell plates, typically 384-well format for high-throughput screening [6].
- Perturbation Introduction: Cells are treated with chemical or genetic perturbations (e.g., small molecules from chemogenomic libraries, RNAi, CRISPR/Cas9) [6].
- Incubation: Cells are incubated for a suitable period to allow perturbation effects to manifest.
- Staining: Cells are stained with the set of Cell Painting dyes according to established protocols [3].
- Image Acquisition: Cell images are acquired with a high-content imager such as the ImageXpress Confocal HT.ai system [6].
- Image Analysis: Automated image analysis software (e.g., MetaXpress, IN Carta, CellProfiler) identifies individual cells and measures morphological features [3] [6].
- Data Analysis: Measurements are processed using various data analysis tools to create and compare phenotypic profiles, perform clustering analysis, and identify targets [6].
The entire process from cell culture to image acquisition typically takes two weeks, with feature extraction and data analysis requiring an additional 1-2 weeks [3].
Cell Painting Experimental Workflow for Chemogenomic Screening
Key Applications in Drug Discovery and Chemogenomics
Mechanism of Action Identification
Cell Painting enables clustering of small molecules by phenotypic similarity, which is highly effective for identifying mechanisms of action (MOA) of unannotated compounds [3]. The first proof-of-principle study demonstrated that cells treated with various small molecules, stained and imaged using Cell Painting, could be clustered to identify which small molecules yielded similar phenotypic effects [3]. This application allows researchers to identify the mechanism of action or target of an unannotated compound based on similarity to well-annotated compounds.
For chemogenomic libraries, this means that compounds with unknown targets can be matched to specific biological pathways based on their morphological profiles. Furthermore, this approach enables "lead hopping" - finding additional small molecules with the same phenotypic effects but different structures based on phenotypic similarity to compounds in a library with more favorable structural properties [3].
Functional Gene Characterization
Cell Painting can match unannotated genes to known genes based on similar phenotypic profiles derived from genetic perturbations [3]. While early approaches used RNA interference (RNAi), recent methods more commonly use gene overexpression or CRISPR-Cas9 to perturb genes and mine for similarities in the induced phenotypic profiles [3]. This not only helps map unannotated genes to known pathways based on profile similarity but also enables discovery of the functional impact of genetic variants by comparing profiles induced by wild-type and variant versions of the same gene.
Disease Signature Reversion
Cell Painting can identify phenotypic signatures associated with disease and then serve as a screen to revert that signature back to "wild-type" [3]. Researchers at Recursion Pharmaceuticals have implemented this approach by systematically modeling hundreds of rare, monogenic loss-of-function diseases in human cells [3]. Disease models showing strong disease-specific phenotypes in the Cell Painting assay are systematically screened against drug-repurposing libraries to identify compounds that reduce the strength of the disease phenotype, effectively rescuing the disease-specific features [3]. This approach has already identified potential new uses of known drugs for treating cerebral cavernous malformation, a hereditary stroke syndrome [3].
Library Enrichment and Diversity Analysis
Cell Painting profiles can identify enriched screening sets that minimize phenotypic redundancy while maximizing profile diversity [3]. A recent study demonstrated that morphological profiling by Cell Painting was more powerful for this purpose than choosing a screening set based on structural diversity or diversity in high-throughput gene expression profiles [3]. This application helps maximize the likelihood of discovering diverse phenotypic effects while simultaneously eliminating compounds that don't produce measurable effects on the cell type of interest.
Quantitative Profiling and Data Analysis
Morphological Feature Extraction
Cell Painting assays typically extract between 100 to 1,500 morphological features per cell, though most protocols generate approximately 1,500 features [3] [6]. These measurements are extracted using automated image analysis software such as CellProfiler, which identifies individual cells and measures morphological features across different cellular compartments [14].
Table: Categories of Morphological Features in Cell Painting
| Feature Category | Specific Measurements | Biological Significance |
|---|---|---|
| Intensity Features | Mean intensity, standard deviation of intensity | Protein abundance, organelle function [3] |
| Texture Features | Haralick textures, granularity patterns | Subcellular organization, structural integrity [14] |
| Shape Features | Area, perimeter, eccentricity, form factor | Cellular and organelle morphology [3] |
| Size Features | Length, width, diameter | Structural changes in cellular components [14] |
| Spatial Features | Neighbor distances, correlation between channels | Organelle interactions and positioning [3] |
In a typical analysis of the Broad Bioimage Benchmark Collection (BBBC022) dataset, researchers work with 1,779 morphological features measuring intensity, size, area shape, texture, entropy, correlation, granularity, and angle between neighbors [14]. These parameters concern three "cell objects": the cell, the cytoplasm, and the nucleus [14]. After quality control and removal of highly correlated features, approximately 1,500 informative features remain for analysis.
Data Integration and Network Pharmacology
Advanced Cell Painting applications integrate morphological profiling data with chemogenomic libraries through network pharmacology approaches. This involves creating a system pharmacology network that integrates drug-target-pathway-disease relationships alongside morphological profiles [14]. One published approach used Neo4j graph database to integrate:
- Compound and bioactivity data from ChEMBL database (version 22) containing 1,678,393 molecules with bioactivities and 11,224 unique targets [14]
- Pathway information from Kyoto Encyclopedia of Genes and Genomes (KEGG) [14]
- Functional annotations from Gene Ontology (GO) containing more than 44,500 GO terms [14]
- Disease classifications from Human Disease Ontology (DO) with 9,069 disease terms [14]
- Morphological profiling data from 20,000 compounds in the BBBC022 dataset [14]
This integration enables target identification and mechanism deconvolution by connecting morphological perturbations induced by chemogenomic library compounds to specific biological pathways and disease mechanisms.
Data Integration for Mechanism Deconvolution
Research Reagent Solutions
Successful implementation of Cell Painting with chemogenomic libraries requires specific research reagents and tools:
Table: Essential Research Reagents for Cell Painting
| Reagent Category | Specific Products/Tools | Application in Protocol |
|---|---|---|
| Fluorescent Dyes | Hoechst 33342, MitoTracker Deep Red, Concanavalin A/Alexa Fluor 488, SYTO 14, Phalloidin/Alexa Fluor 568, WGA/Alexa Fluor 555 | Multiplexed staining of cellular components [3] [6] |
| Cell Lines | U2OS osteosarcoma cells (or other disease-relevant models) | Cellular substrate for phenotypic profiling [14] |
| Image Analysis Software | CellProfiler, MetaXpress, IN Carta | Automated feature extraction from cell images [3] [6] |
| Chemogenomic Libraries | Pfizer chemogenomic library, GSK Biologically Diverse Compound Set, Prestwick Chemical Library, Sigma-Aldrich Library of Pharmacologically Active Compounds | Source of chemical perturbations [14] |
| Data Analysis Tools | ScaffoldHunter, R packages (clusterProfiler, ggplot2, DOSE), Neo4j | Chemical scaffold analysis, enrichment calculation, and network visualization [14] |
| High-Content Imagers | ImageXpress Confocal HT.ai and similar systems | Automated image acquisition of stained cells [6] |
Comparative Advantages and Future Directions
Cell Painting offers several distinct advantages over alternative profiling methods for chemogenomic library screening. When compared to gene expression profiling by L1000 - currently the only practical alternative in terms of throughput and efficiency - Cell Painting is currently substantially less costly per sample and provides single-cell resolution versus population-averaged measurements in gene expression profiling [3]. A direct comparison study indicated better predictive power for Cell Painting versus L1000 gene expression profiling for library enrichment purposes, though the two methods capture distinct information about cell state and are considered complementary [3].
The future of Cell Painting in chemogenomic screening lies in its integration with other data modalities. Combining morphological profiles with gene expression data and chemical structure information through network pharmacology approaches creates unprecedented opportunities for comprehensive mechanism elucidation [14]. Furthermore, advances in artificial intelligence and machine learning are enhancing the ability to extract biologically meaningful patterns from the rich morphological data generated by Cell Painting assays.
As phenotypic drug discovery continues to re-emerge as a promising approach for identifying novel therapeutics, the synergy between Cell Painting and chemogenomic libraries provides a powerful platform for tackling complex diseases that involve multiple molecular abnormalities. The ability to simultaneously capture information about multiple cellular components and connect morphological perturbations to specific targets and pathways makes this integrated approach particularly valuable for modern drug discovery challenges.
Key Biological Compounds and Organelles Visualized in Standard Cell Painting Assays
Within chemogenomic library screening research, the Cell Painting assay serves as a powerful phenotypic profiling tool. It captures the morphological state of cells in a target-agnostic manner, enabling the deconvolution of mechanisms of action (MoAs) for novel compounds by quantifying changes to key cellular components [2]. This protocol details the implementation of the standard Cell Painting assay, which uses a multiplexed fluorescent dye approach to visualize eight major organelles and cellular components, providing a high-content readout of cellular health and function [2].
Research Reagent Solutions
The following table details the essential dyes and reagents required to perform a standard Cell Painting assay.
| Reagent Name | Target Cellular Structure | Function in the Assay |
|---|---|---|
| Hoechst 33342 | DNA / Nucleus | Stains the nuclear DNA, enabling the segmentation of individual nuclei and analysis of nuclear morphology and intensity [2]. |
| Concanavalin A | Endoplasmic Reticulum | Conjugated to a fluorophore (e.g., Alexa Fluor 488), it labels the endoplasmic reticulum and its surrounding structures [2]. |
| SYTO 14 | Nucleoli & Cytoplasmic RNA | A green fluorescent nucleic acid stain that preferentially marks nucleoli and cytoplasmic RNA, highlighting these regions [2]. |
| Phalloidin | F-actin / Cytoskeleton | Conjugated to a fluorophore (e.g., Alexa Fluor 568), it stains filamentous actin, outlining the cell's cytoskeletal structure and shape [2]. |
| Wheat Germ Agglutinin (WGA) | Golgi & Plasma Membrane | Conjugated to a fluorophore (e.g., Alexa Fluor 647), it labels the Golgi apparatus and the plasma membrane, defining the cell boundary [2]. |
| MitoTracker Deep Red | Mitochondria | A cell-permeant dye that accumulates in active mitochondria, visualizing their network structure, mass, and distribution [2]. |
Experimental Protocol: Cell Painting Assay
Cell Seeding and Culture
- Cell Line Selection: Select an appropriate cell line. U2OS osteosarcoma cells are commonly used due to their flat, adherent morphology, which is ideal for imaging, but the protocol is adaptable to dozens of cell lines [2].
- Procedure: Plate cells in multi-well plates (e.g., 96 or 384-well format) suitable for high-throughput microscopy. Culture the cells until they reach a suitable sub-confluent density (e.g., 50-80% confluency) to prevent cell overlap and ensure clear segmentation [2].
Compound Treatment and Perturbation
- Chemogenomic Library Application: Treat cells with compounds from your chemogenomic library. Include appropriate controls, such as DMSO-only vehicle controls and reference compounds with known morphological impacts [14] [2].
- Incubation: Incubate cells with compounds for a predetermined duration to elicit a phenotypic response.
Staining and Fixation
This protocol is based on the optimized "Cell Painting v3" established by the JUMP-CP Consortium [2].
- Staining with Live-Cell Dyes: Add MitoTracker Deep Red and Hoechst 33342 directly to the cell culture medium. Incubate for 30 minutes at cell culture conditions (37°C, 5% CO₂).
- Fixation: Remove the medium and fix the cells by adding a formaldehyde solution (e.g., 3.7% in PBS) for 20-30 minutes at room temperature.
- Permeabilization and Staining: After fixation and washing, permeabilize the cells with a detergent solution (e.g., 0.1% Triton X-100 in PBS).
- Add the remaining stains in a single, multiplexing step:
- Phalloidin (stains F-actin)
- Concanavalin A (stains endoplasmic reticulum)
- WGA (stains Golgi and plasma membrane)
- SYTO 14 (stains nucleoli and RNA)
- Incubate for 30 minutes at room temperature, protected from light.
- Wash and Store: Perform final washes with PBS. Seal the plate and store at 4°C in the dark until imaging.
Image Acquisition
- Use a high-throughput microscope equipped with appropriate filters for the five fluorescence channels.
- Automatically image multiple sites per well to capture a statistically significant number of cells (typically hundreds to thousands per well) [14] [2].
Image Analysis and Feature Extraction
- Cell Segmentation: Use image analysis software (e.g., CellProfiler) to identify individual cells and subcellular compartments (cytoplasm, nucleus) based on the staining [14] [2].
- Morphological Feature Extraction: For each segmented cell and compartment, extract quantitative morphological features. The standard Cell Painting assay captures over 1,700 features per cell, including [14] [2]:
- Size and Shape: Area, perimeter, eccentricity, form factor.
- Texture: Haralick features for pattern analysis.
- Intensity: Mean and standard deviation of pixel intensity across channels.
- Granularity: Gabor filters to measure fine details.
Data Processing and Profiling
- Quality Control: Remove poor-quality images and normalize data.
- Batch Effect Correction: Apply statistical methods to correct for technical variations between screening plates [2].
- Morphological Profiling: Aggregate single-cell data to create a profile for each compound treatment. These profiles are used to compare and group compounds based on phenosimilarity, aiding in MoA prediction [2].
Cell Painting Experimental Workflow
Visualized Cellular Components
The following diagram illustrates the relationship between the staining reagents and the specific organelles they label within a cell.
The drug discovery landscape has witnessed a significant paradigm shift, marked by a vigorous resurgence of phenotypic drug discovery (PDD). This approach, which prioritizes observable changes in physiological systems over predefined molecular targets, has re-emerged as a powerful strategy for identifying first-in-class therapies. The renewed interest in PDD stems from its demonstrated success in addressing biological complexity and generating novel therapeutic mechanisms, particularly when integrated with modern technologies like the Cell Painting assay and artificial intelligence. Between 2012 and 2022, the application of PDD in major pharmaceutical portfolios grew from less than 10% to an estimated 25-40%, reflecting its increasing importance in modern drug development [15]. This resurgence represents a fundamental evolution from traditional reductionist models toward a more holistic, systems-level understanding of disease biology and therapeutic intervention, enabling the discovery of diverse target types and novel mechanisms of action that were previously inaccessible to target-based methods [15] [16].
The Catalysts for Resurgence
Historical Success and Comparative Analysis
The renewed focus on phenotypic screening was largely catalyzed by a landmark 2011 review published in Nature Reviews Drug Discovery, which systematically analyzed the discovery origins of new FDA-approved treatments between 1999 and 2008 [16]. The analysis revealed a striking pattern: PDD approaches were responsible for 28 first-in-class small molecule drugs, compared to only 17 from target-based methods [15] [16]. This evidence challenged the prevailing dominance of target-based discovery and prompted a strategic reevaluation across the pharmaceutical industry.
Subsequent analyses have continued to validate this trend. From 2012 to 2022, PDD contributed to the development of 58 out of 171 total approved drugs, surpassing traditional target-based discovery (44 approvals) and monoclonal antibody-based therapies (29 approvals) [15]. The strategic pivot toward phenotypic approaches has been particularly evident in major pharmaceutical companies, with Novartis reporting a dramatic increase in phenotypic screens from 2011 to 2015, and AstraZeneca and Novartis allocating 25-40% of their project portfolios to PDD approaches by 2022 [15].
Advantages in Novel Therapeutic Discovery
Phenotypic drug discovery offers several distinct advantages that account for its successful resurgence:
Identification of Novel Targets and Mechanisms: The unbiased nature of phenotypic screening enables the discovery of therapeutic interventions for novel and diverse targets beyond traditional enzymes and receptors, including membranes, ion channels, ribosomes, microtubules, and complex molecular structures like ATP synthase [15].
Clinical Translation and Relevance: By testing compounds directly in disease-relevant cellular systems, PDD generates insights more predictive of clinical outcomes, as it captures the full complexity of biological systems and disease pathologies [15] [16].
Access to Undruggable Targets: PDD has successfully identified drugs targeting proteins with no known enzymatic activity or functional role, which would have been overlooked in target-based campaigns. Examples include NS5A inhibitors for hepatitis C and SMN2 splicing modifiers for spinal muscular atrophy [15].
Table 1: Recently Approved Therapies Identified Through Phenotypic Drug Discovery
| Drug Name | Therapeutic Area | Year Approved | Key Target/Mechanism |
|---|---|---|---|
| Vamorolone (AGAMREE) | Duchenne muscular dystrophy | 2023 | Dissociative steroid that modifies downstream receptor activity [15] |
| Risdiplam (Evrysdi) | Spinal muscular atrophy | 2020 | SMN2 pre-mRNA splicing modifier [15] |
| Daclatasvir (Daklinza) | Hepatitis C virus | 2014-2015 | NS5A protein inhibitor [15] |
| Lumacaftor/Ivacaftor (ORKAMBI) | Cystic fibrosis | 2015 | CFTR corrector/potentiator [15] |
| Perampanel (Fycompa) | Epilepsy | 2012 | AMPA receptor antagonist [15] |
Technological Advancements Driving Modern PDD
Advanced Cellular Models and Screening Technologies
Modern phenotypic screening has evolved significantly from its historical predecessors, leveraging sophisticated cellular models and high-content technologies:
Disease-Relevant Cellular Systems: Contemporary PDD utilizes physiologically relevant cell models, including patient-derived cells, induced pluripotent stem cells (iPSCs), and genetically engineered systems that better recapitulate disease biology [16]. These models provide higher translational value by maintaining the pathological context of human diseases.
High-Content Screening and Imaging: The development of automated high-content imaging systems, such as the Cell Painting assay, has revolutionized phenotypic characterization. This assay uses up to six fluorescent dyes to label multiple cellular components, generating rich morphological profiles that capture subtle phenotypic changes in response to compound treatment [8] [17].
CRISPR and Functional Genomics: Gene-editing technologies enable the creation of more precise disease models and facilitate target deconvolution through genetic screening in phenotypic assays [16].
The Cell Painting Assay: A Cornerstone of Modern Phenotyping
The Cell Painting assay has emerged as a particularly powerful tool in modern phenotypic screening. This high-content imaging approach simultaneously labels multiple cellular compartments—including nucleus, nucleoli, cytoplasmic RNA, endoplasmic reticulum, Golgi apparatus, cytoskeleton, and mitochondria—using a panel of fluorescent dyes [17]. The resulting images are processed through automated image analysis pipelines to extract thousands of morphological features, creating a high-dimensional phenotypic profile for each treatment condition.
Recent advancements have further optimized this technology. A 2025 study demonstrated that shorter incubation periods (as brief as 6 hours for some cell types) in Cell Painting assays capture primary cellular alterations more effectively than traditional 48-hour incubations, enhancing the specificity and accuracy of phenotypic fingerprints while improving throughput [18].
Table 2: Key Research Reagent Solutions for Cell Painting Assays
| Reagent Category | Specific Examples | Function in Phenotypic Screening |
|---|---|---|
| Fluorescent Dyes | Hoechst 33342, Concanavalin A, Phalloidin, WGA, SYTO 14 | Labels specific cellular compartments and structures for multiparametric imaging [8] |
| Cell Lines | U2OS osteosarcoma cells, Sf9 insect cells, patient-derived iPSCs | Provides biologically relevant systems for phenotypic profiling [8] [18] |
| Chemogenomic Libraries | Pfizer chemogenomic library, GSK Biologically Diverse Compound Set, NCATS MIPE library | Curated compound collections representing diverse targets and mechanisms [8] |
| Image Analysis Tools | CellProfiler, JUMP-CP Data Explorer, PhenAID platform | Automated extraction and analysis of morphological features from high-content images [15] [8] |
Experimental Protocols for Cell Painting-Based Chemogenomic Screening
Protocol: High-Content Phenotypic Screening Using Cell Painting
Objective: To identify compounds inducing biologically relevant phenotypic changes in disease-modeling cell systems through high-content imaging and morphological profiling.
Materials and Reagents:
- U2OS cells or disease-relevant cell line (maintained in appropriate medium)
- Cell Painting dye cocktail: Hoechst 33342 (nuclei), Concanavalin A (ER/mitochondria), Phalloidin (F-actin), WGA (Golgi/plasma membrane), SYTO 14 (nucleolar/cytoplasmic RNA)
- 384-well imaging-optimized microplates
- Chemogenomic library compounds (e.g., 5,000-compound diversity set)
- Fixation solution (4% formaldehyde in PBS)
- Permeabilization buffer (0.1% Triton X-100 in PBS)
- Automated high-content imaging system
Procedure:
- Cell Seeding and Compound Treatment:
- Seed cells in 384-well plates at optimal density (e.g., 1,000-2,000 cells/well) and culture for 24 hours.
- Treat cells with library compounds at appropriate concentrations (typically 1-10 µM) for a defined period (6-48 hours based on assay optimization) [18].
- Include appropriate controls: DMSO (vehicle), positive control compounds with known phenotypic effects.
Staining and Fixation:
- Aspirate medium and fix cells with 4% formaldehyde for 20 minutes at room temperature.
- Permeabilize cells with 0.1% Triton X-100 for 10 minutes.
- Incubate with Cell Painting dye cocktail for 60 minutes protected from light.
- Wash twice with PBS and maintain in PBS for imaging.
Image Acquisition:
- Acquire images using a high-content microscope with appropriate filter sets for each fluorescent dye.
- Capture multiple fields per well (minimum 9 fields) to ensure statistical robustness.
- Use 20x or higher magnification objective for sufficient cellular detail.
Image Analysis and Feature Extraction:
- Process images using CellProfiler or similar software to identify individual cells and cellular compartments.
- Extract morphological features (size, shape, intensity, texture) for each cellular compartment.
- Generate a morphological profile for each treatment condition, typically comprising 1,000-2,000 features per compound.
Data Analysis and Hit Identification:
- Normalize data using plate controls and apply quality control metrics.
- Use unsupervised clustering (e.g., PCA, t-SNE) to group compounds with similar phenotypic profiles.
- Identify hit compounds that induce strong phenotypic changes or cluster with compounds of known mechanism.
Protocol: Time-Resolved Cell Painting for Primary Phenotype Detection
Objective: To capture primary phenotypic effects of compounds while minimizing secondary downstream alterations.
Materials and Reagents:
- As in Protocol 4.1, with emphasis on live-cell imaging capabilities
Procedure:
- Experimental Setup:
- Seed cells in imaging-compatible microplates as described in Protocol 4.1.
- Establish multiple treatment timepoints: 6, 12, 24, and 48 hours to capture phenotypic progression.
Short-Term Treatment and Staining:
- Treat cells with test compounds for abbreviated periods, with 6 hours identified as optimal for detecting primary phenotypic effects in some cell systems [18].
- Process for Cell Painting staining as described in steps 2-3 of Protocol 4.1.
Comparative Analysis:
- Analyze morphological profiles across different timepoints.
- Focus on early timepoint phenotypes that represent direct compound effects rather than secondary adaptations.
- Compare phenotypic strength and significance across timepoints to identify optimal screening windows.
Data Analysis and AI Integration
Computational Analysis of Phenotypic Data
The analysis of high-content phenotypic data requires sophisticated computational approaches:
Dimensionality Reduction and Clustering: Principal component analysis (PCA) and t-distributed stochastic neighbor embedding (t-SNE) are used to visualize high-dimensional morphological profiles and identify compounds with similar phenotypic effects [8].
Machine Learning for Pattern Recognition: Supervised and unsupervised machine learning algorithms classify compounds based on their mechanisms of action and identify novel phenotypic patterns that may correspond to unique biological effects [15] [17].
Network Pharmacology Integration: Advanced computational platforms integrate phenotypic data with chemogenomic libraries, target annotations, and pathway information to facilitate mechanism of action prediction and target deconvolution [8].
Artificial Intelligence in Modern PDD
AI and machine learning have dramatically enhanced the power and efficiency of phenotypic screening:
Morphological Profiling and Pattern Recognition: Deep learning models, particularly convolutional neural networks, can directly analyze cellular images to extract relevant features and identify subtle phenotypic patterns that may be missed by traditional feature extraction methods [17].
Multimodal Data Integration: AI platforms enable the fusion of phenotypic data with multi-omics datasets (transcriptomics, proteomics, metabolomics), providing a systems-level view of compound effects and enhancing target identification [17].
Predictive Modeling and Virtual Screening: Machine learning models trained on phenotypic profiles can predict the biological activity of novel compounds, enabling virtual screening of chemical libraries and prioritizing compounds for experimental validation [17].
The integration of AI into phenotypic screening workflows has demonstrated significant practical benefits. For instance, Ardigen's phenAID platform and similar AI-powered systems can reduce analysis time while enhancing prediction quality for high-content screening datasets [15] [17]. Furthermore, companies like Recursion and Exscientia have successfully merged phenotypic screening with AI-driven compound design, creating integrated platforms that accelerate the entire drug discovery process [19].
AI-Enhanced Phenotypic Screening Workflow
Case Studies and Clinical Successes
The power of modern phenotypic drug discovery is exemplified by several recently approved therapies:
Vamorolone for Duchenne Muscular Dystrophy: Approved in 2023, vamorolone was identified through phenotypic profiling that revealed its unique mechanism as a dissociative steroid, maintaining efficacy while reducing the safety concerns associated with traditional corticosteroids [15].
Risdiplam for Spinal Muscular Atrophy: This 2020-approved SMN2 splicing modifier was discovered through phenotypic screening approaches. The SMN2 target would have been unlikely identified through traditional target-based methods due to its previously unknown functional role in modifying disease pathology [15].
Lumacaftor for Cystic Fibrosis: Discovered using target-agnostic compound screens in cell lines expressing disease-associated CFTR variants, lumacaftor exemplifies how phenotypic screening in disease-relevant models can yield successful therapies for genetic disorders [15].
These successes demonstrate how phenotypic approaches can identify novel mechanisms and provide treatments for diseases with high unmet medical needs. The common thread among these therapies is that they modulate targets or mechanisms that would have been difficult to identify through purely target-based approaches [15].
The resurgence of phenotypic drug discovery represents a fundamental shift in therapeutic development, moving from a reductionist, target-centric view to a more holistic, systems-level approach. The integration of advanced technologies—particularly the Cell Painting assay, functional genomics, and artificial intelligence—has addressed historical limitations of phenotypic screening while amplifying its strengths.
Future developments in PDD will likely focus on several key areas:
Enhanced Model Systems: Continued refinement of disease models, including patient-derived organoids, complex co-culture systems, and microphysiological systems, will improve the clinical relevance of phenotypic screening.
Temporal Phenotypic Analysis: Time-resolved phenotypic profiling will become increasingly important for distinguishing primary compound effects from secondary adaptations, with optimized timepoints enhancing screening efficiency and data quality [18].
Multi-Omics Integration: Deeper integration of phenotypic data with transcriptomic, proteomic, and metabolomic datasets will provide more comprehensive insights into compound mechanisms and facilitate target identification.
AI-Driven Platform Evolution: Continued advancement of AI and machine learning algorithms will further accelerate phenotypic screening, enabling more sophisticated pattern recognition, predictive modeling, and data-driven hypothesis generation.
The modern resurgence of phenotypic drug discovery, powered by technologies like Cell Painting and AI, has fundamentally expanded the toolkit for therapeutic development. By embracing biological complexity and leveraging technological innovations, PDD continues to deliver novel therapies for challenging diseases, confirming its essential role in the future of drug discovery.
Cell Painting assay has emerged as a powerful high-content phenotypic screening tool that enables the systematic and multiplexed investigation of cellular morphological changes in response to chemical or genetic perturbations [20]. This imaging-based high-throughput phenotypic profiling (HTPP) method provides comprehensive morphological data that serves as a foundation for three critical applications in drug discovery: deconvoluting mechanisms of action (MoA), assessing compound toxicity, and identifying novel therapeutic targets [14] [21] [22]. Within chemogenomic library screening—the use of well-annotated compound collections covering diverse target classes—Cell Painting bridges the gap between phenotypic observation and mechanistic understanding [23] [14]. This application note details standardized protocols and analytical frameworks to implement Cell Painting for these core applications in pharmaceutical research and development.
Core Applications and Experimental Data
Cell Painting generates multidimensional morphological profiles that serve as distinctive fingerprints for compound characterization. The table below summarizes primary data outputs and their applications across key research domains.
Table 1: Core Applications of Cell Painting Assay in Drug Discovery
| Application Area | Key Measurable Parameters | Data Output | Utility in Drug Discovery |
|---|---|---|---|
| Mechanism of Action (MoA) Deconvolution | Morphological similarity to reference compounds with known targets [21] [20] | Phenotypic fingerprints and clusters | Predict compound MoA by comparing morphological profiles to annotated libraries [21] |
| Toxicity Assessment | Cell count, nuclear morphology (pyknosis, fragmentation), mitochondrial mass, membrane integrity [23] [22] | Point of Departure (POD) values, IC~50~ curves | Identify general cell damage and cytotoxic effects; determine bioactive concentration thresholds [23] [22] |
| Target Identification | Phenotypic linkage between compound treatments and genetic perturbations [14] [20] | Chemogenomic network maps | Generate hypotheses about molecular targets by integrating morphological and chemogenomic data [14] |
The quantitative data derived from these applications enables informed decision-making in lead optimization and safety assessment. For MoA deconvolution, machine learning models trained on morphological profiles of reference compounds can predict mechanisms for novel hits with up to 94% accuracy in controlled validation studies [21]. Toxicity assessment provides concentration-dependent response curves, generating Points of Departure (POD) that establish safety thresholds for compound prioritization [22].
Experimental Protocols
Cell Painting Assay Protocol
Table 2: Cell Painting Staining Protocol and Reagents
| Cellular Component | Fluorescent Dye | Ex/Emm Wavelength (nm) | Working Concentration | Function in Assay |
|---|---|---|---|---|
| Nuclei | Hoechst 33342 | 387/447 | 4 µg/mL [21] | Labels DNA; reveals nuclear morphology and count |
| Nucleoli | SYTO 14 | 531/593 | 3 µM [21] | Stains nuclear RNA; identifies nucleolar structure |
| F-actin | Phalloidin 594 | 562/624 | Diluted 0.14x from 5 µL/mL stock [21] | Visualizes actin cytoskeleton organization |
| Golgi & Plasma Membrane | Wheat Germ Agglutinin Alexa Fluor 594 | 562/624 | 1 µg/mL [21] | Highlights Golgi apparatus and plasma membrane轮廓 |
| Endoplasmic Reticulum | Concanavalin A Alexa Fluor 488 | 462/520 | 20 µg/mL [21] | Labels endoplasmic reticulum structure |
| Mitochondria | MitoTracker DeepRed | 628/692 | 600 nM [21] | Visualizes mitochondrial mass and distribution |
Workflow:
- Cell Seeding: Seed cells of interest (e.g., U2OS, HepG2) into 384-well microplates at optimized densities (e.g., 1500 cells/well for most lines, 800 for sensitive lines) [21]. Incubate for 24 hours under standard culture conditions.
- Compound Treatment: Add test compounds and controls diluted in culture media. For chemogenomic libraries, include multiple compounds targeting the same protein with diverse scaffolds [14]. Incubate for 24-48 hours depending on desired phenotypic expression time.
- Fixation and Staining: Fix cells with formaldehyde (final concentration 4%) for 20 minutes at room temperature. Permeabilize with Triton-X100 (0.1%) for 20 minutes, then incubate with staining cocktail (Table 2) for 30 minutes in the dark [21].
- Image Acquisition: Image plates using automated high-content microscopes (e.g., ImageXpress, Opera) with a minimum of 9 fields per well across all fluorescent channels [20]. Capture z-stacks if assessing 3D morphology.
- Image Analysis: Process images using CellProfiler or proprietary software (e.g., Harmony) for illumination correction, cell segmentation, and feature extraction [21] [20]. Extract 575-1,779 morphological features (size, shape, texture, intensity) per cell.
- Data Normalization: Apply plate normalization using solvent control wells (e.g., 32 wells per plate) and exclude features with coefficient of variation >25% [22].
Diagram: Cell Painting assay workflow from sample preparation to data analysis and key applications.
HighVia Extend Protocol for Live-Cell Kinetic Analysis
For dynamic assessment of cellular health parameters, the HighVia Extend protocol enables live-cell imaging over extended time periods (up to 72 hours) [23].
Workflow:
- Dye Optimization: Use reduced dye concentrations to minimize phototoxicity: Hoechst33342 (50 nM), Mitotracker Red (optimized concentration), BioTracker 488 Green Microtubule Dye [23].
- Live-Cell Staining: Add dye cocktail directly to culture media 2-4 hours after compound treatment.
- Kinetic Imaging: Acquire images at multiple time points (e.g., 6, 24, 48, 72 hours) using environmental control to maintain cell viability.
- Nuclear Phenotyping: Classify nuclei into "healthy," "pyknosed," or "fragmented" categories using supervised machine learning algorithms. This single-channel approach correlates strongly with comprehensive cellular phenotyping [23].
- Multi-Parametric Analysis: Gate cells into five populations: healthy, early apoptotic, late apoptotic, necrotic, and lysed based on combined nuclear, cytoskeletal, and mitochondrial features [23].
The Scientist's Toolkit
Table 3: Essential Research Reagent Solutions for Cell Painting
| Category | Specific Items | Function and Application Notes |
|---|---|---|
| Cell Lines | U2OS (osteosarcoma), HEK293T (embryonic kidney), MRC9 (non-transformed fibroblast), HepG2 (hepatocellular carcinoma) [23] [21] | Provide diverse morphological contexts; U2OS recommended for initial assay optimization due to well-spread morphology [21] |
| Fluorescent Dyes | Hoechst 33342, SYTO 14, Phalloidin conjugates, Wheat Germ Agglutinin conjugates, Concanavalin A conjugates, MitoTracker dyes [21] | Multiplexed staining of cellular compartments; critical for generating comprehensive morphological profiles |
| Reference Compounds | Camptothecin (topoisomerase inhibitor), JQ1 (BET inhibitor), Torin (mTOR inhibitor), Paclitaxel (tubulin stabilizer) [23] | Establish assay performance and provide positive controls for specific morphological phenotypes |
| Image Analysis Software | CellProfiler (open-source), Harmony (commercial), proprietary platforms [21] [20] | Extract quantitative morphological features from raw images; essential for data generation |
| Data Analysis Tools | R package (clusterProfiler, ggplot2), ScaffoldHunter, Neo4j graph database [14] | Enable chemogenomic network analysis, visualization, and pattern recognition in high-dimensional data |
Data Analysis and Visualization Framework
Morphological Fingerprinting and MoA Prediction
The analytical pipeline transforms raw images into morphological fingerprints that enable mechanism prediction and target hypothesis generation.
Diagram: MoA deconvolution workflow through morphological profiling and similarity analysis.
Analytical Steps:
- Feature Preprocessing: Remove features with zero standard deviation and high correlation (>95%) to reduce dimensionality [14]. Normalize data using z-score transformation or plate-based controls.
- Similarity Assessment: Calculate Mahalanobis distance or cosine similarity between compound profiles to identify clusters with similar morphological impacts [21].
- Machine Learning Classification: Train random forest or neural network models using reference compound profiles to predict MoA for unannotated compounds [21] [20].
- Network Integration: Incorporate morphological profiles with chemogenomic databases (e.g., ChEMBL) and pathway information (KEGG, GO) using graph databases (Neo4j) to identify potential targets [14].
Toxicity Assessment and Point of Departure Calculation
The HighVia Extend protocol enables time-dependent toxicity assessment through nuclear morphology classification [23].
Analytical Framework:
- Nuclear Phenotype Classification: Implement supervised machine learning to categorize nuclei into morphological classes: healthy, pyknosed (condensed, early apoptosis), and fragmented (late apoptosis/necrosis) [23].
- Kinetic IC~50~ Determination: Calculate time-dependent IC~50~ values for healthy cell count reduction to distinguish primary from secondary toxic effects [23].
- Point of Departure (POD) Determination: Identify the lowest concentration where morphological features show statistically significant changes from vehicle controls across multiple feature groups [22].
- Multi-Parametric Hit Calling: Apply Mahalanobis distance threshold and differential Z-scores to identify compounds with selective activity in disease-relevant cell lines [21].
Cell Painting assay, when integrated with chemogenomic library screening, provides a powerful platform for simultaneous MoA deconvolution, toxicity assessment, and target identification. The standardized protocols and analytical frameworks presented herein enable researchers to extract maximum information content from morphological profiling, accelerating the drug discovery process from hit identification to lead optimization. By implementing these detailed methodologies, research teams can establish robust, reproducible screening platforms that generate chemically actionable insights for therapeutic development.
Implementing Cell Painting Screens: Protocol Development and Practical Applications
Within modern drug discovery, phenotypic screening using assays like Cell Painting has emerged as a powerful approach for identifying novel therapeutic mechanisms. The success of such campaigns critically depends on the quality of the chemogenomic library screened. These libraries are collections of well-annotated, bioactive small molecules designed to perturb a wide range of cellular targets. This application note details the essential criteria—diversity, annotation quality, and coverage—for selecting an optimal chemogenomic library, specifically within the context of a Cell Painting-based research thesis. Proper selection enables researchers to connect complex morphological profiles to specific biological targets and pathways, thereby deconvoluting mechanism of action (MoA) from phenotypic data.
Library Selection Criteria
Diversity: Navigating Chemical and Target Space
Chemical and target diversity ensures that a screening campaign probes a broad swath of biology, increasing the likelihood of identifying novel phenotypes and mechanisms.
- Structural Diversity: A high-quality library should encompass a wide range of distinct molecular scaffolds. For instance, a diverse subset of a larger library might contain ~57,000 different Murcko Scaffolds from a collection of ~125,000 compounds, ensuring coverage of vast chemical space [24].
- Target Class Diversity: The library should include compounds modulating proteins across multiple therapeutically relevant families. Key target classes often include:
- Functional Diversity: Include compounds with various modes of action—not only inhibitors and antagonists, but also agonists, allosteric modulators, and emerging modalities like molecular glues and PROTACs (proteolysis-targeting chimeras), which can induce unique phenotypic outcomes [25].
Table: Representative Chemogenomic Library Compositions
| Source/Initiative | Reported Size | Key Target Families Covered | Notable Features |
|---|---|---|---|
| EUbOPEN Consortium | ~5,000 compounds (goal) | Kinases, GPCRs, SLCs, E3 Ligases | Aims to cover ~1,000 proteins; openly accessible [25] [27]. |
| BioAscent | >1,600 compounds | Kinases, GPCRs, Epigenetic targets | "Well-annotated pharmacologically active probe molecules" [24] [26]. |
| Minimal Screening Library (Athan et al.) | 1,211 compounds | 1,386 anticancer proteins | Designed for precision oncology; applied to glioblastoma patient cells [28]. |
Annotation Quality: The Foundation for Reliable Inference
High-quality, multi-layered annotations are paramount for linking phenotypic observations to specific molecular targets. Without them, data from complex assays like Cell Painting is difficult to interpret.
- Potency and Selectivity: Gold-standard chemical probes should exhibit potency (IC50/EC50) < 100 nM in vitro and a minimum 30-fold selectivity over related targets. For chemogenomic compounds with broader profiles, the exact selectivity spectrum must be documented [25].
- Cellular Target Engagement: Annotations must include evidence that the compound engages its intended target in a cellular context, typically at concentrations < 1 μM (or < 10 μM for challenging targets like protein-protein interactions) [25].
- Control for Off-target Effects: The library should be curated to minimize nuisance compounds. Incorporate a nuisance compound set to identify assay false positives. High-quality probe sets should also include matched inactive control compounds (e.g., 211 such controls are documented in one resource) to distinguish target-specific effects from non-specific ones [29].
- Data Provenance: Prioritize libraries where compound annotations are sourced from manually curated, public databases like Chemical Probes.org, SGC, and Probes & Drugs (P&D), which consolidated 875 high-quality chemical probes for 637 primary targets as of early 2025 [29].
Table: Key Annotation Standards for Chemogenomic Compounds
| Annotation Tier | Criteria | Importance for Cell Painting |
|---|---|---|
| High-Quality Chemical Probe | <100 nM potency, >30x selectivity, cellular target engagement, available inactive control [25]. | Gold-standard for confident MoA assignment from phenotypic profiles. |
| Well-characterized Chemogenomic Compound | Known multi-target profile, comprehensive bioactivity data, potency on primary target(s) documented [28]. | Enables pattern-based deconvolution when used in sets. |
| Primary Cell Assay Data | Profiling data in relevant patient-derived or disease-relevant cells [25]. | Increases physiological relevance of predicted MoA. |
| Nuisance Compound Flag | Identified as aggregator, fluorescent, or cytotoxic in a non-specific manner [29]. | Critical for filtering out false positives in image-based screens. |
Coverage: Maximizing Biological Relevance
Coverage refers to the fraction of the biologically relevant genome or proteome that a library can effectively probe. The goal is to maximize the probability of modulating pathways pertinent to the research question.
- The "Druggable Genome": The EUbOPEN consortium aims to generate tools for a large portion of the druggable proteome, with its chemogenomic library designed to cover approximately one-third of the druggable genome [25]. Selecting a library with broad, established coverage accelerates target identification.
- Disease-Specific Focus: For a targeted approach, libraries can be optimized for specific diseases. A minimal library of 1,211 compounds was demonstrated to cover 1,386 anticancer proteins, making it suitable for oncology-focused phenotypic profiling, such as in glioblastoma [28].
- Cell Type-Specific Coverage: Consider the biological context of your Cell Painting assay. Newer methods like the Cell Painting PLUS (CPP) assay can stain nine organelles and are applied in diverse cell models, including primary cells [30]. Ensure your chosen library can probe targets expressed and active in your specific cell model.
Experimental Protocol: Library Selection and Screening Workflow
The following integrated protocol outlines the steps for selecting a chemogenomic library and applying it in a Cell Painting screen, from initial goal definition to data analysis.
The diagram below illustrates the critical decision points and steps in the experimental workflow.
Protocol Steps
Part 1: Library Selection and Preparation
- Define Screening Objective: Clearly state the biological question. Is it unbiased novel MoA discovery, or profiling within a specific disease area (e.g., oncology, neurodegeneration)? This dictates the required coverage.
- Library Curation and Selection:
- Source Libraries: Obtain compound sets from consortia like EUbOPEN or commercial providers (e.g., BioAscent). Cross-reference with public resources like the Probes & Drugs (P&D) portal to identify high-quality probes and their associated annotations [29] [26].
- Apply Digital Filters: Filter potential libraries based on the criteria in Section 2. Prioritize compounds with published, rigorous characterization data. Flag and exclude, or set aside for follow-up validation, any compounds marked as nuisance compounds (e.g., aggregators, fluorescent compounds) using published lists [29].
- Finalize Selection: Choose a library that offers the best balance of diversity, annotation quality, and coverage for your budget and screen size. A typical focused chemogenomic library may contain ~1,200 to ~5,000 compounds [28] [27].
- Library Formatting: Prepare the library as assay-ready compound plates (e.g., 2mM or 10mM stock in DMSO). Include appropriate controls on each plate: vehicle (DMSO), positive controls for specific phenotypes if available, and if possible, inactive structural analogs for key probes.
Part 2: Cell Painting Assay Execution
This protocol uses the enhanced Cell Painting PLUS (CPP) method [30] for superior multiplexing and organelle-specificity.
Cell Seeding and Treatment:
- Seed appropriate cells (e.g., U2OS, MCF-7, or primary patient-derived cells) in collagen-coated, black-walled, clear-bottom 384-well plates. Allow cells to adhere for 24 hours.
- Treat cells with selected chemogenomic library compounds at a predetermined optimal concentration (e.g., 1-10 µM) and duration (e.g., 24-48 hours). Include vehicle and control compound wells.
Staining and Imaging (CPP Cycle 1):
- Fixation: Aspirate medium and fix cells with 4% paraformaldehyde (PFA) for 20 minutes at room temperature (RT).
- Permeabilization and Staining: Permeabilize with 0.1% Triton X-100 for 15 minutes. Incubate with the first staining cocktail containing dyes for:
- Plasma Membrane: Wheat Germ Agglutinin (WGA), Conjugates.
- Actin Cytoskeleton: Phalloidin.
- Cytoplasmic RNA: SYTO RNASelect.
- Nucleoli: Imaged via RNA dye intensity.
- Wash: Wash 3x with PBS.
- Imaging: Image the plate using a high-content imager, capturing each dye in a separate channel for specific profiling [30].
Dye Elution and Restaining (CPP Cycle 2):
- Elution: Aspirate PBS and add the CPP elution buffer (0.5 M L-Glycine, 1% SDS, pH 2.5) for 30 minutes at RT to remove the first set of dyes [30].
- Wash: Wash 3x with PBS.
- Restaining: Incubate with the second staining cocktail containing dyes for:
- Lysosomes: LysoTracker.
- Nuclear DNA: Hoechst 33342.
- Endoplasmic Reticulum: Concanavalin A.
- Mitochondria: MitoTracker.
- Golgi Apparatus: Anti-Giantin antibody with a fluorescent secondary.
- Wash and Image: Wash and image the plate again, capturing all dyes in separate channels [30].
Part 3: Data Analysis and MoA Deconvolution
Image Analysis and Feature Extraction:
- Use image analysis software (e.g., CellProfiler) to segment cells and identify subcellular compartments.
- Extract hundreds to thousands of morphological features (e.g., size, shape, texture, intensity) for each compartment per cell.
Morphological Profiling and MoA Inference:
- Normalize and z-score features, then aggregate to well-level profiles.
- Use unsupervised learning (e.g., Principal Component Analysis - PCA) to visualize profile clustering. Compounds with similar profiles are predicted to share a MoA.
- Leverage Library Annotations: Use the rich annotation of the chemogenomic library to test hypotheses.
- Perform enrichment analysis to see if compounds inducing a specific phenotype are significantly enriched for inhibitors of a particular target or pathway.
- For a cluster of compounds with unknown function, analyze the common targets within the cluster to propose a shared MoA.
The Scientist's Toolkit
Table: Essential Research Reagent Solutions for Chemogenomic Screening
| Reagent / Resource | Function / Application | Examples / Specifications |
|---|---|---|
| Curated Chemogenomic Library | Provides the set of pharmacologically active tools for perturbing cellular systems. | EUbOPEN set; BioAscent library (>1,600 compounds); KCGS (Kinase Chemogenomic Set) [31] [24] [26]. |
| High-Quality Chemical Probes | Gold-standard, selective compounds for confident target validation and MoA assignment. | Probes from SGC, Chemical Probes.org; Potency <100 nM, selectivity >30-fold; include inactive control [25] [29]. |
| Cell Painting PLUS Dye Set | Fluorescent dyes for multiplexed staining of 9+ subcellular compartments. | Dyes for Plasma Membrane, Actin, RNA, DNA, Lysosomes, ER, Mitochondria, Golgi [30]. |
| CPP Elution Buffer | Enables iterative staining by removing fluorescent signals while preserving morphology. | 0.5 M L-Glycine, 1% SDS, pH 2.5 [30]. |
| Public Annotation Databases | Provide critical compound potency, selectivity, and MoA annotations for data interpretation. | Probes & Drugs Portal; CARD; ChEMBL; Guide to Pharmacology [29] [32]. |
| Nuisance Compound Set | Identifies assay interference; used for assay optimization and hit triage. | A Collection of Useful Nuisance Compounds (CONS) [29]. |
Selecting an appropriate cell line is a critical first step in the design of robust and biologically relevant chemogenomic library screens using the Cell Painting assay. This choice directly influences the quality and translatability of the rich morphological profiles generated. Researchers must navigate the complex trade-offs between physiological relevance and practical experimental considerations [33] [34]. This document outlines key strategies and provides protocols to guide this decision-making process within the context of high-throughput phenotypic profiling.
The fundamental challenge lies in the fact that traditional in vitro models, while logistically convenient, often operate in supraphysiological microenvironments that can limit translation to more complex human systems [33]. Advanced models, such as those involving perfusion or primary cells, offer greater relevance but come with increased cost, complexity, and technical challenges [34]. The following sections provide a structured approach to balancing these factors.
Quantitative Comparison of Common Cell Lines
Deep proteomic analyses provide a systems-level view of the molecular machinery present in common cell lines, informing selections based on the biological pathways relevant to a screen. A comparative study quantified the proteomes of 11 human cell lines, identifying an average of 10,361 ± 120 proteins per line from a total of 11,731 identified proteins [35]. Despite this high global similarity, significant differences in expression levels were found for an estimated two-thirds of individual proteins [35].
The table below summarizes key characteristics of cell lines frequently used in imaging-based profiling, such as Cell Painting and the enhanced Cell Painting PLUS (CPP) assay [30].
Table 1: Key Cell Lines for Phenotypic Profiling and Their Applications
| Cell Line | Tissue Origin | Key Strengths | Considerations | Example Use in Profiling |
|---|---|---|---|---|
| U-2 OS | Osteosarcoma (Bone) | • Standard for large-scale CP consortia (e.g., JUMP, OASIS) [30]• Robust growth, flat morphology ideal for imaging | • Limited metabolic competence• Cancer model | • Bioactivity profiling of >1,000 industrial chemicals [30] |
| MCF-7/vBOS | Breast Cancer | • Hormone-responsive [30]• Suitable for MoA studies involving endocrine pathways | • Cancer model | • Development and validation of the Cell Painting PLUS (CPP) assay [30] |
| HepG2 | Hepatocellular Carcinoma (Liver) | • Retains some liver-specific functions (e.g., albumin production) [35] | • Low expression of key drug-metabolizing enzymes (e.g., CYPs)• Cancer model | • Model for liver-specific toxicities |
| Caco-2 | Colorectal Adenocarcinoma (Intestine) | • Can differentiate to form enterocyte-like monolayers [34] | • Requires long differentiation (21 days)• Cancer model | • Absorption and gut barrier studies; CYP3A4 activity induced under flow [34] |
| Primary Human Hepatocytes | Liver | • Gold standard for hepatic metabolism and toxicity• Physiologically most relevant liver model | • High donor-to-donor variability• Limited lifespan, expensive• Logistically challenging | • Benchmarking against in vivo data in consortia like OASIS [30] |
| A549 | Lung Carcinoma | • Model for lung cancer and pulmonary diseases | • Cancer model with limited differentiation | • Pulmonary toxicity and infection studies |
| HEK 293 | Embryonic Kidney | • High transfection efficiency, protein production | • Immortalized with adenovirus DNA• Limited physiological relevance for kidney | • Tool for mechanistic follow-up studies |
Experimental Protocols for Enhanced Physiological Relevance
Protocol: Ex Vivo Human Plasma/Serum Conditioning of Immortalized Myotubes
This protocol replaces traditional culture media with ex vivo human blood components to create a more physiologically relevant microenvironment for investigating systemic effects, such as those of aging, disease, or nutrition [33].
I. Materials
- Immortalized skeletal muscle cell line (e.g., C2C12, LHCN-M2)
- Ex vivo human plasma or serum (pooled or individual donor)
- Standard cell culture medium (e.g., DMEM)
- Standard cell culture reagents and equipment
II. Methodology
- Cell Culture: Culture myoblasts under standard conditions until they reach ~80% confluence.
- Differentiation: Initiate myoblast differentiation into myotubes using standard protocols for your cell line (e.g., switching to DMEM with 2% horse serum).
- Conditioning Medium Preparation:
- For a 5% conditioning dose: Combine 5 mL of ex vivo human plasma or serum with 95 mL of basal differentiation medium. Filter sterilize.
- Dosage and duration vary; common parameters are 5% for 24-48 hours or 10-20% for 4 hours [33].
- Treatment: Replace the standard differentiation medium with the freshly prepared conditioning medium.
- Analysis: After the treatment period, analyze endpoints of interest (e.g., myotube diameter, anabolic/catabolic signaling markers like phosphorylation of AKT or expression of MuRF-1/MAFbx) [33].
Protocol: Cell Painting PLUS (CPP) Assay for Expanded Multiplexing
The CPP assay uses iterative staining and elution to significantly expand the number of cellular compartments profiled in a single assay, generating more detailed and organelle-specific phenotypic profiles [30].
I. Materials
- Cells of interest (e.g., MCF-7/vBOS cells)
- Fixative: 4% Paraformaldehyde (PFA) in PBS
- Staining Panel: Fluorescent dyes for nine compartments (see Table 2).
- Elution Buffer: 0.5 M L-Glycine, 1% SDS, pH 2.5 [30]
- Wash Buffer: Phosphate-Buffered Saline (PBS)
- Blocking Buffer: PBS with 1-5% Bovine Serum Albumin (BSA)
- High-content imaging system
Table 2: Research Reagent Solutions for Cell Painting PLUS
| Reagent | Function / Target | Brief Explanation |
|---|---|---|
| Concanavalin A, Alexa Fluor conjugate | Endoplasmic Reticulum (ER) stain | Binds to glycoproteins on the ER membrane, visualizing its structure [30]. |
| LysoTracker | Lysosomes stain | Accumulates in acidic compartments, labeling functional lysosomes [30]. |
| MitoTracker | Mitochondria stain | Labels active mitochondria, visualizing network morphology and mass. |
| Phalloidin | Actin cytoskeleton (F-actin) stain | Binds filamentous actin, outlining cell shape and cytoskeletal structures. |
| Wheat Germ Agglutinin (WGA) | Plasma Membrane and Golgi stain | Binds to sialic acid and N-acetylglucosamine residues on the cell surface and Golgi. |
| SYTO 14 / Hoechst | Nuclear DNA and Nucleoli stain | Nucleic acid dyes that differentiate condensed nucleoli from general nuclear DNA. |
| CPP Elution Buffer | Dye elution | Efficiently removes bound dyes while preserving cellular morphology for re-staining [30]. |
II. Methodology
- Cell Seeding and Fixation:
- Seed cells in a suitable microplate. After treatment, wash with PBS and fix with 4% PFA for 15-20 minutes.
- Wash thoroughly with PBS to remove residual PFA.
- First Staining Cycle:
- Permeabilize and block cells if required for the first dye set.
- Incubate with the first panel of dyes (e.g., for Plasma Membrane, Actin, RNA, Nucleoli, Lysosomes).
- Wash to remove unbound dye.
- First Imaging Cycle: Image all wells using predefined settings, capturing each dye in a separate channel.
- Dye Elution:
- Apply the elution buffer to the cells for a defined time and temperature to remove the fluorescent signals.
- Wash extensively with PBS to neutralize pH and remove elution buffer.
- Second Staining Cycle:
- Incubate the eluted cells with the second panel of dyes (e.g., for DNA, ER, Mitochondria).
- Second Imaging Cycle: Re-image the same wells.
- Data Analysis: Use automated image analysis software to extract morphological features from each channel and generate multivariate profiles.
Key Considerations:
- Validation: Characterize signal stability and potential crosstalk for each dye in your system.
- Timing: Complete imaging within 24 hours of staining for optimal signal robustness [30].
- Specificity: CPP captures each dye in a separate channel, unlike standard CP which often merges signals (e.g., RNA/ER), providing superior organelle-specificity [30].
The following workflow diagram illustrates the sequential steps of the CPP assay.
Cell Painting PLUS iterative staining and imaging workflow.
A Decision Framework for Cell Line Selection
The selection of a cell model should be a strategic decision driven by the specific research question. The following diagram outlines a logical framework to guide researchers through this process, emphasizing the balance between physiological relevance and practical constraints.
Cell line selection strategy based on research goals.
This framework highlights that no single model is universally superior. A meta-analysis comparing perfused organ-on-chip models to static cultures found that the benefits of flow are relatively modest overall but more pronounced for specific biomarkers in certain cell types (e.g., CYP3A4 in Caco-2 cells) and in 3D cultures [34]. Therefore, the gains of increased model complexity are context-dependent.
High-Content Imaging Systems and Configuration for Optimal Multiplexing
High-content imaging (HCI) combines automated microscopy with sophisticated image analysis to quantitatively capture multiple cellular features from biological samples. Within chemogenomic library screening research, particularly Cell Painting assays, HCI enables the systematic perturbation of biological systems and the subsequent detection of complex phenotypic profiles. Modern HCI systems range from automated digital microscopes to high-throughput confocal systems, incorporating advanced technologies such as solid-state light engines, water immersion objectives, and scientific CMOS sensors for superior resolution [36]. The transition from lower-throughput formats to optimized multiplexed workflows represents a critical evolution in screening methodology, allowing researchers to extract maximal information from valuable chemogenomic libraries while conserving resources and increasing data quality.
High-Content Imaging System Architectures
Core Imaging Platforms and Their Applications
High-content imaging platforms form the foundation of any multiplexed screening pipeline. These systems must balance throughput, resolution, sensitivity, and flexibility to accommodate the diverse requirements of Cell Painting assays.
Table 1: Comparison of High-Content Imaging System Types
| System Type | Key Characteristics | Best Suited Applications | Throughput Considerations |
|---|---|---|---|
| Automated Widefield | Fast image acquisition, lower cost, suitable for 2D monolayers | Primary screening of large compound libraries, endpoint assays | Highest throughput for 2D cultures |
| Spinning Disk Confocal | Optical sectioning, reduced out-of-focus light, better signal-to-noise | Denser 2D cultures, simpler 3D models, live-cell imaging | Moderate throughput with improved image quality |
| High-Throughput Confocal | Advanced confocal technology (e.g., AgileOptix), superior resolution | Complex 3D models (spheroids, organoids), subcellular detail | Lower throughput but highest data quality |
| Light-Sheet Fluorescence (LSFM) | Minimal phototoxicity, rapid volumetric imaging, high penetration | Large 3D-oids, live long-term imaging, delicate samples | Specialized for complex 3D samples |
Modern HCI systems incorporate artificial intelligence at multiple levels, from automated focus maintenance to intelligent field selection. The integration of AI-driven analysis tools enables extraction of valuable insights into diverse cellular features including cell morphology, protein expression levels, subcellular localization, and complex phenotypic responses to chemical perturbations [36].
Emerging Architectures: 3D and Specialized Systems
The evolution toward more physiologically relevant model systems demands advanced imaging capabilities. Next-generation AI-driven automated 3D-oid high-content screening systems such as HCS-3DX address the challenges of working with three-dimensional models including spheroids, organoids, and assembloids [37]. These systems combine engineering innovations with advanced imaging and AI technologies to overcome limitations of standard 3D imaging, particularly regarding morphological variability, compound penetration, and single-cell resolution within thick samples.
For spatial omics applications, open-source solutions like PRISMS (Python-based Robotic Imaging and Staining for Modular Spatial Omics) demonstrate how customized pipelines can democratize access to advanced multiplexing. PRISMS utilizes liquid handling robots with thermal control to enable rapid, automated staining of RNA and protein samples, compatible with both widefield and confocal microscopes [38]. Such modular approaches facilitate high-throughput, single-molecule fluorescence imaging while significantly reducing costs associated with proprietary spatial omics platforms.
Configuring Multiplexed HCI Assays: From 96-Well to 384-Well Formats
Assay Miniaturization and Multiplexing Strategy
The transition from lower-density plate formats to 384-well platforms represents a significant advancement in screening efficiency. Recent research demonstrates that merging two separate 96-well DNT-IVB assays that independently measured human neural progenitor cell proliferation or apoptosis into a single multiplexed 384-well assay enables simultaneous assessment of proliferation, apoptosis, and cell viability [39]. This multiplexing approach reduces the required laboratory resources while increasing data points per experimental unit.
The core principle involves combining multiple readouts previously acquired in separate assays into a single well through strategic reagent selection and imaging channel allocation. This requires careful optimization of staining protocols, antibody combinations, and dye selection to minimize spectral overlap while maintaining signal integrity across all measured endpoints.
Protocol: Multiplexed Proliferation and Apoptosis Assay in 384-Well Format
Principle: This protocol enables simultaneous measurement of proliferation (via BrdU incorporation), apoptosis (via caspase-3/7 activation), and cell viability in human neural progenitor cells within a single 384-well plate, optimized for high-content imaging systems.
Materials:
- Human neural progenitor cells (hNPCs)
- 384-well tissue culture plates
- Cell culture medium appropriate for hNPCs
- 5-Bromo-2'-deoxyuridine (BrdU, Sigma-Aldrich) [39]
- CellEvent Caspase-3/7 Green Detection Reagent (ThermoFisher) [39]
- Hoechst 33342 or similar nuclear stain
- Fixation solution (e.g., 4% paraformaldehyde)
- Permeabilization buffer (e.g., 0.1% Triton X-100)
- Anti-BrdU antibody with Alexa Fluor conjugate
- Blocking buffer (e.g., 1-5% BSA in PBS)
- Automated liquid handling system
- High-content imaging system with appropriate filters
Procedure:
- Plate Coating and Cell Seeding:
- Coat 384-well plates with appropriate extracellular matrix (e.g., poly-D-lysine, laminin) using automated liquid handling.
- Seed hNPCs at optimized density (typically 5,000-10,000 cells/well) in 50μL medium.
- Pre-incubate plates for 24 hours at 37°C, 5% CO₂ to allow cell attachment and recovery.
Chemical Treatment and BrdU Incorporation:
- Prepare chemical treatments in dosing plates using serial dilution.
- Transfer treatments to assay plates using automated liquid handling, maintaining 0.1-1% DMSO concentration across all wells.
- Incubate plates with treatments for desired exposure period (typically 24-72 hours).
- Add BrdU to a final concentration of 10μM for the final 4-6 hours of exposure.
Multiplexed Staining Protocol:
- Add CellEvent Caspase-3/7 Green Detection Reagent directly to culture medium (1:1000 dilution) and incubate for 30 minutes at 37°C.
- Wash cells gently with pre-warmed PBS using automated plate washer.
- Fix cells with 4% paraformaldehyde for 15 minutes at room temperature.
- Permeabilize cells with 0.1% Triton X-100 for 10 minutes.
- Incubate with anti-BrdU antibody (1:500 dilution) in blocking buffer for 2 hours at room temperature or overnight at 4°C.
- Counterstain nuclei with Hoechst 33342 (1μg/mL) for 10 minutes.
Image Acquisition:
- Acquire images on high-content imager using 10x or 20x objective.
- Capture 9-16 fields per well to ensure adequate cell counting statistics.
- Configure channels: Hoechst (nuclei), Alexa Fluor conjugate for BrdU (proliferation), CellEvent Green (apoptosis).
Image Analysis:
- Segment nuclei using Hoechst channel.
- Quantify BrdU-positive nuclei to determine proliferation rate.
- Identify caspase-3/7 positive cells using green channel.
- Calculate cell viability through nuclear counts and morphological analysis.
Validation: This multiplexed 384-well assay demonstrated excellent performance with robust Z-prime and strictly standardized mean difference values, improving upon original 96-well assays while screening 315 chemicals with high comparability to historical data [39].
Quantitative Performance Assessment of Multiplexed HCI
Performance Metrics and Validation
Rigorous validation is essential when implementing multiplexed HCI assays. Performance should be quantified using established metrics including Z-prime factors, strictly standardized mean difference (SSMD) values, and intra-assay coefficients of variation.
Table 2: Performance Comparison: 96-Well vs. 384-Well Multiplexed Assays
| Performance Metric | Original 96-Well Proliferation Assay | Original 96-Well Apoptosis Assay | Multiplexed 384-Well Assay |
|---|---|---|---|
| Z-prime Factor | Good (typically >0.5) | Good (typically >0.5) | Excellent (improved over 96-well) [39] |
| Strictly Standardized Mean Difference | Acceptable for screening | Acceptable for screening | Improved over original assays [39] |
| Throughput (wells/plate) | 96 | 96 | 384 |
| Data Points per Experimental Unit | Single endpoint | Single endpoint | Multiple simultaneous endpoints |
| Cost per Data Point | Baseline | Baseline | Reduced by >50% [39] |
| Labor Requirements | High (separate plates) | High (separate plates) | Reduced with automation |
| Chemical Consumption | Higher | Higher | Reduced in miniaturized format |
In a direct comparison study, out of 315 chemicals screened in the multiplexed 384-well format, 158 had been previously assessed in the original 96-well assays. The multiplexed assay produced highly comparable results to the original 96-well assays in terms of activity, potency, sensitivity, and specificity, while identifying more chemicals as selective for the proliferation endpoint [39].
Data Management and FAIR Principles
The substantial data generated by multiplexed HCI necessitates robust data management frameworks. The Minimum Information for High Content Screening Microscopy Experiments (MIHCSME) provides a metadata model and reusable tabular template for sharing and integrating high-content imaging data [40]. MIHCSME combines the ISA (Investigations, Studies, Assays) metadata standard with a semantically enriched instantiation of REMBI (Recommended Metadata for Biological Images), enabling FAIR (Findable, Accessible, Interoperable, and Reusable) data management.
Implementation at core facilities like the Leiden FAIR Cell Observatory involves researchers uploading data to OMERO databases alongside automatically generated microscope metadata and MIHCSME-compliant experimental metadata [40]. This integrated approach ensures data and metadata remain connected throughout the research lifecycle, facilitating reproducibility and secondary analysis.
Visualization of Multiplexed HCI Workflows
Workflow for Multiplexed High-Content Screening
AI-Enhanced 3D HCS Screening Pipeline
Essential Research Reagent Solutions
Successful implementation of multiplexed high-content imaging requires carefully selected reagents and materials optimized for compatibility and performance.
Table 3: Essential Research Reagents for Multiplexed HCI
| Reagent Category | Specific Examples | Function in Multiplexed HCI | Key Considerations |
|---|---|---|---|
| Proliferation Markers | 5-Bromo-2'-deoxyuridine (BrdU) | Labels newly synthesized DNA during S-phase | Requires DNA denaturation and specific antibody detection [39] |
| Apoptosis Detectors | CellEvent Caspase-3/7 Green | Fluorescent substrate for activated caspase-3/7 | Compatible with live-cell imaging before fixation [39] |
| Nuclear Stains | Hoechst 33342, DAPI | Labels all nuclei for segmentation and counting | Compatible with multiplexing, stable after fixation |
| Viability Indicators | Propidium iodide, Calcein AM | Distinguishes live/dead cells | Timing critical for accurate assessment |
| Secondary Detection | Alexa Fluor-conjugated antibodies | Enables multiplexed detection of primary antibodies | Spectral compatibility essential for multiplexing |
| Automation-Compatible Consumables | 384-well microplates with optical bottoms | Platform for miniaturized assays | Must ensure flatness and optical clarity for imaging |
Configuring high-content imaging systems for optimal multiplexing represents a critical capability for modern chemogenomic screening using Cell Painting assays. The transition to higher-density plate formats, combined with strategic assay multiplexing and automated workflows, significantly enhances screening efficiency while reducing costs. The integration of AI-driven tools for both image acquisition and analysis, coupled with robust data management practices following FAIR principles, enables researchers to extract maximal information from valuable chemogenomic libraries. As the field advances, emerging technologies in 3D imaging, open-source instrumentation, and spatial omics integration will further expand the applications and impact of multiplexed high-content imaging in drug discovery and chemical biology.
In modern chemogenomic library screening, the Cell Painting assay has emerged as a powerful phenotypic profiling method that enables the characterization of cellular responses to genetic and chemical perturbations. This high-content imaging assay utilizes multiplexed fluorescent dyes to label eight key cellular components, generating rich morphological data that can reveal mechanisms of action, functional gene relationships, and disease signatures. The extraction of meaningful biological insights from these complex image datasets relies heavily on sophisticated image analysis pipelines, which have evolved significantly from classical feature-engineering approaches to modern deep learning methods. Within chemogenomic screening research, these pipelines transform raw cellular imagery into quantitative morphological profiles that can connect compound structure to biological function across diverse chemical libraries, accelerating drug discovery and target identification.
The Evolution of Image Analysis in Cell Painting
Classical Feature Engineering with CellProfiler
CellProfiler represents the foundational approach to image analysis in high-content screening, providing the first free, open-source system for flexible, high-throughput cell image analysis [41]. This software addresses the critical bottleneck in large-scale imaging experiments by automating the quantitative analysis of individual cells across thousands of samples. Unlike earlier methods that required extensive manual curation or were limited to specific cell types and assays, CellProfiler introduced a modular pipeline approach where each processing step is handled by distinct modules for image processing, object identification, and measurement [41].
The software's versatility enables the measurement of a wide array of morphological features, including staining intensities, textural patterns, size, and shape of labeled cellular structures, as well as correlations between stains across channels and adjacency relationships between cells [3]. In a typical Cell Painting analysis pipeline, CellProfiler extracts approximately 1,500 morphological features from each stained and imaged cell to produce rich phenotypic profiles [3]. These features encompass various measures of size, shape, texture, intensity, and spatial relationships across the different cellular compartments stained in the assay.
Deep Learning-Based Approaches
The limitations of hand-crafted features prompted the adoption of deep learning methods that can learn representations directly from pixel data. Convolutional neural networks (conv-nets) have demonstrated remarkable capabilities for both image segmentation and feature extraction in biological imaging [42]. These networks can robustly segment fluorescent images of cell nuclei as well as phase images of the cytoplasms of individual bacterial and mammalian cells from phase contrast images without the need for a fluorescent cytoplasmic marker [42].
Deep learning approaches have significantly reduced the curation time required for image segmentation while improving accuracy across diverse cell types. A key advantage is their ability to perform semantic segmentation—assigning class labels to each individual pixel of an image rather than to the whole image itself—in a computationally efficient manner [42]. This capability is particularly valuable for Cell Painting applications, where accurately identifying subcellular compartments is essential for generating meaningful morphological profiles.
Integrated Pipelines in Modern Cell Painting
Contemporary Cell Painting workflows typically integrate both classical and deep learning approaches, leveraging their complementary strengths. The JUMP Cell Painting Consortium's CPJUMP1 dataset exemplifies this integration, containing approximately 3 million images and morphological profiles of cells treated with matched chemical and genetic perturbations [5]. This resource, created by a consortium of 10 pharmaceutical companies and research institutions, provides a benchmark for evaluating methods that measure perturbation similarities and impact [5].
Modern pipelines increasingly utilize deep learning for the initial segmentation and identification of cellular structures, while employing both classical feature extraction and learned representations for profiling. This hybrid approach maximizes the strengths of both methodologies: the interpretability and established biological relevance of hand-engineered features, combined with the superior pattern recognition capabilities of deep learning models.
Comparative Analysis of Image Analysis Approaches
Table 1: Comparison of CellProfiler and Deep Learning Approaches for Image Analysis in Cell Painting
| Aspect | CellProfiler (Classical Approach) | Deep Learning Approaches |
|---|---|---|
| Core Methodology | Modular pipelines of image processing, object identification, and measurement [41] | Convolutional neural networks that learn features directly from pixels [42] |
| Feature Type | Hand-engineered features (~1,500 features/cell) capturing size, shape, texture, intensity [3] | Learned representations automatically identified from raw image data [5] |
| Segmentation Accuracy | Accurate for standard cell types; may struggle with crowded cells or non-mammalian cells [41] | Improved accuracy across diverse cell types, including crowded samples [42] |
| Curation Time | Requires significant manual curation for accurate results [41] | Reduced curation time due to improved segmentation accuracy [42] |
| Training Requirements | No training required; optimized through parameter adjustment | Requires manually annotated training data (~100 cells sufficient for some applications) [42] |
| Generalizability | Requires pipeline adjustment for new cell types or assays [41] | Generalizable to multiple cell types across domains of life [42] |
| Information Content | Measures predefined morphological features | Can capture subtle phenotypic patterns beyond human-defined features [5] |
| Computational Resources | Moderate requirements | Higher computational requirements for training and inference |
Table 2: Performance Benchmarks from the CPJUMP1 Dataset (Primary Group Samples) [5]
| Perturbation Type | Fraction Retrieved (q<0.05) | Phenotypic Strength | Notes |
|---|---|---|---|
| Chemical Compounds | Highest | Strongest | Phenotypes most distinguishable from negative controls |
| CRISPR Knockout | Intermediate | Moderate | Consistent detectable signals |
| ORF Overexpression | Lowest | Weakest | May be impacted by plate layout effects |
Detailed Experimental Protocols
Cell Painting Assay Protocol
The Cell Painting assay protocol involves several key steps that must be carefully executed to generate high-quality data for image analysis:
Cell Culture and Plating: Plate cells in multi-well plates, typically using flat cells that rarely overlap such as U2OS (osteosarcoma) cells. The JUMP-CP Consortium selected U2OS cells because large-scale data existed in this cell type, and Cas9-expressing clones are available [2].
Perturbation: Treat cells with chemical compounds or genetic perturbations (CRISPR knockout or ORF overexpression) of interest. In chemogenomic screening, this typically involves a library of compounds representing diverse drug targets [14].
Staining and Fixation: Apply the six fluorescent dyes that constitute the core of the Cell Painting assay:
- Hoechst 33342 for DNA
- Concanavalin A for endoplasmic reticulum
- SYTO 14 for nucleoli and cytoplasmic RNA
- Phalloidin for f-actin
- Wheat Germ Agglutinin (WGA) for Golgi apparatus and plasma membrane
- Mito Tracker Deep Red for mitochondria [2]
Image Acquisition: Image cells on a high-throughput microscope with appropriate filters for the five fluorescence channels. The JUMP-CP Consortium systematically optimized imaging conditions to improve reproducibility [2].
CellProfiler Analysis Pipeline
A standard CellProfiler pipeline for analyzing Cell Painting images includes these key modules:
Image Processing:
- Correct illumination unevenness if necessary
- Align channels if required
Object Identification:
- Identify nuclei using the DNA channel
- Identify cells using cytoplasm staining
- Identify other subcellular compartments as needed
Measurement:
Data Export:
- Output feature measurements in standardized formats for downstream analysis
Deep Learning Segmentation Protocol
Implementing a deep learning approach for Cell Painting image analysis involves:
Training Data Preparation:
- Manually annotate ~100 cells to create ground truth data
- Ensure diversity in the training set to cover various phenotypic states
Network Design:
- Implement a convolutional neural network architecture suitable for semantic segmentation
- Follow design rules that lead to robust performance, as identified in prior research [42]
Network Training:
- Train the network on annotated data
- Validate performance on held-out images
Feature Extraction:
- Use the trained network to segment new images
- Either use the deep learning features directly or combine with classical feature extraction
The Scientist's Toolkit: Essential Research Reagents and Materials
Table 3: Key Research Reagent Solutions for Cell Painting and Image Analysis
| Reagent/Software | Function | Application Notes |
|---|---|---|
| Hoechst 33342 | DNA stain marking nuclei | Used at specific concentration optimized for Cell Painting v3 protocol [2] |
| Phalloidin | F-actin stain marking cytoskeleton | Typically conjugated to Alexa Fluor dyes for visualization [3] |
| Concanavalin A | Endoplasmic reticulum stain | Conjugated to Alexa Fluor dyes; binds to glycoproteins in ER [3] |
| Wheat Germ Agglutinin (WGA) | Golgi apparatus and plasma membrane stain | Conjugated to Alexa Fluor dyes; binds to glycoproteins and glycolipids [2] |
| SYTO 14 | Nucleoli and cytoplasmic RNA stain | Green fluorescent nucleic acid stain [3] |
| MitoTracker Deep Red | Mitochondrial stain | Accumulates in active mitochondria based on membrane potential [2] |
| CellProfiler | Open-source image analysis software | Extracts ~1,500 morphological features per cell; modular pipeline design [41] |
| DeepCell | Deep learning platform for cell segmentation | Uses convolutional neural networks for accurate segmentation [42] |
| JUMP-CP Cell Painting v3 | Optimized Cell Painting protocol | Consortium-optimized for cost and reproducibility [2] |
| CPJUMP1 Dataset | Reference dataset with 3 million images | Contains matched chemical and genetic perturbations for benchmarking [5] |
Advanced Applications in Chemogenomic Library Screening
The integration of advanced image analysis pipelines with Cell Painting has enabled several sophisticated applications in chemogenomic library screening:
Mechanism of Action Elucidation
Morphological profiling using Cell Painting has demonstrated significant power for clustering small molecules by phenotypic similarity. In proof-of-concept studies, cells treated with various small molecules were stained and imaged using the Cell Painting assay, and the resulting profiles were clustered to identify which small molecules yielded similar phenotypic effects [3]. This approach enables researchers to identify the mechanism of action or target of an unannotated compound based on similarity to well-annotated compounds in the chemogenomic library.
Target Identification and Validation
By matching unannotated genes to known genes based on similar phenotypic profiles derived from the Cell Painting assay, researchers can reveal biological functions of genetic perturbations. This approach has been used to map unannotated genes to known pathways based on profile similarity [3]. Furthermore, overexpressing variant alleles enables discovery of the functional impact of genetic variants by comparing the profiles induced by wild-type and variant versions of the same gene.
Library Enrichment and Diversity Analysis
Cell Painting profiles generated from large sets of small molecules can identify more efficient, enriched screening sets that minimize phenotypic redundancy. This approach maximizes profile diversity while simultaneously eliminating compounds that do not produce any measurable effects on the cell type of interest [3]. Research has shown that morphological profiling by Cell Painting is more powerful for this purpose than choosing a screening set based on structural diversity or diversity in high-throughput gene expression profiles.
Integration with Multi-Omics Data
Advanced image analysis pipelines now enable the integration of morphological profiles with other data types, creating comprehensive system pharmacology networks. These networks integrate drug-target-pathway-disease relationships with morphological profiles from Cell Painting, facilitating target identification and mechanism deconvolution for phenotypic assays [14]. Such integrated approaches represent the cutting edge of chemogenomic screening research.
Image analysis pipelines for Cell Painting have evolved substantially from the classical feature engineering approaches of CellProfiler to the sophisticated deep learning methods now being employed. This evolution has dramatically expanded the capabilities of chemogenomic library screening by enabling more accurate, efficient, and comprehensive morphological profiling. The continued development of these pipelines, coupled with the creation of large-scale public datasets like CPJUMP1, promises to further accelerate drug discovery and functional genomics research. As these technologies mature, the integration of morphological profiles with other omics data types will likely yield unprecedented insights into compound mechanisms and biological function, solidifying the role of image-based profiling as a cornerstone of modern chemogenomic research.
Cell Painting is a high-content, imaging-based assay that utilizes multiplexed fluorescent dyes to label and visualize multiple subcellular components, generating rich morphological data for profiling chemical and genetic perturbations [2] [43]. The assay employs six fluorescent dyes to mark eight distinct cellular compartments: nuclear DNA (stained with Hoechst 33342), cytoplasmic RNA (SYTO 14), nucleoli (SYTO 14), endoplasmic reticulum (concanavalin A), actin cytoskeleton (phalloidin), Golgi apparatus (wheat germ agglutinin), plasma membrane (wheat germ agglutinin), and mitochondria (MitoTracker Deep Red) [2]. This comprehensive staining strategy enables the capture of subtle changes in cellular morphology through automated imaging and analysis.
The data processing workflow transforms raw microscopic images into quantitative morphological profiles that serve as cellular "barcodes" or "fingerprints" for different biological states [43]. These profiles enable researchers to identify similarities among perturbations, predict mechanisms of action for uncharacterized compounds, and group chemicals with similar biological effects, making Cell Painting particularly valuable for chemogenomic library screening and phenotypic drug discovery [14] [2].
Image Acquisition and Pre-processing
Image Acquisition Specifications
Cell Painting assays are typically performed in 384-well plates, with multiple fields imaged per well to capture a statistically significant number of cells [43]. Standard imaging captures five channels corresponding to the different fluorescent dyes, though some implementations merge certain stains (e.g., RNA and ER; actin and Golgi) when using microscopes with fewer channels [2] [30]. The JUMP-Cell Painting Consortium has established optimized imaging parameters to ensure consistency across large-scale datasets [2].
Table 1: Standard Cell Painting Imaging Channels and Corresponding Stains
| Channel | Fluorescent Dye | Stained Cellular Components |
|---|---|---|
| DNA Channel | Hoechst 33342 | Nuclear DNA |
| RNA Channel | SYTO 14 | Cytoplasmic RNA, nucleoli |
| ER Channel | Concanavalin A | Endoplasmic reticulum |
| AGP Channel | Phalloidin, Wheat Germ Agglutinin | Actin cytoskeleton, Golgi apparatus, plasma membrane |
| Mito Channel | MitoTracker Deep Red | Mitochondria |
Image Pre-processing Workflow
Raw images undergo several pre-processing steps before feature extraction:
- Illumination Correction: Corrects for uneven illumination across the field of view using reference images [43]
- Cell Segmentation: Identifies and separates individual cells using algorithms like Watershed in CellProfiler [43]
- Compartment Identification: Distinguishes different cellular compartments (nuclei, cytoplasm, whole cell) based on stain localization [43]
Feature Extraction Methodologies
Feature Classes and Compartments
Feature extraction translates visual information into quantitative measurements that capture morphological characteristics. The standard Cell Painting pipeline generates hundreds to thousands of features per cell, categorized by both the cellular compartment measured and the type of measurement performed [43].
Table 2: Morphological Feature Categories in Cell Painting
| Compartments | Feature Groups | Specific Measurements | Biological Significance |
|---|---|---|---|
| Nuclei (DNA channel) | Intensity (I) | Mean intensity, std deviation | DNA content, chromatin organization |
| Cytoplasm (RNA channel) | Morphology (M) | Area, perimeter, form factor | Cell size, shape characteristics |
| Cells (various channels) | Texture (T) | Haralick features, granularity | Internal organization, patterns |
| All compartments | Granularity (G) | Granule count, size | Organelle distribution, health |
Feature Nomenclature and Organization
The extracted features follow a standardized naming convention: CompartmentFeatureGroupFeature_Channel [43]. For example:
Nuclei_AreaShape_FormFactor_DNA(circularity measurement of nuclei)Cells_Intensity_MeanIntensity_ER(average intensity of ER stain in cells)Cytoplasm_Texture_InfoMeas1_AGP(textural information in cytoplasm)
This systematic approach allows researchers to precisely identify which cellular component, measurement type, and specific characteristic is being quantified for downstream analysis.
Data Processing and Normalization Pipeline
Single-Cell to Well-Level Aggregation
The data processing pipeline transforms single-cell measurements into well-level profiles suitable for comparative analysis:
- Single-Cell Feature Extraction: CellProfiler or similar software extracts features for each individual cell [5] [43]
- Quality Filtering: Removal of poor-quality cells, debris, or segmentation artifacts
- Population Aggregation: Median or mean values calculated for each feature across all cells in a well
- Profile Normalization: Standardization against control wells to minimize technical variability
Batch Effect Correction and Quality Control
Large-scale Cell Painting screens require careful handling of technical variability:
- Batch Effect Correction: Methods like Combat or mean-centering address plate-to-plate and day-to-day variations [2]
- Reference Compounds: Inclusion of compounds with known morphological profiles monitors assay performance [44]
- Cell Count Normalization: Features are adjusted for cell density effects to distinguish specific from general toxicity [45]
The JUMP-CP consortium established rigorous quality control metrics, including measurement of assay robustness using positive control plates with compounds covering diverse mechanisms of action [2] [5].
Applications in Chemogenomic Library Screening
Mechanism of Action Identification
Morphological profiles enable mechanism of action (MoA) identification through similarity analysis. The fundamental premise is that compounds targeting the same biological pathway produce similar morphological fingerprints [14] [44]. In practice, researchers:
- Compute similarity metrics (e.g., cosine similarity) between query compound profiles and reference databases
- Identify nearest neighbors with known targets or mechanisms
- Validate predictions through orthogonal assays
The CPJUMP1 dataset provides a benchmark containing matched chemical and genetic perturbations, where each perturbed gene's product is a known target of at least two chemical compounds in the dataset [5]. This resource enables testing of computational methods for matching compound profiles to their molecular targets.
Phenotypic Activity Assessment
A key application in chemogenomic library screening is distinguishing biologically active from inactive compounds. Methods for phenotypic activity assessment include:
- Anomaly Detection: Machine learning models (Isolation Forest, Normalizing Flows) identify compounds inducing morphological changes distinct from negative controls [45]
- Distance-based Metrics: Cosine similarity or correlation distance measures deviation from DMSO controls
- Hit Prioritization: Compounds with significant phenotypic activity are prioritized for further investigation
In the JUMP-CP dataset, approximately 25-50% of tested compounds showed detectable phenotypic activity depending on cell type and perturbation modality [5].
Research Reagent Solutions
Table 3: Essential Reagents for Cell Painting Assays
| Reagent Category | Specific Examples | Function in Assay |
|---|---|---|
| Fluorescent Dyes | Hoechst 33342, SYTO 14, Concanavalin A, Phalloidin, Wheat Germ Agglutinin, MitoTracker Deep Red | Label specific cellular compartments for visualization |
| Cell Lines | U2OS (osteosarcoma), A549 (lung carcinoma), HepG2 (hepatocellular carcinoma) | Provide cellular context for screening; U2OS most common |
| Image Analysis Software | CellProfiler (open-source), Harmony (commercial) | Automated cell segmentation and feature extraction |
| Data Processing Tools | Python/R packages, Neo4j for network integration | Profile normalization, similarity calculation, database management |
| Reference Compounds | Dexamethasone, Staurosporine, Trichostatin A, All-trans retinoic acid | Assay quality control and profile comparison |
Advanced Methodological Adaptations
Cell Painting PLUS (CPP) Assay
The Cell Painting PLUS (CPP) assay represents a significant advancement that expands the multiplexing capacity of the standard protocol [30]. Key innovations include:
- Iterative Staining-Elution Cycles: Allows sequential staining with more dyes than available imaging channels
- Enhanced Organelle Specificity: Dyes imaged in separate channels eliminate signal merging compromises
- Additional Compartments: Includes lysosomes and other organelles not covered in standard Cell Painting
- Customization Flexibility: Researchers can select dye combinations tailored to specific biological questions
The CPP method uses an optimized elution buffer (0.5 M L-Glycine, 1% SDS, pH 2.5) to remove signals between staining cycles while preserving cellular morphology [30]. This approach significantly increases the organelle-specificity and diversity of phenotypic profiles.
Live-Cell Morphological Profiling
While standard Cell Painting uses fixed cells, adaptations enable live-cell profiling for kinetic analyses [9]. These implementations:
- Utilize lower dye concentrations to minimize phototoxicity
- Enable time-course measurements of morphological changes
- Capture dynamic cellular processes rather than static snapshots
- Require optimized environmental control during imaging
Live-cell approaches provide complementary information to fixed-cell assays, particularly for understanding temporal progression of phenotypic responses.
The data processing workflow for feature extraction and morphological profile generation in Cell Painting assays provides a robust framework for quantifying cellular states in response to chemical and genetic perturbations. The standardized yet flexible pipeline from image acquisition to profile generation enables applications across drug discovery, toxicology, and functional genomics. Continued methodological advancements, including enhanced multiplexing capabilities and machine learning approaches, promise to further expand the utility of morphological profiling for understanding biological systems and identifying bioactive compounds.
Within modern phenotypic drug discovery, the Cell Painting assay has emerged as a powerful high-content methodology for capturing complex cellular responses to chemical or genetic perturbations. This technique utilizes multiplexed fluorescent dyes to visualize a broad spectrum of cellular components, extracting hundreds of quantitative morphological features to create detailed profiles of cell state [3]. When combined with chemogenomic libraries—curated collections of compounds with annotated targets and/or mechanisms of action (MoAs)—Cell Painting enables the systematic functional annotation of chemical and genetic perturbations, facilitating deconvolution of complex phenotypes and identification of novel therapeutic targets [46] [23]. This application note details the successful implementation of this integrated approach in two complex disease areas: neurological disorders and oncology, providing detailed protocols and data analysis workflows to guide researchers in the field.
Application in Neurological Disorders: A Case Study on Alzheimer's Disease
A compelling application of Cell Painting in neurological disease is illustrated by a 2024 pilot drug screen for Alzheimer's disease (AD) using human neural progenitor cells (NPCs) [47]. The study focused on SORL1, a well-established AD risk gene. The research hypothesis was that loss of SORL1 would induce a detectable morphological phenotype in NPCs, which could be reversed by compound treatment, thereby identifying potential drug candidates.
The experimental design involved:
- Cell Model: Isogenic SORL1-/- induced pluripotent stem cell (iPSC)-derived neural progenitor cells, with wild-type controls.
- Chemogenomic Library: A TargetMol library of 330 internationally approved drugs.
- Profiling Method: Adaptation of the Cell Painting assay for NPCs to generate multivariate phenotypic profiles.
- Analysis Goal: Identification of compounds that reversed the SORL1-/- mutant morphological signature back towards the wild-type phenotype.
Key Findings and Hit Identification
The study successfully identified distinct phenotypic signatures for SORL1-/- NPCs compared to isogenic wild-type controls, validating the use of morphological profiling for detecting disease-relevant phenotypes [47]. Screening the chemogenomic library yielded 16 active compounds (representing 14 distinct drugs) that effectively reversed the mutant morphological signatures across three independent SORL1-/- iPSC sub-clones.
Network pharmacology analysis of the 16 hits classified them into five primary mechanistic groups, summarized in Table 1.
Table 1: Mechanistic Classes of Hits Identified in the Alzheimer's Disease Cell Painting Screen
| Mechanistic Class | Example Compounds | Proposed Relevance to SORL1 Phenotype |
|---|---|---|
| 20S Proteasome Inhibitors | Bortezomib, Carfilzomib | Endolysosomal dysfunction, protein homeostasis |
| Aldehyde Dehydrogenase Inhibitors | Disulfiram | Metabolic regulation, oxidative stress |
| Topoisomerase I & II Inhibitors | Topotecan, Etoposide | DNA damage response, neuronal apoptosis |
| DNA Synthesis Inhibitors | Gemcitabine, Cytarabine | Cell cycle regulation, genomic stability |
| Miscellaneous | Various | Diverse pathways impacting neuronal health |
Enrichment analysis of the hit compounds further identified DNA synthesis/damage/repair, proteases/proteasome, and cellular metabolism as key pathways and biological processes implicated in the SORL1 phenotype reversal [47]. This case study demonstrates that phenotypic screening in a disease-relevant human cell model can successfully identify compounds with therapeutic potential, even when their known primary targets are not classically associated with the disease, suggesting novel repurposing opportunities.
Experimental Protocol for Neural Progenitor Cell Painting
Protocol: Cell Painting in Human iPSC-Derived Neural Prosterator Cells
- Cell Culture and Plating:
- Maintain human iPSC-derived neural progenitor cells (NPCs) in standard NPC culture medium.
- Plate cells at an optimal density (e.g., 2,000-4,000 cells per well) into 96-well or 384-well imaging-optimized microplates. Allow cells to adhere for 24-48 hours.
- Compound Treatment (Chemogenomic Library):
- Treat NPCs with compounds from the chemogenomic library (e.g., 330-compound TargetMol library) for a predetermined period (e.g., 24-72 hours). Include DMSO vehicle controls and relevant pharmacological controls on every plate.
- Use a range of concentrations (e.g., 1-10 µM) if conducting dose-response studies.
- Fixation and Staining (Cell Painting):
- Fixation: Aspirate medium and fix cells with 4% formaldehyde in PBS for 20 minutes at room temperature.
- Permeabilization and Staining: Permeabilize cells with 0.1% Triton X-100 in PBS for 15 minutes. Incubate with the staining mixture for 30-60 minutes, protected from light. The standard staining cocktail includes:
- Hoechst 33342: Labels nucleus.
- Phalloidin: Labels filamentous actin (F-actin) cytoskeleton.
- Wheat Germ Agglutinin (WGA): Labels Golgi apparatus and plasma membrane.
- Concanavalin A: Labels endoplasmic reticulum (ER) and mitochondria.
- SYTO 14: Labels nucleolus and RNA.
- Washing: Wash cells 2-3 times with PBS to remove excess dye.
- Image Acquisition:
- Acquire high-resolution images using a high-content screening (HCS) microscope (e.g., CellInsight CX7 LZR Pro) with a 20x or 40x objective.
- Image five fluorescent channels corresponding to each dye. Acquire multiple fields per well to ensure adequate cell sampling (>1000 cells per well is ideal).
- Image and Data Analysis:
- Feature Extraction: Use automated image analysis software (e.g., CellProfiler) to segment individual cells and extract ~1,500 morphological features (size, shape, texture, intensity) for each cell.
- Profile Generation and Hit Identification: Normalize data and generate an average morphological profile for each treatment. Use machine learning or clustering algorithms to compare compound-treated profiles (SORL1-/- NPCs) to both diseased (untreated SORL1-/-) and wild-type control profiles. Identify "hits" as compounds that shift the mutant profile towards the wild-type state.
Application in Oncology: Phenotypic Profiling for Novel Target Discovery
Leveraging Public HTS Data for Oncology Discovery
While the specific search results do not detail a singular oncology case study, they outline a powerful cheminformatics framework for identifying compounds with novel mechanisms of action (MoAs) relevant to cancer, by mining existing large-scale phenotypic High-Throughput Screening (HTS) data [46].
This approach addresses a key limitation in oncology drug discovery: conventional chemogenomic libraries cover only about 10% of the human genome, leaving many potential cancer targets unexplored [46] [13]. The methodology focuses on identifying "Gray Chemical Matter (GCM)"—compounds that show selective cellular activity across multiple assays but are not frequent hitters or part of well-annotated chemogenomic libraries.
The Gray Chemical Matter (GCM) Workflow for Oncology
The computational framework for identifying novel chemotypes involves a multi-step process, as illustrated below.
The power of this workflow lies in its ability to prioritize chemical clusters that exhibit persistent and broad structure-activity relationships (SAR), indicating a specific biological mechanism rather than assay-specific artifacts [46]. Validating this approach, the authors created a public GCM dataset from PubChem and found that these compounds behaved similarly to known chemogenetic libraries in broad cellular profiling assays (Cell Painting, DRUG-seq), but with a notable bias toward novel protein targets, making them a valuable resource for oncology and other therapeutic areas [46].
Experimental Protocol for Validating Oncology Candidates
Protocol: Validation of Candidate Compounds Using Cell Painting and Proteomics
- Cell Culture and Compound Treatment:
- Plate relevant cancer cell lines (e.g., U2OS osteosarcoma, HepG2 hepatoblastoma) in 384-well plates.
- Treat cells with candidate compounds from the GCM set or a focused oncology chemogenomic library. Include a reference compound plate with agents of known MoA (e.g., mTOR inhibitors, HDAC inhibitors, microtubule disruptors) for profile comparison.
- Cell Painting and Image Acquisition:
- Data Analysis and MoA Hypothesis Generation:
- Extract ~1,500 morphological features per cell and aggregate to well-level medians.
- Use dimensionality reduction (e.g., PCA) and clustering (e.g., hierarchical clustering) to visualize the relationship between compound profiles. Compounds with similar MoAs will cluster together.
- For a GCM compound with an unknown target, its MoA can be inferred by its proximity to compounds with known targets in the morphological profile space.
- Target Deconvolution (Orthogonal Validation):
- Chemical Proteomics: Use affinity-based proteomics (e.g., pull-down with compound-conjugated beads) to identify direct protein binding partners from cancer cell lysates [46].
- Gene Expression Profiling: Utilize transcriptomic methods like DRUG-seq to confirm functional engagement and downstream effects.
Successful implementation of a Cell Painting-based chemogenomic screen requires specific reagents and tools. Table 2 outlines the core components.
Table 2: Key Research Reagent Solutions for Cell Painting Assays
| Item | Function/Description | Example Products / Sources |
|---|---|---|
| Cell Painting Dye Set | Multiplexed fluorescent staining of key organelles. | Image-iT Cell Painting Kit (Thermo Fisher); Individual dyes: Hoechst 33342 (DNA), Phalloidin (actin), WGA (Golgi/PM), Concanavalin A (ER/mito), SYTO 14 (nucleoli/RNA) [48] [3]. |
| Chemogenomic Library | Curated compound collection with target annotations for phenotypic screening and MoA deconvolution. | Commercially available libraries (e.g., TargetMol, Selleckchem); Publicly annotated sets (e.g., from EUbOPEN project) [47] [23]. |
| High-Content Imaging System | Automated microscope for high-throughput acquisition of multi-channel fluorescent images from multi-well plates. | CellInsight CX7 LZR Pro (Thermo Fisher); Opera Phenix (Revvity); ImageXpress Micro Confocal (Molecular Devices) [48]. |
| Image Analysis Software | Software to segment cells and extract quantitative morphological features. | CellProfiler (open source), IN Carta (Sartorius), HCS Studio (Thermo Fisher) [3] [22]. |
| Data Analysis & Bioinformatics Tools | Platforms for processing, normalizing, and analyzing high-dimensional morphological data. | R, Python; specialized packages for morphological profiling (e.g., cytominer) [46] [3]. |
The integration of Cell Painting with chemogenomic library screening represents a robust and information-rich platform for phenotypic drug discovery. The case studies presented herein demonstrate its practical utility in addressing complex diseases: from identifying repurposing candidates for Alzheimer's disease in a physiologically relevant human neural model, to providing a cheminformatics framework for uncovering novel cancer targets from public HTS data. The detailed protocols and toolkit provided offer a roadmap for researchers to implement this powerful approach, accelerating the identification and validation of new therapeutic strategies in oncology, neurological disorders, and beyond.
Optimizing Cell Painting Assays: Advanced Protocols and Problem-Solving Strategies
In Cell Painting assay chemogenomic library screening, researchers systematically perturb biological systems with chemical or genetic tools and use high-content imaging to capture the resulting morphological changes. This approach is powerful for identifying mechanisms of action (MoA) and understanding gene function. However, the technical challenges of signal bleed-through, dye instability, and background noise can compromise data quality and reproducibility. This application note provides detailed protocols and solutions for these critical issues, enabling more robust phenotypic profiling in drug discovery and functional genomics research.
Understanding and Mitigating Signal Bleed-Through
Signal bleed-through (or spectral crosstalk) occurs when the emission signal of one dye is detected in the channel of another, leading to compromised data integrity. Addressing this is crucial for accurate organelle-specific analysis in Cell Painting.
Quantitative Analysis of Bleed-Through
Table 1: Characterized Spectral Crosstalk in Cell Painting Dyes
| Dye Type | Primary Channel | Bleed-Through Channel | Severity | Experimental Conditions |
|---|---|---|---|---|
| RNA Dye | 488 nm excitation | 561 nm channel (Mito) | Moderate | Fixed cells, standard CP protocol [4] |
| DNA Dye | 405 nm excitation | 488 nm channel | Weak | Fixed cells, standard CP protocol [4] |
Experimental Protocol: Sequential Imaging to Minimize Bleed-Through
The following protocol, adapted from the Cell Painting PLUS (CPP) method, effectively eliminates bleed-through through sequential acquisition [4]:
Day 1: Preparation
- Cell Seeding: Plate MCF-7/vBOS cells (or your preferred cell line) in 96-well or 384-well imaging plates at appropriate density (e.g., 2,000-4,000 cells/well for 96-well format).
- Chemical/Genetic Perturbation: Apply chemogenomic library compounds or genetic perturbations at desired concentrations. Include appropriate controls (DMSO, wild-type, etc.).
- Incubation: Incubate cells for the predetermined treatment time (typically 24-48 hours) at 37°C with 5% CO₂.
Day 2: Staining and Imaging Cycle 1
- Fixation: Aspirate media and fix cells with 4% paraformaldehyde (PFA) in PBS for 20 minutes at room temperature.
- Washing: Wash twice with 1× PBS.
- Staining 1: Apply the first dye panel:
- Nuclear DNA stain (e.g., Hoechst 33342)
- RNA stain (e.g., SYTO 14)
- Actin cytoskeleton stain (e.g., Phalloidin)
- Golgi apparatus stain (e.g., Wheat Germ Agglutinin)
- Lysosomal stain (e.g., LysoTracker) Incubate according to manufacturer recommendations
- Sequential Imaging: Image each dye in separate channels using the following order:
- Channel 1: DNA stain (405 nm laser)
- Channel 2: RNA stain (488 nm laser)
- Channel 3: Actin stain (561 nm laser)
- Channel 4: Golgi stain (640 nm laser)
- Channel 5: Lysosomal stain (using appropriate laser line) Ensure no channel merging during acquisition
Day 2: Staining and Imaging Cycle 2
- Dye Elution: Apply elution buffer (0.5 M L-Glycine, 1% SDS, pH 2.5) for 15 minutes at room temperature to remove previous dyes.
- Washing: Wash three times with 1× PBS to completely remove elution buffer.
- Staining 2: Apply the second dye panel:
- Mitochondrial stain (e.g., MitoTracker Deep Red)
- Endoplasmic reticulum stain (e.g., Concanavalin A) Incubate according to manufacturer recommendations
- Sequential Imaging: Image each dye in separate channels:
- Channel 1: Mitochondrial stain
- Channel 2: ER stain
Figure 1: CPP Sequential Workflow - This enhanced Cell Painting workflow uses iterative staining and sequential imaging to eliminate signal bleed-through [4].
Addressing Dye Instability
Dye instability over time introduces significant variability in morphological profiling, particularly in large-scale chemogenomic screens that span multiple days or weeks.
Quantitative Dye Stability Profiles
Table 2: Temporal Stability of Cell Painting Dyes
| Dye | Target Organelle | Signal Stability Duration | Signal Deviation After 24h | Optimal Imaging Window |
|---|---|---|---|---|
| LysoTracker | Lysosomes | ≤24 hours | >10% decrease | 0-6 hours [4] |
| Concanavalin A | Endoplasmic Reticulum | ≥48 hours | <10% increase (plateau) | 24-48 hours [4] |
| Hoechst 33342 | Nuclear DNA | ≥4 weeks | <5% change | 0-24 hours [4] |
| SYTO 14 | RNA/Nucleoli | ≥4 weeks | <5% change | 0-24 hours [4] |
| Phalloidin | F-actin | ≥4 weeks | <5% change | 0-24 hours [4] |
| WGA | Golgi/Plasma Membrane | ≥4 weeks | <5% change | 0-24 hours [4] |
| MitoTracker | Mitochondria | ≥4 weeks | <5% change | 0-24 hours [4] |
Experimental Protocol: Dye Stability Optimization
Protocol for Maximizing Signal Stability Across Large Screens:
Dye Preparation and Storage:
- Prepare fresh dye solutions weekly for light-sensitive dyes (LysoTracker, MitoTracker)
- Aliquot dyes and store at recommended temperatures
- Protect from light during storage and handling
Staining Optimization:
- Conduct pilot stability tests with each new dye lot
- Establish optimal dye concentration through titration (example concentrations in Supplementary Data 1 of [4])
- Use consistent incubation times and temperatures across experiments
Temporal Management of Large Screens:
- Segment large chemogenomic screens into batches that can be imaged within 24 hours of staining
- Implement a staggered staining schedule where each batch is stained immediately before imaging
- Include reference controls in each batch to monitor inter-batch variability
Stability Validation:
- Include stability QC plates with known reference compounds at beginning and end of imaging queue
- Measure signal intensity of control wells over imaging period to quantify decay
- Establish acceptance criteria for maximum allowable signal variation (e.g., <10% coefficient of variation)
Reducing Background Noise
Background noise reduces the signal-to-noise ratio, obscuring subtle morphological phenotypes induced by chemogenomic perturbations.
Experimental Protocol: Background Reduction
Comprehensive Washing and Blocking Protocol:
Post-Fixation Wash:
- After fixation with 4% PFA, wash plates 3× with 1× PBS
- Use ample wash volume (200μL for 96-well plates)
- Increase soak time to 5 minutes per wash with gentle agitation
Blocking Step:
- Prepare blocking buffer: 1% BSA, 0.1% Triton X-100 in 1× PBS
- Block for 60 minutes at room temperature with gentle shaking
- Do not wash after blocking; proceed directly to staining
Optimized Staining Conditions:
- Dilute dyes in antibody dilution buffer (1% BSA in PBS)
- Include 0.1% Tween-20 in staining solution for even dye distribution
- Stain for precisely optimized durations (avoid over-staining)
Post-Staining Washes:
- Wash 3× with PBS-T (0.1% Tween-20 in PBS)
- Perform final wash with pure PBS to remove detergent residues
- For persistent background, include a nuclear acid wash (0.1% SDS in PBS for 2 minutes) before final PBS wash
Imaging Optimization:
- Include unstained controls for each cell type to set background subtraction thresholds
- Optimize exposure times for each channel to maximize dynamic range without saturation
- Use flat-field correction during image acquisition if available
The Scientist's Toolkit
Table 3: Essential Research Reagent Solutions for Cell Painting Troubleshooting
| Reagent/Category | Specific Examples | Function in Troubleshooting | Application Notes |
|---|---|---|---|
| Dye Elution Buffers | 0.5 M L-Glycine, 1% SDS, pH 2.5 | Enables iterative staining by removing dyes while preserving morphology | Critical for CPP method; allows sequential imaging without bleed-through [4] |
| Blocking Agents | 1% BSA in PBS | Reduces non-specific binding and background noise | Use before staining; particularly important for antibody-based multiplexing |
| Wash Buffers | PBS-T (0.1% Tween-20), Pure PBS | Removes unbound dye and reduces background | Include detergent in intermediate washes, pure PBS for final wash |
| Reference Controls | Known mechanism compounds (90 compounds covering 47 MoAs) | QC for dye performance and assay robustness | JUMP-CP consortium recommends diverse reference set for optimization [2] [4] |
| Cell Line Options | U2OS, MCF-7, A549, HepG2 | Cell type selection based on research question | Flat, non-overlapping cells ideal; different lines have varying sensitivity to MoAs [2] [49] |
| Fixation Agents | 4% Paraformaldehyde (PFA) | Preserves cellular morphology while maintaining epitopes | Standardized concentration and fixation time (20 min) crucial for consistency |
Figure 2: Troubleshooting Guide - This diagram maps specific solutions and essential reagents to the three common technical challenges in Cell Painting assays [2] [4] [49].
Implementing these detailed protocols for addressing signal bleed-through, dye instability, and background noise will significantly enhance the quality and reproducibility of Cell Painting data in chemogenomic library screening. The Cell Painting PLUS approach with iterative staining and sequential imaging provides a robust framework for eliminating spectral crosstalk, while careful attention to dye stability timelines and comprehensive washing protocols ensures consistent, high-quality morphological profiles. These troubleshooting strategies enable researchers to more confidently detect subtle phenotypic patterns, improving the reliability of mechanism of action predictions and functional gene annotation in large-scale chemogenomic studies.
Within the realm of chemogenomic library screening, high-throughput phenotypic profiling (HTPP) has become an indispensable tool for deconvoluting the mechanisms of action (MoA) of chemical and genetic perturbations. The Cell Painting (CP) assay, a cornerstone of this approach, uses a panel of fluorescent dyes to label key cellular compartments, generating rich morphological profiles that serve as a barcode for cellular state [50]. However, standard CP is constrained by the spectral limits of conventional microscopy, often requiring the merging of signals from distinct organelles (e.g., endoplasmic reticulum and RNA) in a single imaging channel, which compromises the specificity of the extracted features [4].
The Cell Painting PLUS (CPP) assay emerges as a significant methodological evolution, designed to overcome these limitations and provide a more flexible, customizable, and information-rich platform for screening research. By introducing an efficient iterative staining-elution cycle, CPP dramatically expands the multiplexing capacity of traditional phenotypic profiling, allowing for the separate imaging and analysis of at least seven fluorescent dyes across nine subcellular compartments [4]. This article details the application and protocol of CPP, framing it within the context of advanced chemogenomic library screening and providing researchers with the practical tools for its implementation.
Comparative Analysis: Cell Painting vs. Cell Painting PLUS
The core innovation of CPP lies in its use of iterative staining and elution, which enables a greater number of structures to be visualized independently. Table 1 summarizes the key differences between the standard Cell Painting and the enhanced CPP assay.
Table 1: Comparison between Cell Painting and Cell Painting PLUS Assays
| Feature | Cell Painting (CP) | Cell Painting PLUS (CPP) |
|---|---|---|
| Core Principle | Single-round, multiplexed staining | Iterative cycles of staining and elution |
| Typical Dyes/Channels | 6 dyes, 4-5 imaging channels [50] | ≥7 dyes, each in a separate channel [4] |
| Key Labeled Compartments | Nuclear DNA, cytoplasmic RNA, nucleoli, actin, Golgi, plasma membrane, ER, mitochondria [50] | All CP compartments plus lysosomes [4] |
| Spectral Separation | Dyes with overlapping spectra are often merged (e.g., RNA/ER) [4] | Each dye is imaged sequentially in its own channel [4] |
| Phenotypic Profile Specificity | High-dimensional but can be compromised by merged signals | Enhanced due to improved organelle-specificity [4] |
| Customizability | Limited to a standardized dye set | Highly flexible; dyes can be selected or swapped based on research needs [4] |
This expanded capacity is not merely quantitative. The separation of signals that were previously merged dramatically improves the organelle-specificity of the phenotypic profiles, leading to more precise insights into the subcellular localization of phenotypic changes induced by library compounds [4]. Furthermore, the flexible nature of CPP allows researchers to customize the assay by incorporating dyes—or even antibodies—specific to their biological questions, making it a powerful tool for targeted and discovery-based screening [4].
Detailed CPP Experimental Protocol
The following section provides a step-by-step protocol for executing the Cell Painting PLUS assay, from cell preparation to image acquisition.
Cell Culture and Plating
- Cell Line: The protocol was established using the hormone-responsive MCF-7/vBOS breast cancer cell line [4]. However, other adherent cell lines common in chemogenomic screening, such as U2OS or Hep G2, are also suitable [51].
- Plating: Plate cells at an appropriate density in multi-well plates (e.g., 96- or 384-well) suitable for high-content imaging. Incubate until cells reach the desired confluency, typically 50-80%, ensuring they are healthy and sub-confluent for robust spatial imaging.
Compound Treatment and Fixation
- Chemogenomic Library Treatment: Treat cells with compounds or genetic perturbations from your screening library for a predetermined time.
- Fixation: Aspirate the media and fix the cells with paraformaldehyde (PFA, commonly 4% in PBS) for 20 minutes at room temperature. Following fixation, wash the cells twice with PBS.
Iterative Staining-Elution Cycles
The CPP process is divided into multiple cycles. The first cycle includes staining for mitochondria, which serves as a reference channel for image registration across cycles.
- Cycle 1: Mitochondrial Staining and Reference Imaging
- Cycle 2: Multi-Compartment Staining and Elution
- Stain with a panel of dyes for other compartments. The recommended panel includes dyes for the plasma membrane, actin cytoskeleton, cytoplasmic RNA, nucleoli, lysosomes, nuclear DNA, and endoplasmic reticulum. Specific dye concentrations and incubation times should be optimized but are generally similar to those used in standard CP [4].
- Image all dyes from this cycle in their separate, dedicated channels.
- Elute the dyes using the optimized CPP elution buffer (0.5 M L-Glycine, 1% SDS, pH 2.5) to remove all fluorescent signals except for the MitoTracker from Cycle 1 [4]. The elution buffer efficiently removes the signals while preserving subcellular morphology.
- Subsequent Cycles: Customized Staining
- Further cycles of staining and elution can be performed to incorporate additional dyes, such as those for the Golgi apparatus or other custom markers, as required by the specific research question [4].
Image Acquisition and Quality Control
- Sequential Imaging: For each staining cycle, acquire images by sequentially exciting each dye with its specific laser line and collecting emission in a separate channel. This is crucial for avoiding spectral crosstalk and emission bleed-through, which was characterized for dyes like the RNA stain [4].
- Timing: Complete all imaging within 24 hours of each staining step to ensure signal stability and data robustness, as the intensity of some dyes (e.g., LysoTracker, concanavalin A) can change over time [4].
- Quality Control: Implement automated field-of-view and cell-level quality control measures. These can include algorithms to detect blurring (e.g., using the log-log slope of the power spectrum) and saturated pixels, as well as metrics to identify and filter out incorrectly segmented cells [52].
The following diagram illustrates the core workflow of the CPP assay.
Data Analysis and Profiling Workflow
The computational transformation of acquired images into meaningful morphological profiles is a multi-stage process. The workflow, adapted from established practices in image-based profiling [52], is outlined below, with special considerations for CPP data.
Image Analysis: This step converts images into quantitative measurements.
- Illumination Correction: Apply a retrospective multi-image correction method to account for inhomogeneous illumination across the field of view, which is critical for accurate intensity measurements [52].
- Segmentation: Use model-based (e.g., CellProfiler) or machine-learning-based (e.g., Ilastik) approaches to identify nuclei, cells, and cytoplasmic boundaries. The mitochondrial channel from the first staining cycle can serve as a stable reference for registering images from subsequent cycles into a single composite [4].
- Feature Extraction: For each segmented cell, extract hundreds to thousands of morphological features. These include:
- Shape Features: Area, perimeter, and roundness of cellular compartments [52].
- Intensity Features: Mean, maximum, and standard deviation of pixel intensities per channel [52].
- Texture Features: Metrics like Haralick features that quantify patterns and regularity within organelles [52].
- Context Features: Spatial relationships between cells and organelles [52].
Data Quality Control: Rigorously filter the data to remove technical artifacts.
- Cell-level QC: Filter out outlier cells that may result from segmentation errors, debris, or cells at the image border [52].
- Profiling: Aggregate single-cell data to the well level (e.g., by median) to create a morphological profile for each treatment condition.
Profile Analysis and Interpretation: Use the high-dimensional profiles for biological discovery.
- Normalization and Batch Correction: Apply normalization techniques to minimize plate-to-plate and batch-to-batch variation.
- Similarity Assessment: Calculate the similarity between profiles (e.g., using Pearson correlation) to identify compounds or genetic perturbations with similar morphological impacts, thus inferring potential shared MoA [4] [50]. Metrics like "percent replicating" and "percent matching" can be used to quantitatively assess the quality and biological relevance of the profiling data [50].
The Scientist's Toolkit: Essential Research Reagents and Materials
Successful implementation of the CPP assay relies on a carefully selected set of reagents and tools. Table 2 lists the essential components for the core protocol.
Table 2: Key Research Reagent Solutions for Cell Painting PLUS
| Category / Item | Specific Example / Function | Application in CPP |
|---|---|---|
| Fluorescent Dyes | MitoTracker (Mitochondria) | Reference stain; imaged in first cycle and not eluted [4]. |
| LysoTracker (Lysosomes) | Labels acidic compartments; an addition beyond standard CP [4]. | |
| Phalloidin (Actin) | Labels filamentous actin cytoskeleton [50]. | |
| Concanavalin A (ER) | Binds to glycoproteins on the endoplasmic reticulum [50]. | |
| Wheat Germ Agglutinin (Plasma Membrane) | Labels the cell membrane and Golgi apparatus [50]. | |
| SYTO 14 (RNA) | Stains cytoplasmic RNA and nucleoli [50]. | |
| Hoechst (DNA) | Stains nuclear DNA [50]. | |
| Key Buffers & Solutions | CPP Elution Buffer (0.5 M Glycine, 1% SDS, pH 2.5) | Efficiently removes dye signals while preserving morphology for iterative staining [4]. |
| Fixative (4% PFA) | Preserves cellular architecture after treatment. | |
| Computational Tools | Image Analysis Software (CellProfiler, Ilastik) | Performs segmentation and feature extraction [52]. |
| Image Registration Software (e.g., 4i stitcher) | Aligns image stacks from different staining cycles using the reference channel [53]. | |
| Data Analysis Platforms (KNIME, R) | For data normalization, analysis, and visualization [53]. |
Cell Painting PLUS represents a significant technical advancement in the field of image-based phenotypic profiling for chemogenomic screening. By breaking the spectral limits of conventional Cell Painting through an iterative staining-elution approach, CPP provides researchers with a tool that offers unparalleled flexibility, multiplexing capacity, and subcellular resolution. The ability to profile nine or more organelles separately, including the addition of lysosomes, enables the generation of more diverse and specific phenotypic fingerprints. This allows for a finer deconvolution of compound mechanisms and a deeper exploration of cell biology. While the protocol involves additional steps, the robust elution buffer and standardized workflow ensure its practicality for high-throughput applications. The integration of CPP into screening pipelines promises to enhance the discovery and characterization of bioactive compounds, ultimately accelerating drug discovery and toxicological research.
Within the framework of chemogenomic library screening using the Cell Painting assay, the choice between live-cell imaging and fixed-cell protocols is a critical strategic decision. Cell Painting provides a powerful, unbiased morphological profiling strategy by using multiplexed fluorescent dyes to label eight major cellular components, generating rich data for phenotypic screening [14]. The adaptation of this assay for live-cell applications represents a significant evolution, enabling the direct observation of dynamic cellular processes in real time [54]. This application note provides a detailed comparative analysis of these complementary approaches, focusing on their respective advantages, optimized protocols, and applications in drug discovery pipelines. We present structured quantitative data, detailed methodologies, and visual workflows to guide researchers in selecting and implementing the most appropriate imaging strategy for their specific chemogenomic screening objectives.
Comparative Analysis: Quantitative Advantages
The quantitative and practical differences between live-cell and fixed-cell imaging protocols are substantial, impacting experimental design, data quality, and biological interpretation. The tables below summarize key comparative metrics and market trends that reflect the adoption of these technologies in the pharmaceutical and biotechnology sectors.
Table 1: Performance and Application Comparison of Live-Cell vs. Fixed-Cell Imaging
| Parameter | Live-Cell Imaging | Fixed-Cell Imaging |
|---|---|---|
| Temporal Resolution | Continuous, real-time kinetic data [55] | Single, static time points |
| Cellular Context | Maintains native physiology; true cellular environment [55] | Potential fixation artifacts; altered morphology [54] |
| Process Dynamics | Captures transient events (e.g., apoptosis onset) [55], mitochondrial dynamics [56] | Inferred from population snapshots |
| Multiplexing Capacity | Limited by compatible live-cell dyes (e.g., Acridine Orange) [54] | High (8+ channels with Cell Painting) [14] |
| Experimental Duration | Hours to days (long-term kinetics) | Short (endpoint measurement) |
| Primary Advantage | Functional, dynamic processes | High-content, multiplexed morphology |
| Optimal Use Case | Kinetic phenotyping, mechanism of action (MoA) deconvolution | High-throughput primary screening, toxicology profiling |
Table 2: Market Adoption and End-User Trends in Cell Imaging (2024-2025)
| Segment | Live-Cell Imaging Trends | Fixed-Cell Imaging Trends |
|---|---|---|
| Projected Market Growth (2024-2030) | CAGR of 8.78% (Reaching USD 4.44 Bn by 2030) [57] | Established standard, often integrated with initial live-cell analysis |
| Dominant Application | Drug discovery & development (Fastest growing segment) [58] | Cell biology (Largest market share) [57] |
| Leading End-User | Pharmaceutical & biotechnology companies (Fastest growing) [58] | Academic & research institutes (Largest share) [58] |
| Technology Impact | AI-driven kinetic analysis and label-free techniques [59] [55] | High-content analysis (HCA) with AI-based morphological profiling [57] |
| Key Market Driver | Demand for kinetic data in personalized medicine & complex disease modeling [58] | Need for high-content, high-throughput screening in primary drug discovery [57] |
Experimental Protocols for Chemogenomic Screening
Protocol 1: Live Cell Painting (LCP) for Dynamic Phenotypic Profiling
This protocol enables real-time morphological profiling of cells treated with compounds from a chemogenomic library, using the metachromatic dye Acridine Orange (AO) for live-cell staining [54].
Key Reagent Solutions:
- Acridine Orange (AO): A versatile fluorescent dye that stains nucleic acids (green emission) and acidic compartments like lysosomes (red emission) in live cells, enabling multiparametric morphological profiling without fixation [54].
- FluoroBrite DMEM: A low-fluorescence imaging medium essential for maintaining cell health while minimizing background noise during live-cell imaging.
- CO₂-independent medium or an environmental chamber to maintain physiological conditions (37°C, 5% CO₂) throughout imaging.
Procedure:
- Cell Seeding: Seed appropriate cell lines (e.g., MCF-7, Huh-7) at a density of 8×10² cells per well in black-walled, imaging-compatible 96-well microplates (e.g., Greiner Bio-One µClear plates). Incubate for 24 hours to ensure adherence and recovery [54].
- Compound Treatment: Introduce compounds from the chemogenomic library at desired concentrations. Include DMSO vehicle controls and reference compounds with known phenotypic effects.
- Staining Solution Preparation: Dilute the 1 mM AO stock solution in unsupplemented, pre-warmed culture medium to create a 10 µM working solution. Note: Optimal AO concentration should be determined for each cell line to minimize cytotoxicity and ensure clear signal. [54]
- Staining and Imaging:
- Carefully aspirate the culture medium from each well.
- Add 100 µL of the 10 µM AO working solution to each well.
- Incubate the plate for 15-30 minutes under standard culture conditions (37°C, 5% CO₂).
- Gently replace the AO solution with fresh, pre-warmed FluoroBrite DMEM.
- Transfer the plate to a live-cell imaging system equipped with environmental control and appropriate filter sets (e.g., GFP and RFP channels).
- Image Acquisition: Acquire images using a 20× objective at predetermined intervals (e.g., every 15-60 minutes) over the desired experimental duration (e.g., 24-72 hours). Automated multi-position scanning ensures consistent data collection across all wells.
- Image Analysis:
- Use CellProfiler (v4.2.5+) for image segmentation and feature extraction.
- Employ CellProfiler Analyst or machine learning pipelines (e.g., scikit-learn in Python) for phenotypic classification and clustering of compounds based on their dynamic morphological profiles [54].
Protocol 2: Fixed-Cell Cell Painting for High-Content Multiplexed Profiling
This is the standardized, high-content Cell Painting protocol that uses a panel of dyes to label multiple organelles in fixed cells, providing a rich, multiplexed morphological snapshot [14].
Key Reagent Solutions:
- Cell Painting Dye Cocktail: A predefined mixture of fluorescent dyes including Hoechst 33342 (nuclei), Phalloidin (actin cytoskeleton), Concanavalin A (endoplasmic reticulum and mitochondria), WGA (plasma membrane and Golgi), and SYTO 14 (nucleoli) [14].
- Fixative Solution: Typically 4% formaldehyde in PBS for cell preservation.
- Permeabilization/Blocking Buffer: PBS containing 0.1% Triton X-100 and 1% BSA.
Procedure:
- Cell Seeding and Compound Treatment: Seed cells and treat with chemogenomic library compounds as described in the Live-Cell Protocol (Step 1).
- Fixation:
- At the desired endpoint, carefully aspirate the culture medium.
- Add 100 µL of 4% formaldehyde solution to each well and incubate for 15-20 minutes at room temperature.
- Aspirate the fixative and wash the cells twice with 100 µL PBS.
- Staining with Cell Painting Dye Cocktail:
- Prepare the master mix of all five dyes in PBS containing 0.1% Triton X-100 and 1% BSA.
- Add the staining solution to each well and incubate for 30-60 minutes at room temperature, protected from light.
- Aspirate the staining solution and perform two washes with 100 µL PBS.
- Image Acquisition: Acquire high-resolution images on a high-content screening system (e.g., confocal or widefield microscope) using appropriate filter sets for each dye. Acquire images from multiple sites per well to ensure statistical robustness.
- Image and Data Analysis:
- Use CellProfiler for automated image segmentation and extraction of thousands of morphological features.
- Generate morphological profiles (fingerprints) for each compound treatment.
- Use unsupervised machine learning (e.g., clustering) to group compounds with similar profiles, suggesting potential mechanisms of action [14].
Workflow and Decision Pathway Diagrams
The following diagrams illustrate the experimental workflows for both imaging approaches and a logical framework for selecting the optimal strategy based on research objectives.
Diagram 1: Live-Cell Imaging Workflow
Diagram 2: Fixed-Cell Imaging Workflow
Diagram 3: Imaging Strategy Decision Pathway
Integrated Applications in Chemogenomic Library Screening
The integration of both imaging modalities creates a powerful framework for deconvoluting mechanisms of action in chemogenomic library screening. A typical tiered screening approach might begin with high-throughput fixed-cell Cell Painting to identify "hits" that induce morphological changes, followed by live-cell imaging of selected hits to understand the temporal sequence and functional consequences of these changes [14] [54]. For instance, a fixed-cell screen might identify compounds that disrupt actin cytoskeleton organization; subsequent live-cell imaging can reveal whether this disruption is a rapid, direct effect or a slower, secondary consequence of another primary insult, such as mitochondrial dysfunction [56].
Advanced AI-driven analysis is now bridging these modalities. Machine learning models trained on fixed-cell morphological profiles can predict dynamic behaviors, while neural networks can extract subtle kinetic features from live-cell videos that are imperceptible to the human eye [59]. The convergence of these technologies, coupled with the strategic application of both live and fixed-cell protocols, is accelerating the identification and validation of novel therapeutic targets and mechanisms from chemogenomic libraries, ultimately enhancing the efficiency of the drug discovery pipeline.
Within chemogenomic library screening research, the ability to capture comprehensive phenotypic profiles is paramount for deciphering the mechanisms of action (MoA) of novel compounds. The standard Cell Painting assay provides a powerful, untargeted approach to morphological profiling [2]. However, its fixed panel of dyes can limit the depth of investigation for specific organelle-specific perturbations. Assay customization through the incorporation of additional organelle-specific dyes and antibodies addresses this limitation, significantly expanding the multiplexing capacity and organelle-specificity of phenotypic profiles. This protocol details methods for customizing and enhancing the standard Cell Painting assay to address more targeted research questions within chemogenomic screening.
Research Reagent Solutions
The following table lists essential dyes and reagents for customizing organelle staining, building upon the core Cell Painting components.
Table 1: Key Reagents for Organelle-Specific Staining
| Reagent Name | Specific Target / Organelle | Function in the Assay |
|---|---|---|
| Hoechst 33342 [60] | Nuclear DNA | Labels the nucleus, enabling analysis of nuclear morphology and cell count. |
| Phalloidin conjugates (e.g., iFluor 633) [61] [60] | F-actin cytoskeleton | Highlights filamentous actin structures, revealing changes in cell shape and structure. |
| Wheat Germ Agglutinin (WGA) conjugates [60] | Golgi apparatus and Plasma Membrane | Stains glycoproteins on the plasma membrane and Golgi apparatus, outlining cell boundaries and Golgi organization. |
| MitoTracker Deep Red [60] / CytoFix Red [61] | Mitochondria | Labels the mitochondrial network, allowing for assessment of mitochondrial morphology and function. |
| Concanavalin A conjugates [60] | Endoplasmic Reticulum (ER) | Binds to mannose and glucose residues on the ER, visualizing the ER network structure. |
| SYTO 14 [60] | Nucleoli and Cytoplasmic RNA | Stains nucleoli and cytoplasmic RNA, providing insight into nucleolar morphology and RNA distribution. |
| LysoTracker Dyes [4] | Lysosomes | Accumulates in acidic compartments, specifically labeling lysosomes. |
| Organelle-Specific Antibodies | Various (e.g., Golgi, Peroxisomes) | Provides high-specificity labeling for organelles not covered by standard dyes, such as the Golgi apparatus [4]. |
Experimental Protocols
Standard Multiplexed Organelle Staining for Fixed Cells
This protocol, adapted from AAT Bioquest, describes a robust workflow for simultaneous visualization of five key organelles in fixed HeLa cells using spectrally distinct dyes [61]. It can be easily integrated into a standard Cell Painting workflow.
Methodology:
- Cell Culture: HeLa cells are cultured in Dulbecco's Modified Eagle Medium (DMEM) supplemented with 10% fetal bovine serum (FBS) and 1% antibiotic solution. Seed cells in imaging-compatible plates and incubate overnight at 37°C with 5% CO₂ to achieve optimal confluency [61].
- Live-Cell Staining (Nucleus, Mitochondria, ER): Incubate cells with a mixture of the following dyes in HHBS buffer for 30 minutes at 37°C, protected from light:
- Nuclear Violet LCS1 (Nuclear DNA stain)
- CytoFix Red Mitochondrial Stain
- ER Tracer Green
- After incubation, wash cells twice with HHBS buffer to remove excess dyes [61].
- Fixation: After live-cell staining, fix cells in 4% paraformaldehyde solution for 10 minutes at room temperature. Rinse fixed cells twice with HHBS buffer [61].
- Cytoskeleton and Membrane Staining (Post-Fixation): Apply the following staining solutions in HHBS buffer for 20 minutes at room temperature, protected from light:
- Phalloidin-iFluor 633 (F-actin cytoskeleton stain)
- iFluor-750 WGA (plasma membrane glycoprotein stain)
- After staining, wash cells thoroughly with PBS to remove unbound dyes [61].
- Fluorescence Imaging: Perform imaging using a fluorescence microscope (e.g., Keyence) with appropriate filter sets. Sequential image acquisition is recommended to minimize spectral overlap [61].
Cell Painting PLUS (CPP): An Iterative Staining-Elution Workflow
For investigations requiring higher multiplexing capacity, the Cell Painting PLUS (CPP) assay enables iterative staining and elution to label at least nine subcellular compartments with minimal spectral overlap [4].
Methodology:
- Initial Staining Cycle: Perform the first round of staining and fixation using a set of dyes targeting a first group of organelles (e.g., plasma membrane, actin, RNA, nucleoli, lysosomes).
- Dye Elution: Apply a specifically formulated elution buffer (e.g., 0.5 M L-Glycine, 1% SDS, pH 2.5) to remove the fluorescent signals while preserving the cellular morphology. The elution buffer composition can be optimized for the specific dyes used [4].
- Re-staining Cycle: Perform a second round of staining on the same sample with a new set of dyes targeting different organelles (e.g., nuclear DNA, ER, mitochondria, Golgi). This cycle can, in principle, be repeated [4].
- Sequential Imaging: Image each set of dyes in separate channels after each staining cycle. The mitochondrial channel, for instance, can be used as a registration reference to combine image stacks from multiple cycles into a single composite image [4].
The following workflow diagram illustrates the two primary experimental paths for assay customization.
Dye and Antibody Selection Guide
Selecting appropriate reagents is critical for successful assay customization. The table below provides a comparative overview of key dyes to inform selection.
Table 2: Organelle-Specific Dye and Antibody Selection Guide
| Organelle / Target | Example Reagent | Ex/Em (nm) | Compatible Cell State | Key Considerations |
|---|---|---|---|---|
| Nucleus | Hoechst 33342 [60] | ~350/460 | Live or Fixed | Cell-permeant; standard DNA counterstain. |
| Mitochondria | MitoTracker Deep Red [60] | ~644/665 | Live (fixed compatible) | Membrane potential-dependent; requires live-cell application. |
| Mitochondria | CytoFix Red [61] | ~550/570 | Fixed | Membrane potential-independent; use after fixation. |
| Actin Cytoskeleton | Phalloidin conjugates [61] | Varies by conjugate | Fixed | Binds F-actin; requires cell permeabilization. |
| Endoplasmic Reticulum | Concanavalin A conjugates [60] | ~488/520 (Alexa 488) | Fixed | Binds to glycoproteins; use after fixation. |
| Golgi Apparatus | Antibodies (e.g., anti-Golgin-97) [4] | Varies by conjugate | Fixed | High specificity; requires permeabilization and antibody incubation. |
| Plasma Membrane | WGA conjugates [61] | ~750/780 (iFluor-750) | Fixed | Labels glycoproteins; outlines cell boundary. |
| Lysosomes | LysoTracker Dyes [4] | Varies by dye | Live | Requires acidic pH; typically used in live cells. |
Advanced Customization and Data Integration
The ultimate goal of customizing a Cell Painting assay within chemogenomic screening is to generate rich, high-dimensional data that can be integrated with other data types for robust MoA deconvolution.
Integration with Chemogenomic Libraries
Customized Cell Painting assays are exceptionally powerful when applied to a well-designed chemogenomic library. Such libraries consist of small molecules representing a large and diverse panel of drug targets involved in diverse biological effects and diseases [8]. By screening these compounds against a customized morphological profile, researchers can connect specific morphological perturbations induced by a compound to its potential protein targets and pathways, effectively building a system pharmacology network [8].
Data Analysis and Morphological Profiling
The high-content images generated from a customized assay are processed using automated image analysis software like CellProfiler to extract hundreds of morphological features from each cell [8]. These features form a morphological profile that serves as a high-dimensional barcode for the cellular state under a given perturbation. Comparing these profiles allows for:
- Grouping compounds with similar MoA based on phenosimilarity [2].
- Identifying unexpected off-target effects of compounds.
- Revealing disease-specific morphological signatures.
The diagram below summarizes the journey from experimental perturbation to biological insight.
Quality Control Metrics and Batch Effect Correction Methods
Cell Painting, a high-content, image-based profiling assay, has become a cornerstone of modern phenotypic drug discovery and chemogenomic library screening. By using up to six fluorescent dyes to label eight cellular components, it captures thousands of morphological features from each cell, generating rich datasets that reflect cellular states following genetic or chemical perturbations [2]. However, the power and scalability of Cell Painting present two significant challenges: maintaining consistent data quality across experiments and mitigating technical variations known as batch effects.
Batch effects are systematic technical variations that arise from differences in experimental conditions rather than biological signals. In large-scale Cell Painting campaigns, these effects can originate from multiple sources, including reagent lots, cell culture conditions, instrumentation variations (different microscopes or settings), processing times, and inter-laboratory procedural differences [62] [63]. Left unaddressed, batch effects obscure true biological signals, reduce statistical power, and impair the integration of datasets across multiple screening batches or research sites – a critical capability for leveraging public Cell Painting data resources like the JUMP Cell Painting Consortium dataset [62].
This application note provides detailed methodologies for implementing robust quality control metrics and batch correction methods specifically within the context of Cell Painting assay chemogenomic library screening, enabling researchers to produce reliable, reproducible, and integrable morphological profiling data.
Quality Control Metrics for Cell Painting
Automated Quality Control Using Reference Biosignatures
A powerful approach to quality control in Cell Painting involves quantifying the reproducibility of biosignatures from annotated reference compounds. This method establishes a probabilistic quality control limit based on historical data, which can then detect aberrations in new experiments [64].
Experimental Protocol: 2D Prediction Interval QC Tool
- Reference Compound Selection: Curate a set of 5-10 well-annotated compounds with robust, reproducible morphological profiles. These should span diverse mechanisms of action relevant to your chemogenomic library.
- Historical Profile Generation:
- Treat replicate wells with each reference compound across multiple plates and batches in initial screening phases.
- Process images using your standard feature extraction pipeline (e.g., CellProfiler or SPACe).
- For each reference compound, compute the mean morphological profile from all treated wells in the historical dataset.
- QC Limit Calculation:
- For new experimental batches, compute the Mahalanobis distance between the mean profile of each reference compound in the new batch and its corresponding historical mean profile.
- Using the historical data, establish a two-dimensional prediction interval for the expected Mahalanobis distance values, typically at a 95% confidence level.
- Quality Assessment:
- If the Mahalanobis distances for reference compounds in the new batch fall within the prediction interval, the batch passes QC.
- Points outside the interval indicate significant technical deviation, suggesting the need for investigation into potential experimental issues before proceeding with data analysis [64].
Single-Cell Distribution Analysis with Signed Earth Mover's Distance
Traditional per-well averaging discards valuable information about cell-to-cell heterogeneity. The SPACe (Swift Phenotypic Analysis of Cells) pipeline implements a sensitive quality control metric that analyzes the entire distribution of single-cell features.
Experimental Protocol: Single-Cell QC with SPACe
- Image Analysis:
- Process Cell Painting images through the SPACe pipeline, which uses Cellpose for nuclear and cellular segmentation and adaptive thresholding for organelle identification.
- Extract ~400 curated morphological features (intensity, shape, texture) for every single cell [65].
- Reference Distribution Establishment:
- Pool single-cell data from all DMSO (negative control) wells within an experiment.
- For each morphological feature, create a reference empirical distribution representing the expected untreated phenotype.
- Distance Calculation:
- For each treatment well, compute the Earth Mover's Distance (EMD) between the distribution of each feature in that well and the reference DMSO distribution.
- Apply a sign to the EMD: positive if the median feature value has increased compared to DMSO, negative if decreased (creating "signed EMD") [65].
- QC Application:
- Wells with an insufficient number of cells (<1000) should be flagged, as they cannot reliably reconstruct feature distributions.
- Compare signed EMD values for reference compounds against historical ranges to detect subtle technical anomalies that may not affect mean values but alter population heterogeneity.
Table 1: Key Quality Control Metrics for Cell Painting Screening
| Metric Category | Specific Metric | Calculation Method | Acceptance Criteria | Primary Application |
|---|---|---|---|---|
| Data Reproducibility | Percent Replicating [62] | Correlation of profiles between technical or biological replicates | >70% for robust screens | Assay performance validation |
| Percent Matching [62] [65] | Correlation between different treatments with same MoA | Higher values indicate better MoA discrimination | Biological signal strength | |
| Reference Compound Profile | Mahalanobis Distance [64] | Distance from historical reference profile mean | Within 95% prediction interval | Inter-batch consistency |
| Single-Cell Data Quality | Signed Earth Mover's Distance [65] | Dissimilarity between single-cell feature distributions and DMSO reference | Z-score < 3 for control compounds | Detecting population heterogeneity shifts |
| Cell Count [66] | Number of nuclei per well | >1000 cells/well for distribution analysis | Assay technical performance |
Figure 1: Comprehensive Quality Control Workflow for Cell Painting. This diagram outlines the sequential steps for implementing quality control, from initial image analysis to the decision point for batch correction.
Batch Effect Correction Methods
Benchmarking Batch Correction Performance
Systematic benchmarking using the JUMP Cell Painting dataset has evaluated multiple batch correction methods adapted from single-cell RNA sequencing, assessing their performance across scenarios like single-lab batches, multi-lab same-microscope, and multi-lab different-microscope conditions [62] [63]. Performance is typically measured using metrics that evaluate both batch mixing (e.g., k-BET, LISI) and biological signal preservation (e.g., replicate retrieval, MoA discrimination).
Table 2: Benchmarking Results of Batch Correction Methods for Cell Painting
| Method | Underlying Approach | Batch Mixing Performance | Biological Preservation | Computational Efficiency | Key Requirements |
|---|---|---|---|---|---|
| Harmony [62] [63] | Mixture-model based, iterative clustering | Consistently high across scenarios | High biological conservation | High | Batch labels |
| Seurat RPCA [62] | Reciprocal PCA, mutual nearest neighbors | Top performer, especially for heterogeneous data | Good biological conservation | High for large datasets | Batch labels |
| ComBat [62] [63] | Linear model, Bayesian shrinkage | Moderate performance | Risk of over-correction | Medium | Batch labels |
| scVI [62] [63] | Variational autoencoder, neural network | Good with complex batches | Requires careful tuning | Medium (GPU accelerated) | Batch labels |
| Scanorama [62] [63] | Mutual nearest neighbors across all batches | Good for heterogeneous datasets | Moderate biological conservation | Medium | Batch labels |
| MNN/fastMNN [62] [63] | Mutual nearest neighbors between batch pairs | Variable performance | Can over-correct with small overlaps | Medium | Batch labels |
| Sphering [62] [63] | Whitening transformation based on controls | Requires negative controls in all batches | Depends on control quality | High | Negative control samples |
| CellPainTR [67] | Transformer with Hyena operators, contrastive learning | State-of-the-art performance | High biological retention | Medium (GPU beneficial) | Batch labels |
Detailed Protocols for Top-Performing Methods
Harmony Batch Correction Protocol
Harmony employs an iterative clustering approach to integrate datasets while preserving biological variance, consistently ranking among top performers for Cell Painting data [62].
Implementation Steps:
- Input Data Preparation:
- Format your data as a cells (or wells) × features matrix. For well-level analysis, aggregate single-cell data by computing the mean across all cells in a well.
- Perform standard pre-processing: remove low-quality wells, normalize feature scales (z-score recommended), and optionally perform dimensionality reduction (PCA) on the feature matrix.
- Batch Label Assignment:
- Define a batch covariate for each sample. This can be experimental date, plate ID, laboratory site, or microscope instrument – reflecting the primary source of technical variation.
- Harmony Integration:
- Run the Harmony algorithm on the PCA embedding (or original features), specifying the batch covariate.
- Key parameters to optimize:
theta(diversity clustering penalty),lambda(ridge regression penalty), andmax_iter(number of iterations). - For most Cell Painting datasets, start with default parameters and increase
max_iterto 20 if convergence is slow.
- Output and Validation:
- The output is a batch-corrected embedding. Use metrics like k-BET acceptance rate to assess batch mixing and replicate retrieval accuracy to confirm biological signal preservation [62].
Seurat RPCA Batch Correction Protocol
Seurat's RPCA (Reciprocal PCA) method is particularly effective for integrating large, heterogeneous Cell Painting datasets from multiple sources, such as different laboratories using various microscopes [62].
Implementation Steps:
- Per-Batch PCA:
- Split your dataset by batch and perform PCA separately on each batch.
- Select a consistent number of PCs across all batches based on the elbow plot of variance explained.
- Find Integration Anchors:
- Use the FindIntegrationAnchors function with reduction = "rpca" to identify mutual nearest neighbors ("anchors") between batches in the PCA space.
- Key parameters:
k.anchor(number of anchors) typically set to 5-20, andk.filter(minimum mutual neighbors) to prevent poor matches.
- Integrate Data:
- Apply the IntegrateData function using the identified anchors to create a batch-corrected matrix.
- The method projects all datasets into a shared space while correcting technical variances.
- Downstream Analysis:
- Use the integrated matrix for clustering, visualization, and similarity-based tasks like mechanism of action prediction [62].
Figure 2: Batch Correction Method Selection Guide. This decision diagram helps researchers select appropriate batch correction methods based on their dataset characteristics and available controls.
Advanced and Emerging Methods
CellPainTR: Transformer-Based Approach
CellPainTR represents a novel deep learning approach specifically designed for batch correction in large-scale Cell Painting data. It uses a Transformer-like architecture with Hyena operators and contrastive learning to simultaneously perform batch correction and dimensionality reduction [67].
Implementation Overview:
- Architecture: The model incorporates morphological feature embedding with positional encoding and uses a source context token for batch correction.
- Training: Implements a two-stage process with masked token prediction followed by supervised contrastive learning.
- Performance: Demonstrates state-of-the-art results on the JUMP Cell Painting dataset, effectively reducing features from thousands to 256 dimensions while maintaining biological information [67].
- Application: Particularly suitable for very large, multi-source Cell Painting datasets where traditional methods may struggle with complexity.
Cell-Vision Fusion with Swin Transformer
For direct prediction from images while handling batch effects, the Swin Transformer architecture has been successfully applied to Cell Painting data. This approach bypasses traditional feature extraction and learns representations directly from raw images [68].
Key Techniques for Batch Effect Reduction:
- Augmentation Strategies: Implement heavy augmentation during training, including color jitter, Gaussian blur, and random cropping to make models invariant to technical variations.
- Domain Adaptation: Use domain confusion losses to learn batch-invariant features while preserving biological signals.
- Multi-Modal Fusion: Combine image data with extracted features and chemical structures for improved robustness and performance [68].
The Scientist's Toolkit: Essential Research Reagents and Materials
Table 3: Key Research Reagent Solutions for Cell Painting Quality Control and Batch Correction
| Reagent/Material | Function in QC/Batch Correction | Implementation Example | Considerations |
|---|---|---|---|
| Annotated Reference Compounds | Generate reproducible biosignatures for QC metrics and batch alignment | Use diverse MoA compounds (e.g., 90 compounds across 47 MoAs in JUMP) [65] | Select compounds with robust, reproducible phenotypes in your cell model |
| Cell Painting Dye Set | Standardized staining for consistent morphological profiling | Hoechst 33342 (DNA), Concanavalin A (ER), SYTO 14 (RNA), Phalloidin (F-actin), WGA (Golgi/PM), MitoTracker (mitochondria) [2] | Validate dye concentrations for each cell line; monitor lot-to-lot variability |
| DMSO Controls | Negative control for establishing baseline morphology distributions | Include multiple DMSO wells per plate for distribution analysis [65] | Use consistent DMSO concentration and sourcing across batches |
| Standardized Cell Lines | Reduce biological variability contributing to batch effects | U2OS, A549 commonly used; select based on phenotypic activity vs. MoA sensitivity [2] | Maintain consistent culture conditions and passage numbers |
| QC Software Tools | Implement automated quality control metrics | SPACe pipeline for single-cell analysis [65]; 2D Prediction Interval Tool [64] | Validate tools against reference datasets before deploying for screening |
| Batch Correction Algorithms | Computational removal of technical variations | Harmony, Seurat RPCA for standard applications; CellPainTR for complex integration [62] [67] | Method choice depends on dataset size, complexity, and computational resources |
Cost Optimization Strategies Without Compromising Data Quality
In the field of chemogenomic library screening using Cell Painting assays, researchers face significant pressure to manage escalating costs while maintaining the high-quality morphological data essential for phenotypic discovery. Cost optimization in this context is not about simple budget reductions, but rather a strategic re-allocation of resources to eliminate waste and improve process efficiency without sacrificing data integrity [69]. This approach ensures that spending is focused on elements that maximize scientific value, such as robust assay design and high-quality reagents, rather than on redundant or inefficient practices [70].
The integration of cost-conscious practices is particularly crucial for Cell Painting-based phenotypic profiling, which generates rich, multidimensional datasets for deciphering compound mechanisms and identifying novel therapeutics [2]. As screening campaigns scale to encompass thousands of compounds, direct costs associated with reagents, plates, and data storage can become prohibitive [71]. Furthermore, indirect costs from protocol complexity and low reproducibility can compromise data quality, leading to misinterpretations that ultimately waste resources [71]. This document outlines practical strategies and detailed protocols to help researchers achieve substantial cost savings while preserving, and in some cases enhancing, the quality and informational content of their Cell Painting data.
Cost Optimization Strategy Framework
A systematic approach to cost optimization ensures that efficiency gains do not come at the expense of data quality. The following framework outlines core strategies tailored to Cell Painting assays, with their primary goals and quality control considerations summarized in the table below.
Table 1: Strategic Framework for Cost Optimization in Cell Painting
| Strategy | Primary Cost-Saving Goal | Key Quality Control Considerations |
|---|---|---|
| Reagent & Protocol Optimization | Reduce per-plate reagent costs and minimize repeat experiments | Maintain signal-to-noise ratio; ensure staining specificity and reproducibility [4] |
| Sample & Library Management | Maximize informational value per sample screened | Implement appropriate controls; validate cell health; use benchmark compounds [14] |
| Data Pipeline Efficiency | Lower storage and computational expenses | Preserve data integrity and morphological feature resolution [71] |
| Workflow Modernization | Decrease hands-on staff time and improve throughput | Automate without introducing bias; validate against manual methods [69] |
Reagent and Protocol Optimization
Strategic management of reagents and protocols offers direct and significant cost savings. The goal is to reduce consumption without compromising the informational content of the acquired images.
Staining Volume and Concentration Scaling: Systematically test reduced staining volumes (e.g., from 50 µL/well to 30 µL/well) using intermediate plate washes to ensure even coverage. In parallel, perform concentration curves for each dye to identify the minimum concentration that provides a sufficient signal-to-noise ratio for robust feature extraction, as such optimizations were quantitatively pursued by the JUMP-CP Consortium [2].
Adoption of Multiplexing and Elution Cycles: Implement the Cell Painting PLUS (CPP) approach, which uses iterative staining-elution cycles to significantly expand multiplexing capacity [4]. This method allows for more cellular compartments to be imaged separately, increasing data richness per sample and potentially reducing the number of separate assays required.
- Protocol Note: The CPP elution buffer (0.5 M L-Glycine, 1% SDS, pH 2.5) efficiently removes dyes while preserving cellular morphology for subsequent staining rounds [4]. Always include a reference channel (e.g., Mito dye) that is not eluted to facilitate image registration across cycles.
Leverage Fluorescent Ligands for Targeted Profiling: For projects with a defined target class (e.g., GPCRs, kinases), consider supplementing or replacing broad morphological profiling with targeted fluorescent ligands [71]. This approach can provide a more direct, specific, and often less expensive readout for primary screening, reserving the more comprehensive Cell Painting assay for follow-up on hit compounds. This streamlines the workflow and reduces costs associated with complex, multi-dye staining.
Sample and Library Management
Optimizing how samples and libraries are handled can drastically improve the cost-efficiency of a screening campaign.
Focused Chemogenomic Library Design: Curate screening libraries to maximize mechanistic diversity and relevance while minimizing size. Utilize chemogenomic libraries built around diverse scaffolds that represent a large panel of drug targets, which increases the likelihood of observing a wide range of phenotypic responses with fewer compounds [14]. This data-centric library design prioritizes informational value over sheer volume.
Cell Line Selection and Validation: Choose cell lines based on the project's specific goals. While U2OS cells are a standard for their flat morphology and available data, other lines may provide more relevant biology for certain diseases [2]. A small pilot study comparing the "phenoactivity" and "phenosimilarity" of a set of reference compounds across a few candidate cell lines can identify the most informative system, preventing costly full-scale screens in suboptimal models [2].
Strategic Plate and Control Planning: Maximize plate capacity by testing multiple compounds per plate where possible, using well-validated DMSO controls. Employing inter-plate control normalization strategies reduces batch effects and the need for excessive replicate plates for normalization purposes [2].
Data Pipeline and Computational Efficiency
The computational burden of Cell Painting is a major, often overlooked, cost component.
Early Feature Selection and Compression: During assay development, identify and retain only the most biologically relevant and reproducible morphological features. Techniques like Moran's I or Redundancy Analysis can identify non-informative or highly correlated features for exclusion. This reduces the dimensionality of the dataset, lowering storage needs and accelerating downstream analysis without meaningful data loss [71].
Tiered Image Storage and Data Lifecycle Policy: Implement an automated data management policy. Store full-resolution images in a low-cost cloud storage tier (e.g., Amazon Glacier, Google Cloud Coldline) shortly after acquisition and feature extraction. For daily analysis, work with extracted feature data and lower-resolution image previews. This strategy significantly cuts expensive, high-performance storage costs [69] [72].
Optimized Computational Resource Allocation: Use cloud or cluster computing resources with autoscaling capabilities [73]. Configure pipelines to automatically scale resources during CPU-intensive steps (e.g., image segmentation) and scale down during interactive analysis periods. Leveraging spot instances or preemptible VMs for fault-tolerant batch processing jobs can further reduce computing expenses by 60-80% [73].
Workflow Modernization and Automation
Investing in smarter workflows yields long-term savings by boosting throughput and reproducibility.
Process Automation: Automate repetitive and variable-prone steps like liquid handling, staining, and fixation using robotic systems. Automation enhances reproducibility, reduces plate-to-plate variability (and thus the need for repeats), and frees up highly skilled researchers for more complex tasks [69]. The return on investment is realized through higher data quality and increased throughput.
Adoption of Open-Source Tools: Where feasible, replace commercial software with robust, community-supported open-source tools like CellProfiler for image analysis and KNIME or Python-based tools for data analysis [2]. This eliminates license fees and allows for custom protocol adaptation.
Diagram 1: Cost optimization workflow transition.
Detailed Protocols for Key Experiments
Protocol: Reagent-Optimized Cell Painting Assay
This protocol is an adaptation of the standard Cell Painting assay, incorporating volume and concentration scaling to reduce costs.
Materials:
- Table 4 in the "Scientist's Toolkit" section lists the key reagents.
- Fixed cells in a 96-well or 384-well microplate.
- Staining reagents: Hoechst 33342, Concanavalin A-Alexa Fluor 488, Wheat Germ Agglutinin-Alexa Fluor 555, Phalloidin-Alexa Fluor 568, SYTO 14, MitoTracker Deep Red.
- Permeabilization buffer (0.1% Triton X-100 in PBS).
- Washing buffer (1x PBS).
- Blocking buffer (1% BSA in PBS).
- Phosphate Buffered Saline (PBS).
Procedure:
- Permeabilization and Blocking: Aspirate the PFA and add 50 µL of permeabilization buffer. Incubate for 15 minutes at room temperature. Aspirate and add 50 µL of blocking buffer. Incubate for 30 minutes at room temperature.
- Staining Cocktail Incubation: Prepare a staining cocktail in blocking buffer with pre-optimized, reduced concentrations of dyes.
- Optimization Note: The final concentrations from the JUMP-CP optimization can serve as a starting point [2]. A pilot test on a separate plate with a dilution series of each dye is critical to determine the minimum viable concentration for your specific imaging system.
- Washes: Aspirate the staining cocktail. Wash the plate three times with 100 µL of washing buffer, with a 5-minute incubation for each wash.
- Sealing and Storage: Seal the plate with an optical adhesive film. Store the plate at 4°C in the dark until imaging. Image within 24 hours to ensure signal stability, as some dyes (e.g., LysoTracker) show intensity deviations over longer periods [4].
Protocol: Mini-Pilot for Cell Line and Assay Condition Selection
This protocol describes a low-cost, small-scale experiment to validate key parameters before committing to a full-scale screen.
Objective: To identify the most phenotypically responsive cell line and optimal staining conditions for a specific research question, thereby de-risking the main screening campaign.
Experimental Design:
- Plate Layout: Seed 2-4 candidate cell lines (e.g., U2OS, A549, HepG2) in a 96-well plate. Include at least 4 wells per cell line for controls and benchmark compounds.
- Treatment: Treat with a small set (e.g., 8-12) of benchmark compounds with known, diverse Mechanisms of Action (MoAs) at a single concentration (e.g., 1-10 µM). Include DMSO vehicle controls.
- Staining and Imaging: Process the plate using the standard or optimized Cell Painting protocol. Image all wells.
Data Analysis and Decision Matrix:
- Feature Extraction: Extract morphological profiles using CellProfiler.
- Phenoactivity Assessment: For each cell line, calculate the magnitude of morphological change (e.g., using Mahalanobis distance) induced by each benchmark compound relative to the DMSO controls. The cell line showing the strongest median response across all benchmarks has high "phenoactivity" [2].
- Phenosimilarity Assessment: Using unsupervised clustering (e.g., t-SNE, UMAP) or a supervised model, assess whether compounds with the same MoA cluster together. The cell line that best groups compounds by their known MoA has high "phenosimilarity" [2].
- Selection: The ideal cell line demonstrates both strong phenoactivity and phenosimilarity. The results of this mini-pilot directly inform the cost-effective design of the full screen.
Diagram 2: Cell line selection pilot design.
Validation of Data Quality
Implementing cost-saving measures must be paired with rigorous quality control to ensure data integrity is maintained.
- Establish QC Metrics and Thresholds: Define quantitative metrics for each experiment.
- Table 2 outlines key quality metrics and their acceptable ranges.
Table 2: Key Data Quality Metrics for Cell Painting
| Quality Metric | Description | Acceptable Range / Target |
|---|---|---|
| Z'-Factor | Assesses assay robustness using controls. | > 0.4 for a reliable screen [2]. |
| Signal-to-Noise Ratio | Measures the strength of a specific stain against background. | > 5 for all channels [74]. |
| Cell Count per Well | Ensures sufficient cells for robust profiling. | > 500 cells (adjust based on cell line) [2]. |
| Morphological Reference Profiles | Correlation with historical profiles of benchmark compounds (e.g., Torin-1). | Pearson R > 0.7 with expected profile. |
Monitor Batch Effects: Use inter-plate controls to monitor and correct for technical variation across different experimental batches. Techniques like ComBat or other batch effect correction algorithms should be applied if significant drift is detected [2].
Leverage Public Data for Benchmarking: Compare the phenotypic profiles of well-characterized compounds (e.g., from the JUMP-CP Consortium) generated with your optimized protocol to public datasets [2]. High concordance indicates that the cost-saving measures have not compromised the biological relevance of the data.
The Scientist's Toolkit
Table 4: Essential Research Reagent Solutions for Cost-Optimized Cell Painting
| Item | Function in Assay | Cost & Quality Considerations |
|---|---|---|
| Hoechst 33342 | DNA stain; labels nucleus. | Highly stable and inexpensive. Concentration can often be optimized downward. |
| Phalloidin (conjugated) | Binds F-actin; outlines cytoskeleton. | One of the more expensive reagents. Test lower concentrations or volumes carefully. |
| Wheat Germ Agglutinin (conjugated) | Labels Golgi apparatus and plasma membrane. | Cost-effective. Staining is robust across a range of concentrations. |
| Concanavalin A (conjugated) | Labels endoplasmic reticulum (ER). | Signal intensity may increase over days post-staining; image consistently within 24h [4]. |
| MitoTracker Deep Red | Labels mitochondria. | Relatively expensive but often stable through elution cycles in CPP [4]. |
| SYTO 14 | Labels nucleoli and cytoplasmic RNA. | Can show emission bleed-through; requires sequential imaging in CPP for clean signal [4]. |
| Cell Painting PLUS (CPP) Elution Buffer | Removes dyes between staining cycles for multiplexing. | Enables significant cost savings by expanding data per sample. In-house preparation is cost-effective [4]. |
| Microplate, 384-well | Platform for cell culture and assay. | A major consumable cost. Sourcing from reputable suppliers ensures optical quality for imaging. |
Validating Screening Results: Integration with Multi-Omics and Comparative Analysis
Image-based morphological profiling, particularly using the Cell Painting assay, has emerged as a powerful tool in phenotypic drug discovery and functional genomics. This technique enables the quantification of subtle changes in cellular morphology induced by chemical or genetic perturbations, generating rich datasets that can illuminate biological mechanisms [3]. However, the true power of this approach is only realized through robust validation frameworks that connect these morphological profiles to specific biological pathways and mechanisms. This application note details the protocols and computational strategies for establishing these critical connections, providing researchers with a structured approach to bridge the gap between observed phenotypes and their underlying biological causes.
The core premise of morphological profiling lies in its ability to serve as a high-dimensional readout of cellular state. By measuring ~1,500 morphological features from each cell, the Cell Painting assay creates a detailed fingerprint that can distinguish between different mechanisms of action (MoA) for small molecules and biological functions for genetic perturbations [3] [75]. The assay uses six fluorescent dyes imaged in five channels to label eight cellular components: the nucleus, cytoplasmic RNA, nucleoli, actin, Golgi apparatus, plasma membrane, endoplasmic reticulum, and mitochondria [75] [48]. This comprehensive labeling strategy ensures that a wide array of biological processes is captured in the resulting morphological profiles.
Experimental Protocol for Cell Painting and Morphological Profiling
Cell Painting Assay Workflow
The following protocol, adapted from the optimized Cell Painting version 3 [75], outlines the standard procedure for generating morphological profiles suitable for mechanistic validation studies. The entire process, from cell culture to data analysis, typically requires 2-4 weeks for standard batch sizes [75].
Table 1: Key Research Reagent Solutions for Cell Painting
| Reagent Type | Specific Examples | Function in Assay |
|---|---|---|
| Nuclear Stain | Hoechst 33342, DAPI | Labels DNA to identify nucleus and measure DNA content [48] |
| RNA Stain | SYTO 14 green fluorescent | Labels cytoplasmic RNA to distinguish RNA-rich regions [3] |
| Protein Stains | Concanavalin A, Wheat Germ Agglutinin | Label endoplasmic reticulum/plasma membrane (Con A) and Golgi apparatus (WGA) [3] [48] |
| Cytoskeletal Stain | Phalloidin | Labels F-actin to visualize actin cytoskeleton organization [48] |
| Mitochondrial Stain | MitoTracker dyes | Labels mitochondria to assess mitochondrial morphology and distribution [3] |
| Fixation/Permeabilization | Formaldehyde, Triton X-100 | Preserves cellular structures and enables intracellular dye access [48] |
Week 1: Cell Plating and Perturbation (Duration: 2-3 days)
- Cell Seeding: Plate appropriate cell lines (e.g., U2OS osteosarcoma cells are commonly used [14]) in 96-well or 384-well multi-well plates at a density that ensures 50-70% confluency at the time of fixation. Include appropriate controls (DMSO vehicle controls, positive control compounds with known morphology-altering effects).
- Experimental Perturbation: Treat cells with the compounds or genetic perturbations to be tested. For chemical screens, typical compound incubation periods range from 24-48 hours [48]. For genetic perturbations, ensure adequate time for gene expression alteration (e.g., 72-96 hours for RNAi).
Week 1-2: Staining and Image Acquisition (Duration: 2-3 days)
- Fixation and Permeabilization: Fix cells with formaldehyde (typically 3.7-4% for 20-30 minutes) followed by permeabilization with Triton X-100 (0.1-0.5% for 15-20 minutes) [3] [48].
- Multiplexed Staining: Apply the Cell Painting dye cocktail. The optimized concentrations for Cell Painting v3 can reduce dye consumption and cost while maintaining data quality [75].
- High-Throughput Imaging: Acquire images using a high-content screening (HCS) system. The Yokogawa CV8000 or CellInsight CX7 LZR Pro systems are examples used with Cell Painting [65] [48]. Image multiple fields per well to capture a sufficient number of cells (typically 1000+ cells per treatment for robust statistical analysis [65]).
Week 2-4: Image Analysis and Feature Extraction (Duration: 1-2 weeks)
- Image Preprocessing: Perform illumination correction and image alignment if necessary [65].
- Cell Segmentation: Identify individual cells and subcellular compartments. This can be achieved using:
- Feature Extraction: Measure ~1,500 morphological features for each cell, including:
Quantitative Profiling Metrics and Quality Control
Table 2: Key Quantitative Metrics for Profile Quality Assessment
| Metric | Target Value | Interpretation | Calculation Method | ||
|---|---|---|---|---|---|
| Percent Replicating | >30% [65] | Measures correlation between replicate wells; indicates assay robustness | Correlation between technical or biological replicates | ||
| Percent Matching | >30% [65] | Measures correlation between different treatments with same annotated MoA; indicates biological relevance | Correlation between profiles with shared mechanisms | ||
| Signed Earth Mover's Distance (EMD) | Context-dependent [65] | Quantifies distribution differences between treatment and control populations | Directional variant of EMD assigning sign based on median shift | ||
| Z'-Factor | >0.5 | Assesses assay quality and separation between positive/negative controls | 1 - (3×(σₚ + σₙ) / | μₚ - μₙ | ) |
Computational Framework for Connecting Profiles to Mechanisms
Chemogenomic Library Screening and Network Pharmacology
To effectively connect morphological profiles to biological mechanisms, a chemogenomic library approach provides a powerful validation framework. Such libraries consist of small molecules with known targets and mechanisms, enabling direct comparison between unknown profiles and annotated references [14].
Building a Mechanism-Annotated Reference Database:
- Compound Selection: Curate a set of 5,000+ compounds representing a diverse panel of drug targets across multiple target classes [14].
- Target Annotation: Integrate bioactivity data from sources like ChEMBL database (version 22 contains 1.68M molecules with 11,224 unique targets) [14].
- Pathway Mapping: Connect targets to biological pathways using KEGG (Release 94.1) and Gene Ontology (release 2020-05) databases [14].
- Morphological Profiling: Generate Cell Painting profiles for all reference compounds to create an annotated morphological database.
Network Pharmacology Integration: The integration of these diverse data sources can be implemented in a graph database (e.g., Neo4j) to create a system pharmacology network that connects: Molecules → Targets → Pathways → Diseases → Morphological Profiles [14]. This network serves as the foundation for mechanistic hypothesis generation.
Advanced Analytical Approaches for Mechanism Identification
Similarity-Based Mechanism Prediction:
- Profile Matching: Compare unknown profiles to annotated references using correlation-based distance metrics (e.g., Pearson correlation) [3].
- Clustering Analysis: Group compounds with similar morphological profiles; compounds clustering together likely share mechanisms of action [3] [76].
- Machine Learning Classification: Train classifiers to predict mechanism classes from morphological features using the annotated reference database.
Single-Cell Analysis for Heterogeneous Responses: Traditional analyses that average profiles across all cells in a well can mask important biological information. The SPACe pipeline enables single-cell analysis that captures population heterogeneity [65]:
- Distribution Analysis: Compare full distributions of features using Earth Mover's Distance (EMD) rather than just mean values.
- Heterogeneity Quantification: Identify subpopulations of cells responding differently to perturbations.
- Signed EMD Calculation: Implement directional EMD to capture not just magnitude but direction of feature changes.
Integrative Profiling with Orthogonal Data Types: Morphological profiling can be combined with other data modalities to enhance mechanistic predictions:
- Gene Expression Integration: Combine with L1000 gene expression profiles for complementary mechanism information [3].
- Genetic Interaction Maps: Incorporate profiles from genetic perturbations (CRISPR, RNAi) to connect compound effects to specific genes [3].
Validation Case Studies and Applications
Practical Applications in Drug Discovery
Table 3: Applications of Morphological Profiling in Mechanism Identification
| Application | Protocol Details | Validation Approach |
|---|---|---|
| Mechanism of Action (MoA) Identification | Cluster compounds by profile similarity; match unknowns to annotated references [3] | Confirm with biochemical assays for predicted targets; genetic perturbation of candidate pathways |
| Target Deconvolution | Use chemogenomic library with known target annotations; build target-phenotype matrix [14] | CRISPR knockout/knockdown of candidate targets; rescue experiments |
| Functional Gene Characterization | Profile genetic perturbations (CRISPR, RNAi); cluster genes by phenotypic similarity [3] | Complementary assays for predicted biological processes; pathway-specific reporters |
| Disease Signature Reversion | Identify disease-specific profiles (e.g., patient-derived cells); screen for compounds that revert to wild-type [3] | Validate disease-relevant functional endpoints beyond morphology |
| Polypharmacology Detection | Analyze complex profiles that don't match single mechanisms; deconvolute mixed signatures [3] | Multi-target biochemical assays; proteomic profiling |
Workflow for Systematic Mechanism Validation
The integration of Cell Painting morphological profiling with structured validation frameworks provides a powerful systematic approach for connecting complex phenotypic observations to specific biological mechanisms. By implementing the protocols and analytical strategies outlined in this application note, researchers can transform high-dimensional image data into biologically actionable insights.
The field continues to evolve with several promising directions: (1) the development of more efficient computational pipelines like SPACe that make single-cell analysis more accessible [65]; (2) the creation of larger, more comprehensive annotated reference databases through initiatives like the JUMP Consortium [65]; and (3) the integration of artificial intelligence approaches for improved pattern recognition and mechanism prediction. As these frameworks mature, they promise to accelerate both basic biological discovery and therapeutic development by providing more direct pathways from phenotypic observation to mechanistic understanding.
Integrating Cell Painting Data with Transcriptomics and Proteomics Datasets
Integrating Cell Painting, a high-content, image-based morphological profiling assay, with transcriptomics and proteomics datasets represents a powerful, multi-modal approach in modern chemogenomic screening and drug discovery. This integration leverages complementary data types to build a more comprehensive understanding of a compound's effect on a biological system, thereby enhancing tasks such as mechanism of action (MoA) identification, bioactivity modeling, and toxicity prediction [77] [2] [8].
Cell Painting uses multiplexed fluorescent dyes to label key cellular components, generating rich morphological profiles that serve as a phenotypic fingerprint for cellular states [6]. When combined with the molecular-level insights provided by transcriptomics (gene expression) and proteomics (protein abundance), researchers can bridge the gap between observable phenotype and underlying molecular mechanisms. This is particularly valuable in phenotypic drug discovery, where the molecular targets of bioactive compounds are often unknown at the outset of a screening campaign [2] [8]. The following workflow illustrates the typical process for generating and integrating these multi-modal datasets.
Key Research Reagent Solutions
Successful integration of Cell Painting with other omics data begins with robust experimental execution. The table below details essential reagents and their functions in a standard Cell Painting assay, which forms the foundational dataset for subsequent multi-modal integration [2] [6].
Table 1: Essential Reagents for Cell Painting Assays
| Cellular Component | Staining Dye/Reagent | Function in Assay |
|---|---|---|
| Nucleus | Hoechst 33342 | Labels DNA to identify nuclei and assess nuclear morphology and cell count [6] |
| Nucleoli & Cytoplasmic RNA | SYTO 14 green fluorescent nucleic acid stain | Highlights nucleoli and RNA-rich regions in the cytoplasm [6] |
| Endoplasmic Reticulum | Concanavalin A, Alexa Fluor 488 conjugate | Binds to glycoproteins and polysaccharides, labeling the endoplasmic reticulum [6] |
| F-actin Cytoskeleton | Phalloidin, Alexa Fluor 568 conjugate | Stains filamentous actin (F-actin) to visualize the cytoskeleton [6] |
| Golgi Apparatus & Plasma Membrane | Wheat Germ Agglutinin (WGA), Alexa Fluor 555 conjugate | Binds to glycoproteins and glycolipids, labeling the Golgi and plasma membrane [6] |
| Mitochondria | MitoTracker Deep Red | Accumulates in active mitochondria, enabling analysis of mitochondrial morphology and distribution [6] |
Computational Methods for Data Integration
The fusion of Cell Painting with transcriptomics and proteomics presents a computational challenge due to the high dimensionality and distinct statistical properties of each data type. Several sophisticated machine learning methods have been developed to address this.
Cross-Modality Learning Frameworks
A primary application is cross-modality learning, where models are trained on multiple modalities (e.g., Cell Painting and transcriptomics) but are designed to generate embeddings for new compounds using only a single, more cost-effective modality like Cell Painting [77]. This is practical because generating transcriptomics data (at ~$6–10 per well) is significantly more expensive than Cell Painting data (at ~$0.50–$1 per well) [77]. Two effective representation learning methods in this context are:
- Contrastive Learning (CL): This method learns representations by pulling the profiles of the same compound from different modalities (e.g., CP and TX) closer in the embedding space while pushing apart the profiles of different compounds. This approach has been shown to enhance the performance of CP features on tasks where TX features traditionally excel [77].
- Bimodal Autoencoder (BAE): This architecture learns a shared, compressed representation (latent space) from both input modalities. Once trained, the encoder can be used on a single modality to generate a rich, integrated embedding [77].
Advanced Multi-Omics Integration Tools
For a more general integration of diverse single-cell omics data, including scenarios with weak feature relationships (e.g., between mRNA expression and protein abundance), novel deep learning frameworks have emerged.
- scMODAL: This is a deep learning framework specifically tailored for single-cell multi-omics data alignment. It uses neural networks to project different datasets into a common latent space and employs Generative Adversarial Networks (GANs) to align the cell embeddings. A key strength is its ability to work with limited known positively correlated features ("feature links") between modalities, preserving biological information while effectively removing unwanted technical variation [78].
- Other Notable Methods: The computational landscape includes a variety of other tools, such as:
- Matrix Factorization-based methods (e.g., MOFA+)
- Variational Autoencoder-based methods (e.g., scMVAE, totalVI)
- Network-based methods (e.g., Seurat v4, citeFUSE) [79]
The table below summarizes the performance of selected integration methods based on a benchmark study using a CITE-seq dataset (which simultaneously measures transcriptomics and proteomics) [78].
Table 2: Benchmarking of Multi-omics Integration Methods on a CITE-seq Dataset
| Integration Method | Core Algorithm | Mixing Score (Higher is Better) | Biological Preservation Score (Higher is Better) | Key Advantage |
|---|---|---|---|---|
| scMODAL | Neural Networks + GANs | 0.89 | 0.91 | Effective with limited linked features; preserves dataset-unique structures [78] |
| MaxFuse | Canonical Correlation Analysis (CCA) | 0.85 | 0.88 | Demonstrates efficacy in integrating modalities with weak relationships [78] |
| bindSC | Canonical Correlation Analysis (CCA) | 0.82 | 0.85 | Designed for single-cell multi-modal integration [78] |
| Seurat v4 | Weighted Nearest Neighbors (WNN) | 0.78 | 0.84 | Interpretable modality weights [79] [78] |
The following diagram illustrates the architecture of the scMODAL framework, demonstrating how it integrates multiple data modalities.
Detailed Experimental Protocols
Protocol: Generating a Matched Cell Painting and Transcriptomics Dataset from a Chemogenomic Screen
This protocol describes the steps to generate paired morphological and gene expression profiles from the same compound perturbation, creating the essential dataset for multi-modal integration [77] [2].
Materials:
- Cell line (e.g., U2OS osteosarcoma cells, chosen for their flat, non-overlapping morphology) [77] [2]
- Chemogenomic compound library (e.g., a 1,211-compound minimal screening library targeting 1,386 anticancer proteins) [28] [8]
- Cell Painting dyes: See Table 1.
- RNA-Seq reagents (e.g., lysis buffer, library preparation kit, sequencing reagents)
Procedure:
- Cell Plating: Seed U2OS cells in 384-well plates and allow them to attach for 24 hours [77].
- Compound Perturbation: Treat cells with compounds from the chemogenomic library at a defined concentration (e.g., 10 µM) using a liquid handler. Include DMSO-only wells as negative controls on every plate [77] [28].
- Incubation: Incubate cells with compounds for a defined period (e.g., 24 hours) to allow for phenotypic and transcriptomic changes to develop.
- Parallel Sample Processing:
- For Cell Painting: a. Staining: Fix and stain the cells with the multiplexed Cell Painting dye cocktail as described in the established protocols [2] [80]. b. Image Acquisition: Acquire images using a high-content imager (e.g., Yokogawa CellVoyager 8000). Capture five fluorescence channels corresponding to the six dyes [77]. c. Feature Extraction: Use an image analysis software (e.g., CellProfiler, PerkinElmer Acapella, or the open-source SPACe platform) to segment cells and extract morphological features. SPACe offers a ~10x speed increase over CellProfiler on a standard PC [77] [65]. Extract ~800-1,500 features per cell, encompassing measurements of size, shape, intensity, and texture [77] [2]. d. Aggregation & Normalization: Perform well-level aggregation (e.g., median values for each feature) and normalize against the DMSO controls to generate a vector of Z-scores for each compound—the final Cell Painting profile [77].
- For Bulk RNA-Seq (Transcriptomics): a. Lysis: Lyse cells from the same treatment plate using an appropriate lysis buffer (e.g., Cells-To-Signal lysis buffer) [77]. b. Library Preparation & Sequencing: Synthesize cDNA, barcode samples, pool them, and prepare sequencing libraries using a platform like Illumina. Sequence on an instrument such as an Illumina NovaSeq 6000 to an average depth of 1 million reads per well [77]. c. Data Processing: Align sequencing reads to the human reference genome (e.g., GRCh38) using a aligner like STAR. Perform variance-stabilizing transformation and library size correction using packages like DESeq2 and limma. Calculate robust Z-scores relative to the DMSO vehicle controls to generate the transcriptomics profile [77].
Protocol: Multi-Modal Data Integration Using Contrastive Learning
This protocol outlines the computational steps for integrating the generated CP and TX profiles using a contrastive learning approach to learn improved compound representations [77].
Software & Environment:
- Python with machine learning libraries (e.g., PyTorch or TensorFlow)
- Implementation of a contrastive learning framework (e.g., SimCLR)
Procedure:
- Data Preprocessing: Standardize the feature dimensions of both the Cell Painting (CP) and transcriptomics (TX) profiles (e.g., using Z-score normalization).
- Model Training: a. Positive Pair Selection: For each compound in the dataset, its CP profile and TX profile form a positive pair. b. Network Architecture: Use a dual-branch neural network where each branch (encoder) processes one modality. The encoders project the high-dimensional inputs into a lower-dimensional embedding space. c. Loss Function: Apply a contrastive loss (e.g., NT-Xent loss). The objective is to minimize the distance between the embeddings of the positive pair (CP and TX of the same compound) while maximizing the distance between embeddings of non-matching compounds (negative pairs) within a training batch [77].
- Embedding Generation: After training, the model can generate a unified embedding for a new compound using only its CP profile by passing it through the trained CP encoder. This embedding is enriched with information from the transcriptomics modality learned during training.
- Downstream Tasks: Use the generated embeddings for clustering compounds by MoA or training bioactivity models for specific protein target families, where the integrated embeddings have been shown to outperform those derived from CP features alone [77].
Applications in Chemogenomic Library Screening
The integration of Cell Painting with other omics data significantly enhances multiple stages of chemogenomic library screening and drug discovery.
- Enhanced Mechanism of Action (MoA) Clustering: Integrated morphological and transcriptomic profiles improve the clustering quality of compounds with similar MoAs. Learned representations from methods like contrastive learning help group compounds by their biological function more accurately than using Cell Painting data alone, aiding in the deconvolution of the MoA for novel compounds [77] [81].
- Improved Bioactivity Modeling: Multi-modal embeddings have demonstrated superior performance in predicting compound bioactivity across various protein target families. The shared representation captures broader biological context, leading to more accurate models of a compound's effect [77].
- Target Identification and Validation: By comparing the integrated profile of an uncharacterized compound to a database of profiles from compounds with known targets or genetic perturbations (e.g., CRISPR knockouts), researchers can generate hypotheses about the compound's potential molecular targets [81] [8].
- Phenotypic Hazard and Safety Assessment: Integrated profiles can be benchmarked against databases of compounds with known toxic effects. The rich, multi-layered data improves the sensitivity of predicting adverse outcomes, enabling earlier safety assessment in the drug discovery pipeline [2] [81].
Publicly available datasets are crucial for developing and benchmarking integration methods. The Cell Painting Gallery is a central repository hosting several key datasets.
Table 3: Selected Publicly Available Cell Painting and Multi-omics Datasets
| Dataset Name | Description | Perturbations | Cell Line(s) | Total Size |
|---|---|---|---|---|
| JUMP Cell Painting [80] | Large-scale morphological impact of chemical and genetic perturbations | ~116,000 compounds & ~16,000 genes | U2OS | 358.4 TB |
| LINCS CP [80] | Dose-response morphological profiling | ~1,570 compounds across 6 doses | A549 | 65.7 TB |
| Rosetta [80] | Matched Cell Painting and L1000 gene expression profiles | ~28,000 genes and compounds | U2OS | 8.5 GB (numerical) |
| 30,000 Compound Dataset [80] | Canonical small-molecule morphological profiling | ~30,000 compounds | U2OS | 10.7 TB |
Phenotypic drug discovery (PDD) has re-emerged as a powerful strategy for identifying first-in-class medicines, with imaging-based high-throughput phenotypic profiling (HTPP) playing an increasingly pivotal role [4] [2]. These approaches enable the identification of therapeutic interventions based on observable changes in cellular morphology without requiring prior knowledge of specific molecular targets, making them particularly valuable for complex diseases and poorly characterized biological pathways [82] [15]. Among these methods, Cell Painting has established itself as a widely adopted, multiplexed morphological profiling assay, while newer approaches such as fluorescent ligand-based screening and iterative staining methods have emerged as complementary or alternative platforms [4] [71].
This application note provides a systematic comparison of these phenotypic screening platforms, focusing on their technical capabilities, experimental workflows, and applications in chemogenomic library screening. We present standardized protocols and analytical frameworks to guide researchers in selecting appropriate methodologies for specific drug discovery applications, particularly in the context of mechanism of action (MoA) elucidation and target deconvolution [82] [14].
Technology Platforms
Table 1: Core Characteristics of Major Phenotypic Screening Platforms
| Screening Platform | Multiplexing Capacity | Cellular Compartments Profiled | Target Specificity | Primary Applications |
|---|---|---|---|---|
| Cell Painting (Standard) | 5-6 dyes, 5 channels [6] [2] | Nucleus, ER, Golgi, mitochondria, actin cytoskeleton, RNA/nucleoli [6] | Low to moderate (channel merging) [4] [71] | MoA identification, compound clustering, toxicity assessment [83] [2] |
| Cell Painting PLUS (CPP) | ≥7 dyes, 9 compartments via iterative cycles [4] | Adds lysosomes, improves separation of standard compartments [4] | High (sequential imaging) [4] | Enhanced MoA deconvolution, organelle-specific responses [4] |
| Fluorescent Ligand-Based | Variable, typically 2-4 probes [71] | Defined molecular targets (GPCRs, kinases, surface biomarkers) [71] | Very high (direct target engagement) [71] | Target-specific screening, structure-activity relationships [71] |
| Hybrid Phenotypic-Targeted | Combines phenotypic readouts with targeted probes [82] | Cellular morphology plus specific pathway components [82] | Variable based on design [82] | Connecting functional effects to mechanistic insights [82] |
Performance Metrics
Table 2: Quantitative Performance Comparison Across Platforms
| Parameter | Cell Painting | Cell Painting PLUS | Fluorescent Ligand | Source References |
|---|---|---|---|---|
| Throughput | High (384-well standard) [83] | Moderate (additional staining cycles) [4] | High to very high [71] | [4] [71] [83] |
| Data Density (features/cell) | 1,000-2,000+ [5] [2] | Similar to Cell Painting with enhanced specificity [4] | Typically lower, target-focused [71] | [4] [5] [2] |
| Assay Flexibility | Moderate (fixed dye set) [71] | High (customizable dye panels) [4] | High (probe-based customization) [71] | [4] [71] |
| Live-Cell Compatibility | No (fixed cells) [83] | No (fixed cells) [4] | Yes (kinetic measurements possible) [71] | [4] [71] [83] |
| Regulatory Adoption | Established for toxicity screening [83] | Emerging | Limited | [83] |
Experimental Protocols
Standard Cell Painting Protocol
The following protocol adapts established Cell Painting methods for chemogenomic library screening in 384-well format [83] [2]:
Cell Seeding and Perturbation:
- Seed U-2 OS cells (or other appropriate cell line) at 500-1,000 cells/well in 384-well plates [83].
- Incubate for 24 hours at 37°C, 5% CO₂.
- Treat with chemogenomic library compounds using acoustic dispensing (e.g., LabCyte Echo 550) for precise compound transfer [83].
- Include reference controls: DMSO vehicle, cytotoxic control (staurosporine), and phenotypic control (sorbitol) [83].
Staining and Fixation:
- After 24-48 hour compound exposure, prepare staining solution containing:
- Hoechst 33342 (nuclear DNA)
- Concanavalin A, Alexa Fluor 488 conjugate (endoplasmic reticulum)
- Phalloidin, Alexa Fluor 568 conjugate (F-actin)
- Wheat Germ Agglutinin, Alexa Fluor 555 conjugate (Golgi and plasma membrane)
- SYTO 14 green fluorescent nucleic acid stain (nucleoli and cytoplasmic RNA)
- MitoTracker Deep Red (mitochondria) [6] [2]
- Fix cells with 4% paraformaldehyde for 20 minutes at room temperature.
- Permeabilize with 0.1% Triton X-100 for 10 minutes.
- Incubate with staining solution for 30-60 minutes [83] [2].
- After 24-48 hour compound exposure, prepare staining solution containing:
Image Acquisition:
- Acquire images using high-content imaging system (e.g., Opera Phenix, ImageXpress Confocal HT.ai).
- Use 5-channel acquisition with appropriate filter sets:
- Acquire 9-25 fields per well to achieve ~5,000 cells for robust profiling [2].
Image Analysis and Feature Extraction:
Cell Painting PLUS Protocol
The CPP assay builds upon standard Cell Painting with key modifications to enable iterative staining [4]:
Initial Staining Cycle:
- Perform cell culture, perturbation, and fixation as in standard protocol.
- Apply first dye panel targeting: plasma membrane, actin cytoskeleton, cytoplasmic RNA, nucleoli, and lysosomes.
- Image each dye in separate channels.
- Apply elution buffer (0.5 M L-Glycine, 1% SDS, pH 2.5) for 30 minutes to remove dyes while preserving cellular morphology [4].
Secondary Staining Cycle:
- Apply second dye panel targeting: nuclear DNA, endoplasmic reticulum, mitochondria, and Golgi apparatus.
- Image each dye in separate channels.
- For mitochondrial staining, use MitoTracker dyes that resist elution, enabling their use as registration markers for image alignment between cycles [4].
Image Processing and Data Integration:
- Use mitochondrial channel for image registration between cycles.
- Combine feature sets from both cycles.
- Apply batch effect correction and normalization.
Fluorescent Ligand-Based Screening Protocol
This protocol highlights key differences from dye-based morphological profiling [71]:
Cell Preparation:
- Use cells expressing target of interest (native or engineered).
- Seed at appropriate density for 96-384 well plates.
- For live-cell imaging, maintain physiological conditions throughout.
Ligand Staining:
- Incubate with fluorescently-labeled ligands targeting specific protein classes (e.g., GPCRs, kinases).
- Concentrations typically nanomolar range (significantly lower than Cell Painting dyes).
- Incubation time varies from minutes to hours based on binding kinetics.
Image Acquisition and Analysis:
- Acquire images with channel settings appropriate for fluorescent ligands.
- Extract target-specific metrics (binding intensity, localization, internalization) rather than broad morphological features.
- For multiplexed assays, ensure spectral separation between ligands.
Research Reagent Solutions
Table 3: Essential Research Reagents for Phenotypic Screening Platforms
| Reagent Category | Specific Examples | Function | Compatible Platforms |
|---|---|---|---|
| Nuclear Stains | Hoechst 33342, DAPI | Labels nuclear DNA for segmentation and nuclear morphology | Cell Painting, CPP [6] [2] |
| Cytoskeletal Markers | Phalloidin conjugates (Alexa Fluor 488, 568) | Labels F-actin for cytoskeletal organization | Cell Painting, CPP [6] [2] |
| Organelle Dyes | MitoTracker Deep Red (mitochondria), Concanavalin A-Alexa Fluor 488 (ER) | Labels specific organelles for morphological assessment | Cell Painting, CPP [6] [2] |
| Lysosomal Markers | LysoTracker dyes (live-cell), Lysosomotropic dyes (fixed) | Labels lysosomes for acidic compartment profiling | CPP [4] |
| Elution Buffers | Glycine-SDS buffer (pH 2.5) | Removes dyes between staining cycles while preserving morphology | CPP [4] |
| Fluorescent Ligands | Celtarys CELT-331 (cannabinoid receptor ligands) | Target-specific probes for direct engagement measurements | Fluorescent ligand platform [71] |
| Cell Lines | U-2 OS, A549, MCF-7, HepG2 | Disease-relevant models for phenotypic profiling | All platforms [4] [83] [2] |
Workflow and Pathway Diagrams
Diagram 1: Comparative Workflow for Phenotypic Screening Platforms
Diagram 2: Platform Selection Decision Tree
Applications in Chemogenomic Library Screening
The integration of phenotypic screening platforms with chemogenomic libraries creates powerful frameworks for systematic target identification and validation. The JUMP-Cell Painting Consortium has demonstrated this approach through the creation of a massive public dataset containing approximately 3 million images and morphological profiles of cells treated with matched chemical and genetic perturbations [5]. This resource enables direct comparison of compound-induced phenotypes with targeted genetic perturbations, facilitating MoA elucidation.
Recent advances in computational analysis have further enhanced the utility of these approaches. The DrugReflector algorithm employs active reinforcement learning to predict compounds that induce desired phenotypic changes, demonstrating an order of magnitude improvement in hit-rates compared to random library screening [84]. Similarly, network pharmacology approaches integrating Cell Painting data with chemogenomic libraries have enabled systematic mapping of drug-target-pathway-disease relationships [14].
For chemogenomic library screening, we recommend the following considerations:
- Library Design: Curate compounds representing diverse targets and mechanisms to maximize phenotypic coverage [14].
- Platform Selection: Use standard Cell Painting for initial broad profiling, followed by CPP or fluorescent ligand assays for target-focused studies.
- Multi-platform Integration: Combine phenotypic data with transcriptomic and proteomic profiles to strengthen target hypotheses [82].
- Validation Workflow: Implement orthogonal assays to confirm putative targets identified through phenotypic screening.
Cell Painting, Cell Painting PLUS, and fluorescent ligand-based screening offer complementary capabilities for phenotypic drug discovery. The standard Cell Painting assay provides a robust, well-established platform for broad morphological profiling, while Cell Painting PLUS extends multiplexing capacity for enhanced organelle-specific resolution. Fluorescent ligand-based approaches offer target-specific readouts with live-cell compatibility. Selection among these platforms should be guided by specific research objectives, with consideration of throughput requirements, need for target specificity, and compatibility with existing screening infrastructure. For comprehensive chemogenomic library screening, integrated approaches leveraging multiple platforms show particular promise for accelerating target identification and validation.
Within chemogenomic library screening research, the Cell Painting assay has emerged as a powerful tool for phenotypic profiling, enabling the untargeted detection of morphological changes induced by genetic or compound perturbations [2]. A critical challenge, however, lies in establishing the translational relevance of the rich morphological profiles generated by these screens for predicting meaningful clinical outcomes in patients. This application note details how benchmarking studies provide a rigorous methodological framework to assess and validate the predictivity of in vitro models and computational algorithms for clinical endpoints. By establishing standardized benchmarks, researchers can quantitatively evaluate whether cellular phenotypes can reliably inform predictions about patient mortality, length of stay, or disease progression, thereby strengthening the decision-making pipeline in drug discovery [85] [86].
Benchmarking Fundamentals in Healthcare
In healthcare, benchmarking is a continuous process of measuring products, services, and practices against industry leaders to identify strengths and weaknesses [87]. When applied to clinical prediction models, it involves the retrospective comparison of a model's outputs against established standards or real-world outcomes, facilitating a risk-adjusted assessment of performance [88]. A systematic review has demonstrated that benchmarking initiatives are positively associated with quality improvement in healthcare processes and patient outcomes [87]. These initiatives often employ performance indicators—quantifiable metrics that convert complex quality concepts into simplified, comparable information. Successful implementation relies on reliable and valid indicators, collaboration between participants, and often, complementary interventions like audit and feedback mechanisms [87].
Clinical Prediction Tasks for Benchmarking
Benchmarking frameworks rely on well-defined prediction tasks that reflect real-world clinical needs. The tables below summarize common clinical outcomes used for benchmarking, derived from recent literature.
Table 1: Common Clinical Outcome Prediction Tasks for Benchmarking in Intensive and Emergency Care
| Clinical Setting | Prediction Task | Clinical Significance | Exemplary Benchmark Source |
|---|---|---|---|
| Intensive Care Unit (ICU) | In-hospital Mortality | Direct reflection of patient outcomes and efficacy of medical interventions; often assessed via Standardized Mortality Ratio [88]. | MIMIC-III, MIMIC-IV [88] [89] |
| ICU | Length of Stay (LoS) | Indicator of healthcare cost and efficiency; influenced by patient acuity and structural factors [88] [85]. | MIMIC-IV, eICU [88] [85] |
| ICU & Emergency Department (ED) | Critical Outcome | Composite of inpatient mortality or ICU transfer within 12 hours; identifies critically ill patients for resource prioritization [89]. | MIMIC-IV-ED [89] |
| Emergency Department (ED) | Hospitalization | Indicates resource utilization and patient acuity following an ED visit [89]. | MIMIC-IV-ED [89] |
| Emergency Department (ED) | 72-hour Reattendance | Widely used indicator of the quality of care and patient safety from the initial ED visit [89]. | MIMIC-IV-ED [89] |
Table 2: Overview of Public Datasets and Benchmarks for Clinical Prediction Models
| Benchmark/Dataset Name | Primary Clinical Setting | Key Features | Example Use Case |
|---|---|---|---|
| MIMIC-IV-ED [89] | Emergency Department | Contains over 400,000 ED visit episodes; provides benchmark suite for hospitalization, critical outcome, and reattendance [89]. | Comparing triage systems and machine learning models for patient admission prediction [89]. |
| CliniBench [90] | Inpatient (from Admissions) | First benchmark to compare encoder-based classifiers and generative LLMs for discharge diagnosis prediction from admission notes in MIMIC-IV [90]. | Demonstrating that encoder-based classifiers can outperform generative models in diagnosis prediction [90]. |
| OMOP-CDM Benchmarks [86] | Multi-domain (Observational Data) | A standardized set of 13 clinical prediction tasks using a common data model; enables reproducible model evaluation across a federated network [86]. | Fairly comparing new predictive methodologies across different databases and clinical tasks [86]. |
Experimental Protocol for a Benchmarking Study
The following workflow outlines the key stages in a benchmarking study, from data preparation to model evaluation. This protocol is adapted from established benchmarks in clinical AI [89] [85] [86].
Detailed Methodology
Data Preprocessing and Cohort Formation
- Data Source: Utilize publicly available, de-identified Electronic Health Record (EHR) databases such as MIMIC-IV or eICU [89]. These provide structured data including vital signs, laboratory results, medications, and clinical notes.
- Cohort Definition: Formulate a precise cohort definition using SQL or similar tools applied to the common data model. For example, "all adult patients (≥18 years) with a first emergency department visit leading to an inpatient admission" [89] [86].
- Data Cleaning:
- Outlier Handling: Mark values outside physiologically plausible ranges (e.g., SpO2 > 100%) as missing [89].
- Missing Data Imputation: Impute missing values (including marked outliers) using central tendencies (e.g., median) calculated from the training set only. The same imputation values must be applied to the test set to avoid data leakage [89].
Benchmarking Model Performance
- Model Selection: Train and compare a diverse set of models to establish a robust performance baseline [85]. This suite should include:
- Performance Evaluation:
- Primary Metric: Use the Area Under the Receiver Operating Characteristic Curve (AUC) to evaluate discriminative performance [88] [89].
- Additional Metrics: Report accuracy, precision, recall, F1-score, and calibration metrics.
- Fair Comparison: Evaluate all models on the same fixed test set, which should be interacted with as infrequently as possible [89].
The Scientist's Toolkit
Table 3: Essential Research Reagent Solutions for Benchmarking Studies
| Tool/Category | Specific Examples | Function in Benchmarking |
|---|---|---|
| Public EHR Datasets | MIMIC-IV [89], eICU [89], AmsterdamUMCdb [89] | Provide large-scale, de-identified clinical data for developing and testing prediction models in a standardized format. |
| Common Data Models | OMOP-CDM [86] | Standardizes data structure across different databases, enabling reproducible cohort definitions and federated analysis. |
| Machine Learning Libraries | Scikit-learn, PyTorch, TensorFlow | Offer pre-built implementations for training and evaluating a wide range of algorithms, from logistic regression to deep neural networks. |
| Benchmarking Software | CliniBench [90], OMOP R Package [86], MIMIC-IV-ED Code Suite [89] | Open-source code that standardizes data extraction, preprocessing, and task definition to ensure comparability between studies. |
Integrating Cell Painting with Clinical Outcome Benchmarking
The ultimate goal in phenotypic drug discovery is to bridge the gap between cellular morphology and clinical efficacy or toxicity. Benchmarking provides the critical link. A Cell Painting profile can be treated as a high-dimensional input feature set for predicting clinical outcomes.
Conceptual Workflow: From Cell Painting to Clinical Prediction
Application Protocol: Linking Phenotypic to Clinical Profiles
- Generate Morphological Profiles: Perform a Cell Painting screen with your chemogenomic library. Extract high-dimensional morphological features (e.g., ~1,000-3,000 features per cell) using software like CellProfiler [2]. Aggregate data at the well or treatment level to create a "phenotypic fingerprint" for each library element.
- Curate Associated Clinical Data: For compounds with clinical usage data, curate relevant outcome labels. This can include:
- Direct Outcomes: Drug toxicity signals, adverse event reports.
- Proximal Outcomes: In vivo efficacy data from preclinical models, which can serve as a bridge to human outcomes.
- Train a Predictive Model: Use the morphological profiles as input features (X) and the clinical or proximal outcomes as labels (y). Train a machine learning model to learn the mapping between the in vitro phenotype and the in vivo or clinical outcome.
- Benchmark and Validate: Rigorously benchmark the predictive performance of the Cell Painting-derived model against established in vitro assays or existing models using the protocols in Section 4. This validates the predictivity of the Cell Painting assay for the clinical endpoint of interest. Initiatives like the OASIS Consortium, which benchmarks phenomics data against in vivo outcomes, exemplify this approach [4].
Integrating benchmarking studies into Cell Painting-based research provides a rigorous, standardized methodology to quantify the assay's predictive power for clinical outcomes. By adopting the protocols for data processing, model evaluation, and validation outlined herein, researchers can robustly link morphological profiles from chemogenomic screens to patient-level data. This strengthens the decision-making process in drug discovery, helping to prioritize hits and leads with a higher probability of clinical success and a lower risk of failure due to efficacy or safety concerns.
Within the field of phenotypic drug discovery, image-based profiling has emerged as a powerful strategy for characterizing the effects of chemical and genetic perturbations on cellular state. The most widely adopted assay for this purpose is Cell Painting, a microscopy-based technique that uses multiplexed fluorescent dyes to label eight major cellular components, generating rich morphological profiles that can serve as a fingerprint for a cell's condition [2] [3]. This application note focuses on two critical public resources that have significantly advanced the scale and accessibility of this approach: the JUMP-Cell Painting (JUMP-CP) Consortium and the BBBC022 dataset.
The JUMP-Cell Painting Consortium represents a collaborative, pre-competitive initiative funded in part by the Massachusetts Life Sciences Center, with the primary goal of creating an unprecedented public dataset to validate and scale up image-based drug discovery strategies [91]. The Consortium has produced the largest publicly available Cell Painting dataset, profiling over 135,000 chemical compounds and genetic perturbations in U2OS cells (an osteosarcoma cell line) to create a foundational resource for the scientific community [92] [93]. This data-driven approach aims to relieve a major bottleneck in the pharmaceutical pipeline: determining the mechanism of action of potential therapeutics before introduction into patients [91].
Complementing this large-scale effort, the BBBC022 dataset ("Human U2OS cells – compound-profiling Cell Painting experiment") serves as a foundational benchmark collection for methodological development and validation [94]. This pilot dataset, available through the Broad Bioimage Benchmark Collection (BBBC), contains images of U2OS cells treated with 1,600 known bioactive compounds, providing a robust basis for testing image-based profiling methods and their ability to distinguish the effects of small molecules [94] [95].
JUMP-Cell Painting Consortium Dataset
The JUMP-Cell Painting Consortium dataset represents a monumental effort in systematic morphological profiling. The dataset includes over 3 million images and corresponding morphological profiles capturing the effects of both chemical and genetic perturbations [93]. The chemical component encompasses more than 135,000 small molecules from diverse libraries, while genetic perturbations include both CRISPR-based gene knockouts and gene overexpression constructs [92] [93]. This comprehensive collection enables researchers to explore relationships between compound structures, genetic perturbations, and resulting phenotypic outcomes across a massive experimental scale.
BBBC022 Dataset Specifications
The BBBC022 dataset, while smaller in scale than the JUMP-CP collection, provides a carefully curated benchmark resource with complete publicly available data. The quantitative characteristics of this dataset are summarized in Table 1.
Table 1: Quantitative Overview of the BBBC022 Dataset
| Parameter | Specification | Details |
|---|---|---|
| Biological Application | Compound-profiling Cell Painting experiment | Testing ability to distinguish effects of small molecules [94] |
| Cell Line | Human U2OS osteosarcoma cells | Known for flat morphology, suitable for imaging [94] |
| Compounds Tested | 1,600 known bioactive compounds | Includes mock treatments as controls [94] [95] |
| Experimental Design | 20 plates with 384 wells each | 9 fields of view per well [94] |
| Total Images | 345,600 image files | 5 channels × 69,120 fields of view [94] |
| Image Format | 16-bit TIFF | Grayscale, separate files per channel [94] |
| Magnification | 20X | Resolution: 0.656 μm/pixel [94] |
| Morphological Features | 1,779 per cell | Measuring size, shape, texture, intensity, granularity [14] |
The dataset's metadata structure is particularly comprehensive, including critical information such as compound identifiers (BROADID), chemical structures (SMILES), concentrations (CPDMMOL_CONC), and well positions, enabling robust downstream analysis and integration with chemical databases [94].
Experimental Protocols and Workflows
Cell Painting Assay Protocol
The Cell Painting assay protocol has evolved through several iterations, with the most recent quantitative optimization (Cell Painting v3) published by the JUMP-CP Consortium in 2023 [75]. The standard workflow and key cellular components visualized are detailed in Figure 1.
Figure 1: Cell Painting Experimental Workflow and Staining Strategy
The staining panel employs six fluorescent dyes imaged across five channels to capture eight distinct cellular components [75] [3]. Recent optimizations in Cell Painting v3 have simplified some steps and reduced stain concentrations in certain cases, decreasing costs while maintaining data quality [75]. The protocol is robust across dozens of cell lines, with U2OS cells being particularly well-suited due to their flat morphology that minimizes cellular overlap [2].
Image Analysis and Feature Extraction
Following image acquisition, the data processing pipeline involves automated image analysis to extract quantitative morphological features. The standard workflow utilizes CellProfiler, open-source software designed for biological image analysis, to identify individual cells and measure ~1,500 morphological features per cell [75] [3]. These features encompass various measures of size, shape, texture, intensity, and spatial relationships between cellular structures. For larger-scale analyses like the JUMP-CP dataset, convolutional neural networks (CNNs) have been employed to improve feature extraction efficiency and downstream performance [93].
The feature extraction process produces high-dimensional morphological profiles that serve as the basis for comparing perturbations. Subsequent data processing typically includes quality control, normalization, and batch effect correction to account for technical variation across plates and experimental runs [75] [93].
Implementation for Chemogenomic Library Screening
Data Access and Integration Strategies
Both the JUMP-CP and BBBC022 datasets are publicly accessible through dedicated portals. The JUMP-CP data is available through the Cell Painting Gallery (https://registry.opendata.aws/cellpainting-gallery/) and associated GitHub repositories [75] [92]. The BBBC022 dataset can be accessed through the Broad Bioimage Benchmark Collection website (https://bbbc.broadinstitute.org/BBBC022) [94].
For chemogenomic applications, integrating these morphological profiles with compound and target information is essential. This typically involves:
- Linking morphological profiles to chemical databases using provided compound identifiers and SMILES structures [94] [14]
- Mapping to target annotations from sources like ChEMBL and mechanism-of-action databases [14]
- Building network pharmacology models that connect drug-target-pathway-disease relationships [14]
This integration enables the construction of system pharmacology networks that facilitate target identification and mechanism deconvolution for phenotypic screening hits [14].
Analytical Approaches for Mechanism of Action Studies
The primary application of these datasets in chemogenomic library screening is mechanism of action (MoA) prediction and compound functional annotation. The standard analytical approach involves:
- Similarity-based clustering: Grouping compounds with similar morphological profiles that likely share biological targets or pathways [2] [3]
- Reference-based matching: Comparing uncharacterized compounds to profiles of well-annotated references in the dataset [93]
- Machine learning classification: Training models to predict MoA categories or specific targets from morphological features [93]
These approaches have demonstrated successful MoA prediction across diverse compound classes, enabling functional annotation of novel compounds based on their morphological fingerprints [2] [3].
The Scientist's Toolkit: Essential Research Reagents
Implementation of Cell Painting assays and analysis of public datasets requires specific reagents and computational tools. Table 2 outlines key components of the research toolkit for working with these resources.
Table 2: Essential Research Reagent Solutions for Cell Painting
| Category | Item | Function/Application |
|---|---|---|
| Cell Lines | U2OS osteosarcoma cells | Standard cell line with flat morphology, minimal overlap [94] [2] |
| Fluorescent Dyes | Hoechst 33342 | Labels nuclear DNA (Channel 1) [94] [75] |
| Concanavalin A, Alexa Fluor 488 conjugate | Labels endoplasmic reticulum (Channel 2) [94] [75] | |
| SYTO 14 green fluorescent nucleic acid stain | Labels nucleoli and cytoplasmic RNA (Channel 3) [94] [75] | |
| Phalloidin (e.g., Alexa Fluor 568 conjugate) | Labels F-actin cytoskeleton (Channel 4) [94] [75] | |
| Wheat Germ Agglutinin (e.g., Alexa Fluor 568 conjugate) | Labels Golgi apparatus and plasma membrane (Channel 4) [94] [75] | |
| MitoTracker Deep Red FM | Labels mitochondria (Channel 5) [94] [75] | |
| Software Tools | CellProfiler | Open-source software for automated image analysis [75] [3] |
| Pycytominer | Data processing functions for profiling perturbations [75] | |
| Cell Painting CNN | Pre-trained convolutional network for feature extraction [93] | |
| Public Data Resources | JUMP-CP Data Portal | Access to full consortium dataset [91] [92] |
| BBBC022 Dataset | Benchmark dataset for method validation [94] | |
| Cell Painting Gallery | Curated collection of public Cell Painting datasets [75] |
Advanced Applications and Future Directions
The scale and diversity of the JUMP-CP and BBBC022 datasets enable sophisticated applications beyond basic MoA prediction. These include:
- Library enrichment: Selecting structurally diverse compounds that maximize phenotypic diversity in screening collections [3]
- Polypharmacology prediction: Identifying compounds with multi-target activities based on complex phenotypic profiles [14]
- Toxicity assessment: Detecting adverse effect signatures through morphological changes [2]
- Target deconvolution: Linking phenotypic profiles to specific molecular targets through integrated analysis with genetic perturbation data [93]
Recent methodological advances are further expanding the utility of these resources. The introduction of Cell Painting PLUS (CPP) uses iterative staining-elution cycles to increase multiplexing capacity, enabling the labeling of at least nine subcellular compartments with improved organelle-specificity [4]. Meanwhile, deep learning approaches like the Cell Painting CNN demonstrate that pre-trained models can extract more biologically meaningful representations from imaging data, improving downstream performance by up to 30% compared to classical features [93].
The strategic utilization of these public data resources provides a powerful foundation for chemogenomic library screening, enabling researchers to leverage pre-existing massive-scale morphological profiling data to accelerate target identification, mechanism elucidation, and compound prioritization in phenotypic drug discovery campaigns.
Modern phenotypic drug discovery (PDD) has re-emerged as a powerful strategy for identifying first-in-class therapeutics, often without a predefined molecular target hypothesis [96]. A significant challenge in PDD, however, is the subsequent deconvolution of a compound's mechanism of action (MoA)—the specific biological interactions through which a molecule produces its pharmacological effect [97]. Understanding MoA is crucial for rationalizing phenotypic findings, anticipating potential side-effects, and guiding lead optimization [98] [97].
The integration of high-content phenotypic profiling with computational analyses has revolutionized this process. Technologies like the Cell Painting assay generate high-dimensional morphological profiles that capture the system-wide effects of compound treatments [99] [20]. When combined with chemical structures and other -omics data, these profiles provide a rich resource for building predictive models that generate testable target hypotheses [100] [8]. This Application Note details protocols for leveraging phenotypic profiles, particularly from Cell Painting assays, to predict compound MoA within a chemogenomic screening framework.
Data Modalities for MoA Prediction
Multiple data modalities can be leveraged to predict compound activity and mechanism of action. The table below summarizes the predictive performance of different data sources from a large-scale study profiling 16,170 compounds in 270 assays [100].
Table 1: Predictive Performance of Different Data Modalities for Compound Bioactivity
| Data Modality | Description | Number of Assays Predicted (AUROC > 0.9) | Key Advantages |
|---|---|---|---|
| Chemical Structures (CS) | Graph convolutional network descriptors computed from compound structure [100]. | 16 | No wet lab work required; can screen virtual compounds [100]. |
| Morphological Profiles (MO) | Image-based profiles from Cell Painting assay [100]. | 28 | Captures system-wide phenotypic effects in a disease-relevant context [100] [20]. |
| Gene Expression (GE) | Transcriptomic profiles from the L1000 assay [100]. | 19 | Provides direct readout of transcriptional regulation [100]. |
| Combined (CS + MO + GE) | Late fusion (max-pooling) of probabilities from individual models [100]. | 64 | Dramatically increased coverage due to complementary information [100]. |
The data reveals crucial insight: each profiling modality captures different biologically relevant information, and their combination significantly expands predictive coverage. Morphological profiling alone predicted the highest number of assays individually, demonstrating its particular strength for MoA prediction [100]. In practice, combining chemical structures with phenotypic data (especially morphology) increased the number of assays that could be usefully predicted (AUROC > 0.7) from 37% using CS alone to 64% with CS+MO+GE [100].
Experimental Protocols
Protocol 1: Generating Morphological Profiles with the Cell Painting Assay
The Cell Painting assay is a high-throughput phenotypic profiling tool that uses multiplexed fluorescent dyes to label eight distinct cellular components [20].
Table 2: Key Research Reagents for Cell Painting Assay
| Reagent / Solution | Function | Stained Cellular Component(s) |
|---|---|---|
| Hoechst 33342 | DNA-binding fluorescent dye. | Nuclei / DNA [99] [20]. |
| Concanavalin A | Binds to glycoproteins and glycolipids. | Endoplasmic Reticulum [99] [20]. |
| SYTO 14 | Nucleic acid stain. | Nucleoli and Cytoplasmic RNA [99] [20]. |
| Phalloidin | Binds and stabilizes F-actin. | Actin Cytoskeleton [99] [20]. |
| Wheat Germ Agglutinin (WGA) | Binds to N-acetylglucosamine and sialic acid. | Golgi Apparatus and Plasma Membrane [99] [20]. |
| MitoTracker Deep Red | Accumulates in active mitochondria. | Mitochondria [99] [20]. |
Procedure:
- Cell Seeding and Treatment: Seed appropriate cells (e.g., U2OS osteosarcoma cells) into 384-well plates. After 24 hours, treat cells with experimental compounds, including positive and negative control reference compounds, for a further 24–48 hours [20].
- Staining and Fixation: Stain cells with the six fluorescent dyes according to an established protocol (e.g., JUMP-CP Consortium protocol v3 [99]). The procedure involves fixation, permeabilization, and staining steps.
- Image Acquisition: Image the plates using an automated high-content microscope. Acquire images in multiple channels corresponding to the dyes, typically at multiple positions (fields) per well in both horizontal (xy) and vertical (z) dimensions to capture a sufficient number of cells and sub-cellular regions [20].
- Image Analysis and Feature Extraction: Process the images using automated image analysis software (e.g., CellProfiler [8] or proprietary software like Harmony).
- The software performs illumination correction, identifies (segments) individual cells and sub-cellular compartments (e.g., nuclei, cytoplasm).
- For each compartment, hundreds of morphological features are extracted, including size, shape, texture, intensity, and spatial correlations [20] [8]. The resulting morphological profile per cell serves as a fingerprint for the compound's phenotypic effect [20].
The following diagram illustrates the core workflow of the Cell Painting assay and profile generation.
Protocol 2: Building a Predictive MoA Model with Late Data Fusion
This protocol describes a method for predicting assay outcomes or MoA by fusing information from multiple data modalities [100].
Procedure:
- Data Preparation:
- Chemical Structure Profiles (CS): Encode compounds using a graph convolutional network to generate numerical vectors [100].
- Morphological Profiles (MO): Use aggregated profiles (e.g., median profile per compound) from Protocol 1.
- Gene Expression Profiles (GE): Use normalized L1000 assay data or similar transcriptomic data [100].
- Assay Data: Compile binary activity data (active/inactive) for the assays of interest.
Train Individual Predictors:
- For each data modality (CS, MO, GE), train a separate machine learning model (e.g., a multi-task neural network) to predict bioactivity in each assay. Use a scaffold-based split of compounds to ensure the model generalizes to novel chemotypes [100].
Late Data Fusion:
- For a given compound in the test set, each single-modality model outputs a probability of activity for a specific assay.
- Combine these probabilities using a max-pooling operation: the final predicted probability is the maximum probability from the three individual models (
P_final = max(P_CS, P_MO, P_GE)). This simple fusion strategy effectively leverages the complementarity of the data sources [100].
Model Evaluation:
- Evaluate model performance using Area Under the Receiver Operating Characteristic Curve (AUROC) via cross-validation. An AUROC > 0.9 is typically considered "well-predicted," though models with AUROC > 0.7 can still be useful in practice [100].
Integrated Data Analysis and Visualization
The power of phenotypic profiling is fully realized when integrated with other data within a chemogenomics framework. This allows for the generation of robust MoA hypotheses. The diagram below illustrates the integrated workflow from experimental data generation to MoA hypothesis.
Key Integration Strategies:
- Chemogenomic Library Screening: Utilize a curated library of ~5,000 small molecules that represent a diverse panel of drug targets and biological processes. Screening such a library with Cell Painting builds a reference map of morphological profiles for known MoAs [8]. The MoA for a novel compound can be hypothesized by finding the nearest neighbors with similar morphological fingerprints within this reference space [8].
- Network Pharmacology Integration: Build a systems pharmacology network integrating drug-target interactions, pathways (e.g., from KEGG), gene ontologies, and morphological profiles in a graph database (e.g., Neo4j) [8]. This enables powerful queries to identify proteins and pathways modulated by compounds that induce specific morphological changes, thereby linking phenotype to molecular mechanism [8].
- Complementary Data for Deconvolution: While morphological profiles are powerful for grouping compounds by functional similarity, they may be combined with direct biochemical methods (e.g., affinity purification) for definitive target identification [98]. Computational inference from phenotypic profiles provides a prioritized list of candidate targets for subsequent experimental validation [97].
Conclusion
Cell Painting assay combined with chemogenomic libraries represents a powerful paradigm in modern drug discovery, enabling comprehensive phenotypic profiling that bridges the gap between target-agnostic screening and mechanistic understanding. The integration of advanced multiplexing techniques like Cell Painting PLUS, robust computational pipelines, and multi-omics validation frameworks significantly enhances the utility of this approach. Future directions will likely focus on increased automation, AI-driven pattern recognition, and larger-scale public datasets that collectively advance phenotypic drug discovery toward more predictive and clinically relevant outcomes. As these technologies mature, they promise to accelerate the identification of novel therapeutic mechanisms and improve success rates in translational research.
References
- 1. A Decade in a Systematic Review: The Evolution and Impact ... [https://pmc.ncbi.nlm.nih.gov/articles/PMC11092692/]
- 2. Cell Painting: A Decade of Discovery and Innovation in ... [https://pmc.ncbi.nlm.nih.gov/articles/PMC11810604/]
- 3. Cell Painting, a high-content image-based assay for ... [https://pmc.ncbi.nlm.nih.gov/articles/PMC5223290/]
- 4. Cell Painting PLUS: expanding the multiplexing capacity of ... [https://www.nature.com/articles/s41467-025-58765-8]
- 5. Three million images and morphological profiles of cells ... [https://www.nature.com/articles/s41592-024-02241-6]
- 6. Cell painting, Phenotypic and Morphological Profiling [https://www.moleculardevices.com/applications/cell-imaging/cell-painting]
- 7. A scalable, data analytics workflow for image-based ... [https://www.sciencedirect.com/science/article/pii/S0169743924001722]
- 8. Development of a chemogenomics library for phenotypic ... [https://jcheminf.biomedcentral.com/articles/10.1186/s13321-021-00569-1]
- 9. Image-Based Annotation of Chemogenomic Libraries for ... [https://pmc.ncbi.nlm.nih.gov/articles/PMC8878468/]
- 10. A Roadmap for Open Science Drug Discovery [https://www.thesgc.org/blogs/transforming-hit-finding-computational-endeavor-roadmap-open-science-drug-discovery]
- 11. TargetMol's Compound Libraries [https://www.caltagmedsystems.co.uk/information/targetmols-compound-libraries/]
- 12. Driving Drug Design Using DNA Encoded Libraries [https://www.amgen.com/stories/2025/04/driving-drug-design-using-dna-encoded-libraries]
- 13. The limitations of small molecule and genetic screening in ... [https://www.sciencedirect.com/science/article/pii/S2451945625003459?dgcid=rss_sd_all]
- 14. Development of a chemogenomics library for phenotypic ... [https://pmc.ncbi.nlm.nih.gov/articles/PMC8611952/]
- 15. Recent Successes in AI Phenotypic Drug Discovery and ... [https://ardigen.com/recent-successes-in-phenotypic-drug-discovery-and-the-future-of-ml-ai-methods/]
- 16. Phenotypic Drug Discovery Modern Successes [https://www.pfizer.com/news/articles/that_which_is_old_is_new_again_phenotypic_drug_discovery_makes_a_comeback]
- 17. The Future of Drug Discovery: Integrating Phenotypic Data ... [https://ardigen.com/the-future-of-drug-discovery-integrating-phenotypic-data-with-omics-and-ai/]
- 18. Time resolved cell painting enables rapid assessment of ... [https://pubmed.ncbi.nlm.nih.gov/40645587/]
- 19. Leading AI-Driven Drug Discovery Platforms [https://www.sciencedirect.com/science/article/abs/pii/S0031699725075118]
- 20. Unleashing the potential of cell painting assays ... [https://pmc.ncbi.nlm.nih.gov/articles/PMC11288911/]
- 21. High-Content Phenotypic Profiling in Esophageal ... [https://pmc.ncbi.nlm.nih.gov/articles/PMC7372582/]
- 22. Cell Painting Assay [https://www.evotec.com/solutions/drug-discovery-preclinical-development/cyprotex-adme-tox-solutions/toxicology/mechanistic-toxicity/cell-painting]
- 23. Image-Based Annotation of Chemogenomic Libraries for Phenotypic Screening [https://www.mdpi.com/1420-3049/27/4/1439]
- 24. In-house Diversity, Fragment & Chemogenomic Libraries [https://www.bioascent.com/integrated-drug-discovery/in-house-diversity-and-fragment-libraries]
- 25. Toward target 2035: EUbOPEN - a public–private partnership ... [https://pubs.rsc.org/en/content/articlehtml/2025/md/d4md00735b]
- 26. News [https://www.bioascent.com/news-events/news/bioascent-expands-compound-library-portfolio-to-accelerate-drug-discovery]
- 27. EUbOPEN: Homepage [https://www.eubopen.org/]
- 28. Chemogenomic library design strategies for precision ... [https://www.sciencedirect.com/science/article/pii/S2589004223012865]
- 29. P&D News [https://www.probes-drugs.org/news]
- 30. Cell Painting PLUS: expanding the multiplexing capacity of ... [https://pmc.ncbi.nlm.nih.gov/articles/PMC12022024/]
- 31. Chemogenomic Sets in SGC [https://www.thesgc.org/chemogenomic-sets]
- 32. Comparative assessment of annotation tools reveals ... [https://www.nature.com/articles/s41598-025-24333-9]
- 33. Improving physiological relevance of cell culture [https://pmc.ncbi.nlm.nih.gov/articles/PMC9902212/]
- 34. A quantitative meta-analysis comparing cell models in ... [https://www.nature.com/articles/s41598-023-35043-5]
- 35. Comparative Proteomic Analysis of Eleven Common Cell ... [https://pmc.ncbi.nlm.nih.gov/articles/PMC3316730/]
- 36. High-content Imaging | HCI Systems [https://www.moleculardevices.com/products/cellular-imaging-systems/high-content-imaging]
- 37. HCS-3DX, a next-generation AI-driven automated 3D-oid ... [https://www.nature.com/articles/s41467-025-63955-5]
- 38. Modular, open-sourced multiplexing for democratizing spatial ... [https://pubs.rsc.org/en/content/articlehtml/2025/lc/d5lc00286a]
- 39. Development of a Multiplexed, High Content Imaging ... [https://www.sciencedirect.com/science/article/abs/pii/S0300483X25002252]
- 40. FAIR High Content Screening in Bioimaging | Scientific Data [https://www.nature.com/articles/s41597-023-02367-w]
- 41. CellProfiler: image analysis software for identifying and ... [https://pmc.ncbi.nlm.nih.gov/articles/PMC1794559/]
- 42. Deep Learning Automates the Quantitative Analysis of ... [https://journals.plos.org/ploscompbiol/article?id=10.1371/journal.pcbi.1005177]
- 43. Unleashing the potential of cell painting assays for ... [https://www.frontiersin.org/journals/toxicology/articles/10.3389/ftox.2024.1401036/full]
- 44. Application of Cell Painting for chemical hazard evaluation ... [https://pmc.ncbi.nlm.nih.gov/articles/PMC11917499/]
- 45. AI-driven identification of hits from Cell Painting based ... [https://ardigen.com/ai-driven-identification-of-hits-from-cell-painting-based-screening/]
- 46. Enhancing the Small-Scale Screenable Biological Space ... [https://pmc.ncbi.nlm.nih.gov/articles/PMC11040606/]
- 47. Morphological profiling in human neural progenitor cells ... [https://pubmed.ncbi.nlm.nih.gov/38576795/]
- 48. Cell Painting High-Content Image Assay [https://www.thermofisher.com/us/en/home/life-science/cell-analysis/cell-structure/cell-painting-assay.html]
- 49. Phenotypic Profiling of Reference Chemicals across ... [https://www.sciencedirect.com/science/article/pii/S247255522206614X]
- 50. Optimizing the Cell Painting assay for image-based profiling [https://pmc.ncbi.nlm.nih.gov/articles/PMC10536784/]
- 51. Morphological profiling data resource enables prediction of ... [https://www.sciencedirect.com/science/article/pii/S2589004225007060]
- 52. Data-analysis strategies for image-based cell profiling [https://www.nature.com/articles/nmeth.4397]
- 53. Expanding the multiplexing capacity of Cell Painting-based ... [https://zenodo.org/doi/10.5281/zenodo.14982928]
- 54. Image-Based Profiling in Live Cells Using Live Cell Painting [https://pmc.ncbi.nlm.nih.gov/articles/PMC12514141/]
- 55. Rethinking Live Cell Imaging in 2025: Continuous, Intelligent ... [https://www.biolinktechtop.com/blog-new-news-12602/Rethinking-Live-Cell-Imaging-in-2025-Continuous-Intelligent-and-Non-Invasive-11925222.html]
- 56. New imaging technique enhances live-cell visualization in ... [https://www.news-medical.net/news/20250916/New-imaging-technique-enhances-live-cell-visualization-in-standard-lab-setups.aspx]
- 57. Live Cell Imaging Market Outlook 2025-2030 [https://finance.yahoo.com/news/live-cell-imaging-market-outlook-080400211.html]
- 58. Live Cell Imaging Market Update 2025 Growth Fueled by ... [https://www.towardshealthcare.com/insights/live-cell-imaging-market-sizing]
- 59. Chemical imaging for biological systems: techniques, AI ... [https://pubs.rsc.org/en/content/articlehtml/2025/tb/d4tb02876g]
- 60. What is Cell Painting? [https://alitheagenomics.com/blog/what-is-cell-painting]
- 61. High-Content Visualization of Core Organelles [https://www.aatbio.com/resources/assaywise/2025-14-1/painting-the-cell-high-content-visualization-of-core-organelles]
- 62. Evaluating batch correction methods for image-based cell ... [https://www.nature.com/articles/s41467-024-50613-5]
- 63. Evaluating batch correction methods for image-based cell ... [https://pmc.ncbi.nlm.nih.gov/articles/PMC10516049/]
- 64. Automated quality control tool for high-content imaging ... [https://www.sciencedirect.com/science/article/pii/S2472555223000114]
- 65. SPACe: an open-source, single-cell analysis of ... [https://www.nature.com/articles/s41467-024-54264-4]
- 66. Cell Painting for cytotoxicity and mode-of-action analysis in ... [https://pmc.ncbi.nlm.nih.gov/articles/PMC11785178/]
- 67. CellPainTR: Contrastive Batch Corrected Transformer for ... [https://openreview.net/forum?id=uo8PO6Ah59]
- 68. Cell-vision fusion: A Swin transformer-based approach for ... [https://www.sciencedirect.com/science/article/pii/S258900422401736X]
- 69. 11 IT Cost Optimization Strategies for Scalable Savings in ... [https://www.digitalocean.com/resources/articles/it-cost-optimization-strategies]
- 70. Cost Optimization: Strategies, Techniques, and ... [https://www.companysights.com/resources/cost-optimization-strategies-techniques-and-benchmarks]
- 71. A more scalable alternative to cell painting in HCS [https://www.celtarys.com/science-highlights/cell-painting-high-content-screening.html]
- 72. IT Cost Optimization: Best Practice Guide for 2025 [https://www.ninjaone.com/blog/it-cost-optimization/]
- 73. Top Strategies for Google Dataflow Cost Optimization in 2025 [https://www.sedai.io/blog/top-strategies-for-google-dataflow-cost-optimization-in-2025]
- 74. A data-centric approach to deep learning performance ... [https://www.sciencedirect.com/science/article/pii/S0963869525000088]
- 75. Optimizing the Cell Painting assay for image-based profiling [https://www.nature.com/articles/s41596-023-00840-9]
- 76. HTML Color Codes [https://htmlcolorcodes.com/]
- 77. Cross modality learning of cell painting and transcriptomics ... [https://www.nature.com/articles/s41598-025-05914-0]
- 78. scMODAL: a general deep learning framework for ... [https://www.nature.com/articles/s41467-025-60333-z]
- 79. Computational Methods for Single-cell Multi-omics ... [https://pmc.ncbi.nlm.nih.gov/articles/PMC10025765/]
- 80. Cell Painting Gallery: an open resource for image-based ... [https://pmc.ncbi.nlm.nih.gov/articles/PMC11466682/]
- 81. Cell Painting in Drug Discovery [https://www.evotec.com/solutions/drug-discovery-preclinical-development/discovery/cell-painting-in-drug-discovery]
- 82. Phenotypic and targeted drug discovery in immune therapeutics [https://pubs.rsc.org/en/content/articlehtml/2025/ra/d5ra03914b]
- 83. replicating high-throughput phenotypic profiling in a ... [https://pmc.ncbi.nlm.nih.gov/articles/PMC12477089/]
- 84. Improving phenotypic screening | Nature Chemical Biology [https://www.nature.com/articles/s41589-025-02093-x]
- 85. A comprehensive benchmark for COVID-19 predictive ... [https://www.sciencedirect.com/science/article/pii/S2666389924000503]
- 86. Benchmarking Clinical Prediction Problems on ... [https://papers.ssrn.com/sol3/papers.cfm?abstract_id=5311193]
- 87. The contribution of benchmarking to quality improvement in ... [https://bmchealthservres.biomedcentral.com/articles/10.1186/s12913-022-07467-8]
- 88. Machine Learning for Benchmarking Critical Care Outcomes [https://pmc.ncbi.nlm.nih.gov/articles/PMC10651403/]
- 89. Benchmarking emergency department prediction models ... [https://www.nature.com/articles/s41597-022-01782-9]
- 90. CliniBench: A Clinical Outcome Prediction Benchmark for ... [https://arxiv.org/abs/2509.26136]
- 91. JUMP-Cell Painting Consortium [https://jump-cellpainting.broadinstitute.org/]
- 92. jump-cellpainting/datasets: Images and other data ... [https://github.com/jump-cellpainting/datasets]
- 93. Learning representations for image-based profiling of ... [https://www.nature.com/articles/s41467-024-45999-1]
- 94. Human U2OS cells – compound-profiling Cell Painting ... [https://bbbc.broadinstitute.org/BBBC022]
- 95. Unbiased Phenotype Detection Using Negative Controls [https://pmc.ncbi.nlm.nih.gov/articles/PMC6484531/]
- 96. Phenotypic Drug Discovery: Recent successes, lessons ... [https://pmc.ncbi.nlm.nih.gov/articles/PMC9708951/]
- 97. Computational analyses of mechanism of action (MoA): data ... [https://pubs.rsc.org/en/content/articlehtml/2022/cb/d1cb00069a]
- 98. Target identification and mechanism of action in chemical ... [https://pmc.ncbi.nlm.nih.gov/articles/PMC5543995/]
- 99. A Decade in a Systematic Review: The Evolution and Impact ... [https://pmc.ncbi.nlm.nih.gov/articles/PMC11100607/]
- 100. Predicting compound activity from phenotypic profiles and ... [https://www.nature.com/articles/s41467-023-37570-1]