Overcoming Morphological Profiling Data Analysis Challenges: From Classical Features to Self-Supervised Learning
Morphological profiling through high-content imaging, particularly the Cell Painting assay, has emerged as a powerful technology for drug discovery and functional genomics.
Overcoming Morphological Profiling Data Analysis Challenges: From Classical Features to Self-Supervised Learning
Abstract
Morphological profiling through high-content imaging, particularly the Cell Painting assay, has emerged as a powerful technology for drug discovery and functional genomics. This article addresses the key computational challenges in analyzing large-scale morphological data, covering the complete workflow from image processing to biological interpretation. We explore foundational concepts of image-based profiling, compare traditional feature extraction methods with emerging self-supervised learning approaches, provide solutions for common troubleshooting scenarios, and present validation frameworks using recently released benchmark datasets. Targeted at researchers and drug development professionals, this comprehensive review synthesizes current best practices and technological advances that are transforming how we extract biological insights from cellular morphology.
The Fundamentals of Image-Based Cell Profiling: Workflows, Applications, and Core Principles
This technical support resource details the Cell Painting assay, a high-content morphological profiling technique that uses multiplexed fluorescent dyes to reveal cellular components. The assay extracts hundreds of morphological features from images to create profiles for comparing biological samples, enabling applications in drug discovery, functional genomics, and disease modeling [1] [2]. This guide provides troubleshooting and methodological support for researchers facing data analysis challenges in morphological profiling.
Core Staining Panel and Detection
The standard Cell Painting assay uses six fluorescent dyes across five imaging channels to label eight cellular components [1] [2].
Table: Standard Cell Painting Dye Configuration
| Cellular Component | Fluorescent Dye | Staining Type |
|---|---|---|
| Nucleus | Hoechst 33342 | Fixed or live cells |
| Mitochondria | MitoTracker Deep Red | Live cells |
| Endoplasmic Reticulum | Concanavalin A, Alexa Fluor 488 conjugate | Fixed cells |
| Nucleoli & Cytoplasmic RNA | SYTO 14 green fluorescent nucleic acid stain | Fixed cells |
| F-actin cytoskeleton | Phalloidin, Alexa Fluor 568 conjugate | Fixed cells |
| Golgi apparatus & Plasma membrane | Wheat germ agglutinin, Alexa Fluor 555 conjugate | Fixed cells |
Experimental Workflow
The general workflow for a Cell Painting assay follows a series of standardized steps, from cell plating to data analysis [2].
Detailed Protocol Methodology
- Cell Plating and Perturbation: Plate cells in multi-well plates (e.g., 384-well format) and treat with chemical compounds, RNAi, CRISPR/Cas9, or other genetic perturbations [1] [2]. The choice of cell type (e.g., U2OS, A549, Hep G2) and perturbation duration are critical variables that require optimization [3] [4].
- Staining and Fixation: Perform the multiplexed staining procedure. The protocol involves both live-cell staining (e.g., MitoTracker) and staining after fixation [1] [5]. Incubation times for probes can be titrated (from 2 to 30 minutes) to optimize intensity [6].
- Image Acquisition: Acquire images on a high-content or high-throughput confocal microscope. The ImageXpress Confocal HT.ai and CellInsight CX7 LZR Pro Platform are examples of systems used [2] [5]. Ensure consistent imaging settings across plates and batches to minimize technical variation.
- Image Analysis and Feature Extraction: Use automated image analysis software (e.g., MetaXpress, IN Carta, or CellProfiler) to identify individual cells and their components [1] [2]. These tools extract ~1,500 morphological features per cell, including measurements of size, shape, texture, intensity, and spatial relationships between structures [1].
- Data Analysis and Profiling: Perform data normalization, batch correction, and dimensionality reduction. Aggregate single-cell data to create well-level profiles and use similarity metrics (e.g., cosine similarity) to compare perturbations and identify matches [4].
Data Analysis Pathway
The data processing pipeline transforms raw images into comparable morphological profiles.
Troubleshooting Guides and FAQs
Low or Uneven Staining Intensity
- Problem: Sub-optimal signal from cell painting markers, leading to poor segmentation.
- Solution:
- Titrate the concentration of off-instrument applied probes, such as those for cell membrane and nucleus [6].
- Optimize incubation times for probes. Test a range from 2 minutes to 30 minutes to find the ideal signal intensity [6].
- For non-specific binding or charge-related issues, use a signal enhancer like Image-iT FX Signal Enhancer to block non-specific interactions [7].
Excessive Photobleaching
- Problem: Fluorescent signals fade quickly during imaging or storage.
- Solution:
- Use an appropriate antifade reagent. For live-cell imaging, use ProLong Live Antifade Reagent. For long-term storage of fixed samples, use a hardening mountant like ProLong Diamond Antifade Mountant [7].
- Choose more photostable dyes, such as Alexa Fluor dyes [7].
- Reduce light exposure by lowering laser power, using neutral density filters, and minimizing viewing time [7].
High Background Fluorescence
- Problem: Poor signal-to-noise ratio due to high background.
- Solution:
- Ensure you are using the correct excitation and detection wavelengths for your dyes [7].
- Optimize dye concentration and staining time using control samples [7].
- For live-cell systems, wash out unreacted dye or add a background suppressor like BackDrop Suppressor ReadyProbes Reagent [7].
- Check for endogenous autofluorescence in unstained controls. If present, wash samples with sodium borohydride prior to blocking and labeling [7].
Bubbles in Mounting Medium
- Problem: Bubbles trapped in the mounting medium during sample preparation.
- Solution:
- Degas the mounting medium by centrifuging the aliquot or placing the entire vial under a vacuum for 10-20 minutes before use [7].
- When applying the coverslip, lower it at a slight angle gently to avoid trapping air [7].
- For tissue sections, degas the sections while submerged in buffer to remove air trapped within the tissue [7].
Objective Lens Hitting Sample or Vessel Holder
- Problem: The objective lens makes contact with the sample container during focusing.
- Solution:
- Calibrate objectives using the system's calibration slide [7].
- Ensure you are using the correct objective type (e.g., Long-Working Distance (LWD) for imaging through plasticware or slides, not Coverslip-Corrected (CC) objectives) [7].
- Manually focus the objective upward to touch the sample bottom, then slowly move away for fine focusing, especially with high magnification and oil immersion objectives [7].
The Scientist's Toolkit
Table: Key Research Reagent Solutions
| Item Name | Function / Application |
|---|---|
| Invinrogen Image-iT Cell Painting Kit | A curated kit containing six reagents for standard Cell Painting staining [5]. |
| Hoechst 33342 | A cell-permeable blue fluorescent dye that stains DNA in the nucleus [2]. |
| MitoTracker Deep Red FM | A far-red fluorescent dye that stains mitochondria in live cells [2]. |
| Concanavalin A, Alexa Fluor 488 conjugate | A green fluorescent lectin that binds to glycoproteins in the endoplasmic reticulum and Golgi [1] [2]. |
| Phalloidin, Alexa Fluor 568 conjugate | An orange-red fluorescent dye that selectively binds to F-actin in the cytoskeleton [2]. |
| Wheat Germ Agglutinin (WGA), Alexa Fluor 555 conjugate | An orange fluorescent lectin that stains the Golgi apparatus and plasma membrane [1] [2]. |
| SYTO 14 | A green fluorescent nucleic acid stain that labels nucleoli and cytoplasmic RNA [2]. |
| ProLong Diamond Antifade Mountant | A hardening mounting medium that retards photobleaching in fixed samples for long-term storage [7]. |
| Image-iT FX Signal Enhancer | A reagent used to block non-specific binding of fluorescent conjugates to cellular components [7]. |
Frequently Asked Questions (FAQs)
1. What is morphological profiling and why is it important in drug discovery? Morphological profiling is a high-content, image-based method that quantitatively captures changes in cell morphology across various cellular compartments. It enables the rapid prediction of compound bioactivity and mechanisms of action (MOA) by analyzing induced phenotypic changes. This is crucial in drug discovery for identifying drug targets, predicting off-target effects, and grouping compounds with similar biological impacts, thereby accelerating the research pipeline [3] [4] [8].
2. What is the difference between quantitative and qualitative data in this workflow? In the context of image-based profiling, the raw images (pixels) represent qualitative, unstructured data. Through feature extraction and analysis, these are transformed into quantitative, structured data. This quantitative data consists of measurable numerical features (size, shape, intensity, texture) that form the morphological profile, allowing for statistical comparison and pattern recognition [9].
3. Why is a unified semantic layer important in this workflow? A unified semantic layer creates a consistent source of truth by standardizing data definitions and metrics across different analytical workflows. It ensures that all researchers and systems (e.g., analytics, machine learning, data science) work with accurate, cohesive data. This breaks down data silos, enhances collaboration, and ensures decision-making is based on consistent and reliable information, which is critical for reproducible research [10].
4. How can we address the challenge of poor data quality in morphological profiles? Data quality is paramount. Strategies include:
- Robust Data Governance: Implementing policies and standards for data collection, processing, and management [10] [11].
- Extensive Assay Optimization: Prior to large-scale screening, optimize protocols to achieve high data quality and reproducibility, even across different imaging sites [3].
- Data Cleaning and Validation: Processes must include removing duplicates, handling missing values, standardizing formats, and validating the cleaned data to ensure accuracy and consistency [12] [13].
Troubleshooting Guides
Issue 1: Poor Reproducibility of Morphological Profiles Across Experimental Replicates
Problem: Profiles from technical or biological replicates of the same perturbation show high variability and low similarity, making it difficult to distinguish true biological signal from noise.
Investigation and Resolution:
| Step | Action | Expected Outcome |
|---|---|---|
| 1 | Verify Image Quality: Check for technical artifacts like out-of-focus images, uneven illumination, or background fluorescence. | High-quality, clear images with consistent staining and illumination across all wells and plates. |
| 2 | Check Plate Layout Effects: Analyze if profiles cluster by well position rather than treatment. Implement plate normalization techniques to correct for systematic row/column biases. | Treatment replicates cluster together in similarity analyses, regardless of their position on the plate. |
| 3 | Validate Replicate Concordance: Use metrics like average precision to quantify how well replicates of the same perturbation retrieve each other against a background of negative controls. | A high fraction of perturbations should be statistically distinguishable from controls (e.g., q-value < 0.05) [4]. |
| 4 | Review Assay Protocol: Ensure consistency in cell culture, perturbation timing, staining protocols, and imaging settings. Document any deviations rigorously. | A standardized and documented protocol leading to highly reproducible profiles across different operators and days. |
Issue 2: Failure to Match Chemical and Genetic Perturbations Targeting the Same Gene
Problem: Computational strategies fail to retrieve or group known compound-gene pairs (where the compound targets the gene's product) based on their morphological profiles.
Investigation and Resolution:
| Step | Action | Expected Outcome |
|---|---|---|
| 1 | Benchmark Profile Quality: Confirm that the perturbations produce detectable and robust phenotypes using the "perturbation detection" benchmark. Without a strong signal, matching is impossible [4]. | Both chemical and genetic perturbations show significant morphological changes compared to negative controls. |
| 2 | Evaluate Similarity Metric: Test different similarity metrics (e.g., cosine similarity, correlation) and data transformation methods. The directionality of correlation (positive or negative) must be considered. | The chosen metric successfully groups positive controls (e.g., two different CRISPR guides targeting the same gene). |
| 3 | Incorporate Multiple Views: Utilize data from different cell types or time points if available. A match may only be apparent under specific biological conditions [4]. | Compound-gene pairs show higher similarity in a specific cell line or at a specific time point post-treatment. |
| 4 | Leverage Advanced Representations: Explore deep learning and representation learning methods that can automatically learn features directly from image pixels, which may capture more nuanced biological relationships than hand-engineered features [4]. | Improved retrieval of known compound-gene pairs compared to classical feature-based methods. |
Issue 3: Low Discrimination Power in Profile Analysis
Problem: The extracted morphological profiles cannot reliably distinguish between different perturbation mechanisms or identify unique phenotypes.
Investigation and Resolution:
| Step | Action | Expected Outcome |
|---|---|---|
| 1 | Assess Feature Selection: Ensure the feature set is comprehensive and captures diverse morphological aspects. Consider incorporating features learned by deep learning models. | A rich set of features that captures variations in size, shape, intensity, and texture across all stained cellular compartments. |
| 2 | Optimize Dimensionality Reduction: Re-evaluate parameters for techniques like PCA or UMAP. Overly aggressive reduction can collapse distinct phenotypes. | Clear, separated clusters in 2D visualization corresponding to perturbations with different known mechanisms of action. |
| 3 | Validate with Controls: Include a diverse set of reference compounds with well-annotated mechanisms of action (MOAs) in your screen. | Profiles cluster meaningfully by MOA, and positive controls are reliably retrieved. |
| 4 | Implement Explainable AI (XAI): Use XAI techniques to understand which features or image regions are driving profile differences, helping to build trust and identify potential areas for assay improvement [10]. | Clear, interpretable insights into the morphological changes that define specific phenotypic classes. |
The Scientist's Toolkit: Research Reagent Solutions
The following table details key materials and computational tools essential for a morphological profiling experiment.
| Item Name | Function/Application |
|---|---|
| Cell Painting Assay Kits | Multiplexed fluorescent dye sets for staining major cellular compartments (nucleus, nucleoli, cytoplasm, Golgi/ER, actin cytoskeleton, plasma membrane). Provides a comprehensive view of cell morphology [4]. |
| High-Throughput Confocal Microscopes | Automated imaging systems that generate high-resolution, multi-channel images of stained cells in multi-well plates, enabling large-scale screening. |
| JUMP Cell Painting Consortium CPJUMP1 Dataset | A publicly available benchmark dataset containing ~3 million images from chemical and genetic perturbations. Used for method development and validation [4]. |
| Open Data Format (Apache Parquet/Iceberg) | Columnar storage formats that enable efficient querying and analysis of large feature data tables, facilitate data sharing, and help avoid vendor lock-in [10]. |
| RAG-Powered AI Tools | AI systems using Retrieval-Augmented Generation. They are integrated into data platforms to allow users to query proprietary morphological profile data using natural language, unlocking insights from structured and unstructured data [10]. |
| Explainable AI (XAI) Frameworks | Software tools that help explain the reasoning behind AI-driven analysis of morphological profiles, building trust and meeting regulatory demands by showing the 'why' behind decisions [10]. |
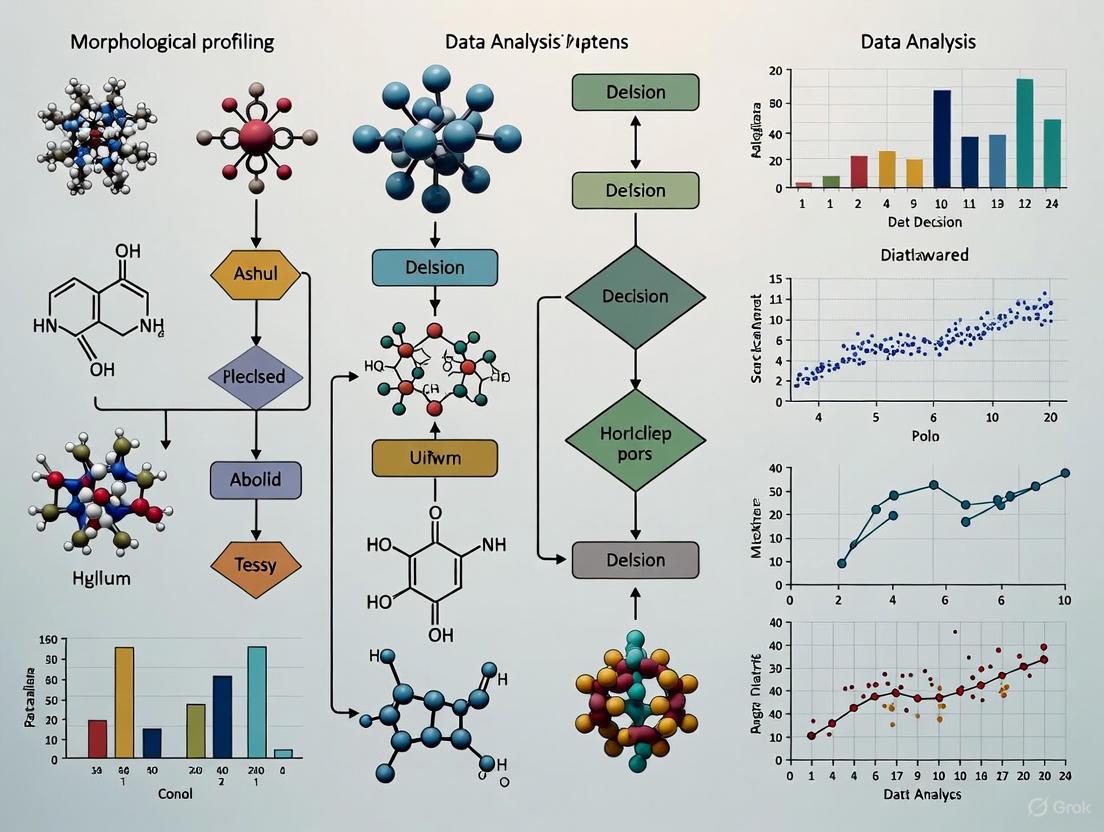
Standard Data Analysis Workflow: From Images to Profiles
The diagram below illustrates the eight critical stages of transforming raw cellular images into quantitative morphological profiles, integrating both established practices and modern data lifecycle management principles [11] [13].
Data Analysis Workflow: Eight Key Stages
Detailed Experimental Protocols for Key Workflow Stages
Stage 1 & 2: Image Acquisition, Data Collection & Aggregation
- Methodology: Cells (e.g., U2OS, A549, Hep G2) are seeded in multi-well plates, treated with perturbations (chemical compounds or genetic tools like CRISPR-Cas9), and stained using the Cell Painting protocol [4]. Imaging is performed using high-throughput confocal microscopes across multiple sites, requiring extensive assay optimization to ensure high cross-site data quality and reproducibility [3] [4].
- Key Considerations: Standardize imaging settings (exposure time, laser power) across plates and sites. Implement careful plate layout planning, randomizing treatments and including adequate positive/negative controls to mitigate batch effects [4].
Stage 3: Data Processing & Feature Extraction
- Methodology: This stage involves classical image segmentation to identify individual cells and feature extraction using software that quantifies morphological aspects. The process includes data cleaning (handling missing data, removing duplicates) and transformation to create a unified dataset [4] [13].
- Key Considerations: "Hand-engineered" features (size, shape, texture) are the current field standard. However, there is active exploration of deep learning methods to learn features directly from pixels, which may capture more subtle biological phenomena [4]. This step lays the foundation for all subsequent analysis, making data quality and validation critical [13].
Stage 5: Profiling & Data Analysis
- Methodology: The goal is to derive a representation where biologically similar samples are close. This involves:
- Normalization & Batch Correction: Account for technical variability.
- Dimensionality Reduction: Use PCA or UMAP to visualize and explore profile relationships.
- Similarity Measurement: Calculate cosine similarity between aggregated profiles.
- Benchmarking: Evaluate analysis pipelines using tasks like "perturbation detection" (identifying active treatments) and "perturbation matching" (finding similar profiles) [4].
- Key Considerations: The analysis must be robust against plate layout effects. The success of matching chemical and genetic perturbations can be challenging and depends on the strength and specificity of the induced phenotype [4].
Stage 7 & 8: Interpretation, Insight Generation & Actionable Recommendations
- Methodology: Interpret patterns and correlations to derive meaningful biological insights, such as predicting a compound's Mechanism of Action (MoA) or identifying novel gene functions [4] [13]. This involves reviewing analytical objectives, seeking explanations for observed patterns, and validating insights against original goals.
- Key Considerations: Provide actionable recommendations based on insights, such as prioritizing a compound for further testing or suggesting a new hypothesis for a gene's function. Clearly articulate how these recommendations align with overarching research goals [13].
This technical support center is designed to assist researchers in navigating the common computational and experimental challenges encountered in two key areas of modern drug discovery: Mechanism of Action (MoA) identification and toxicity prediction. The guidance provided is framed within a research thesis focusing on overcoming morphological profiling data analysis challenges, leveraging high-content imaging and artificial intelligence (AI) to deconvolve complex biological data into actionable insights.
Troubleshooting Guides
Mechanism of Action Identification
Problem: High-Content Screen Shows High Phenotypic Variability, Compering MoA Classification A phenotypic screen using a Cell Painting assay returns images with high cell-to-cell variability, making it difficult to cluster compounds with similar MoAs reliably.
- Potential Cause 1: Inconsistent Cell Culture Conditions
- Solution: Standardize passage number, confluence at time of treatment, and media composition. Implement strict quality control logs for serum lots and cell line authentication [14].
- Potential Cause 2: Suboptimal Image Acquisition Parameters
- Solution: Calibrate microscope lasers and cameras regularly. For live-cell imaging, optimize frequency and duration of imaging to minimize phototoxicity, which can itself induce phenotypic changes [14].
- Potential Cause 3: Inefficient Feature Extraction and Normalization
- Solution: Use standardized image analysis pipelines like CellProfiler to extract morphological features. Apply batch correction algorithms to normalize data across different experimental runs and imaging sites [8].
Problem: Inability to Distinguish Between Primary On-Target Effects and Off-Target Toxicity After identifying a phenotypic hit, follow-up experiments fail to confirm the suspected molecular target, suggesting the observed phenotype may be due to off-target effects.
- Potential Cause 1: Limitations of a Single Target Identification Method
- Solution: Employ a combination of orthogonal target deconvolution methods. Do not rely solely on one technique. Combine biochemical methods (e.g., affinity purification) with genetic interaction methods (e.g., CRISPR-based knockouts) and computational inference for cross-validation [15].
- Potential Cause 2: Lead Compound Lacks Sufficient Selectivity
Toxicity Prediction
Problem: AI Model for Hepatotoxicity Prediction Shows Poor Generalization to New Chemical Scaffolds A machine learning model trained on existing toxicity data performs well on test compounds but fails to predict the toxicity of novel chemotypes.
- Potential Cause 1: Training Data is Not Representative of Chemical Space
- Solution: Augment training data with diverse public and proprietary toxicology resources. Use databases like TOXRIC, ChEMBL, and DrugBank, which aggregate toxicity and bioactivity data from numerous sources [17].
- Potential Cause 2: Model Relies on Overly Simplistic Molecular Descriptors
- Solution: Implement advanced deep learning architectures that can learn directly from molecular structures (e.g., graphs or SMILES strings) or utilize multimodal data fusion, incorporating both structural and high-content imaging data [17].
- Potential Cause 3: Species Extrapolation Error
Problem: In Vitro Cytotoxicity Data Does Not Correlate with In Vivo Organ-Specific Toxicity Findings A compound shows minimal cytotoxicity in standard in vitro assays but causes specific organ damage in animal models.
- Potential Cause 1: The In Vitro Model Lacks Physiological Complexity
- Solution: Move from simple 2D monocultures to more complex in vitro models, such as 3D organoids or co-cultures, which can better capture cell-cell interactions and tissue-level responses [14].
- Potential Cause 2: The Toxicity is Metabolite-Mediated
- Solution: Incorporate metabolically competent systems, such as hepatocytes or systems that express key cytochrome P450 enzymes, to assess the toxicity of both the parent compound and its metabolites [17].
- Potential Cause 3: The Assay is Measuring the Wrong Endpoint
Frequently Asked Questions (FAQs)
Q1: What is the fundamental difference between target-based and phenotypic screening approaches in MoA identification? A1: Target-based screening is a reverse chemical genetics approach. It starts with a purified protein target hypothesized to be disease-relevant and screens for compounds that modulate its activity [18] [15]. In contrast, phenotypic screening is a forward chemical genetics approach. It starts by screening for compounds that induce a desired phenotypic change in a cell or organism, without preconceived notions of the target, requiring subsequent target deconvolution [15]. Phenotypic screens can discover novel therapeutic targets and MoAs.
Q2: When during drug discovery should we invest in elucidating a compound's precise MoA? A2: There is no one-size-fits-all answer. The decision should consider the disease complexity, existence of standard-of-care, and project resources. While MoA knowledge is not strictly required for FDA approval, it greatly benefits lead optimization, understanding clinical efficacy, and managing potential side effects. For programs arising from phenotypic screens, MoA studies are essential and often occur after confirmation of cellular efficacy [18].
Q3: How can morphological profiling from assays like Cell Painting predict toxicity? A3: The Cell Painting assay uses multiplexed fluorescent dyes to label key cellular components (e.g., nucleus, actin, mitochondria). Treating cells with a compound generates a morphological profile—a high-dimensional vector of quantitative features describing cell shape, texture, and organelle organization [8]. Compounds with known toxicity profiles produce characteristic morphological "fingerprints." By comparing a new compound's profile to these references using machine learning, one can predict its potential toxicity, such as mitochondrial dysfunction or cytoskeletal damage, before more costly in vivo studies [14] [8].
Q4: What are Critical Quality Attributes (CQAs) in the context of morphological cell analysis? A4: CQAs are a minimal set of standardized, quantitative morphological measurands (e.g., related to the nucleus, actin cytoskeleton, or mitochondria) that are traceable to standardized units and are critically linked to cell bioactivity, identity, and health [14]. Defining CQAs is a goal of the cell metrology community to reduce data variability and improve comparability across different labs and analytical platforms.
Q5: Can computational methods alone identify a small molecule's target? A5: Computational methods, particularly structure-based approaches like Inverse Virtual Screening (IVS), are powerful for generating target hypotheses. IVS computationally "screens" a compound against a large library of protein structures to predict potential binding partners [16]. However, these in silico predictions are not definitive. They significantly reduce the time and cost of target identification by prioritizing the most likely targets, but the hypotheses must be experimentally validated through biochemical or genetic methods [15] [16].
Experimental Protocols & Data
Key Experimental Methodology: Cell Painting Assay for Morphological Profiling
The following protocol is adapted for generating high-quality data for MoA classification and toxicity prediction [8].
- Cell Seeding and Culture: Seed appropriate cell lines (e.g., U2 OS or Hep G2) into multi-well plates at a pre-optimized density to achieve 50-70% confluence at the time of staining.
- Compound Treatment: Treat cells with the compound of interest alongside appropriate controls (vehicle control, benchmark compounds with known MoA/toxicity). Include a range of concentrations and treatment durations to capture dose- and time-dependent effects.
- Staining and Fixation:
- Fix cells with paraformaldehyde.
- Permeabilize cells with Triton X-100.
- Stain with the multiplexed dye cocktail:
- Nuclei: Hoechst 33342 (DNA)
- Nucleoli and Cytoplasmic RNA: SYTO 14 (RNA)
- Endoplasmic Reticulum: Concanavalin A (ConA) conjugated to a fluorophore
- Mitochondria: MitoTracker Deep Red
- Actin Cytoskeleton: Phalloidin conjugated to a fluorophore
- Golgi Apparatus: A suitable antibody or dye (optional, depending on the panel)
- Image Acquisition: Image plates using a high-throughput confocal microscope. Acquire images from multiple sites per well and across all fluorescent channels using a 20x or higher magnification objective. Ensure exposure times are set to avoid pixel saturation.
- Image Analysis and Feature Extraction:
- Use CellProfiler or similar software to segment cells and identify individual cellular compartments.
- Extract hundreds of morphological features (e.g., area, shape, texture, intensity, neighbor relationships) for each compartment per cell.
- Data Analysis and Profiling:
- Aggregate single-cell data and normalize to plate controls.
- Use dimensionality reduction (e.g., PCA) and clustering algorithms to group compounds with similar morphological profiles, inferring potential MoA or toxicity.
Table 1: Common Morphological Features as Critical Quality Attributes (CQAs) for Cell Health Assessment [14]
| Cellular Compartment | Measurand (CQA) | Description | Link to Bioactivity/Toxicity |
|---|---|---|---|
| Nucleus | Nuclear Area | 2D area of the nucleus | Changes indicate cell cycle arrest, apoptosis, or genotoxic stress. |
| Nucleus | Nuclear Shape Index | Measures roundness (1.0 = perfect circle) | Irregularity can indicate apoptosis or nuclear envelope defects. |
| Actin Cytoskeleton | Actin Fiber Density | Measurement of actin filament bundling | Loss of density indicates disruption of cytoskeletal integrity. |
| Mitochondria | Mitochondrial Network Length | Total length of mitochondrial structures | Fragmentation is linked to apoptosis; elongation can indicate stress. |
| Cell Membrane | Cell Spread Area | Total area occupied by the cell | Reduction can be a marker of cell rounding and detachment in toxicity. |
Table 2: Publicly Available Databases for Toxicity Prediction Model Development [17]
| Database Name | Data Content & Scale | Primary Application in Toxicity Prediction |
|---|---|---|
| TOXRIC | Comprehensive toxicity data (acute, chronic, carcinogenicity) | Training data for various toxicity endpoint models. |
| ChEMBL | Manually curated bioactivity data, ADMET properties | Source for compound structures and associated toxicity data. |
| DrugBank | Drug data with target, mechanism, and adverse reaction info | Linking compound structure to clinical toxicity observations. |
| PubChem | Massive repository of chemical structures and bioassays | Large-scale data source for model training and validation. |
| FAERS | Database of post-market adverse event reports | Identifying clinical toxicity signals for marketed drugs. |
Visual Workflows and Diagrams
MoA Identification Workflow
AI-Driven Toxicity Prediction Pathway
The Scientist's Toolkit: Research Reagent Solutions
Table 3: Essential Resources for MoA and Toxicity Studies
| Tool / Resource | Type | Function in Research |
|---|---|---|
| CellProfiler | Software | Open-source platform for automated analysis of cellular images; extracts morphological features for profiling [14]. |
| TOXRIC / ChEMBL | Database | Provides large-scale, curated toxicity and bioactivity data for training and validating computational models [17]. |
| CRISPR-Cas9 Libraries | Genetic Tool | Enables genome-wide screens to identify genes that confer sensitivity or resistance to a compound, informing MoA [15]. |
| Affinity Beads (e.g., Agarose/NHS) | Biochemical Reagent | For immobilizing compounds to create affinity matrices for pull-down assays to identify direct protein targets [15]. |
| Multiplexed Fluorescent Dyes (Cell Painting Kit) | Staining Reagent | Allows simultaneous labeling of multiple organelles to generate a comprehensive morphological snapshot of the cell [8]. |
Image-based cell profiling is a high-throughput methodology that quantifies the effects of chemical and genetic perturbations on cells by capturing a breadth of morphological changes via microscopy [19]. This approach transforms images into rich, high-dimensional morphological profiles, enabling the comparison of treatments to identify biologically relevant similarities and differences [20]. The foundation of this profiling lies in the extraction and analysis of four core categories of morphological features: Shape, Intensity, Texture, and Spatial Relationships [20]. This technical support guide addresses common challenges researchers encounter when working with these feature categories during their profiling experiments.
Troubleshooting Guides
Common Data Analysis Challenges and Solutions
| Challenge | Root Cause | Solution | Key References/Tools |
|---|---|---|---|
| Poor Segmentation Accuracy [20] | - Inhomogeneous illumination [20]- Suboptimal algorithm parameters [20] | - Apply retrospective multi-image illumination correction [20]- Use machine learning-based segmentation (e.g., Ilastik) for highly variable cell types [20] | - Model-based approach (CellProfiler) [20]- Machine learning approach (Ilastik) [20] |
| Weak or Unreiable Morphological Profiles [19] | - High dimensionality and noise in features [19]- Technical artifacts (e.g., batch effects) [19] | - Perform feature normalization and selection (e.g., remove low-variance/high-correlation features) [19]- Use hierarchical clustering (e.g., Morpheus) to inspect for batch effects [19] | - Pycytominer for data normalization/aggregation [19]- Morpheus software for matrix visualization & clustering [19] |
| Difficulty Interpreting Biological Meaning of Profiles [19] | - Complex phenotypes involving many features [19]- Lack of visual connection to raw data [19] | - Identify "driving features" that contribute most to profile differences [19]- Correlate profiles with representative single-cell images [19] | - Morpheus heatmaps for feature exploration [19]- Custom Python scripts for single-cell visualization [19] |
| Low Contrast Between Key Features and Background [21] | - Insufficient color contrast ratios in visualizations [21] | - Ensure a minimum 3:1 contrast ratio for chart elements and 4.5:1 for text [21]- Use dark themes to access a wider array of compliant color shades [21] | - WCAG 2.1 (Level AA) guidelines [21]- Color contrast checker tools [21] |
Experimental Workflow for Morphological Profiling
The following diagram outlines the key steps for generating and analyzing morphological profiles, from image acquisition to biological interpretation.
Frequently Asked Questions (FAQs)
What are the key advantages of using morphological features for profiling over other methods?
Morphological analysis is particularly well-suited for texture description and capturing complex phenotypes because it excels at exploiting spatial relationships among pixels and possesses numerous tools for extracting size and shape information [22]. Furthermore, in contrast to methods like difference statistics or Fourier transforms, which describe a texture process only up to second-order characteristics, morphological methods can capture higher-order properties of spatial random processes [22]. This allows profiling to capture unexpected behaviors of the cell system without being limited to pre-defined hypotheses [23].
How can we handle the challenge of high-dimensional feature data?
A standard practice is to perform data normalization and aggregation. For example, single-cell profiles are often aggregated into population-averaged profiles for each sample well [19] [23]. Subsequent feature selection steps are crucial, including excluding features with low variance or high correlation to another feature [19]. Tools like pycytominer are specifically designed for this normalization and feature selection process in morphological profiling data [19].
Our profiles are technically robust but biologically uninterpretable. What can we do?
This is a common bottleneck. We recommend a two-pronged approach:
- Exploratory Data Analysis: Use tools like Morpheus to create heatmaps and perform hierarchical clustering. This allows you to visualize correlations between samples and identify groups of perturbations with similar profiles, which can be linked to known mechanisms of action [19].
- Image Visualization: Go back to the images. Create visualizations of representative single cells from different treatments to understand how changes in features are reflected in the actual cell morphology. This helps build intuition about the biological meaning behind the numerical profiles [19].
What are some best practices for visualizing this data accessibly?
When creating visualizations like charts:
- Color and Contrast: Do not rely on color alone. Use a second encoding such as shapes, patterns, or text labels to convey meaning. Ensure all graphics achieve a minimum 3:1 contrast ratio with neighboring elements [24] [21].
- Text and Icons: Integrate text labels directly into graphs where possible, or use clear, unambiguous icons. This benefits all users and is essential for those with color vision deficiencies [21].
- Focus and Simplicity: Use borders that meet contrast requirements while employing lighter fills to direct focus to the most important metrics, improving glanceability without sacrificing accessibility [21].
The Scientist's Toolkit: Essential Research Reagents and Materials
| Item | Function in Morphological Profiling | Example/Note |
|---|---|---|
| Cell Painting Assay Reagents [19] [23] | A standardized set of fluorescent dyes to stain eight cellular components (actin, Golgi, nucleus, etc.), enabling unbiased morphological capture. | Uses six fluorescent dyes imaged across five channels [23]. |
| CellProfiler Software [19] [20] | Open-source software for segmenting cells and performing feature extraction on microscopy images. | Extracts thousands of features per cell for shape, intensity, texture, and spatial relationships [19] [20]. |
| Pycytominer [19] | A Python package for normalizing, aggregating, and performing feature selection on single-cell data from CellProfiler. | Used to normalize features to controls and aggregate single-cell profiles into well-level profiles [19]. |
| Morpheus [19] | A free, web-based software from the Broad Institute for matrix visualization, clustering, and analysis of profiling data. | Helps explore sample similarities and identify features driving profile differences via heatmaps [19]. |
Data Analysis Pathway in Morphological Profiling
This diagram illustrates the computational pathway from raw images to biological insights, highlighting the role of key software tools.
This technical support center provides troubleshooting guides and FAQs for researchers utilizing public morphological profiling resources. These resources are designed to help you overcome common challenges in data analysis and experimental protocols.
Frequently Asked Questions (FAQs)
General Resource Questions
What is the JUMP-Cell Painting Consortium? The JUMP-Cell Painting Consortium was a collaborative effort that created a large-scale, public Cell Painting dataset to validate and scale up image-based drug discovery strategies. This resource helps in determining the mechanism of action of potential therapeutics and provides an unprecedented public data set for the community [25].
What is EU-OPENSCREEN? EU-OPENSCREEN is a non-profit European Research Infrastructure Consortium (ERIC) that provides academic researchers and companies with access to compound screening, medicinal chemistry, and data resources to advance chemical biology and early drug discovery research. Its network includes 30 partner sites across Europe [26].
Can I still join the JUMP-Cell Painting Consortium? No, the original JUMP-Cell Painting Consortium has completed its work. However, you can explore new related consortia such as OASIS (focused on integrated safety assessment) or VISTA (focused on variant integration for screening therapeutic approaches) [27].
How can I access the data from these resources?
- JUMP-Cell Painting: Data and code are publicly available. You can explore it via the JUMP Cell Painting Hub, which offers interactive tools without programming, as well as guides for data fetching and analysis [28].
- EU-OPENSCREEN: The organization provides an open-access chemical biology database with millions of data points, which is available for screening and machine learning applications [26].
Troubleshooting Common Experimental & Data Analysis Issues
How can I improve the quality of my cell images for profiling? A major factor is illumination correction, which addresses uneven background lighting. For high-throughput quantitative profiling, a retrospective multi-image method is recommended. This involves building a correction function from all images in an experiment batch (e.g., per plate) for more robust results compared to single-image or prospective methods [20].
My segmentation results are poor for a complex cell type. What can I do? While model-based segmentation (e.g., using thresholding and watersheds) is common for standard fluorescence images, consider a machine-learning-based approach (e.g., with Ilastik) for highly variable cell types or tissues. This method requires manual pixel labeling for training but can handle more difficult segmentation tasks effectively [20].
What features should I extract for an unbiased morphological profile? To capture a comprehensive view of cell state, extract a wide variety of features [20]:
- Shape features: Area, perimeter, and roundness of cellular compartments.
- Intensity-based features: Mean and maximum intensity within compartments.
- Texture features: Metrics that quantify patterns and regularity of intensities.
- Microenvironment features: Spatial relationships between cells and structures.
How do I handle artifact detection in a high-throughput experiment? Implement automated field-of-view quality control. To detect blurring, compute the log-log slope of the power spectrum of pixel intensities. To identify saturation, calculate the percentage of saturated pixels in an image. We recommend computing multiple such measures to identify and flag a wider range of potential artifacts [20].
The following table summarizes the core components of the featured public datasets, which are critical for planning your experiments and analyses.
Table 1: Key Resource Specifications
| Resource Feature | JUMP-Cell Painting Consortium [25] [28] | EU-OPENSCREEN Compound Set [26] [3] |
|---|---|---|
| Primary Content | Cell Painting image data and morphological profiles | Curated collection of bioactive compounds |
| Key Cell Lines | U2 OS, etc. | Hep G2, U2 OS [3] |
| Number of Compounds | Large-scale, consortium-driven compound set | 2,464 bioactive compounds [3] |
| Imaging Sites | Single centralized source (Broad Institute) | 4 different imaging sites [3] |
| Data Type | Cellular images and extracted feature profiles | Morphological profiles and bioactivity data |
| Primary Application | MOA prediction, drug discovery | Exploring compound bioactivity and toxicity |
The Scientist's Toolkit
Table 2: Essential Research Reagent Solutions
| Item | Function in Morphological Profiling |
|---|---|
| Cell Painting Assay [20] | A standardized multiplexed staining protocol using up to six fluorescent dyes to label major cellular components (nucleus, cytoplasm, mitochondria, etc.), enabling comprehensive morphological capture. |
| High-Quality Compound Collections [26] | Well-annotated chemical libraries, such as the EU-OPENSCREEN Bioactive compounds, used to perturb biological systems in a reproducible manner. |
| High-Throughput Confocal Microscopy [3] | Advanced imaging systems essential for acquiring high-resolution, multi-channel z-stack images of cells in large-scale screening experiments. |
| Image Analysis Software (e.g., CellProfiler, Ilastik) [20] | Computational tools used for critical image processing steps: illumination correction, segmentation of individual cells and structures, and feature extraction. |
| Bioactivity Database (e.g., ECBD) [26] | An open-access database containing millions of data points, used for validating profiles, predicting activity, and training machine learning models. |
Experimental Workflow and Data Analysis
The diagram below outlines the standard workflow for generating and analyzing morphological profiling data, integrating key steps from troubleshooting guides.
Detailed Methodology for Key Steps
Assay Optimization and Cross-Site Validation (EU-OPENSCREEN Protocol): The high reproducibility of the EU-OPENSCREEN resource was achieved through an extensive assay optimization process across four different imaging sites. This ensures that the morphological profiles generated are consistent and comparable, regardless of the imaging location [3].
Image Analysis Workflow:
- Illumination Correction: Apply a retrospective multi-image method to correct for uneven illumination within a batch (e.g., all images from one plate) [20].
- Segmentation: Use a model-based approach (e.g., identifying nuclei first as seeds for whole-cell segmentation) for standard cell lines. For difficult samples, use a machine-learning-based approach (e.g., Ilastik) with manual pixel training [20].
- Feature Extraction: Extract hundreds of quantitative features for each cell, covering shape, intensity, texture, and spatial context to build a rich morphological profile [20].
Profiling and MOA Prediction: The extracted morphological profiles form a "fingerprint" for each compound treatment. By comparing these profiles to a public reference dataset (like JUMP-Cell Painting) using pattern-matching algorithms, researchers can predict the Mechanism of Action (MOA) of uncharacterized compounds by associating them with known bioactivities [25] [3].
From Classical Feature Extraction to AI-Driven Approaches: Methodological Evolution
In the field of image-based profiling, the quantitative analysis of cell morphology is crucial for biological discovery, including identifying disease mechanisms, determining the impact of chemical compounds, and understanding gene functions [4]. Traditional feature extraction using CellProfiler involves the use of handcrafted descriptors—carefully developed and optimized morphological features captured through classical image processing software [4]. These features represent the current standard in the field, designed to capture cellular morphology variations including size, shape, intensity, and texture of various stains in an image [4]. Within the context of morphological profiling data analysis, these handcrafted features provide biologically interpretable representations that describe single-cell morphological characteristics from specific aspects such as size, orientation, and intensity [29]. Every column of these representations describes a particular cellular aspect, making them inherently explainable from a biological perspective [29]. This interpretability offers significant value in applications like drug discovery, where understanding the linkage between cellular morphology and chemical effects is paramount [29].
Troubleshooting Guides and FAQs
Frequently Asked Questions
Q1: What are the primary advantages of using CellProfiler's handcrafted features over learned representations from machine learning models?
CellProfiler extracts well-established morphological features without extensive human intervention, producing interpretable representations with clear biological meanings [29]. Each feature column describes a specific aspect of single-cell morphology, such as size or intensity, allowing researchers to directly understand and interpret the biological significance of their measurements [29]. This contrasts with machine learning representations which, while often exhibiting better performance in some discrimination tasks, typically operate as "black boxes" with limited biological explainability [29].
Q2: How can I resolve issues with the ClassifyObjects module assigning indistinguishable colors to different object classes?
This is a recognized challenge, particularly for colorblind users. The colors are drawn from the program-wide default colour palette set in the preferences dialog. You can select from common matplotlib palettes in the preferences menu to suit your needs. For future versions, the development team has modified the figure display to more reliably shuffle colors between runs [30].
Q3: Why does CellProfiler fail to start after installation on Windows systems?
This issue particularly affects versions 4.2.8 on Windows 10 and 11. The program may show only a briefly flashing terminal window. This problem has been confirmed to be caused by antivirus software (specifically Sentinel One) blocking the application. Work with your IT department to whitelist CellProfiler in your antivirus software, or temporarily disable the software for testing. If issues persist, version 4.2.7 is a stable alternative [31].
Q4: How can I implement complex gating strategies for classifying cell subpopulations based on multiple intensity measurements?
While FilterObjects module only allows hard thresholds in each feature dimension, complex gating requires alternative approaches. For elliptical or irregularly-shaped populations visible in scatterplots, you can use CellProfiler Analyst to create density plots and manually gate populations of interest [32]. Alternatively, consider calculating derived metrics using CalculateMath to transform your data, or use external analysis in R or Python followed by importing classification results back into CellProfiler [32].
Troubleshooting Common Experimental and Computational Challenges
Table 1: Troubleshooting Common CellProfiler Issues
| Problem Domain | Specific Issue | Possible Causes | Solution | Preventive Measures |
|---|---|---|---|---|
| Module Functionality | ClassifyObjects produces indistinguishable colors | Default color palette; random assignment each run | Modify default color palette in Preferences | Select colorblind-friendly palettes; request fixed color assignment |
| Error: "boolean index did not match indexed array" | Software bug; object measurement dimension mismatch | Use FilterObjects module as workaround | Ensure consistent object identification across pipeline | |
| Installation & Startup | CellProfiler fails to start (Windows 10/11) | Antivirus blocking; version-specific bug | Whitelist in antivirus; install version 4.2.7 | Check compatibility before updating; consult user forums |
| Plugin-related startup failures | Incorrect plugins path configuration | Set plugins directory to correct 'active_plugins' folder | Verify folder structure during plugin installation | |
| Data Analysis & Interpretation | Inability to create non-rectangular gates in FilterObjects | Module limitation to hard thresholds per dimension | Use CellProfiler Analyst for manual gating | Pre-plan analysis strategy for complex populations |
| Poor retrieval of replicate perturbations | Plate layout effects; weak phenotypic signals | Apply well-position mean centering; optimize assay conditions | Validate assay sensitivity with positive controls |
Experimental Protocols: Methodologies for Benchmarking Feature Performance
Protocol: Benchmarking Perturbation Detection Using Handcrafted Features
Objective: To evaluate the sensitivity of CellProfiler's handcrafted features in detecting morphological changes induced by chemical or genetic perturbations compared to negative controls.
Materials and Reagents:
- Cell lines (e.g., U2OS and A549 as used in CPJUMP1) [4]
- Chemical perturbations (e.g., Drug Repurposing set) [4]
- Genetic perturbations (CRISPR knockout and ORF overexpression) [4]
- CellPainting assay reagents [4]
- 384-well plates [4]
Methodology:
- Experimental Design: Treat cells with matched chemical and genetic perturbations targeting the same genes across multiple cell types and time points [4].
- Image Acquisition: Capture approximately 3 million images using high-throughput microscopy [4].
- Feature Extraction: Process images using CellProfiler to extract handcrafted morphological features (size, shape, intensity, texture) for ~75 million single cells [4].
- Profile Aggregation: Generate well-level aggregated profiles from single-cell data [4].
- Similarity Calculation: Compute cosine similarity between perturbation replicates and negative controls [4].
- Statistical Analysis:
- Calculate average precision for each sample's ability to retrieve its replicates against negative control background [4].
- Perform permutation testing to obtain p-values, adjusted using false discovery rate to yield q-values [4].
- Determine fraction of perturbations with q-value < 0.05 significance threshold (fraction retrieved) [4].
Interpretation: Compounds typically show higher fraction retrieved than genetic perturbations, with CRISPR knockout generally more detectable than ORF overexpression [4]. Note that plate layout effects can significantly impact results, particularly for ORF overexpression [4].
Protocol: Evaluating Perturbation Matching Capability
Objective: To assess the capability of handcrafted features to correctly group gene-compound pairs where the gene's product is a target of the compound.
Methodology:
- Dataset Preparation: Utilize the CPJUMP1 resource dataset containing chemical and genetic perturbation pairs targeting the same genes [4].
- Profile Comparison: Calculate cosine similarity (or its absolute value) between pairs of well-level aggregated profiles [4].
- Benchmark Establishment: Create retrieval task where the goal is to find genes or compounds with similar morphological impacts as the query [4].
- Performance Evaluation: Measure success in identifying known biological relationships through morphological similarity [4].
Application: This protocol enables researchers to test computational strategies for representing samples to uncover biological relationships, potentially elucidating compounds' mechanisms of action or novel regulators of genetic pathways [4].
Research Reagent Solutions for Morphological Profiling
Table 2: Essential Research Reagents and Computational Tools
| Reagent/Tool | Function in Morphological Profiling | Application Context |
|---|---|---|
| Cell Painting Assay | Standardized microscopy-based profiling using fluorescent dyes | High-throughput morphological screening of chemical and genetic perturbations [4] |
| CPJUMP1 Dataset | Benchmark dataset with 3 million images & morphological profiles | Method development and validation for image-based profiling [4] |
| BBBC021 Dataset | Benchmark dataset of cell responses to drugs | Training and validation of generative models like CP2Image [29] |
| CellProfiler Analyst | Data exploration and analysis software | Interactive analysis of multidimensional image-based screening data [33] |
| Equivalence Scores | Multivariate metric for treatment comparison | Highlighting morphological deviations from negative controls [34] |
Workflow Visualization: From Image Acquisition to Biological Insight
Critical Analysis: Limitations of Handcrafted Descriptors
Technical and Biological Constraints
The application of handcrafted CellProfiler features presents several significant limitations for modern morphological profiling research:
Limited Reconstruction Capability: While handcrafted features demonstrate impressive discrimination performance for mechanisms of action, their capability to generate realistic cell images remains limited compared to machine learning approaches [29]. The CP2Image model represents a pioneering effort to bridge this gap, generating realistic single-cell images directly from CellProfiler representations, but the field is still evolving [29].
Standardization Challenges: Widespread adoption of morphological profiling is partially hindered by lack of alignment in analysis methodologies and output metrics, limiting data comparability across studies [35]. While CellProfiler provides extensive feature sets, the identification of a minimal set of morphological measurands, often termed Critical Quality Attributes (CQAs), traceable to standardized units remains a challenge [35].
Workflow Complexity: Traditional CellProfiler analysis requires multiple post-processing steps including normalization, feature selection, and dimensionality reduction [4]. This multi-step process introduces potential variability and requires careful optimization at each stage to produce reliable morphological profiles [4].
Emerging Solutions and Comparative Performance
Table 3: Performance Comparison of Feature Extraction Methods
| Evaluation Metric | Handcrafted Features | Learned Representations | Clinical Significance |
|---|---|---|---|
| Biological Interpretability | High (clear feature meaning) [29] | Limited ("black box") [29] | Direct linkage to cellular morphology [29] |
| Image Generation Capability | Limited (requires CP2Image) [29] | High (native generative ability) [29] | Visualization of morphological responses to treatments [29] |
| Perturbation Detection | Variable (compounds > CRISPR > ORF) [4] | Architecture-dependent | Identification of phenotypically active treatments [4] |
| Standardization Potential | Challenging (many redundant features) [35] | Architecture-dependent | Enabling data comparability across labs [35] |
Handcrafted descriptors from CellProfiler remain foundational for morphological profiling, offering unparalleled biological interpretability that is crucial for applications in drug discovery and functional genomics [29]. However, their limitations in image reconstruction, standardization, and handling complex phenotypic patterns necessitate complementary approaches. The integration of handcrafted features with machine learning methods, such as the CP2Image model that generates realistic images from CellProfiler representations, represents a promising direction for the field [29]. Furthermore, emerging metrics like Equivalence Scores that use negative controls as baselines demonstrate improved performance in k-NN classification of morphological changes compared to using raw CellProfiler features alone [34]. As the field advances toward greater standardization and identification of Critical Quality Attributes, the strengths of handcrafted features—particularly their biological interpretability—will continue to make them valuable for researchers tackling morphological profiling data analysis challenges [35].
FAQs: Self-Supervised Learning for Morphological Profiling
Q1: What are the main advantages of using self-supervised learning (SSL) over supervised learning for morphological profiling in drug discovery?
SSL offers two key advantages for morphological profiling. First, it eliminates the massive cost and time required for manual data annotation. Creating a high-quality labeled dataset for tasks like image segmentation can cost millions of dollars [36]. Second, by learning from vast amounts of unlabeled data, SSL models learn robust and generalizable feature representations. This reduces overfitting and can make models less sensitive to adversarial attacks [36]. In practice, this means you can leverage existing, unlabeled data from high-throughput microscopy systems, like Cell Painting assays, to build powerful foundation models without manual annotation [3] [34].
Q2: My lab works with 3D medical images. Why might a Masked Autoencoder (MAE) be a good choice, and what are the common pitfalls to avoid?
MAEs are highly effective for 3D data because their pre-training task—reconstructing masked portions of the input—learns strong internal representations of anatomical structure [37]. However, previous applications in 3D medical imaging have faced three common pitfalls [37]:
- P1 - Limited Dataset Size: Training on too few unlabeled volumes (e.g., <10,000) fails to unlock SSL's potential.
- P2 - Outdated Backbones: Using architectures that are not state-of-the-art for the target downstream task (e.g., transformers for segmentation when CNNs dominate).
- P3 - Insufficient Evaluation: A lack of rigorous evaluation on diverse, unseen datasets and comparisons against strong baselines. A recent successful implementation, which avoided these pitfalls, used a large dataset of ~39k 3D MRI volumes and a Residual Encoder U-Net CNN architecture, establishing a new state-of-the-art [37].
Q3: The DINOv3 paper claims its features are "universal." What does this mean for a researcher analyzing satellite or histology images?
A "universal" backbone means that a single, pre-trained model can produce high-quality features for a wide array of tasks without needing task-specific fine-tuning [38]. For your work, this implies:
- Versatility: A DINOv3 model pre-trained on satellite imagery can be applied directly to various downstream tasks like land cover classification, canopy height estimation, and change detection [38] [39].
- Efficiency: You can train lightweight linear classifiers or adapters on top of the frozen DINOv3 backbone with minimal annotations, drastically reducing computational costs and development time [38]. This has been demonstrated in real-world applications, such as using DINOv3 to analyze satellite imagery for deforestation monitoring with high accuracy [38].
Q4: I have limited compute resources. Can I still use large SSL models like DINOv3?
Yes. The developers of DINOv3 have addressed this by creating a family of models to suit different compute constraints [38]. For resource-constrained environments, you can use:
- Distilled Models: Smaller versions (e.g., ViT-B and ViT-L) that retain much of the performance of the largest model.
- Alternative Architectures: ConvNeXt-based versions (Tiny, Small, Base, Large) that are distilled from the ViT model and are designed for efficient deployment [38]. Furthermore, frameworks like DEIMv2 integrate DINOv3 features into real-time object detection models that span from large (X) to ultra-lightweight (Atto) scales, making them suitable for mobile and edge devices [40].
Troubleshooting Common Experimental Challenges
Challenge 1: Poor Feature Quality in Contrastive Learning
- Problem: Your model fails to learn discriminative features, leading to low performance on downstream tasks.
- Solution: Implement hard negative mining. Early contrastive learning models treated all negative samples equally, which diluted learning. Modern variants of frameworks like MoCo focus on identifying and prioritizing "hard negatives"—data points that are semantically similar but belong to different classes. This forces the model to learn finer distinctions and results in richer representations [41].
Challenge 2: Integrating Data from Multiple Modalities
- Problem: How to effectively combine different types of image data (e.g., RGB, multispectral, temporal) for a unified analysis.
- Solution: Employ a Cross-Modal Fusion (CMF) strategy. Research in satellite image analysis has shown that you can enrich feature representations by fusing data from different modalities. For instance, one can effectively combine multispectral and temporal data using a cross-modal fusion module within a Convolutional Vision Transformer (CvT) architecture, significantly enhancing feature discrimination and final classification accuracy [39].
Challenge 3: Achieving Spatial Coherence in Predictions
- Problem: Model predictions for individual pixels or cells lack consistency with their spatial neighbors, making results look noisy.
- Solution: Use Conditional Random Fields (CRFs) for post-processing. CRFs are a probabilistic graphical model that can enforce spatial smoothness and consistency. By incorporating CRFs, you can refine raw model outputs, ensuring that the final segmentation or classification map respects spatial relationships and leads to more biologically plausible results [39].
Comparative Analysis of SSL Methods
The table below summarizes the core characteristics, strengths, and ideal use cases for DINO, MAE, and SimCLR.
| Method | Core Pre-training Mechanism | Key Strengths | Common Architectures | Ideal Use Cases |
|---|---|---|---|---|
| DINO/DINOv3 | Self-distillation; matching outputs of a student and teacher network for different augmented views of an image [38]. | Produces strong, high-resolution features; excels at dense prediction tasks; versatile "universal" backbone [38]. | Vision Transformer (ViT) [38] | Segmentation, depth estimation, object detection on natural, medical, or satellite imagery [38] [40]. |
| MAE (Masked Autoencoder) | Reconstructs randomly masked patches of the input image [37]. | Highly scalable and efficient; learns rich internal representations of data structure and content [37]. | Vision Transformer (ViT), CNN (e.g., U-Net) [37] | Pre-training for data-rich domains (e.g., 3D medical imaging); tasks requiring understanding of global context [37]. |
| SimCLR | Contrastive learning; pulls augmented views of the same image together while pushing views of different images apart [41] [39]. | Simple and effective framework; improves class separability in the feature space [41] [39]. | CNN (e.g., ResNet), Vision Transformer [41] [39] | Image classification; representation learning where class separation is crucial; can be integrated with other methods [39]. |
Experimental Protocols for Key SSL Methods
Protocol 1: Implementing a Masked Autoencoder (MAE) for 3D Data
This protocol is based on a successful implementation for 3D medical image segmentation [37].
- Data Preparation: Assemble a large-scale unlabeled dataset. A successful study used ~39k 3D MRI volumes. Critically, filter out low-quality data (e.g., scout scans, images with a field of view <50mm, or incorrect file sizes) [37].
- Preprocessing: Resample all images to a uniform target spacing (e.g., 1x1x1 mm). Apply z-score normalization to achieve zero mean and unit variance [37].
- Model Architecture: Utilize a state-of-the-art CNN architecture for the downstream task. The cited study used a Residual Encoder U-Net within the nnU-Net framework [37].
- Pre-training:
- Masking: Randomly mask a high proportion (e.g., 80-90%) of the input 3D volume.
- Task: Train the model to reconstruct the masked voxels. Use an L1 or L2 loss between the reconstructed and original voxel intensities.
- Optimizer: Use SGD with a polynomial learning rate decay [37].
- Downstream Fine-tuning: Transfer the pre-trained encoder weights to your target segmentation network and fine-tune on the labeled downstream task.
Protocol 2: Leveraging DINOv3 Features for Downstream Task Adaptation
This protocol outlines how to use a pre-trained DINOv3 backbone for a new task without fine-tuning the backbone itself [38] [40].
- Backbone Selection: Choose a pre-trained DINOv3 model (e.g., ViT-g, ViT-L, or a distilled version) suitable for your compute constraints [38].
- Feature Extraction: Perform a single forward pass of your images through the frozen DINOv3 backbone to extract feature maps.
- Adapter Design: To adapt these features for a task like object detection, design a lightweight adapter. For example, DEIMv2 uses a Spatial Tuning Adapter (STA) to efficiently convert DINOv3's single-scale features into multi-scale features, complementing strong semantics with fine-grained details [40].
- Task-Specific Head: Train a small task-specific head (e.g., a linear layer, or a more sophisticated decoder for segmentation) on top of the adapted features. This step requires minimal labeled data.
- Evaluation: The entire pipeline can achieve state-of-the-art performance while keeping the backbone frozen, allowing the same features to be shared across multiple applications [38] [40].
The Scientist's Toolkit: Research Reagent Solutions
| Item / Solution | Function in SSL for Image Analysis |
|---|---|
| Cell Painting Assay | A high-content, high-throughput microscopy assay that uses fluorescent dyes to label multiple cellular compartments. It generates rich, morphological profiles used as a basis for training and validating SSL models in drug discovery [3] [34]. |
| Vision Transformer (ViT) | A neural network architecture that processes images as sequences of patches. It is the foundational backbone for modern SSL methods like DINOv3 and MAE, enabling them to model global context in images [36] [38]. |
| Convolutional Vision Transformer (CvT) | An enhanced ViT that incorporates convolutional layers. It improves local feature extraction and computational efficiency, making it particularly suitable for high-resolution satellite and medical imagery [39]. |
| Conditional Random Fields (CRFs) | A probabilistic model used for post-processing. It refines SSL model outputs by enforcing spatial coherence and smoothness, leading to more accurate and biologically plausible segmentations [39]. |
| Momentum Contrast (MoCo) | A contrastive learning framework that uses a momentum-updated encoder and a memory bank to maintain a large and consistent set of negative samples, which is crucial for learning effective representations [41]. |
SSL Method Workflow Diagrams
Morphological Profiling Data Processing Steps
The table below Articalizes the critical steps for generating high-quality morphological profiles from microscopy images, which serve as the foundation for effective SSL.
| Processing Step | Core Function | Recommended Techniques & Notes |
|---|---|---|
| Illumination Correction | Corrects for uneven lighting in raw images to ensure accurate quantification. | Use retrospective multi-image methods that build a correction function from all images in a batch (e.g., per plate). Avoids inconsistencies of single-image methods [20]. |
| Segmentation | Identifies and outlines individual cells and sub-cellular structures. | Model-based approaches (e.g., CellProfiler) work well for standard fluorescence images. Machine learning-based (e.g., Ilastik) is better for highly variable cell types or tissues but requires manual labeling for training [20]. |
| Feature Extraction | Quantifies hundreds of morphological characteristics per cell. | Extract a wide variety of features: Shape (area, perimeter), Intensity (mean, max), Texture (patterns), and Microenvironment (spatial relationships) to create a rich, unbiased profile [20]. |
| Image QC | Automatically flags blurry, saturated, or otherwise corrupted images. | Compute multiple metrics (e.g., power spectrum log-slope for blur, percentage of saturated pixels). Use data-analysis tools to set robust thresholds for exclusion [20]. |
| Cell-Level QC | Removes outlier cells resulting from segmentation errors or artifacts. | Filter cells based on predefined criteria (e.g., size, intensity extremes, location at image edge) to prevent contamination of the morphological profile with noise [20]. |
Frequently Asked Questions (FAQs)
FAQ 1: What is the core difference between whole-image analysis and single-cell segmentation in terms of their data output?
Whole-image analysis typically provides summary statistics or patch-level classifications for a tissue region, such as the overall density of a cell type or the spatial proximity between two cell communities. In contrast, single-cell segmentation is the process of identifying the precise boundary of every cell in an image, resulting in single-cell expression profiles, morphology measurements, and spatial coordinates for each individual cell [42] [43]. The key trade-off is that while segmentation enables powerful single-cell analysis, it is an error-prone process. Inaccuracies at this stage, such as segments that capture parts of multiple cells (doublets), can have far-reaching consequences for all downstream biological interpretation [44] [42].
FAQ 2: My segmentation results show cells co-expressing mutually exclusive markers (e.g., CD3 and CD20). What is the cause and how can I resolve it?
The appearance of cell populations that co-express biologically implausible marker combinations is a classic indicator of segmentation errors, specifically heterotypic doublets where a single segment covers two or more adjacent cells of different types [44]. To resolve this, consider the following steps:
- Validate with a plausibility score: Curate a list of known mutually exclusive and conditionally co-expressed marker pairs to quantify the biological plausibility of your discovered cellular phenotypes [44].
- Use segmentation-aware tools: Employ computational methods like STARLING, a probabilistic clustering model designed to infer cell populations while explicitly accounting for segmentation errors. This allows you to recover denoised cellular phenotypes from potentially flawed segmentation data [44].
- Inspect segmentation quality: Manually review the segmentation masks in densely packed tissue regions to confirm the algorithm is correctly separating adjacent cells.
FAQ 3: I am working with H&E-stained images. What are my options for whole-cell segmentation, and how do they compare?
While H&E-stained tissue is the diagnostic gold standard, whole-cell segmentation is more challenging than nuclei segmentation due to weak and variable membrane signals [45]. The following table compares two advanced approaches:
| Method | Key Principle | Reported Performance (F1 Score at IoU=0.5) | Considerations |
|---|---|---|---|
| CSGO (Cell Segmentation with Globally Optimized boundaries) | Integrates a dedicated U-Net for membrane detection with HD-YOLO for nuclei detection, followed by an energy-based watershed algorithm [45]. | 0.37 to 0.53 across multiple cancer types (e.g., lung adenocarcinoma, squamous cell carcinoma) [45]. | A specialized, robust pipeline for H&E images that does not require image inversion. |
| Cellpose | A generalist algorithm trained on diverse image types, including fluorescence, brightfield, and H&E [45]. | 0.21 to 0.36 on the same external datasets as CSGO [45]. | For H&E images, may require a preprocessing step to invert image intensities, which can affect generalizability across cancer types with different staining intensities [45]. |
FAQ 4: For a new, large-scale imaging project, what are the key computational and logistical factors I should consider when choosing a segmentation strategy?
Beyond pure algorithmic accuracy, consider these factors for a scalable and efficient project:
- Computational Infrastructure: Deep learning models like Mesmer and BIDCell can achieve human-level performance but require significant resources, often needing specialized GPU infrastructure to scale effectively [42] [46].
- Analysis Speed: Deep learning models, once trained, are typically faster for analyzing large datasets than classical methods like watershed, which can run into major scaling issues [46]. However, training the models themselves is computationally intensive.
- Ease of Use and Parameter Tuning: Classical methods often require extensive manual parameter tuning for each new dataset. In contrast, modern deep learning tools like Cellpose are designed as generalist models with fewer tunable parameters, making them more accessible for non-expert users [47] [46].
- Cloud-Based Solutions: To mitigate local hardware constraints, consider cloud-oriented tools and resources that are becoming more prevalent and user-friendly, moving technical complexity away from the end-user [47].
Troubleshooting Guides
Issue: Poor Cell Segmentation in Densely Packed Tissue Regions
Problem: In tissues with high cellular density, segmentation algorithms frequently fail, resulting in merged cells (under-segmentation) or fragmented cells (over-segmentation). This is a common issue in lymphoid tissues like the tonsil or in densely packed epithelia [44] [48].
Solution Protocol:
- Preprocessing (Image Restoration): For 3D tissues, ensure imaging parameters are optimized for depth. Use image restoration (deconvolution) software like Huygens Professional to reduce scattering and improve signal-to-noise ratio, especially in deeper axial planes [48].
- Algorithm Selection: Choose a segmentation method designed for complex morphologies. For 3D tissues, a human-in-the-loop pipeline using Cellpose is effective [48]. For 2D highly multiplexed images (IMC, MIBI-TOF), use a segmentation-aware clustering tool like STARLING to de-noise the cellular phenotypes post-segmentation [44].
- Human-in-the-Loop Correction:
- Obtain an initial segmentation with a pre-trained model (e.g., Cellpose 'cyto3').
- Manually correct the segmentation in each 2D slice using an interactive tool like Napari or DeepCell Label [48].
- Use TrackMate (in Fiji/ImageJ) to automatically correct 3D stitching issues, then manually correct any remaining errors [48].
- Model Retraining: Use the manually corrected segmentation as ground truth to re-train the model. This iterative process significantly improves accuracy for your specific tissue type [48].
Issue: Integrating Single-Cell RNA Sequencing Data with Spatial Transcriptomics to Improve Segmentation
Problem: In Subcellular Spatial Transcriptomics (SST) data, such as from Xenium or CosMx, relying solely on image intensity may not be sufficient for accurate cell segmentation, leading to contaminated expression profiles.
Solution Protocol:
- Data Collection: Gather your SST data (subcellular transcript maps and DAPI images) and relevant average expression profiles of cell types from public single-cell RNA sequencing repositories (e.g., Human Cell Atlas) [49].
- Apply a Biologically-Informed Model: Use the BIDCell (Biologically-informed deep learning-based cell segmentation) framework.
- BIDCell uses a self-supervised learning approach, eliminating the need for manually generated ground truth [49].
- It incorporates biologically-informed loss functions that leverage the relationship between spatial gene expression and cell morphology [49].
- The model uses prior knowledge from scRNA-seq data to guide the segmentation towards biologically plausible cell shapes and expression patterns [49].
- Performance Assessment: Evaluate the results using a comprehensive framework like CellSPA, which assesses segmentation quality across five categories: baseline characteristics, expression purity, spatial/morphological diversity, neighbor contamination, and replicability [49].
Experimental Protocols for Benchmarking Segmentation Methods
Objective: To quantitatively evaluate and compare the performance of different cell segmentation algorithms on a defined set of tissue images.
Materials:
- Sample Images: A set of multiplexed tissue images (e.g., from IMC, MIBI, or fluorescent microscopy) representing the tissue types of interest.
- Ground Truth Data: A subset of images with expertly manually segmented cell boundaries. Public datasets like TissueNet, which contains over 1 million manually labeled cells, can serve this purpose [42].
Methodology:
- Run Segmentation: Apply the algorithms you wish to benchmark (e.g., Mesmer, Cellpose, CSGO, Baysor, watershed) to your sample images.
- Quantitative Evaluation: Calculate the following metrics by comparing the algorithm output to the manual ground truth:
- Biological Plausibility Evaluation: For datasets without perfect ground truth, calculate a plausibility score [44].
- Curate a list of protein/gene pairs with known mutually exclusive expression patterns (e.g., CD3 for T cells and CD20 for B cells).
- For the cellular phenotypes (clusters) discovered after segmentation, calculate the proportion of cluster centroids that do not fall into implausible co-expression regions.
- Runtime Analysis: Record the computational time required for each algorithm to process a standard-sized image.
Decision Workflow for Segmentation Strategy
Research Reagent Solutions
The following table details key software tools and data resources essential for advanced cell segmentation and analysis.
| Resource Name | Type | Function/Brief Explanation |
|---|---|---|
| Mesmer [42] | Segmentation Algorithm | A deep learning model for nuclear and whole-cell segmentation that achieves human-level performance across diverse tissue types and imaging platforms. |
| Cellpose [47] [48] | Segmentation Algorithm | A generalist deep learning algorithm for cellular segmentation that is user-friendly and can be trained on user-provided annotations. |
| STARLING [44] | Analysis Tool | A probabilistic machine learning model that clusters single-cell data from multiplexed imaging while accounting for segmentation errors, yielding denoised cellular phenotypes. |
| BIDCell [49] | Segmentation Framework | A self-supervised deep learning framework that incorporates single-cell transcriptomics data to improve cell segmentation in spatial transcriptomics data. |
| TissueNet [42] | Training Dataset | A massive dataset containing over 1 million manually labeled cells, used to train and benchmark segmentation models like Mesmer. |
| Napari [47] [48] | Software Tool | An interactive, multi-dimensional image viewer for Python that is extensible via plugins and ideal for visualizing and manually correcting segmentations. |
| DeepCell Label [42] | Software Tool | A browser-based tool optimized for the collaborative creation and editing of cell annotations in tissue images. |
| CellSPA [49] | Evaluation Framework | A comprehensive framework for assessing cell segmentation performance across five complementary categories of metrics. |
MorphoGenie and Other Unsupervised Frameworks for Interpretable Feature Learning
Core Concepts: Unsupervised Learning in Morphological Analysis
Frequently Asked Questions
What is the primary advantage of unsupervised learning for morphological profiling? Unsupervised learning operates without pre-defined labels or training data, allowing it to autonomously identify latent patterns, structures, and statistical regularities within complex morphological datasets. This is particularly valuable in drug discovery where many morphological changes induced by compounds are not yet annotated or fully understood, enabling hypothesis-free exploration and discovery of novel biological relationships beyond human perception [50] [51].
How does MorphoGenie simulate subcellular morphogenesis? MorphoGenie utilizes a multi-agent system comprising macroscopic agents (representing cellular components like cortex pieces or cytoplasm) and microscopic agents (representing individual molecules or complexes). It solves systems of ordinary differential equations to model the interplay between mechanical forces and biochemical kinetics as compartments move, deform, and exchange factors, effectively simulating how cellular shapes and organizations emerge [52].
What are the main challenges in benchmarking perturbation matching? A significant challenge is the lack of absolute ground truth regarding the true relationships between perturbations. While designed pairs targeting the same gene are more likely to produce similar phenotypes, this isn't guaranteed. Other major challenges include substantial technical variations (e.g., plate layout effects), weak phenotypic signals especially from genetic perturbations like ORF overexpression, and the complexity of determining whether correlations should be positive or negative [4].
Key Research Reagent Solutions for Morphological Profiling
Table 1: Essential Research Reagents and Computational Tools
| Item Name | Type | Primary Function |
|---|---|---|
| Cell Painting Assay | Biological Assay | Captures morphological changes across multiple cellular compartments using fluorescent dyes to enable rapid prediction of compound bioactivity [3]. |
| CPJUMP1 Dataset | Data Resource | Provides ~3 million annotated images of cells treated with matched chemical and genetic perturbations, serving as a benchmark for developing and testing computational methods [4]. |
| Self-Organizing Maps (SOM) | Algorithm | Unsupervised neural architecture for mapping molecular representations and clustering complex morphological profiles, effective for both human-interpretable and non-intuitive features [50]. |
| t-SNE (t-Distributed Stochastic Neighbor Embedding) | Algorithm | Dimensionality reduction technique that simplifies high-dimensional morphological data into 2D/3D visualizations while preserving local and global structures for compound clustering and target exploration [51]. |
| K-means Clustering | Algorithm | Partitions morphological profile data into homogeneous groups based on similarity, useful for identifying molecular patterns and predicting compound behavior [51]. |
| EU-OPENSCREEN Bioactive Compounds | Compound Library | A carefully curated and well-annotated set of 2,464 bioactive compounds used for morphological profiling and predicting mechanisms of action [3]. |
| U2 OS & A549 Cell Lines | Biological Materials | Common human cell lines (bone osteosarcoma and lung carcinoma respectively) used in morphological profiling to study cell-type specific perturbation responses [4]. |
Troubleshooting Guides
MorphoGenie Simulation Issues
Problem: Simulation fails to converge or produces physically unrealistic cell deformations
- Potential Cause 1: Improper parameterization of mechanical properties. The constitutive mechanical rules governing macroscopic agents (representing cortex, cytoplasm) may not reflect biological reality.
- Solution: Recalibrate the passive (viscoelastic) and active (contractile) properties of macroscopic elements against experimental measurements of cellular mechanics. Run parameter space searches across a computational cluster to identify viable parameter ranges [52].
- Potential Cause 2: Violation of conservation laws during compartment movement and deformation.
- Solution: Verify that the framework correctly preserves the conservation of "stuff" (biochemical factors) as compartments move and deform. Ensure that flux calculations between compartments with different volumes properly account for changing volumes over time [52].
Problem: Inability to replicate expected biological behavior in multicellular simulations
- Potential Cause: Oversimplified biochemical network interactions or inadequate coupling between mechanics and biochemistry.
- Solution: Expand the biochemical interaction network to include additional relevant pathways. Strengthen the coupling hypotheses by ensuring mechanical properties of each element appropriately depend on local concentrations of biochemical factors within compartments [52].
Unsupervised Feature Learning Challenges
Problem: Unsupervised algorithms fail to distinguish biologically meaningful perturbation profiles from negative controls
- Potential Cause 1: Weak phenotypic signal strength, particularly common with ORF overexpression perturbations.
- Solution: Implement rigorous plate layout normalization and mean centering of features at each well position. Filter out perturbations with low replicate consistency before analysis. Consider increasing sample size or combining multiple cell types/time points to amplify signal [4].
- Potential Cause 2: High-dimensional noise overwhelming true biological signal.
- Solution: Apply robust feature selection methods before unsupervised learning. Utilize deep feature learning approaches like stacked denoising autoencoders to learn noise-resistant representations. Validate features against known positive control perturbations [4] [53].
Problem: Poor separation of known compound classes in t-SNE or clustering visualizations
- Potential Cause: Suboptimal hyperparameter selection or inadequate preprocessing.
- Solution: Systematically optimize perplexity and learning rate parameters for t-SNE. Experiment with alternative dimensionality reduction techniques like UMAP. Preprocess morphological profiles using z-score normalization and batch effect correction algorithms [51] [53].
Data Quality and Reproducibility Issues
Problem: Low cross-site reproducibility in morphological profiling data
- Potential Cause: Technical variability between imaging sites despite using standardized protocols.
- Solution: Implement extensive assay optimization processes across all sites. Use reference compounds and control perturbations to normalize data between sites. Apply cross-site batch effect correction algorithms to extracted profiles before analysis [3].
Problem: Inconsistent correlation directions between perturbations targeting the same protein
- Potential Cause: Complex biological relationships where similar targets may produce opposite morphological effects depending on experimental context.
- Solution: Test both positive and negative correlation measures when evaluating perturbation matches. Consider cell-type specific and time-dependent effects in the analysis framework. Incorporate additional orthogonal data to validate identified relationships [4].
Experimental Protocols for Morphological Profiling
Workflow for Benchmarking Perturbation Detection Methods
Diagram 1: Perturbation Detection Workflow
Step-by-Step Protocol:
Profile Acquisition: Generate morphological profiles following the Cell Painting assay protocol across multiple cell types (e.g., U2OS, A549, Hep G2) and time points. The CPJUMP1 resource includes 40 384-well plates in primary experimental conditions [4].
Feature Extraction: Extract morphological features using either classical image processing (hand-engineered features capturing size, shape, intensity, texture) or deep learning approaches for automated feature learning [4].
Similarity Calculation: For each perturbation, calculate cosine similarity between all replicate pairs and between replicates and negative control samples.
Precision Computation: Compute average precision for each sample's ability to retrieve its replicates against the background of negative controls.
Statistical Testing: Perform permutation testing (typically 1000 permutations) to obtain p-values for the average precision values.
Multiple Testing Correction: Apply false discovery rate (FDR) correction to obtain q-values.
Performance Assessment: Calculate the fraction of perturbations with q-value < 0.05 significance threshold. This "fraction retrieved" metric indicates method performance [4].
Protocol for Unsupervised Compound Mechanism of Action Analysis
Diagram 2: MoA Analysis Workflow
Quantitative Performance Metrics:
Table 2: Benchmarking Results of Unsupervised Learning on Morphological Profiles
| Algorithm | Primary Application | Performance Metric | Reported Outcome | Considerations |
|---|---|---|---|---|
| Self-Organizing Maps (SOM) | Molecular representation mapping | Feature learning efficiency | Identifies non-intuitive molecular patterns beyond human perception [50] | Requires careful topology design; computational complexity increases with map size |
| K-means Clustering | Compound grouping & similarity analysis | Cluster cohesion & separation | Effective for predicting chemical properties & identifying drug candidates [51] | Sensitive to initial centroid selection; requires predefined cluster count |
| t-SNE | Visualization of high-dimensional profiles | Structure preservation in 2D/3D | Reveals local & global patterns in compound bioactivity data [51] | Computational demand for large datasets; sensitive to hyperparameters |
| Deep Feature Learning | Automated feature extraction from images | Reconstruction error & retrieval accuracy | Outperforms hand-engineered features in some perturbation detection tasks [4] | Requires large datasets; potential overfitting without proper regularization |
Step-by-Step Protocol:
Compound Treatment: Plate cells in appropriate multi-well plates and treat with compounds from a carefully curated library such as EU-OPENSCREEN Bioactive Compounds (2,464 compounds) [3].
Cell Painting Assay: Implement the standardized Cell Painting protocol using multiplexed fluorescent dyes to label various cellular compartments (nucleus, cytoplasm, mitochondria, Golgi, actin). Image using high-throughput confocal microscopes [3] [4].
Feature Extraction and Normalization: Extract morphological features capturing size, shape, intensity, and texture characteristics. Apply robust normalization to remove plate and batch effects.
Unsupervised Analysis: Apply appropriate unsupervised learning algorithms:
Cluster Validation: Evaluate clustering quality using internal metrics (silhouette score) and biological validation against known compound annotations.
Mechanism Prediction: Compare unknown compound profiles to annotated reference compounds with known mechanisms of action to predict novel targets and MoAs [3].
Troubleshooting Guide: Common Experimental Issues
FAQ 1: My equivalence score analysis suggests persistent bias despite using negative controls. What could be wrong?
Answer: This issue often arises from violations in the core assumptions required for valid negative control use. The following table summarizes common problems and their solutions.
| Problem | Diagnostic Check | Solution |
|---|---|---|
| Invalid Negative Control Outcome (NCO) | Check for a significant association between the NCO and the treatment in the pre-intervention period. A significant association indicates the NCO is not a valid counterfactual [54]. | Select a different NCO that is not causally affected by the treatment but is affected by the same confounders [55]. |
| Violation of "Rank Preservation" | The bias correction assumes the confounding bias for the treatment effect is similar in magnitude to the bias observed for the NCOs. | Use a robust aggregation method, such as median calibration across multiple NCOs, which is less sensitive to a single invalid control [54]. |
| Time-Varying Confounding | The effect of unmeasured confounders is not constant over time, violating the parallel trends assumption [54]. | Apply a Negative Control-Calibrated Difference-in-Differences (NC-DiD) approach, which uses NCOs from both pre- and post-intervention periods to detect and adjust for time-varying bias [54]. |
FAQ 2: How can I formally test if my data meets the parallel trends assumption for a valid analysis?
Answer: You can implement a formal hypothesis testing procedure using Negative Control Outcomes (NCOs). The NC-DiD framework provides a method for this [54]:
- Apply the DiD Model to NCOs: Conduct your difference-in-differences analysis not just on your primary outcome, but also on your selected NCOs. Since the NCOs should, by definition, be unaffected by the treatment, any significant "effect" estimated for them is a direct measure of systematic bias.
- Aggregate the Bias Estimates: Combine the bias estimates from all NCOs. The empirical posterior mean approach is optimal if all NCOs are valid, while the median calibration approach is more robust if some NCOs are unreliable [54].
- Statistical Testing: The aggregated bias estimate enables a formal test of the null hypothesis that the parallel trends assumption holds. A statistically significant result indicates a violation of the parallel trends assumption [54].
FAQ 3: What are the best practices for selecting multiple Negative Control Outcomes (NCOs) for bias correction?
Answer: Leveraging multiple NCOs simultaneously improves the robustness of bias detection and correction. Best practices include [54] [55]:
- Diverse Sources: Select NCOs from different domains or measurement sources to capture various potential pathways of unmeasured confounding.
- Pre- and Post-Intervention Data: Utilize NCOs measured both before and after the intervention. This provides a more accurate calibration of confounding biases over time [54].
- Functional Purpose: Clearly define the intended use for the NCOs—whether for bias detection, bias correction, or p-value/confidence interval calibration. Each function may have slightly different assumptions [55].
- Robust Aggregation: When aggregating bias estimates from multiple NCOs for correction, use methods like median calibration to protect against the influence of a small number of invalid controls [54].
Experimental Protocols & Methodologies
Protocol: Negative Control-Calibrated Difference-in-Differences (NC-DiD) Analysis
This protocol details a three-step calibration process to correct for bias from time-varying unmeasured confounding in observational data [54].
Step 1: Standard DiD Analysis
- Estimate the initial intervention effect (e.g., Average Treatment Effect on the Treated - ATT) on your primary outcome using a standard DiD model, while adjusting for all measured confounders.
Step 2: Negative Control Experiments and Bias Estimation
- Apply the same DiD model from Step 1 to each of your pre-selected Negative Control Outcomes (NCOs).
- Since the NCOs are not causally affected by the intervention, the estimated "effect" for each NCO quantifies the systematic bias present in your study.
- Aggregate the individual bias estimates from all NCOs into a single overall bias estimate. The recommended methods are:
- Empirical Posterior Mean: The weighted average of all bias estimates, optimal when all NCOs are valid.
- Median Calibration: The median of all bias estimates, which provides robustness against invalid NCOs [54].
Step 3: Calibration of Intervention Effect
- Subtract the overall bias estimate (from Step 2) from the initial intervention effect (from Step 1).
- The result is the calibrated (bias-corrected) estimate of the true intervention effect.
Diagram 1: NC-DiD Analysis Workflow
The Scientist's Toolkit: Research Reagent Solutions
Key Materials for Morphological Profiling Experiments
The following table details essential reagents and their functions for generating high-quality morphological profiles, such as with the Cell Painting assay [3] [20].
| Research Reagent / Material | Function in Experiment |
|---|---|
| Cell Painting Assay Dyes (e.g., Phalloidin, Concanavalin A, SYTO dyes) | Stains major cellular compartments (actin cytoskeleton, mitochondria, endoplasmic reticulum, nuclei, Golgi) to enable rich morphological feature extraction [3] [20]. |
| Carefully Curated Compound Library (e.g., EU-OPENSCREEN Bioactive compounds) | Provides a well-annotated set of chemical perturbagens with known mechanisms of action, essential for benchmarking and predicting compound properties [3]. |
| High-Quality, Deionized Formamide | Used in capillary electrophoresis for STR analysis; degraded formamide causes peak broadening and reduced signal intensity, compromising data quality [56]. |
| PCR Inhibitor Removal Kits | Specialized kits with additional washing steps to remove contaminants like hematin or humic acid that inhibit DNA polymerase activity, ensuring successful amplification [56]. |
| Validated Primer-Pair Mixes | For uniform amplification of target genetic loci (e.g., CODIS core loci). Must be thoroughly mixed to prevent allelic dropouts and ensure complete STR profiles [56]. |
| Optimized Cell Lines (e.g., Hep G2, U2 OS) | Well-characterized cell lines that are used across imaging sites to enable reproducible morphological profiling and cross-site data comparison [3]. |
Advanced Analysis Workflow
The overall workflow for using equivalence scores and negative controls in morphological profiling integrates experimental and computational steps, from perturbation to final comparison.
Diagram 2: Morphological Profiling and Equivalence Score Workflow
Solving Practical Challenges: Data Quality, Reproducibility, and Technical Variability
Frequently Asked Questions
1. What is the fundamental difference between prospective and retrospective illumination correction?
Prospective correction is applied during the image acquisition process, where the imaging system is actively modified in real-time to compensate for illumination issues. This includes techniques like adaptive optics that physically correct wavefront distortions as they occur [57]. In contrast, retrospective correction is applied after data acquisition through computational methods, where algorithms process the already-captured images to correct for illumination inhomogeneities [58] [59].
2. When should I choose prospective correction over retrospective methods for my imaging experiments?
Prospective correction is particularly beneficial when imaging thick tissues or deep into specimens where sample-induced aberrations significantly degrade image quality. It's also preferred for live imaging applications where you need to maintain optimal resolution throughout the acquisition process, such as when imaging more than 10-130 µm into tissues like Drosophila brains [57]. Retrospective methods are more suitable for post-processing fixed samples or when you cannot modify the imaging hardware.
3. How does correction frequency impact the effectiveness of illumination correction strategies?
Higher correction frequency generally leads to better artifact reduction. In motion correction studies, increasing the correction frequency from before each echo-train to within echo-trains (every 48 ms vs. 2500 ms) significantly reduced motion artifacts in both prospective and retrospective approaches [60]. Similar principles apply to illumination correction, where more frequent sampling and correction of illumination patterns yield superior results.
4. What are the main limitations of retrospective illumination correction methods?
Retrospective methods cannot fully compensate for violations of the Nyquist criterion caused by sample rotations or severe aberrations, as they work with already-acquired data that may have inherent gaps or undersampling in frequency space [60]. They also retain the shot noise of background light after reconstruction, which can be particularly problematic in dense fluorescent samples [57].
5. Which method provides better performance for super-resolution microscopy in thick tissues?
Prospective correction generally delivers superior performance for challenging super-resolution applications. In direct comparisons, prospective correction resulted in visibly and quantitatively better image quality than retrospective approaches [57] [60]. Techniques like Deep3DSIM with integrated adaptive optics enable high-quality 3D-SIM imaging at depths greater than 130 µm, where retrospective methods alone would struggle with severe aberrations [57].
Troubleshooting Guides
Problem: Reconstruction artifacts in 3D-SIM imaging of thick tissues
Possible Cause: Sample-induced aberrations and refractive index mismatches that distort the point spread function [57].
Solution:
- Implement adaptive optics with deformable mirrors for prospective wavefront correction
- Use water-immersion or silicone oil objectives with better refractive index matching
- Incorporate remote focusing to eliminate mechanical stage movements
- For Deep3DSIM systems: Apply continuous aberration correction using Shack-Hartmann wavefront sensors [57]
Problem: Uneven background and shading artifacts in whole slide imaging
Possible Cause: Vignetting, imperfect illumination, or temporal baseline drift [58] [59].
Solution:
- Use BaSiC algorithm for low-rank and sparse decomposition-based correction
- Acquire as few as 5-10 images for reliable shading estimation
- For time-lapse movies: Correct both spatial shading and temporal drift using the full BaSiC model [58]
- Ensure proper flat-field and dark-field calibration images if using prospective methods
Problem: Poor axial resolution in super-resolution microscopy
Possible Cause: Anisotropic resolution with inferior z-axis resolution compared to lateral dimensions [61].
Solution:
- Implement AXIS-SIM using constructive interference from back-reflecting mirrors
- Use speckle illumination with interference patterns to enhance axial resolution
- Apply SACD (super-resolution autocorrelation with two-step deconvolution) for reconstruction
- Ensure proper mirror alignment (tolerates up to 10° tilt) [61]
Comparison of Correction Methods
Table 1: Performance Characteristics of Illumination Correction Methods
| Method | Correction Type | Optimal Use Cases | Resolution Improvement | Limitations |
|---|---|---|---|---|
| Deep3DSIM with AO [57] | Prospective | Thick tissue imaging, live samples >10µm depth | Lateral: 185 nm, Axial: 547 nm | Complex setup, requires specialized hardware |
| BaSiC [58] | Retrospective | Whole slide imaging, time-lapse movies | N/A (background correction) | Requires multiple images, less effective on single images |
| AXIS-SIM [61] | Hybrid | Near-isotropic super-resolution | Lateral: 108.5 nm, Axial: 140.1 nm | Requires mirror placement near sample |
| CIDRE [58] | Retrospective | High-content screening, fluorescence imaging | N/A (shading correction) | Sensitive to outliers, requires many images |
| OLS illumination [62] | Prospective | Single-molecule tracking, live cells | Enables tracking up to 14 µm²/s | Specialized optical configuration |
Table 2: Technical Requirements and Data Characteristics
| Method | Sample Requirements | Hardware Requirements | Processing Time | Implementation Complexity |
|---|---|---|---|---|
| Deep3DSIM with AO [57] | Fixed or live thick samples | Deformable mirrors, wavefront sensors | Real-time with acquisition | High (bespoke systems) |
| BaSiC [58] | Multiple images of similar conditions | Standard microscope | Minutes to hours (post-processing) | Low (Fiji/ImageJ plugin) |
| AXIS-SIM [61] | Samples compatible with mirror proximity | Silver mirror substrate | Moderate (reconstruction needed) | Medium |
| Conventional 3D-SIM [57] | Thin samples (<10µm) | Standard SIM setup | Fast reconstruction | Medium |
| OLS [62] | Live cells, single molecules | Galvanometric mirrors, sCMOS camera | Real-time scanning | Medium-high |
Experimental Protocols
Protocol 1: Implementing BaSiC for Background and Shading Correction
Purpose: Correct spatial shading and temporal background variation in microscopy images [58].
Materials:
- Image sequence (minimum 5 images, ideally 50-200 for optimal performance)
- BaSiC plugin for Fiji/ImageJ
- Compute resources for matrix decomposition
Procedure:
- Image Collection: Acquire multiple images under consistent imaging conditions. For whole slide imaging, collect tiled images with sufficient overlaps (typically 10-15%).
- Software Setup: Install BaSiC plugin in Fiji/ImageJ from official repositories.
- Matrix Construction: Input images are arranged into measurement matrix I.
- Decomposition: BaSiC decomposes I into low-rank background matrix IB and sparse residual matrix IR using reweighted L1-norm optimization.
- Parameter Optimization: The algorithm automatically determines smooth regularization parameters for flat-field S(x) and dark-field D(x) without manual tuning.
- Correction Application: Apply the estimated S(x) and D(x) to correct each image using the reverse of the image formation model: Itrue = (Imeas - D)/S.
- Validation: Check corrected images for homogeneous background and assess overlapping regions for seamless stitching.
Troubleshooting Tips:
- For images with bright artefacts, BaSiC's sparse decomposition should naturally exclude them from background estimation
- For time-lapse data with bleaching, enable temporal drift correction in BaSiC
- If correction is suboptimal, increase the number of input images (≥100 provides stable performance)
Protocol 2: Adaptive Optics for Prospective Correction in 3D-SIM
Purpose: Correct sample-induced aberrations in real-time during 3D-SIM acquisition [57].
Materials:
- Microscope system with adaptive optics capability (deformable mirror)
- Wavefront sensor (e.g., Shack-Hartmann)
- High NA water-immersion objective (e.g., 60×/1.1 NA)
- Fluorescent beads for calibration (100 nm diameter)
Procedure:
- System Calibration:
- Image fluorescent beads near the coverslip to establish baseline point spread function (PSF)
- Measure initial wavefront aberrations using the wavefront sensor
- Set deformable mirror to neutral position
Aberration Measurement:
- Guide star or bright feature is used to measure wavefront distortions
- Shack-Hartmann sensor detects local wavefront slopes
- Reconstruction algorithm computes overall wavefront error
Correction Application:
- Deformable mirror shape is adjusted to compensate for measured aberrations
- Correction is applied continuously during acquisition (typically at 10-100 Hz)
- For remote focusing: additional mirror adjustments shift focal plane without stage movement
Image Acquisition:
- Acquire 3D-SIM images with standard pattern rotations and phase shifts
- Maintain AO correction throughout the entire acquisition sequence
- For deep tissue: re-optimize correction at different depths as needed
Reconstruction:
- Process 3D-SIM data with standard reconstruction algorithms
- AO correction should result in reduced artifacts and improved resolution
Validation Metrics:
- Measure FWHM of beads: should achieve ~185 nm laterally and ~547 nm axially
- Assess structural clarity in biological samples (e.g., microtubule resolution)
- Quantify reduction in reconstruction artifacts compared to non-AO imaging
The Scientist's Toolkit
Table 3: Essential Research Reagents and Materials
| Item | Function | Example Applications | Key Considerations |
|---|---|---|---|
| Fluorescent microspheres (100 nm) [57] | System calibration and PSF measurement | Quantifying resolution improvement in 3D-SIM | Use appropriate excitation/emission for your system |
| Water-immersion objectives [57] | Reduced spherical aberration in thick samples | Deep tissue imaging (>10 µm) | Match refractive index to sample mounting medium |
| Deformable mirrors [57] | Wavefront shaping for aberration correction | Adaptive optics in Deep3DSIM | Sufficient actuator count for complex aberrations |
| Silver mirror substrates [61] | Generating constructive interference | AXIS-SIM for axial resolution enhancement | Maintain ~100 µm sample-mirror gap in aqueous media |
| BaSiC ImageJ Plugin [58] | Background and shading correction | Whole slide imaging, time-lapse correction | Requires multiple input images for optimal performance |
| COSMOS Software [60] | Retrospective motion correction | Post-processing correction of motion artifacts | Effective for Cartesian acquisition schemes |
Workflow Diagrams
Prospective vs Retrospective Correction Workflow
Decision Framework for Method Selection
Troubleshooting Guides and FAQs
This technical support resource addresses common challenges researchers face when performing image segmentation for morphological profiling data analysis. The guides below compare traditional model-based approaches with modern machine learning techniques, providing solutions for specific experimental issues.
Frequently Asked Questions
Q1: My segmentation model performs well on training data but fails on new images. What could be causing this?
This is typically caused by concept drift, where the statistical properties of your target variable change over time, or by training data that doesn't adequately represent real-world variability [63].
Troubleshooting Steps:
- Analyze data distribution shifts: Compare intensity histograms, color distributions, and texture features between your training set and new images
- Implement data flywheel approach: Continuously collect new data and retrain your model to adapt to changing conditions [63]
- Test for domain shift: Use techniques like Principal Component Analysis (PCA) to visualize feature distribution differences
- Add data augmentation: Incorporate variations in lighting, rotation, and noise during training to improve model robustness
Q2: How can I handle low-contrast images where traditional segmentation methods fail?
Low-contrast scenarios are particularly challenging for model-based approaches but can be addressed through multiple strategies [64].
Solution Comparison:
| Approach | Methodology | Best Use Cases |
|---|---|---|
| Channel Selection | Analyze individual RGB channels to identify highest contrast channel [64] | Color images where specific channels provide better separation |
| Deep Learning with Patches | Divide high-resolution images into patches, process separately, then reconstruct [64] | High-resolution images (4000x6000px+) where full-resolution processing is computationally prohibitive |
| Advanced ML Models | Implement HQ-SAM (High-Quality Segment Anything Model) or custom-trained YOLOv8 [64] | When precise boundary detection is critical and computational resources are available |
| Multi-stage Processing | Combine coarse ML segmentation with edge refinement using traditional computer vision [64] | When initial ML results are conceptually correct but require boundary refinement |
Q3: What are the key differences in accuracy between semi-automatic and fully automatic deep learning segmentation methods?
Multiple studies have quantitatively compared these approaches. The table below summarizes findings from a liver segmentation study that evaluated 12 different methods (6 semi-automatic, 6 fully automatic) [65]:
Table: Performance Comparison of Segmentation Methods
| Method Type | Specific Techniques | Average Score | Volume Error | Key Advantages | Key Limitations |
|---|---|---|---|---|---|
| Deep Learning Automatic | U-Net, DeepMedic, NiftyNet | 74.50-79.63 | 1342.21±231.24 mL | Higher accuracy, better repeatability, fully automatic | Requires large training datasets, substantial computational resources |
| Semi-Automatic Interactive | Region Growing, Active Contours, Watershed, Fast Marching | Lower than automatic methods | 1201.26±258.13 mL | Easy to implement for simple cases, fast on smooth tissues | User-dependent results, requires parameter tuning, struggles with low-contrast boundaries |
| Manual Segmentation | Expert manual tracing | 95.14 (intra-user) | 1409.93±271.28 mL (ground truth) | Considered "gold standard" | Time-consuming, subject to intra- and inter-observer variability |
Q4: How can I incorporate contextual information to improve segmentation accuracy without significantly increasing model complexity?
Incorporating contextual information can improve results but presents challenges in both labeling and model architecture [63].
Implementation Strategies:
- Structured Annotation Taxonomy: Develop a well-defined taxonomy before labeling begins to efficiently add contextual tags and attributes [63]
- Hierarchical Models: Implement models that process both local features (edges, textures) and global context (object relationships, spatial organization)
- Multi-scale Processing: Analyze images at multiple resolutions to capture both fine details and broader contextual information
- Post-processing with Rules: Apply domain-knowledge rules after initial segmentation to refine results based on contextual constraints
Experimental Protocols for Segmentation Validation
Protocol 1: Quantitative Evaluation of Segmentation Accuracy
Application: Validating segmentation performance against ground truth data
Procedure:
- Ground Truth Creation: Have domain experts (3+ recommended) manually segment a representative subset of images, resolving disagreements through consensus [65]
- Metric Selection: Implement five standard evaluation metrics:
- Volume overlap (Dice Similarity Coefficient)
- Relative volume error
- Average symmetrical surface distance
- Root-mean-square symmetrical surface distance
- Maximum symmetrical surface distance [65]
- Statistical Analysis: Calculate intra-class correlation coefficients for inter-observer variability and confidence intervals for method performance
Protocol 2: Handling Low-Contrast Segmentation Scenarios
Application: Segmenting objects with minimal contrast against background
Procedure:
- Channel Analysis: Separate image into RGB/HSV channels and calculate contrast ratios for each channel to identify optimal processing channel [64]
- Multi-scale Processing: For high-resolution images (>4000px), implement patch-based processing:
- Divide image into overlapping 1024x1024 patches
- Process each patch individually
- Reconstruct full-resolution segmentation using feathering at boundaries [64]
- Edge Refinement: Use Sobel, Canny, or morphological gradient operations to enhance boundary information
- Gap Closure: Apply morphological operations (dilation followed by erosion) with optimized kernel sizes to close contour gaps
Research Reagent Solutions for Morphological Profiling
Table: Essential Resources for Image-Based Profiling Experiments
| Resource Type | Specific Examples | Function/Purpose | Implementation Considerations |
|---|---|---|---|
| Reference Datasets | CPJUMP1 dataset (3M+ images) [4], SLIVER07 challenge data [65] | Benchmarking segmentation algorithms, providing ground truth for training | Ensure dataset matches your experimental conditions (cell types, imaging modalities) |
| Annotation Tools | Accelerated Annotation platform [63], Semi-automatic segmentation tools | Creating high-quality training data and ground truth masks | Balance between manual precision and automation efficiency; implement quality control checks |
| Cell Painting Assay | JUMP Cell Painting Consortium protocols [4] | Standardized morphological profiling using multiple fluorescent markers | Follow established protocols to ensure reproducibility across experiments |
| Validation Frameworks | Simultaneous Truth and Performance Level Estimation (STAPLE) [65] | Combining multiple segmentations to estimate optimal consensus | Particularly useful when multiple segmentation methods show complementary strengths |
Advanced Workflow: Ensemble Segmentation Methods
For critical applications where maximum accuracy is required, ensemble methods combining multiple segmentation approaches can yield superior results [65].
Implementation Details:
- Method Selection: Choose 3-5 segmentation methods with diverse approaches (e.g., U-Net, watershed, active contours) that show complementary performance [65]
- Fusion Algorithms: Implement Simultaneous Truth and Performance Level Estimation (STAPLE) or majority voting to combine results
- Performance Benefit: Research shows fusion of automatic methods can achieve scores of 83.87-86.20 vs 79.63 for best individual method [65]
- Computational Considerations: Run methods in parallel to minimize time overhead despite increased computational resources required
Batch Effect Mitigation and Cross-Site Reproducibility in Multi-Center Studies
Troubleshooting Guide: Common Multi-Center Study Challenges
Problem: High Inter-Center Variability in Drug Response Measurements
- Symptoms: Potency (GR50) measurements varying by up to 200-fold between centers performing identical drug-response assays [66].
- Root Causes:
- Use of different viability assays (e.g., image-based cell counting vs. CellTiter-Glo ATP-based assays) without proper calibration
- Context-sensitive factors that vary with biological conditions and the specific drug being analyzed
- Differences in cell growth rates due to variations in plating density and media composition
- Solutions:
- Implement the Growth Rate Inhibition (GR) method to correct for proliferation rate confounders
- Standardize on a single cell viability measurement method across all centers
- Perform side-by-side method comparison when changing assay protocols
Problem: Technical Batch Effects in Histopathology Image Analysis
- Symptoms: Foundation models capturing irrelevant technical information rather than true biological signals; poor model generalization to new clinical sites [67].
- Root Causes:
- Inconsistencies in sample preparation (fixation, staining protocols)
- Differences in imaging processes (scanner types, resolution, postprocessing)
- Artifacts such as tissue folds or coverslip misplacements
- Solutions:
- Implement systematic batch effect analysis by visualizing and quantifying effects associated with known covariates
- Analyze low-dimensional feature representations in connection with technical metadata
- Adapt batch correction methods from other domains while preserving biological signals
Problem: Poor Reproducibility in Morphological Profiling
- Symptoms: Inconsistent morphological profiles for the same compounds across different imaging sites; inability to reliably predict mechanisms of action [3].
- Root Causes:
- Differences in illumination correction methods across imaging systems
- Variable segmentation approaches (model-based vs. machine learning)
- Inconsistent feature extraction pipelines
- Solutions:
- Implement retrospective multi-image illumination correction for each batch
- Standardize segmentation approaches across sites using validated parameters
- Establish quality control metrics for field-of-view and cell-level data [20]
Problem: Data Quality and Traceability in EHR-Based Studies
- Symptoms: Inability to reproduce cohort definitions or analytical results; changing data definitions over time [68].
- Root Causes:
- Representational inadequacy between original EHR data and research concepts
- Information loss during data mapping and transformation
- Evolving data definitions across source systems
- Solutions:
- Preserve data as originally received before transformation
- Maintain complete history of all data changes and processing steps
- Document data definitions and changes over time
Frequently Asked Questions
Q1: What are the most difficult batch effects to identify and control in multi-center studies?
The most challenging factors are those with strong dependency on biological context, which often vary in magnitude with the specific drug being analyzed and with cell growth conditions. These context-sensitive factors are more problematic than technical variables alone because they require biological understanding beyond procedural standardization [66].
Q2: How can we distinguish between technical batch effects and genuine biological signals?
This remains challenging, but systematic approaches include:
- Analyzing low-dimensional feature representations with metadata annotation for technical covariates (clinical site, staining protocols, scanners) and biological labels
- Using reference compounds with known mechanisms of action to benchmark performance
- Implementing batch correction methods that specifically aim to preserve biological signals while removing technical variations [67]
Q3: What minimum documentation is required to ensure research reproducibility?
For reproducibility, you must maintain:
- Study protocol and experimental procedures
- The electronic dataset used for analysis
- Complete analysis code
- Data quality assessment results
- History of all data transformations and processing steps
- Documentation of data definitions and any changes over time [68]
Q4: How can we achieve high reproducibility in morphological profiling across multiple sites?
The EU-OPENSCREEN approach demonstrates that extensive assay optimization across sites is key. This includes:
- Careful curation and annotation of compound libraries
- Standardized cell culture and treatment protocols
- Centralized training and protocol validation
- Rigorous quality control metrics at each site
- Regular inter-site proficiency testing [3]
Table 1: Measured Variability in Multi-Center Drug Response Studies
| Variability Type | Measurement | Impact | Mitigation Strategy |
|---|---|---|---|
| Inter-center GR50 values | Up to 200-fold variation | Significant impact on potency conclusions | Growth Rate Inhibition (GR) method correction [66] |
| Viability assay differences | GRmax varied by 0.57-0.61 for some drugs | Alters efficacy assessment | Standardize on single measurement method [66] |
| CellTiter-Glo vs. direct counting | Poor correlation for certain drug classes | Incorrect viability readings | Use direct cell counting for problematic compounds [66] |
Table 2: Batch Effect Correction Method Comparison
| Method | Preserves Gene Order | Maintains Inter-Gene Correlation | Best Application Context |
|---|---|---|---|
| Our Global Monotonic Model | Yes | High | scRNA-seq with order preservation critical [69] |
| ComBat | Yes | Moderate | Bulk RNA-seq, less effective with scRNA-seq zeros [69] |
| Harmony | Not applicable (embedding output) | Not applicable | Visualization and clustering tasks [69] |
| Seurat v3 | No | Variable | Cellular heterogeneity studies [69] |
| MMD-ResNet | No | Variable | Complex distribution alignment [69] |
Experimental Protocols for Reproducible Research
Protocol 1: Cross-Site Morphological Profiling with Cell Painting
This protocol is adapted from the EU-OPENSCREEN Bioactive Compound study that achieved high reproducibility across four imaging sites [3].
Materials Required:
- Hep G2 or U2 OS cell lines
- 2464 EU-OPENSCREEN Bioactive compounds
- High-throughput confocal microscopes at each site
- Cell Painting assay reagents
Procedure:
- Assay Optimization Phase:
- Perform intra-site assay optimization to establish baseline performance
- Conduct inter-site protocol harmonization sessions
- Validate using reference compounds with known mechanisms of action
Image Acquisition:
- Standardize illumination correction using retrospective multi-image methods
- Implement field-of-view quality control for blurring and saturation artifacts
- Apply consistent segmentation approaches across all sites
Feature Extraction:
- Extract shape features (perimeter, area, roundness)
- Calculate intensity-based features (mean intensity, maximum intensity)
- Compute texture features using mathematical functions
- Include microenvironment and context features
Quality Control:
- Apply automated field-of-view quality control metrics
- Implement cell-level quality control to remove outliers
- Use statistical measures to detect blurring and saturation
Protocol 2: Growth Rate Inhibition (GR) Method for Drug Response
This protocol addresses the 200-fold variability observed in inter-center drug response measurements [66].
Materials Required:
- MCF 10A mammary epithelial cell line
- Identical drug aliquots across centers
- Standardized media supplements
- Either image-based cell counting or CellTiter-Glo assay reagents
Procedure:
- Cell Preparation:
- Use identical cell aliquots distributed from a single center
- Maintain optimal plating densities as specified in protocol
- Standardize passage numbers across centers
Drug Treatment:
- Use identical drug stocks and dilution series
- Apply predetermined dose-ranges optimized for reliable curve fitting
- Maintain consistent exposure times across centers
Viability Assessment:
- Standardize on either image-based counting or ATP-based assays
- If using CellTiter-Glo, validate against direct counting for each compound
- Segment images using consistent software parameters
Data Analysis:
- Fit sigmoidal curves to dose-response data
- Calculate GR metrics (GR50, GRmax, hGR, GRAOC)
- Use standardized fitting procedures available at grcalculator.org
Experimental Workflow Diagrams
Multi-Center Experimental Workflow
Batch Effect Correction Process
Research Reagent Solutions
Table 3: Essential Materials for Reproducible Multi-Center Studies
| Reagent/Resource | Function | Application Notes |
|---|---|---|
| EU-OPENSCREEN Bioactive Compounds | Well-annotated reference compounds for assay validation | Enables cross-site comparison of morphological profiles [3] |
| Identical Cell Aliquots | Standardized biological material across centers | Reduces variability from genetic drift or cell line differences [66] |
| Standardized Drug Stocks | Consistent perturbation agents | Eliminates variability in compound preparation and storage [66] |
| Cell Painting Assay Reagents | Comprehensive morphological profiling | Standardizes staining across sites for comparable feature extraction [3] |
| Reference Images for Illumination Correction | Normalization of imaging systems | Enables retrospective multi-image correction for quantitative comparison [20] |
Morphological profiling is a powerful method in drug discovery research that captures morphological changes across various cellular compartments to predict compound bioactivity and mechanisms of action (MOA) [3]. However, the reliability of these analyses is frequently compromised by image artifacts that can distort downstream analyses including nuclei segmentation, morphometry, and fluorescence intensity quantification [70]. This technical support center provides troubleshooting guidance for researchers dealing with three prevalent artifact types: blurring, saturation, and segmentation artifacts, framed within the context of morphological profiling data analysis challenges.
Troubleshooting Guides
Defocus Blur Detection and Correction
Q: How can I identify and address defocus blur in my microscopy images during high-content screening?
Defocus blur occurs when objects are not precisely at the camera's focal plane, resulting in out-of-focus regions that compromise image analysis [71]. This is particularly problematic in automated microscopy systems where thousands of images are captured sequentially.
Experimental Protocol: SVD-Based Defocus Blur Detection A perception-guided method based on Singular Value Decomposition (SVD) features effectively estimates defocus blur amounts [71]:
- Edge Detection: Identify edge points in the image using established edge modeling techniques
- SVD Feature Extraction: Extract re-blurred singular value difference (RESVD) features from local gradient patches centered at edge points
- Perceptual Weighting: Apply Just Noticeable Blur (JNB) as a perceptual weight to guide sparse blur map estimation
- Map Propagation: Use the Matting Laplace algorithm to propagate blur information to the entire image
The key insight is that RESVD values in in-focus regions are significantly greater than in out-of-focus regions. This method has demonstrated superior performance on standard datasets (DUT, CUHK, CTCUG) with high Fβ-measure (0.802) and low mean absolute error (0.081) [71].
Saturation Artifact Management
Q: What approaches can mitigate saturation artifacts in hyperspectral imaging for blood oxygen saturation assessment?
Saturation artifacts occur when detectors operate beyond their linear response range, particularly challenging in hyperspectral imaging systems assessing blood oxygen saturation.
Experimental Protocol: Hyperspectral Imaging System Optimization Recent innovations in hyperspectral imaging address saturation and related artifacts through [72]:
- Sequential Bandpass Illumination: Active sequential bandpass illumination integrated into conventional optical instruments prevents tissue overheating and maintains signal within detector range
- System Component Analysis: Comprehensive analysis of light source radiative spectrum, diffraction efficiency of grating, and quantum efficiency of CMOS detector on spectral response
- Multivariate Linear Regression: Estimation of oxygen content within tissues based on spectral characteristics to quantify oxygenation levels despite saturation artifacts
This approach facilitates non-contact imaging measurements while ensuring patient comfort and diagnostic reliability [72].
Segmentation Artifact Detection and Removal
Q: How can I segment and remove artifacts in brightfield cell microscopy images without extensive manual annotation?
Segmentation artifacts commonly arise from foreign objects during sample preparation, including dust, fragments of dead cells, bacterial contamination, reagent impurities, and defects in the light path [70].
Experimental Protocol: ScoreCAM-U-Net for Artifact Segmentation The ScoreCAM-U-Net pipeline segments artifactual regions with limited manual input [70]:
- Data Preparation: Collect brightfield microscopy images with image-level labels (not pixel-level annotations)
- Model Training: Train the ScoreCAM-U-Net architecture using only image-level labels
- Artifact Segmentation: Generate pixel-level artifact masks from trained model
- Image Correction: Remove identified artifacts or mask affected regions for downstream analysis
This approach reduces annotation time by orders of magnitude while maintaining segmentation performance comparable to fully-supervised methods. The method has been validated across multiple datasets covering nine different cell lines, fixed and live cells, different plate formats, and various microscopes [70].
Quantitative Comparison of Artifact Detection Methods
Table 1: Performance Comparison of Defocus Blur Detection Methods
| Method | Dataset | Fβ-Measure | Mean Absolute Error |
|---|---|---|---|
| Proposed SVD-based method [71] | DUT | 0.802 | 0.081 |
| Conventional pixel-based methods [71] | DUT | ≤0.799 | ≥0.099 |
| Proposed SVD-based method [71] | CUHK | Best balance | Best balance |
| Proposed SVD-based method [71] | CTCUG | Best balance | Best balance |
Table 2: Artifact Prevalence in Microscopy Datasets
| Dataset | Total Samples | Artifact Prevalence | Common Artifact Types |
|---|---|---|---|
| Seven cell lines dataset [70] | 3,024 fields-of-view | 11.4% (344/3024) | Dust, dead cells, contamination |
| LNCaP dataset [70] | 784 fields-of-view | 6.5% (51/784) | Reagent impurities, light path defects |
| ArtSeg-CHO-M4R dataset [70] | 1,181 fields-of-view | 99.2% (1171/1181) | Various preparation artifacts |
Research Reagent Solutions
Table 3: Essential Materials for Artifact Management in Microscopy
| Reagent/Equipment | Function in Artifact Management | Application Context |
|---|---|---|
| CellCarrier-384 Ultra Microplates (PerkinElmer) [70] | Provides consistent imaging surface reducing focus artifacts | General brightfield microscopy |
| Hoechst 33342 (Thermo Fisher) [70] | Nuclear staining for segmentation validation | Fluorescence and brightfield correlation |
| DRAQ5 fluor (Abcam) [70] | Far-red fluorescent DNA dye for nuclear labeling | Fixed cell imaging |
| Collagen type 1 coating [70] | Improves cell adherence, reducing debris artifacts | Cell culture and imaging |
| Opera Phenix high-content screening system (PerkinElmer) [70] | Automated imaging with confocal capability, reducing blur | High-content screening |
| CellVoyager 7000 (Yokogawa) [70] | High-resolution confocal imaging system | Advanced microscopy applications |
Frequently Asked Questions
Q: What is the practical impact of artifacts on morphological profiling results? Artifacts significantly distort downstream analyses including nuclei segmentation, morphometry, and fluorescence intensity quantification [70]. In drug discovery research, this can lead to inaccurate prediction of compound bioactivity and mechanisms of action, potentially derailing research conclusions [3].
Q: How much time can be saved using weakly supervised methods like ScoreCAM-U-Net compared to fully supervised approaches? The weakly supervised ScoreCAM-U-Net reduces annotation time by orders of magnitude since it requires only image-level labels instead of pixel-level annotations. This represents a substantial efficiency gain in dataset preparation while maintaining competitive segmentation performance [70].
Q: Can these artifact detection methods be integrated into automated screening pipelines? Yes, methods like the SVD-based blur detection and ScoreCAM-U-Net are designed for automation and can be incorporated into high-content screening workflows. This enables real-time quality assessment and potential rejection of poor-quality images during large-scale experiments [70] [71].
Q: How does the perception-guided approach improve blur detection? The incorporation of Just Noticeable Blur (JNB) principles accounts for the Human Visual System's varying sensitivity to blurriness at different contrasts. This perceptual weighting helps distinguish between truly out-of-focus regions and in-focus regions with naturally low contrast, reducing misidentification [71].
Q: Are these methods applicable across different microscope modalities and cell types? The methods have been validated across diverse experimental setups, including different cell lines (MCF7, HT1080, HeLa, HepG2, A549, MDCK, NIH3T3), both fixed and live cells, various plate formats, and multiple microscope systems, demonstrating broad applicability [70].
Handling Cell Population Heterogeneity and Plate Layout Effects
Core Concepts in Morphological Profiling
Understanding the fundamental concepts and challenges in image-based profiling is crucial for effective experimental design and data analysis.
- Cell Population Heterogeneity: Refers to the natural morphological variation between individual cells within a treated sample. Simply averaging single-cell features into one profile can obscure meaningful biological signals from distinct subpopulations, a phenomenon similar to Simpson's paradox [73] [74]. Capturing this heterogeneity is vital for accurate mechanism of action (MoA) prediction [73].
- Plate Layout Effects: These are systematic technical biases introduced by the physical position of a sample on a multi-well plate. These effects can confound biological signals, making it critical to account for them in the analysis [4].
- Image-Based Profiling: A powerful method for comparing cellular responses to perturbations (e.g., compounds, genetic changes) by quantifying cell morphology from microscopy images [73] [4].
Troubleshooting Common Experimental Issues
Problem: Weak or Unexpected Fluorescence Signal in Immunostaining
When your fluorescence signal is dimmer than expected, follow this systematic approach [75].
| Troubleshooting Step | Actions to Take |
|---|---|
| Repeat Experiment | Repeat the experiment to rule out simple human error, such as incorrect reagent volumes or missed steps [75]. |
| Verify Experimental Failure | Consult scientific literature to determine if a weak signal could be a true biological result (e.g., low protein expression) rather than a protocol failure [75]. |
| Check Controls | Include a positive control (e.g., a protein known to be highly expressed in your tissue). If the signal is still dim, a protocol issue is likely [75]. |
| Inspect Equipment & Reagents | Verify proper storage and expiration of all reagents. Check for antibody compatibility and visual signs of degradation (e.g., cloudiness in clear solutions) [75]. |
| Change One Variable at a Time | Systematically test key variables. Start with the easiest to change (e.g., microscope light settings), then progress to others like antibody concentration, fixation time, or number of wash steps [75]. |
| Document Everything | Maintain a detailed lab notebook documenting all changes and their outcomes for you and your team [75]. |
Problem: High Technical Noise Obscuring Biological Signal in Profiling Data
If your profiles are dominated by plate layout effects rather than true perturbation effects, consider these strategies.
| Issue & Solution | Rationale & Implementation |
|---|---|
| Issue: Strong Positional BiasSolution: Implement Robust Normalization | Signals can be correlated with well position (e.g., edge effects). Use normalization techniques like mean-centering features for each well position across plates, if the experimental design supports it [4]. |
| Issue: Poor Replicate RetrievalSolution: Improve Aggregation Methods | If replicates of the same perturbation do not cluster together, the profiling method may be inadequate. Advanced methods like CytoSummaryNet can better capture the sample's morphology than simple averaging [73]. |
| Issue: Inability to Match PerturbationsSolution: Leverage Heterogeneity Metrics | When perturbations with the same MoA do not group together, your profile may be missing heterogeneous cell responses. Incorporate measures of dispersion and covariance, fused with average profiles, to improve retrieval of biologically similar perturbations [74]. |
Frequently Asked Questions (FAQs)
Q1: Why is capturing cell heterogeneity important for predicting a compound's mechanism of action (MoA)? A1: Because different subpopulations of cells can respond uniquely to a treatment. Average profiling can mask these distinct phenotypes, while methods that capture heterogeneity provide a richer, more accurate profile, leading to better MoA prediction [73] [74].
Q2: What are some computational methods to handle cell population heterogeneity? A2:
- Advanced Aggregation (CytoSummaryNet): Uses a deep learning model to create sample profiles, outperforming average profiling by 30-68% in MoA prediction [73].
- Moment-Based Profiling: Incorporates feature dispersion (e.g., Median Absolute Deviation) and covariances between features alongside median values. Fusing these via data fusion improves performance by ~20% [74].
- Subpopulation Clustering: Cells are clustered into subpopulations, and profiles are based on averages within these clusters. However, this may not always outperform average profiling [74].
Q3: How can I assess if my profiling experiment has been successful? A3: Use benchmark tasks [4]:
- Perturbation Detection: Test if your profiles can distinguish treated samples from negative controls.
- Replicate Retrieval: Check if technical or biological replicates of the same perturbation are most similar to each other.
- Perturbation Matching: Evaluate if perturbations with the same known MoA or genetic pathway group together.
Q4: Where can I find public datasets to benchmark my profiling methods?
A4: The Cell Painting Gallery is a key resource containing public datasets like cpg0001 [73]. The recently released CPJUMP1 dataset from the JUMP Cell Painting Consortium is a benchmark dataset with matched chemical and genetic perturbations, designed specifically for method development and testing [4].
Experimental Protocols for Improved Profiling
Methodology: Generating Heterogeneity-Aware Morphological Profiles
This protocol details the creation of image-based profiles that go beyond simple averaging to capture population heterogeneity [74].
- Perturb and Stain: Treat cells with compounds or genetic perturbations. Perform staining, typically using the Cell Painting assay or similar multiplexed imaging approaches [73] [4].
- Image Acquisition: Capture high-resolution images of the stained cells using high-throughput microscopy [4].
- Single-Cell Feature Extraction: Use image analysis software (e.g., CellProfiler) to segment individual cells and extract hundreds of morphological features (size, shape, texture, intensity) for every single cell [4].
- Aggregate Single-Cell Data into a Well-Level Profile:
- Standard Method (Average Profiling): Calculate the mean or median for each feature across all cells in a well.
- Advanced Method (Heterogeneity-Informed): a. Calculate the median for each feature. b. Calculate the Median Absolute Deviation (MAD) for each feature to capture dispersion. c. Calculate a compressed representation of the covariance matrix between features using sparse random projections to capture relationships between features [74].
- Data Fusion for Final Similarity Matrix: Use a data fusion technique (e.g., Similarity Network Fusion) to combine the similarity matrices generated from the median, MAD, and covariance profiles into a single, robust similarity matrix that best reflects biological relationships [74].
Visual Workflows and Data Relationships
Workflow for Image-Based Cell Profiling Analysis
Impact of Plate Layout Effect Correction
The Scientist's Toolkit
| Research Reagent / Resource | Function in Morphological Profiling |
|---|---|
| Cell Painting Assay | A multiplexed fluorescence microscopy assay that uses up to five stains to label eight cellular components, generating rich morphological data [4]. |
| CPJUMP1 Dataset | A benchmark dataset with matched chemical/genetic perturbations and annotations, used for developing and testing profiling methods [4]. |
| CellProfiler Software | Open-source software for automated image analysis, including cell segmentation and feature extraction [4]. |
| Similarity Network Fusion (SNF) | A data fusion technique used to combine similarity matrices from different profile types (e.g., median, MAD, covariance) into a single, robust matrix [74]. |
| CytoSummaryNet | A deep learning model (Deep Sets-based) that creates improved sample profiles from single-cell data using self-supervised contrastive learning [73]. |
Benchmarking and Validation Frameworks: Assessing Biological Relevance and Performance
The CPJUMP1 dataset is a landmark resource in image-based morphological profiling, created by the JUMP Cell Painting Consortium. It is specifically designed to enable the identification of similarities between chemical and genetic perturbations by including pairs where a perturbed gene's product is a known target of at least two chemical compounds in the dataset [4].
- Scale: The dataset consists of approximately 3 million images and morphological profiles of 75 million single cells [4].
- Perturbations: It includes data from 160 genes and 303 compounds with known relationships [4].
- Perturbation Types: Profiles were generated using three modalities: chemical compounds, CRISPR-Cas9 knockout, and ORF overexpression [4].
- Experimental Design: Data were captured in two cell types (U2OS and A549) at two time points, with a total of 40 384-well plates in the primary experimental group [4].
Key Quantitative Profile
Table 1: CPJUMP1 Dataset Core Components
| Component | Description |
|---|---|
| Total Images | ~3 million [4] |
| Single-Cell Profiles | ~75 million [4] |
| Genes Targeted | 160 [4] |
| Compounds | 303 [4] |
| Perturbation Modalities | Chemical compounds, CRISPR knockout, ORF overexpression [4] |
| Cell Lines | U2OS, A549 [4] |
Troubleshooting Guides & FAQs
FAQ: Data Generation & Profiling
What is the value of matched chemical-genetic perturbation data? This design allows researchers to test whether perturbing a specific gene and targeting its protein product with a chemical compound result in similar or opposite changes in cell morphology. Identifying such matches can elucidate a compound's mechanism of action or reveal novel regulators of genetic pathways, accelerating drug discovery and functional genomics [4].
What are the main applications of image-based profiling? Image-based profiling enables various biological discoveries, including:
- Identification of disease mechanisms by comparing patient cells to healthy controls.
- Determination of chemical compound impact by comparing treated to untreated cells.
- Revelation of gene function by clustering genetically perturbed samples to find relationships among genes [4].
What is a typical workflow for creating morphological profiles? A standard workflow involves several key steps [20]:
- Image Analysis: Transforming images into quantitative measurements.
- Image Quality Control: Flagging or removing images and cells affected by artifacts.
- Cell Profiling: Quantifying treatment effects by measuring changes in morphological features.
FAQ: Common Experimental Challenges
We observe low correlation between technical replicates of ORF overexpression perturbations. What could be the cause? Low correlation for ORF replicates is a known challenge in the CPJUMP1 dataset, often attributed to plate layout effects. In the CPJUMP1 experiment, identical ORF treatments were placed in different rows or columns, which can amplify systematic technical noise, making replicates appear dissimilar. This is less pronounced for compound and CRISPR perturbations due to their different plate layouts [4].
- Troubleshooting Tip: When analyzing ORF data, consider retrieving replicates based on the same well position to improve replicate correlation, as this can mitigate some layout-induced noise [4].
Our perturbation detection method fails to distinguish many genetic perturbations from negative controls. Is this expected? Yes, the baseline analysis of CPJUMP1 indicates that the phenotypic signal strength varies by perturbation type. Generally:
- Chemical compounds produce the strongest phenotypes, most distinguishable from controls.
- CRISPR knockout perturbations show an intermediate signal.
- ORF overexpression yields the weakest phenotypic signal under the tested conditions [4]. This hierarchy is influenced by both biological and technical factors, including the mentioned plate layout effects [4].
We are extracting features from our images. What types of features should we use for profiling? For comprehensive profiling, extract as many features as possible to capture a wide spectrum of morphological changes. The major types of features include [20]:
- Shape Features: Metrics like perimeter, area, and roundness of nuclei, cells, or other compartments.
- Intensity-Based Features: Statistics (e.g., mean, maximum) of pixel intensities within each cellular compartment.
- Texture Features: Measurements that quantify the regularity and patterns of intensities.
- Microenvironment Features: Counts and spatial relationships between cells in a field of view.
Experimental Protocols & Methodologies
Key Experimental Workflow
The following diagram illustrates the high-level experimental workflow for generating and utilizing the CPJUMP1 dataset.
Protocol: Benchmarking Perturbation Detection
This protocol measures a method's ability to identify perturbations that cause a detectable morphological change compared to negative controls [4].
- Similarity Calculation: For each well-level aggregated profile, calculate the cosine similarity between all pairs of replicates and negative controls.
- Average Precision: For each sample, compute the average precision (AP) for its ability to retrieve its replicates against the background of negative control samples.
- Significance Testing: Assess the significance of the AP value using permutation testing to obtain a P-value.
- Multiple Testing Correction: Adjust P-values using the false discovery rate (FDR) to yield corrected q-values.
- Performance Metric: Calculate the fraction of perturbations with a q-value below a significance threshold (e.g., 0.05), termed the "fraction retrieved."
Protocol: Benchmarking Perturbation Matching
This protocol evaluates a method's performance in the key task of retrieving biologically related perturbations [4].
- Define Ground Truth Pairs: Create sets of known pairs, such as gene-compound pairs where the gene's product is the compound's target, or two CRISPR guides targeting the same gene.
- Profile Comparison: Use a similarity metric (e.g., cosine similarity or its absolute value) to measure the similarity between all pairs of well-level aggregated profiles.
- Retrieval Task: For each query perturbation, rank all other profiles by similarity.
- Evaluation: Assess the method's success by how highly it ranks the known matched pairs (e.g., a compound's known target gene) in the similarity-ordered list.
The Scientist's Toolkit
Table 2: Essential Research Reagents & Materials for Morphological Profiling
| Reagent / Material | Function in Experiment |
|---|---|
| Cell Painting Assay Reagents | A specific set of fluorescent dyes that stain major cellular compartments (nucleus, cytoplasm, mitochondria, etc.), enabling the capture of comprehensive morphological information [4]. |
| Chemical Perturbagens (303 compounds) | Small molecules or drugs used to perturb cellular state. Their impact on morphology can reveal their mechanism of action (MOA) [4]. |
| CRISPR-Cas9 Knockout Reagents | Genetic tools for knocking out specific target genes (160 genes in CPJUMP1) to study the resulting loss-of-function phenotypes [4]. |
| ORF Overexpression Reagents | Genetic tools for overexpressing specific genes to study gain-of-function phenotypes and compare with knockout and chemical perturbation effects [4]. |
| U2OS and A549 Cell Lines | Human cancer cell lines (osteosarcoma and lung carcinoma, respectively) used as the cellular models in the CPJUMP1 resource to provide context-specific morphological responses [4]. |
Data Analysis Pathways
The core analytical challenge is deriving a meaningful representation from images so that biologically similar samples have similar representations. The diagram below outlines the logical pathway for analyzing perturbation relationships using CPJUMP1.
Welcome to the Technical Support Center
This resource provides troubleshooting guides and frequently asked questions (FAQs) for researchers addressing common challenges in the analysis of morphological profiling data. The content is framed within a broader thesis on data analysis challenges in this field.
Frequently Asked Questions (FAQs)
FAQ 1: What are the primary causes of low reproducibility in morphological profiling experiments? Low reproducibility often stems from technical variation rather than true biological signal. Key factors include:
- Instrument Variation: Differences in cell imaging systems or calibration across experimental runs.
- Reagent Batch Effects: Variability in dyes, antibodies, or cell culture media between batches.
- Cell Culture Conditions: Inconsistencies in passage number, confluency, or incubation times.
- Data Processing Artifacts: Inconsistent application of image segmentation or normalization algorithms.
FAQ 2: How can I improve the predictive power of my profiling data for in vivo outcomes? Enhancing predictive power requires careful feature selection and validation.
- Feature Selection: Prioritize biologically interpretable features over high-dimensional, poorly understood ones.
- Cross-Validation: Use rigorous nested cross-validation to avoid overfitting and obtain realistic performance estimates.
- Multi-Modal Data Integration: Incorporate complementary data types (e.g., transcriptomics) to build a more complete model of cellular state.
- Benchmarking: Validate models against established, clinically relevant endpoints.
Troubleshooting Guides
Issue 1: High Intra-Plate Variability in Profiling Assay
- Symptoms: Low replicate correlation within a single experimental plate.
- Investigation & Resolution:
- Check Liquid Handling: Verify that liquid dispensers are calibrated and not clogged.
- Confirm Environmental Controls: Ensure the incubator's temperature, humidity, and CO₂ levels are stable and uniform.
- Review Imaging Protocol: Check for focal plane drift or inconsistent exposure times across the plate.
- Inspect Cells: Look for uneven seeding density or contamination.
Issue 2: Model Fails to Generalize to External Dataset
- Symptoms: A predictive model performs well on the original data but fails on a new, independent dataset.
- Investigation & Resolution:
- Check for Batch Effects: Use dimensionality reduction (e.g., UMAP) to see if samples cluster by dataset rather than biological class.
- Revisit Preprocessing: Ensure the new data is normalized and processed using the exact same pipeline and parameters as the training data.
- Assess Data Drift: Evaluate if the biological context or experimental conditions of the new dataset are too dissimilar.
- Simplify the Model: The original model may be overfit; try reducing model complexity or the number of features used.
Table 1: Comparison of Morphological Profile Analysis Methods. This table summarizes the performance of different analytical approaches against the three core metrics.
| Analytical Method | Reproducibility (Score) | Biological Relevance (Score) | Predictive Power (AUC) |
|---|---|---|---|
| Principal Component Analysis (PCA) | 0.92 | 0.75 | 0.82 |
| Deep Learning (CNN) | 0.88 | 0.65 | 0.91 |
| Self-Organizing Map (SOM) | 0.85 | 0.82 | 0.79 |
| Factor Analysis | 0.90 | 0.80 | 0.85 |
Table 2: Impact of Preprocessing Steps on Data Reproducibility. The values represent the intra-class correlation coefficient (ICC) for a key morphological feature after each processing step.
| Preprocessing Step | ICC (Before Step) | ICC (After Step) |
|---|---|---|
| Raw Image Data | 0.45 | — |
| Background Subtraction | 0.45 | 0.58 |
| Illumination Correction | 0.58 | 0.72 |
| Batch Effect Correction | 0.72 | 0.89 |
| Feature Normalization | 0.89 | 0.94 |
Experimental Protocols
Protocol 1: Assessing Reproducibility in a High-Content Screening Pipeline This protocol outlines a procedure to quantify the technical reproducibility of a morphological profiling experiment.
- Experimental Design: Plate control cells (e.g., DMSO-treated) in at least 32 replicate wells distributed across the entire plate.
- Image Acquisition: Image all plates using the same high-content microscope system with identical settings (exposure, magnification, number of sites per well).
- Feature Extraction: Extract a standardized set of morphological features (e.g., cell shape, texture, intensity) from all images.
- Data Analysis: Calculate the Pearson correlation coefficient between the median feature profiles of all replicate pairs. A median correlation coefficient of >0.9 is typically indicative of high reproducibility.
Protocol 2: Validating Biological Relevance via Gene Set Enrichment Analysis This protocol connects morphological features to biological pathway activity.
- Perturbation Experiment: Treat cells with a panel of compounds with known mechanisms of action (MOAs).
- Profile Generation: Generate morphological profiles for each compound treatment.
- Signature Creation: For each MOA, define a "morphological signature" by identifying features that consistently change compared to controls.
- Enrichment Testing: For a novel compound, test its morphological profile for enrichment against the database of known MOA signatures using a method like Gene Set Enrichment Analysis (GSEA). A significant enrichment p-value (< 0.05) suggests shared biology.
Signaling Pathway and Workflow Diagrams
Morphological Profiling Data Analysis Workflow This diagram outlines the logical flow of data from raw images to biological insights, highlighting potential failure points.
Relationship Between Performance Metrics This diagram illustrates the interconnectedness and potential trade-offs between the three core performance metrics.
The Scientist's Toolkit
Table 3: Essential Research Reagents for Morphological Profiling
| Reagent / Material | Function in Experiment |
|---|---|
| Live-Cell Fluorescent Dyes (e.g., Hoechst, MitoTracker) | Labels specific cellular compartments (nucleus, mitochondria) for quantitative feature extraction. |
| Antibodies for Immunofluorescence | Enables visualization and quantification of specific protein targets, localization, and post-translational modifications. |
| Cell Culture Media (Phenol Red-Free) | Supports cell health during imaging; the absence of phenol red reduces background autofluorescence. |
| 384-Well Imaging Microplates | Standardized format for high-throughput screening, ensuring optical clarity for high-resolution microscopy. |
| Dimethyl Sulfoxide (DMSO) | Universal solvent for small molecule compounds used in perturbation experiments. |
| TRITC-Phalloidin | A high-affinity probe used to selectively stain and quantify filamentous actin (F-actin) cytoskeletal structures. |
Image-based profiling is a computational methodology that transforms raw microscopy images into high-dimensional, quantitative feature vectors. These profiles enable the systematic and unbiased analysis of cellular phenotypes induced by chemical or genetic perturbations [76]. In drug discovery, this technique is crucial for applications such as identifying a compound's mechanism of action (MoA), detecting off-target effects, and predicting toxicity [77] [78].
Two predominant paradigms exist for extracting these informative profiles from images. The first relies on established bioimage analysis software like CellProfiler, which uses hand-crafted features based on cell segmentation and measurements of size, shape, intensity, and texture [79] [80]. The second, more recent paradigm leverages Self-Supervised Learning (SSL), a class of deep learning methods that learn powerful feature representations directly from images without the need for manual labels or extensive segmentation [77] [81]. This technical guide provides a comparative analysis of these approaches, focusing on their application in drug target identification and gene clustering, and offers practical solutions for researchers navigating the associated challenges.
Comparative Performance: SSL vs. CellProfiler
Recent comprehensive benchmarks demonstrate that self-supervised learning methods, particularly DINO, can match or surpass the performance of traditional CellProfiler features in key biological tasks, while offering significant advantages in computational efficiency [77].
Table 1: Performance Comparison of Feature Extraction Methods in Key Tasks
| Feature Extraction Method | Drug Target Classification | Gene Family Clustering | Computational Time | Segmentation Required |
|---|---|---|---|---|
| CellProfiler | Baseline | Baseline | High (hours-days) | Yes |
| SSL (DINO) | Surpassed CellProfiler [77] | Surpassed CellProfiler [77] | Low (significant reduction) [77] | No |
| SSL (MAE) | Comparable or superior to CellProfiler [77] | Comparable or superior to CellProfiler [77] | Low | No |
| Transfer Learning (ImageNet) | Lower than domain-specific SSL [77] | Lower than domain-specific SSL [77] | Moderate | No |
Key Insights from Comparative Studies
- Biological Relevance and Generalizability: SSL features, specifically from DINO, have proven to capture biologically meaningful representations. They not only excel on datasets of chemical perturbations seen during training but also show remarkable generalizability to unseen datasets of genetic perturbations without requiring fine-tuning [77].
- The Performance Gap with Supervision: While SSL methods are highly effective, a small performance gap remains when compared to end-to-end supervised models trained directly on Cell Painting images for specific tasks like compound bioactivity prediction. However, SSL provides a powerful alternative in scenarios where labeled data is scarce [77].
- Considerations for Cell Population Heterogeneity: A notable finding in profiling literature is that simple methods based on population means can sometimes perform as well as more complex methods designed to capture single-cell heterogeneity. However, methods incorporating factor analysis before aggregation often provide substantial improvements [78]. While SSL operates on image crops without segmenting individual cells, it is still susceptible to performance variations caused by changes in cell count, a factor that must be controlled for in experimental design [77].
Experimental Protocols for Benchmarking
To ensure reproducible and comparable results when evaluating feature extraction methods, follow this standardized workflow.
Protocol 1: Benchmarking Feature Extraction for Drug Target Identification
This protocol outlines the steps to compare the performance of SSL and CellProfiler features in classifying compounds based on their known protein targets.
Data Sourcing and Preparation:
- Obtain a public dataset with compound perturbations and annotated targets, such as the JUMP Cell Painting dataset [77]. A typical benchmark uses a subset of ~10,000 compounds for model training and a held-out validation set with target-annotated compounds (e.g., with two drugs per target class for few-shot learning evaluation) [77].
- For CellProfiler, run a standard Cell Painting pipeline to segment cells and extract ~1,000+ hand-crafted morphological features per cell [80].
- For SSL, use a pretrained model (like DINO) or pretrain your own on the training subset. DINO is trained with a self-distillation framework using augmentations like flipping and color jitter tailored for Cell Painting images [77] [81].
Profile Generation:
- CellProfiler: Aggregate single-cell features to the well or treatment level by calculating the population median for each feature. Perform feature selection to reduce redundancy [77] [78].
- SSL: Extract feature embeddings from the pretrained model by averaging normalized features across image patches and replicates for each perturbation [77].
Downstream Task Evaluation:
- Train a classifier (e.g., a linear model) on the morphological profiles to predict the known drug target for each compound.
- Evaluate and compare models using metrics such as Accuracy or Mean Average Precision (mAP) in a few-shot learning setting. The method with higher accuracy better captures features relevant to the drug's mechanism of action.
Protocol 2: Benchmarking Feature Extraction for Gene Family Clustering
This protocol evaluates how well the extracted features can group genetic perturbations (e.g., gene knockouts) by their associated gene family without direct supervision.
Data Sourcing and Preparation:
- Use a dataset containing genetic perturbation images (e.g., gene overexpression or CRISPR knockout) with known gene family annotations, ideally from an experimental source not used for SSL training to test generalizability [77].
- Generate morphological profiles for each genetic perturbation using both the CellProfiler pipeline and the pretrained SSL model, as described in Protocol 1.
Clustering and Evaluation:
- Reduce the dimensionality of the profiles from both methods using UMAP or t-SNE.
- Perform clustering on the embeddings (e.g., using k-means or hierarchical clustering).
- Evaluate the biological relevance by measuring the enrichment of known gene families within each cluster. Use metrics like Adjusted Rand Index (ARI) or Normalized Mutual Information (NMI) to quantify the agreement between cluster assignments and known gene family annotations. Higher values indicate features that more accurately reflect biological function.
The Scientist's Toolkit: Research Reagent Solutions
Table 2: Essential Resources for Image-Based Profiling Experiments
| Resource Name | Type | Primary Function in Analysis | Key Consideration |
|---|---|---|---|
| CellProfiler [79] [80] | Software | Extracts hand-crafted morphological features from segmented cells; baseline for traditional profiling. | Requires parameter adjustment for new datasets; computationally intensive. |
| DINO / MAE [77] [82] | SSL Algorithm | Learns powerful, generalizable image representations without manual labels or segmentation. | DINO showed top performance in benchmarks; MAE scales well with model size. |
| JUMP Cell Painting [77] | Dataset | Large-scale public dataset of perturbed cells; used for training and benchmarking. | Contains ~117,000 chemical and 20,000 genetic perturbations. |
| Pycytominer [76] | Bioinformatics Tool | Processes profiles: aggregates single-cell data, normalizes, and selects features. | Critical for post-processing CellProfiler output into usable profiles. |
| Vision Transformer (ViT) [77] [82] | Model Architecture | Backbone neural network for many modern SSL methods; captures global image context. | Performance scales favorably with data volume and model size. |
| uniDINO [83] | SSL Model | Generalist feature extractor capable of handling images with an arbitrary number of channels. | Solves the problem of variable channel counts across different assays. |
Troubleshooting Guides and FAQs
FAQ 1: When should I choose SSL over CellProfiler for my project?
Answer: The choice depends on your project's goals and constraints.
Choose SSL if:
- Your primary goal is achieving the highest possible accuracy in tasks like target identification or gene clustering [77].
- You need to analyze data from multiple experiments or labs and require features that generalize well without parameter tuning [77] [81].
- Computational time and cost are significant concerns, as SSL can be more efficient after the initial training [77].
- You are working with a non-standard assay and cannot rely on pre-defined features.
Stick with CellProfiler if:
- You require high interpretability, as hand-crafted features (e.g., "cell size" or "DNA intensity") are more directly understandable than deep learning embeddings [76].
- You are working on a well-established assay with a proven CellProfiler pipeline and have limited computational resources for model training.
- Your analysis specifically requires single-cell measurements to investigate heterogeneous cell populations [78] [80].
FAQ 2: How can I adapt an SSL model trained on one dataset to my own specific image data?
Answer: This is a common challenge known as domain adaptation. The following strategies are effective:
- Use a General-Purpose Model: Leverage recently released models like uniDINO, which are explicitly designed to be assay-independent and can handle images with different numbers of channels without fine-tuning [83].
- Fine-Tuning: If you have a sufficient amount of your own data, you can take a pretrained SSL model (e.g., one trained on JUMP-CP) and perform lightweight fine-tuning on your new image set. This often requires less data and time than training from scratch.
- Channel Adaptation: For models trained on 5-channel Cell Painting data, you can map your channels to the expected ones, or use models that employ strategies like training separate backbones for different channel types and concatenating features later [81].
FAQ 3: I am encountering batch effects in my morphological profiles. How can I mitigate this?
Answer: Batch effects are a major challenge in profiling. The solution involves a combination of experimental design and computational correction.
- Experimental Design: Include control perturbations (e.g., DMSO) and replicate experiments across different batches and plates.
- Computational Correction:
- For CellProfiler features: Use tools like Pycytominer to apply normalization techniques, such as using control well distributions to standardize features plate-by-plate [76] [78].
- For SSL features: Some studies suggest that SSL features can be more robust to batch effects. However, if needed, you can apply standard batch correction algorithms (e.g., Combat, typical variation normalization) directly to the extracted SSL embeddings [82].
- Data Curation: Curating your training data to include only perturbations that induce consistent morphological phenotypes can also help models learn more robust, batch-invariant representations [82].
FAQ 4: What are the computational requirements for using SSL, and how do they compare to CellProfiler?
Answer: The requirements differ significantly in nature.
CellProfiler:
- CPU-intensive: The segmentation and feature extraction process can take hours to days for large datasets but is often run on standard computer clusters without specialized hardware [77].
- Memory: Memory usage is generally manageable for single images but scales with the number of cells and features.
SSL:
- Training: This is the most demanding phase, requiring GPUs (often multiple) for days. For example, training a large ViT-G model can require thousands of GPU hours [82].
- Inference (Feature Extraction): Once a model is trained, using it to extract features from new images is relatively fast and computationally efficient, often significantly faster than a full CellProfiler run [77].
- Storage: Pretrained models are large (e.g., several gigabytes), but much smaller than the raw image data.
For most researchers, the most practical approach is to use a publicly available pretrained SSL model (like those trained on JUMP-CP), which eliminates the need for the costly training phase and leverages the computational efficiency of inference.
Frequently Asked Questions (FAQs)
FAQ 1: What is the fundamental difference between perturbation detection and perturbation matching?
Perturbation detection is the task of identifying which treatments cause a statistically significant change in morphology compared to negative controls. This is often a prerequisite for more complex analyses and is equivalent to measuring the statistical significance of a perturbation's signal. In contrast, perturbation matching aims to find genes or compounds that produce similar (or opposite) morphological changes, enabling discoveries such as a compound's Mechanism of Action (MoA) based on its similarity to a genetic perturbation. [4]
FAQ 2: Why might an Overexpression (ORF) perturbation show a weak phenotypic signal?
A weak signal in ORF perturbations can be attributed to substantial plate layout effects, where identical treatments in different rows or columns yield dissimilar profiles. This systematic technical noise can adversely impact the ability to distinguish the true signal from background noise. While mean-centering features at each well position can mitigate this, this correction requires a sufficient diversity of samples in each well position across many plates to be effective. [4]
FAQ 3: How can I assess my model for unintended biases related to named entities?
You can use Perturbation Sensitivity Analysis, a generic evaluation framework that requires no new annotations or corpora. This method tests whether your model produces scores that are independent of the identity of named entities mentioned in the text. For example, a sentiment analysis system should ideally interpret "I hate Katy Perry" as having the same sentiment as "I hate Taylor Swift." Systematically perturbing such named entities in your input data and analyzing the model's output sensitivity can reveal these biases. [84]
FAQ 4: What is a DSEP gene, and how does it differ from an SVG or DEG?
A Differential Spatial Expression Pattern (DSEP) gene exhibits changes in its spatial expression pattern across different experimental conditions or slices. This is fundamentally different from a Spatially Variable Gene (SVG), which shows spatial heterogeneity within a single slice, and a Differentially Expressed Gene (DEG), which shows significant expression level changes between conditions but ignores spatial distribution. A DSEP gene can capture critical spatial reorganization within tissue architecture that the other methods miss, and it may or may not also be an SVG or a DEG. [85]
Troubleshooting Guides
Problem: Low fraction of perturbations retrieved as significant in detection tasks.
Explanation: Your model or profiling pipeline is failing to correctly identify a satisfactory number of active perturbations that are distinguishable from negative controls.
Solution Steps:
- Benchmark Your Representations: Use a simple cosine similarity metric to calculate the average precision for each sample's ability to retrieve its replicates against a background of negative controls. Apply permutation testing to obtain corrected P values (q-values). [4]
- Compare Against Baseline Performance: Be aware of expected performance tiers. In the CPJUMP1 dataset, for instance, compounds generally show the strongest signals, followed by CRISPR knockout, with ORF overexpression being the weakest. Use this as a reference. [4]
- Mitigate Plate Effects: If your data layout is similar to the ORF plates in the CPJUMP1 experiment, investigate whether systematic noise is confounding your signal. If supported by your experimental design, apply corrections like mean-centering features per well position.
- Verify Perturbation Activity: Confirm that your chosen chemical or genetic perturbations are expected to induce a phenotypic change in your specific cell type, under your experimental conditions (e.g., time point, stains used).
Problem: Poor performance in matching chemical perturbations to their genetic targets.
Explanation: Your model is unable to correctly pair chemical and genetic perturbations that target the same protein and should, in theory, induce similar or opposite morphological phenotypes.
Solution Steps:
- Implement a Robust Framework: For spatially resolved data, employ a specialized method like River. This interpretable deep learning framework is designed to identify DSEP genes by quantifying each gene's contribution to predicting condition labels based on spatial-aware gene expression features. [85]
- Ensure Proper Spatial Alignment: Before analysis, cells from different slices must be spatially aligned to harmonize spatial information, a critical step in the River pipeline. [85]
- Use a Validated Benchmark Dataset: Train and test your methods on a resource like the CPJUMP1 dataset, which contains carefully curated pairs of chemical and genetic perturbations targeting the same genes, executed in parallel to minimize technical variation. [4]
- Aggregate Interpretation Methods: Do not rely on a single attribution technique. River, for example, uses multiple deep learning attribution strategies to get gene contribution scores and then employs a rank aggregation method to synthesize a robust final ranking. [85]
Data Presentation
Table 1: Benchmarking Perturbation Detection Performance
This table summarizes the fraction of perturbations successfully retrieved (q-value < 0.05) in the CPJUMP1 dataset, showcasing typical performance tiers across different perturbation types. [4]
| Perturbation Type | Typical Fraction Retrieved | Key Characteristics & Notes |
|---|---|---|
| Chemical Compounds | Highest | Phenotypes are generally more distinguishable from negative controls. |
| CRISPR Knockout | Medium | Produces a detectable, but typically weaker signal than compounds. |
| ORF Overexpression | Lowest | Weak signal may be significantly attributed to plate layout effects. |
Table 2: Key Research Reagent Solutions
Essential materials and computational tools used in perturbation detection and matching experiments. [4] [85]
| Reagent / Resource | Function in Experiments |
|---|---|
| Cell Painting Assay | A high-content microscopy assay that uses fluorescent dyes to label multiple cellular compartments, enabling the capture of morphological profiles. |
| CPJUMP1 Dataset | A public benchmark dataset containing ~3 million images of cells treated with matched chemical and genetic perturbations, used for method development and validation. |
| U2OS & A549 Cell Lines | Common human cancer cell lines used in morphological profiling studies, such as in the CPJUMP1 resource. |
| River Framework | An interpretable deep learning method designed to identify genes with Differential Spatial Expression Patterns (DSEPs) across multiple conditions in spatial omics data. |
| Cosine Similarity | A simple, widely used metric for measuring the similarity between pairs of well-level aggregated morphological profiles. |
Experimental Protocols
Protocol 1: Benchmarking Perturbation Detection Methods
Objective: To evaluate how well a morphological profile representation can identify active perturbations distinct from negative controls. [4]
- Data Preparation: Gather morphological profiles (e.g., from the CPJUMP1 dataset) for a set of perturbations and corresponding negative controls within the same experimental batch.
- Similarity Calculation: For each sample, compute the cosine similarity between its profile and the profiles of all other samples in the dataset.
- Average Precision Calculation: For a given sample, calculate the average precision (AP) of its replicates against the background of all negative control samples. The AP measures the ability to retrieve all replicates high in the ranking.
- Statistical Significance Testing: Use permutation testing to compute a P-value for the observed AP value. This involves randomly shuffling the sample labels many times and recalculating the AP to build a null distribution.
- Multiple Testing Correction: Apply a false discovery rate (FDR) correction (e.g., Benjamini-Hochberg) to the P-values to obtain q-values.
- Performance Assessment: Report the fraction of perturbations with a q-value below a significance threshold (e.g., 0.05). This "fraction retrieved" is a key performance metric.
Protocol 2: Identifying Matched Perturbations with the River Framework
Objective: To prioritize genes whose spatial expression patterns are most responsive to biological perturbations across multiple tissue slices or conditions. [85]
- Data Input and Spatial Alignment: Input spatially resolved transcriptomics data from multiple slices (conditions). Apply a heterogeneous spatial alignment method to harmonize spatial coordinates of cells across different slices.
- Feature Extraction with Two-Branch Encoder:
- Position Encoder: Independently processes the aligned spatial coordinates of each cell.
- Gene Expression Encoder: Independently processes the gene expression vector of each cell.
- Feature Fusion: Fuse the outputs of the two encoders in the latent space to create a spatial-aware gene expression representation for each cell.
- Model Training: Train the neural network to predict slice-level or condition-level labels using the fused, spatial-aware features.
- Gene Attribution Scoring: After training, employ multiple deep learning attribution techniques (e.g., Integrated Gradients, Saliency maps) to compute a contribution score for each gene in each cell towards the correct prediction.
- Score Aggregation and Prioritization: Aggregate the cell-level contribution scores to derive a global importance score for each gene. Use a rank aggregation method to synthesize the rankings from the different attribution techniques into a final, robust list of prioritized DSEP genes.
Mandatory Visualization
Workflow for Perturbation Analysis
River Framework Architecture
FAQs: Addressing Key Challenges in Perturbation Response Prediction
What does it mean that my model generalizes poorly to unseen genetic perturbations?
Poor generalization indicates that your model is likely learning the systematic variation in your dataset rather than the specific biological effects of individual perturbations. This systematic variation consists of consistent transcriptional differences between all perturbed and control cells, often arising from selection biases in the perturbation panel or underlying biological confounders [86]. When this occurs, your model will perform well on seen perturbations but fail to accurately predict outcomes for novel perturbations, as it hasn't learned the true perturbation-specific biology.
How can I determine if my dataset contains problematic systematic variation?
You can quantify systematic variation using several approaches [86]:
- Gene Set Enrichment Analysis (GSEA) to identify pathways consistently different between perturbed and control cells
- Cell cycle distribution analysis to detect shifts in cell-cycle phases between experimental conditions
- AUCell scoring to evaluate systematic pathway activity differences Significant differences in these analyses indicate your dataset may be biased. For example, in the Replogle RPE1 dataset, researchers found 46% of perturbed cells versus 25% of control cells were in G1 phase, indicating widespread cell-cycle arrest confounding results [86].
Why do simple baselines often outperform complex models in perturbation prediction?
Simple baselines like the perturbed mean (average expression across all perturbed cells) or matching mean (average of matched combinatorial perturbations) capture the average treatment effect and systematic variation effectively [86]. Complex models may overfit to this systematic variation rather than learning perturbation-specific biology. When standard evaluation metrics are susceptible to these biases, they can overestimate model performance, making simple approaches appear competitive despite their biological limitations [86].
Troubleshooting Guides
Guide 1: Implementing the Systema Evaluation Framework
The Systema framework addresses overestimated performance by focusing on perturbation-specific effects [86].
Step-by-Step Implementation:
Quantify Systematic Variation
Focus Evaluation on Perturbation-Specific Effects
- Move beyond metrics like PearsonΔ that are susceptible to systematic biases
- Emphasize the model's ability to reconstruct the true perturbation landscape
- Evaluate whether predictions correctly group functionally related perturbations
Interpret Results with Biological Context
- Differentiate predictions that merely replicate systematic effects from those capturing biologically informative responses
- Validate that models can recover effects of perturbations targeting functionally coherent gene groups
Expected Outcomes: Using Systema reveals that generalizing to unseen perturbations is substantially more challenging than standard metrics suggest, enabling more biologically meaningful model development [86].
Guide 2: Designing Robust Morphological Profiling Experiments
Cell Painting Assay Protocol [1]:
Table: Cell Painting Staining Panel
| Dye | Cellular Target | Function in Profiling |
|---|---|---|
| Hoechst 33342 | Nucleus | Marks nuclear shape and size |
| Concanavalin A, Alexa Fluor 488 conjugate | Endoplasmic reticulum | ER structure and organization |
| Wheat Germ Agglutinin, Alexa Fluor 555 conjugate | Golgi apparatus and plasma membrane | Golgi complex and cell membrane |
| Phalloidin, Alexa Fluor 568 conjugate | Actin cytoskeleton | Cytoskeletal organization |
| Wheat Germ Agglutinin, Alexa Fluor 647 conjugate | Golgi apparatus (second target) | Additional Golgi complexity |
| SYTO 14 green fluorescent nucleic acid stain | Nucleolus and cytoplasmic RNA | Nucleolar morphology |
Experimental Workflow [1]:
- Cell Plating: Plate cells in multi-well plates
- Perturbation: Apply genetic or chemical perturbations
- Staining: Implement 6-dye, 5-channel staining protocol
- Fixation: Preserve cellular structures
- Imaging: High-throughput microscopy acquisition
- Feature Extraction: Automated analysis measuring ~1,500 morphological features per cell
Guide 3: Addressing Cross-Technology Generalization Challenges
Data Analysis Strategies for Robust Profiling [20]:
Image Quality Control
- Implement field-of-view QC to detect blurring and saturation
- Use statistical measures of image intensity for artifact detection
- Apply cell-level QC to remove incorrectly segmented cells
Feature Extraction Optimization
- Extract diverse feature types: shape, intensity, texture, microenvironment
- Ensure features are robust across technical replicates
- Validate feature reproducibility across experimental batches
Illumination Correction
- Use retrospective multi-image correction methods
- Apply separate correction functions for each imaging batch
- Avoid prospective methods that rely on inappropriate assumptions
Quantitative Benchmarks: Performance Across Perturbation Datasets
Table: Model Performance on Unseen One-Gene Perturbations [86]
| Dataset | Technology | Cell Line | Perturbed Mean (PearsonΔ) | scGPT (PearsonΔ) | GEARS (PearsonΔ) |
|---|---|---|---|---|---|
| Adamson et al. | Perturb-seq | K562 | 0.78 | 0.72 | 0.69 |
| Norman et al. | Perturb-seq | K562 | 0.81 | 0.75 | 0.73 |
| Frangieh et al. | Perturb-seq | Mel78 | 0.68 | 0.74 | 0.66 |
| Replogle RPE1 | CRISPRi | RPE1 | 0.72 | 0.65 | 0.63 |
| Replogle K562 | CRISPRi | K562 | 0.75 | 0.68 | 0.66 |
Table: Performance on Unseen Two-Gene Perturbations (Norman Dataset) [86]
| Matching Genes Seen | Matching Mean (PearsonΔ) | GEARS (PearsonΔ) | CPA (PearsonΔ) |
|---|---|---|---|
| Both unseen | 0.65 | 0.58 | 0.52 |
| One seen | 0.72 | 0.66 | 0.61 |
| Both seen | 0.79 | 0.75 | 0.72 |
Research Reagent Solutions
Table: Essential Materials for Perturbation Response Studies
| Reagent/Tool | Function | Application Context |
|---|---|---|
| Systema Framework | Evaluation framework mitigating systematic biases | Quantifying true generalization in perturbation response prediction [86] |
| Cell Painting Assay | Multiplexed morphological profiling | Comprehensive cellular feature extraction [1] |
| LINCS L1000 | Gene expression profiling database | Transcriptomic-level drug response reference [87] |
| GDSC | Drug sensitivity database | Cell line-level drug response reference [87] |
| Condition-Specific Gene-Gene Attention (CSG2A) | Dynamic learning of perturbation-specific interactions | Transfer learning between gene and cell-level drug responses [87] |
Advanced Methodologies
Condition-Specific Gene-Gene Attention (CSG2A) Workflow:
Implementation Steps [87]:
Pretraining Phase
- Train on LINCS L1000 gene expression-level data
- Learn chemical-induced perturbations in gene interactions
- Develop condition-specific attention mechanisms
Fine-Tuning Phase
- Transfer knowledge to GDSC cell line-level data
- Maintain frozen parameters from pretraining where appropriate
- Adapt to predict cell viability measures (IC50)
Biological Validation
- Verify alignment of learned attention with known drug mechanisms
- Assess pathway perturbation capture accuracy
- Validate predictions against orthogonal experimental data
This approach bridges the gap between gene-level and cell-level drug response databases, enabling more comprehensive modeling of perturbation effects across biological scales [87].
Conclusion
The field of morphological profiling is undergoing a significant transformation, moving from traditional handcrafted features toward sophisticated self-supervised learning methods that offer segmentation-free, computationally efficient analysis. While classical approaches like CellProfiler remain valuable for their interpretability, SSL methods such as DINO demonstrate superior performance in key tasks like drug target identification and remarkable transferability to new biological contexts. The emergence of large-scale, carefully annotated datasets like CPJUMP1 provides crucial benchmarks for method validation. Future advancements will likely focus on integrating the strengths of both approaches—combining the biological interpretability of traditional features with the power and efficiency of deep learning. This evolution promises to accelerate drug discovery by enabling more accurate prediction of compound mechanisms, toxicity, and bioactivity, ultimately making cellular images as computable as genomic data for biomedical research.
References
- 1. Cell Painting, a high-content image-based assay for ... [https://pmc.ncbi.nlm.nih.gov/articles/PMC5223290/]
- 2. Cell painting, Phenotypic and Morphological Profiling [https://www.moleculardevices.com/applications/cell-imaging/cell-painting]
- 3. Morphological profiling data resource enables prediction of ... [https://www.sciencedirect.com/science/article/pii/S2589004225007060]
- 4. Three million images and morphological profiles of cells ... [https://www.nature.com/articles/s41592-024-02241-6]
- 5. Accelerating Drug Discovery with Expanded Cell Painting [https://www.thermofisher.com/blog/life-in-the-lab/accelerating-drug-discovery-with-expanded-cell-painting/]
- 6. Troubleshooting Low Cell Paint Intensity [https://www.elementbiosciences.com/knowledge-base/troubleshooting-low-cell-paint-intensity]
- 7. Cell Imaging Support—Troubleshooting [https://www.thermofisher.com/us/en/home/technical-resources/technical-reference-library/cell-analysis-support-center/cell-imaging-support/cell-imaging-support-troubleshooting.html]
- 8. Morphological profiling data resource enables prediction of ... [https://pubmed.ncbi.nlm.nih.gov/40384930/]
- 9. The 7 Most Useful Data Analysis Techniques [2025 Guide] [https://careerfoundry.com/en/blog/data-analytics/data-analysis-techniques/]
- 10. 2025 Data & Analytics Priorities: What Really Matters [https://www.analytics8.com/blog/2025-data-analytics-priorities-what-really-matters/]
- 11. Data lifecycle: The 8 stages and who is involved [https://www.knime.com/blog/the-data-lifecycle]
- 12. Data Analytics Reporting 2025 in X Steps [https://dotanalytics.ai/blog/data-analytics-reporting-in-2025-how-to-get-data-analysis-reports-in-x-steps/]
- 13. 8 Key Steps to Implement Data Analytics into Your Business [https://www.phygital-insights.com/blog/steps-to-implement-data-analytics]
- 14. Frontiers | Evaluation of image analysis tools for the measurement of... [https://www.frontiersin.org/journals/cell-and-developmental-biology/articles/10.3389/fcell.2025.1572212/full]
- 15. Target identification and mechanism of action in chemical ... [https://pmc.ncbi.nlm.nih.gov/articles/PMC5543995/]
- 16. Target identification by structure-based computational ... [https://www.sciencedirect.com/science/article/pii/S0960894X23000495]
- 17. Artificial Intelligence-Driven Drug Toxicity Prediction [https://pmc.ncbi.nlm.nih.gov/articles/PMC12299075/]
- 18. Mechanism of Action and Target Identification - PubMed Central [https://pmc.ncbi.nlm.nih.gov/articles/PMC7479624/]
- 19. Interpreting Image-based Profiles using Similarity ... [https://pmc.ncbi.nlm.nih.gov/articles/PMC10027367/]
- 20. Data-analysis strategies for image-based cell profiling [https://www.nature.com/articles/nmeth.4397]
- 21. How Accessibility Standards Can Empower Better Chart ... [https://www.smashingmagazine.com/2024/02/accessibility-standards-empower-better-chart-visual-design/]
- 22. Morphological Analysis - an overview [https://www.sciencedirect.com/topics/computer-science/morphological-analysis]
- 23. High-Dimensional Gene Expression and Morphology ... [https://pmc.ncbi.nlm.nih.gov/articles/PMC10012424/]
- 24. How to build accessible graph visualization tools [https://cambridge-intelligence.com/build-accessible-data-visualization-apps-with-keylines/]
- 25. JUMP-Cell Painting Consortium [https://jump-cellpainting.broadinstitute.org/]
- 26. EU-OPENSCREEN: Home [https://www.eu-openscreen.eu/]
- 27. More info | JUMP-Cell Painting Consortium - Broad Institute [https://jump-cellpainting.broadinstitute.org/more-info]
- 28. JUMP Cell Painting Hub - Broad Institute [https://broadinstitute.github.io/jump_hub/]
- 29. Generating realistic single-cell images from CellProfiler ... [https://www.sciencedirect.com/science/article/abs/pii/S1361841525001215]
- 30. Set and modify color palette for output of ClassifyObjects ... [https://forum.image.sc/t/set-and-modify-color-palette-for-output-of-classifyobjects-module-colorblind/55228]
- 31. Cellprofiler 4.2.8 does not start on Windows 10-11 [https://forum.image.sc/t/cellprofiler-4-2-8-does-not-start-on-windows-10-11/102073]
- 32. How to assign specific colors to Objects based on ... [https://forum.image.sc/t/how-to-assign-specific-colors-to-objects-based-on-meanintensity-measurements/24797]
- 33. CellProfiler Analyst: data exploration and analysis software for ... [https://pmc.ncbi.nlm.nih.gov/articles/PMC2614436/]
- 34. A scalable, data analytics workflow for image-based ... [https://www.sciencedirect.com/science/article/pii/S0169743924001722]
- 35. Evaluation of image analysis tools for the measurement of ... [https://pmc.ncbi.nlm.nih.gov/articles/PMC12119626/]
- 36. A Survey of the Self Supervised Learning Mechanisms for ... [https://arxiv.org/html/2408.17059v6]
- 37. Revisiting MAE pre-training for 3D medical image ... [https://arxiv.org/html/2410.23132v3]
- 38. DINOv3: Self-supervised learning for vision at ... [https://ai.meta.com/blog/dinov3-self-supervised-vision-model/]
- 39. CVT-SimCLR: Contrastive visual representation learning ... [https://www.sciencedirect.com/science/article/abs/pii/S1566253525007237]
- 40. [2509.20787] Real-Time Object Detection Meets DINOv3 [https://arxiv.org/abs/2509.20787]
- 41. Contrastive Learning in 2025: How AI Models ... [https://medium.com/@anirudhsekar2008/contrastive-learning-in-2025-how-ai-models-learn-by-comparing-bf4b9b906e5b]
- 42. Whole-cell segmentation of tissue images with human-level ... [https://pmc.ncbi.nlm.nih.gov/articles/PMC9010346/]
- 43. Introduction to Digital Image Analysis in Whole-slide Imaging [https://www.sciencedirect.com/science/article/pii/S2153353922003728]
- 44. Segmentation aware probabilistic phenotyping of single ... [https://pmc.ncbi.nlm.nih.gov/articles/PMC11700195/]
- 45. Cell Segmentation With Globally Optimized Boundaries ... [https://pmc.ncbi.nlm.nih.gov/articles/PMC12305447/]
- 46. The Definitive Guide to Cell Segmentation Analysis [https://blog.biodock.ai/definitive-guide-to-cell-segmentation-analysis/]
- 47. challenges and advances in identifying cells in microscopy ... [https://www.sciencedirect.com/science/article/abs/pii/S0958166923001659]
- 48. Single cell resolution 3D imaging and segmentation within ... [https://www.nature.com/articles/s44303-025-00099-7]
- 49. BIDCell: Biologically-informed self-supervised learning for ... [https://www.nature.com/articles/s41467-023-44560-w]
- 50. Unsupervised Learning in Drug Design from Self-Organization ... [https://pmc.ncbi.nlm.nih.gov/articles/PMC8910896/]
- 51. Unsupervised Learning in Drug Discovery [https://pharmafeatures.com/deciphering-the-unseen-unsupervised-learning-in-drug-discovery/]
- 52. Morphogenie: A software tool for simulating morphogenesis [http://celldynamics.org/celldynamics/downloads/morphogenie/Morphogenie_desc.html]
- 53. An Overview of Unsupervised Machine Learning in Drug ... [https://www.auctoresonline.org/article/an-overview-of-unsupervised-machine-learning-in-drug-discovery-pharmacogenomics-and-pharmacovigilance]
- 54. Negative control-calibrated difference-in-difference analyses [https://www.nature.com/articles/s41746-025-01821-w]
- 55. Advances in methodologies of negative controls: a scoping ... [https://www.sciencedirect.com/science/article/pii/S0895435623003189]
- 56. A Troubleshooting Guide for Common Issues in STR Analysis [https://www.forensicmag.com/Forensic-Tips/613460-A-Troubleshooting-Guide-for-Common-Issues-in-STR-Analysis/]
- 57. Deep3DSIM: Super-resolution imaging of thick tissue using ... [https://elifesciences.org/articles/102144]
- 58. A BaSiC tool for background and shading correction of ... [https://www.nature.com/articles/ncomms14836]
- 59. Uneven illumination correction of digital images: A survey ... [https://www.sciencedirect.com/science/article/abs/pii/S0030402619302359]
- 60. Comparison of prospective and retrospective motion ... [https://pmc.ncbi.nlm.nih.gov/articles/PMC8635810/]
- 61. Near-isotropic super-resolution microscopy with axial ... [https://pmc.ncbi.nlm.nih.gov/articles/PMC12537971/]
- 62. Oblique line scan illumination enables expansive, accurate ... [https://www.nature.com/articles/s41592-025-02594-6]
- 63. Segmentation in Machine Learning: Five Challenges and ... [https://www.cloudfactory.com/blog/five-segmentation-challenges-in-machine-learning]
- 64. python - Low contrast resolution high - Stack Overflow segmentation [https://stackoverflow.com/questions/78362325/low-contrast-high-resolution-segmentation]
- 65. Comparison of semi-automatic and deep learning-based ... [https://pmc.ncbi.nlm.nih.gov/articles/PMC7075579/]
- 66. A Multi-center Study on the Reproducibility of Drug ... [https://pmc.ncbi.nlm.nih.gov/articles/PMC6700527/]
- 67. Understanding and Mitigating Batch Effects in Histopathology [https://www.trillium.de/en/journals/trillium-pathology/archive/2025/tp-1/2025/computational-pathology/image-analysis-understanding-and-mitigating-batch-effects-in-histopathology.html]
- 68. Research Reproducibility in Longitudinal Multi-Center ... [https://pmc.ncbi.nlm.nih.gov/articles/PMC5001777/]
- 69. An order-preserving batch-effect correction method based ... [https://pmc.ncbi.nlm.nih.gov/articles/PMC12207412/]
- 70. ArtSeg—Artifact segmentation and removal in brightfield ... [https://www.nature.com/articles/s41598-022-14703-y]
- 71. Perception-guided defocus blur detection based on SVD ... [https://www.sciencedirect.com/science/article/abs/pii/S0262885623002196]
- 72. Hyperspectral imaging for non-invasive blood oxygen ... [https://www.sciencedirect.com/science/article/pii/S1572100024000425]
- 73. Capturing cell heterogeneity in representations of cell ... [https://pmc.ncbi.nlm.nih.gov/articles/PMC11312468/]
- 74. Capturing single-cell heterogeneity via data fusion ... [https://www.nature.com/articles/s41467-019-10154-8]
- 75. Troubleshooting Protocols - Biological Sciences: Summer ... [https://guides.library.cmu.edu/biologicalsciencesSRI/troubleshooting]
- 76. Image-Based Profiling: Techniques & Applications [https://www.emergentmind.com/topics/image-based-profiling]
- 77. Self-supervision advances morphological profiling by ... [https://www.nature.com/articles/s41598-025-88825-4]
- 78. Comparison of methods for image-based profiling of cellular ... [https://pmc.ncbi.nlm.nih.gov/articles/PMC3884769/]
- 79. CellProfiler [https://cellprofiler.org/]
- 80. CellProfiler: image analysis software for identifying and ... [https://pmc.ncbi.nlm.nih.gov/articles/PMC1794559/]
- 81. Exploring Non-contrastive Self-supervised Representation ... [https://arxiv.org/html/2506.14265v1]
- 82. Scaling Biological Representation Learning for Cell ... [https://arxiv.org/html/2411.02572v2]
- 83. uniDINO: Assay-independent feature extraction for ... [https://www.sciencedirect.com/science/article/pii/S2001037025000479]
- 84. Perturbation Sensitivity Analysis to Detect Unintended ... [https://aclanthology.org/D19-1578/]
- 85. Prioritizing perturbation-responsive gene patterns using ... [https://www.nature.com/articles/s41467-025-61476-9]
- 86. Systema: a framework for evaluating genetic perturbation ... [https://www.nature.com/articles/s41587-025-02777-8]
- 87. Transfer learning of condition-specific perturbation in gene ... [https://pmc.ncbi.nlm.nih.gov/articles/PMC11256952/]