Optimizing Dye Concentrations for Live-Cell Phenotypic Screening: A Guide to Enhanced Assay Performance
Live-cell phenotypic screening provides dynamic, real-time insights into cellular responses but requires careful optimization of dye concentrations to balance signal intensity with cell viability.
Optimizing Dye Concentrations for Live-Cell Phenotypic Screening: A Guide to Enhanced Assay Performance
Abstract
Live-cell phenotypic screening provides dynamic, real-time insights into cellular responses but requires careful optimization of dye concentrations to balance signal intensity with cell viability. This article synthesizes current methodologies for researchers and drug development professionals, covering foundational principles of compatible dyes like MitoBrilliant and ChromaLive, practical protocols for iterative staining and concentration titration, strategies to mitigate phototoxicity and maintain signal stability, and validation through benchmark compounds and cross-assay comparisons. By integrating these elements, this guide aims to equip scientists with the knowledge to generate robust, high-quality morphological profiles that accurately capture compound-induced phenotypic changes.
The Principles and Probes of Live-Cell Phenotypic Profiling
Defining Live-Cell Phenotypic Screening and Its Core Challenges
Frequently Asked Questions
1. What is live-cell phenotypic screening and how does it differ from fixed-cell assays? Live-cell phenotypic screening is an image-based profiling technique used to identify substances that alter cellular phenotype by monitoring biological processes in living cells in real time. Unlike fixed-cell assays, which provide a single snapshot of cellular state after fixation, live-cell imaging enables the study of dynamic processes, acquisition of kinetic data, and analysis of reversible events without fixation-related artifacts [1].
2. What are the primary advantages of using live-cell phenotypic screening in drug discovery? The key advantages include the ability to:
- Capture dynamic biological processes and real-time cellular responses [1].
- Observe subtle, sublethal phenotypic changes that might be missed in endpoint assays [1].
- Track the fate of individual cells over time and monitor reversible events [1].
- Reduce the risk of fixation artifacts that can alter cellular morphology [1].
3. What is the main challenge associated with dye concentration in live-cell imaging? Dye concentration is critical because it must be carefully optimized for each cell line to balance sufficient signal intensity with the avoidance of cytotoxicity or nonspecific staining. Suboptimal concentrations can lead to weak data, phototoxic effects, and inaccurate interpretation of results [1].
4. Which fluorescent dye is commonly used for accessible live-cell phenotypic profiling? Acridine orange (AO) is a metachromatic dye that highlights cellular organization by staining nucleic acids (emitting green) and acidic compartments like lysosomes (emitting red). It provides a two-channel readout for visualizing nuclei, cytoplasmic organelles, and cell shape in live cells [1].
5. How can I address photobleaching and phototoxicity in my live-cell screens? Photobleaching and phototoxicity are common limitations. Mitigation strategies include:
- Carefully optimizing dye concentration and exposure time [1].
- Using imaging systems with sensitive detectors to minimize light exposure.
- Employing low-light settings and acquiring images at longer intervals for long-term experiments.
Troubleshooting Guides
Problem 1: Poor or Inconsistent Staining with Acridine Orange
| Symptom | Possible Cause | Solution |
|---|---|---|
| Weak nuclear or cytoplasmic signal | Dye concentration too low for the specific cell line | Titrate the dye. Test a range of concentrations (e.g., 1-20 µM) to find the optimal signal-to-noise ratio for your cells [1]. |
| Excessive photobleaching | Dye concentration too high; prolonged light exposure | Optimize dye concentration and reduce exposure time during image acquisition [1]. |
| High cytotoxicity or abnormal cell morphology | Dye concentration is toxic to the cells | Reduce the working concentration of the dye and shorten the incubation time if possible [1]. |
| Nonspecific staining or high background | Impurities in dye stock or inadequate washing | Ensure proper preparation of dye stock solutions and include gentle washing steps with buffer after staining [1]. |
Problem 2: Suboptimal Image Segmentation and Analysis
| Symptom | Possible Cause | Solution |
|---|---|---|
| Software fails to identify individual cells | Low contrast between cells and background; over-confluent culture | Re-optimize staining and image acquisition settings. Ensure cells are seeded at an appropriate, sub-confluent density to allow clear separation [2]. |
| Inaccurate quantification of organelles | Spectral crosstalk between channels when using multiple dyes | Use dyes with well-separated emission spectra and acquire channels sequentially instead of simultaneously to minimize bleed-through [2]. |
| High well-to-well variability leading to poor data quality | Edge effects in microplates; batch effects in plating | Do not use peripheral wells for experiments; fill them with sterile PBS or water. Randomize the plate layout across experimental replicates to minimize batch effects [1]. |
Problem 3: Difficulty Distinguishing Compound Mechanisms of Action (MoA)
| Symptom | Possible Cause | Solution |
|---|---|---|
| Phenomic profiles for different MoAs are not distinct | The assay lacks sufficient biological or morphological context | Profile compounds across multiple cell lineages. Different cell types can reveal unique, MoA-specific responses [3]. |
| The set of measured features is too limited | Incorporate additional fluorescent markers. Expand the multiplexing capacity to capture a wider array of organelles and pathways [2] [3]. | |
| Screening at a single concentration | Screen at multiple concentrations. Testing multiple compound doses can better resolve MoAs than including replicates at a single concentration [3]. |
Experimental Protocols
Detailed Methodology: Live Cell Painting with Acridine Orange
This protocol provides a cost-effective and scalable method for live-cell phenotypic profiling [1].
1. Cell Culture and Plate Preparation
- Cell Line: MCF-7 cells (or other relevant lines like Huh-7, PNT1A).
- Culture Conditions: Maintain cells in RPMI-1640 medium supplemented with 10% FBS and 1% penicillin-streptomycin at 37°C and 5% CO₂.
- Seeding: Upon reaching 80% confluency, detach cells with 0.1% trypsin. Count viable cells using trypan blue and a hemocytometer.
- Plating: Seed 8 x 10² viable cells per well in a 96-well black polystyrene microplate with an optically clear bottom. To prevent edge effects, do not plate cells in the peripheral wells; instead, fill these wells with sterile PBS.
- Incubation: Allow the plate to rest in a laminar flow hood for 20 minutes for even cell adhesion, then incubate for 24 hours.
2. Staining with Acridine Orange (AO)
- Stock Solution: Prepare a 1 mM stock solution of AO in distilled water. Aliquot and store at -20°C.
- Working Solution: On the day of the experiment, dilute the stock in unsupplemented, phenol-free medium (e.g., FluoroBrite DMEM) to create a 10 µM working solution. Note: This concentration was optimized for MCF-7 cells and must be titrated for other cell lines. [1]
- Staining: Carefully aspirate the culture medium from each well and add 100 µL of the AO working solution.
- Incubation: Incubate the plate for 30 minutes at 37°C and 5% CO₂, protected from light.
3. Live-Cell Imaging
- Microscope Setup: Use a fluorescence microscope equipped with a live-cell incubation chamber (maintaining 37°C and 5% CO₂).
- Filter Sets: Acquire images using:
- DAPI/GFP channel: For AO-stained nuclei (Ex ~469 nm, Em ~525 nm).
- RFP/TRITC channel: For AO-stained acidic vesicles (Ex ~531 nm, Em ~647 nm).
- Imaging: Image cells using a 20x objective. Begin imaging immediately after staining.
4. Image and Data Analysis
- Software: Use open-source tools like CellProfiler (version 4.2.5) and CellProfiler Analyst for image segmentation, feature extraction, and data analysis. CellPose can be used for refined segmentation.
- Analysis Pipeline: The standard workflow includes:
- Image preprocessing and quality control.
- Segmentation of nuclei and cytoplasm.
- Extraction of hundreds of morphological features (size, shape, texture, intensity) from each cell.
- Aggregation and normalization of data.
- Multivariate analysis (e.g., using Python libraries like scikit-learn and pandas) to generate phenotypic profiles and compare compound treatments.
Optimizing Dye Concentrations: A Quantitative Guide
The table below summarizes key reagents and optimization data for live-cell phenotypic screening, with a focus on Acridine Orange.
Table: Research Reagent Solutions for Live-Cell Phenotypic Screening
| Reagent / Dye | Function / Target | Recommended Concentration Range | Key Considerations & Optimization Tips |
|---|---|---|---|
| Acridine Orange (AO) [1] | Metachromatic dye staining nucleic acids (green) & acidic compartments (red) | Stock: 1 mM (in H₂O). Working: 10 µM (for MCF-7) | Critical to titrate for each cell line. Start with 1-20 µM. High concentrations cause cytotoxicity and photobleaching. |
| MitoBrilliant [4] | Live-cell compatible dye for mitochondria | As per manufacturer's protocol | Can replace MitoTracker in standard panels with minimal performance impact. |
| Phenovue phalloidin 400LS [4] | Long stoke shifted dye for actin cytoskeleton | As per manufacturer's protocol | Can replace standard phalloidin; allows use of an additional dye in the 568 nm channel. |
| ChromaLive [4] | Live-cell compatible dye panel for morphological profiling | As per manufacturer's protocol | Enables real-time assessment; performance differs from fixed-cell assays, with later time points often more distinct. |
| Hoechst 33342 [1] | Cell-permeant nuclear counterstain for live cells | 0.5 - 5 µg/mL | Optional addition to an AO stain to provide a more specific nuclear signal. |
Workflow and Pathway Diagrams
The following diagram illustrates the complete experimental workflow for a live-cell phenotypic screening assay using Acridine Orange.
Live-Cell Phenotypic Screening Workflow
The diagram below outlines a logical decision-making pathway for addressing the core challenge of optimizing dye concentrations in live-cell experiments.
Dye Concentration Optimization Path
Troubleshooting Guides
How can I minimize phototoxicity during long-term live-cell imaging?
Problem: Cell viability decreases or morphological changes occur during extended time-lapse imaging sessions due to phototoxicity.
Solutions:
- Use Red/Near-Infrared Dyes: Employ fluorescent probes in the red and near-infrared spectrum (e.g., Nile Red) as they possess higher photon energy, reduced scattering, and deeper tissue penetration, which collectively minimize light-induced stress on cells [5] [6].
- Optimize Imaging Parameters: Implement advanced microscopy techniques such as Fast FLIM (Fluorescence Lifetime Imaging) and STED (Stimulated Emission Depletion) nanoscopy. These methods enhance signal-to-noise ratio and spatial resolution, allowing you to reduce overall light exposure [5].
- Utilize Environment-Sensitive Probes: Choose dyes whose emission properties change with the local environment, such as Nile Red. This enables ratiometric imaging (collecting two emission channels) which provides more robust data with less light exposure compared to intensity-based measurements alone [6].
Why is my dye not providing specific organelle labeling?
Problem: Non-specific or diffuse staining pattern makes it difficult to distinguish target organelles.
Solutions:
- Verify Targeting Moieties: Ensure your dye structure contains the correct organelle-targeting group. Common examples include:
- Optimize Staining Conditions: Carefully adjust dye concentration and incubation time for each cell type. For example, when using Acridine Orange (AO) for live cell painting, test concentrations around 10 μM as a starting point, but optimize for your specific cell line as uptake and sensitivity vary [1].
- Confirm Probe Properties: For super-resolution techniques like SIM, ensure the dye has a high quantum yield, narrow emission spectrum, and photostability to maintain signal clarity throughout acquisition [7].
How can I achieve multiplexed imaging of multiple organelles with limited fluorescent channels?
Problem: The number of resolvable fluorescence colors is typically less than the number of organelle types you need to track simultaneously.
Solutions:
- Implement "One-to-Many" Staining Strategy: Use a single environmentally-sensitive dye like Nile Red that stains multiple membrane-associated organelles. Due to chromatic polarity sensitivity, the emission spectrum shifts based on the lipid composition of different organelles, enabling discrimination of multiple structures from a single dye [6].
- Combine with Computational Segmentation: After staining with a broad-spectrum dye like Nile Red, use Deep Convolutional Neural Networks (DCNN) to segment up to 15 different subcellular structures based on their spectral ratio "fingerprints" and morphology from high-resolution images [6].
- Apply Lifetime-Based Unmixing: Utilize Fluorescence Lifetime Imaging (FLIM) where dyes with similar emission spectra but different fluorescence lifetimes can be distinguished during processing, enabling flexible multiplexing beyond the limits of spectral separation [5].
Frequently Asked Questions (FAQs)
What are the key advantages of TADF probes over conventional fluorescent dyes?
Thermally Activated Delayed Fluorescence (TADF) probes offer several distinct advantages for live-cell imaging:
- Superior Signal-to-Noise Ratio: TADF materials exhibit long-lived emission lifetimes (typically microseconds to milliseconds). This enables time-gated detection that effectively suppresses short-lived autofluorescence (1-10 ns) from biological samples, significantly improving image clarity [8].
- Heavy-Metal Free Composition: Unlike phosphorescent probes that require toxic heavy metals like iridium or platinum, TADF probes are purely organic molecules, offering better biocompatibility and environmental friendliness [8].
- Efficient Triplet Exciton Utilization: TADF mechanisms efficiently harvest triplet excitons through reverse intersystem crossing (RISC), theoretically achieving 100% exciton utilization efficiency without requiring precious metals [8].
How do I choose between different super-resolution techniques for my live-cell imaging?
The choice depends on your specific requirements for resolution, imaging speed, and phototoxicity:
- SIM (Structured Illumination Microscopy): Ideal for dynamic imaging of live cells. Advantages include fast imaging speed, simple equipment, low light damage, and compatibility with various fluorescent dyes. Resolution is typically improved to about 100 nm, which may be lower than other super-resolution methods [7].
- STED (Stimulated Emission Depletion): Better suited for high-resolution static imaging. Provides higher resolution than SIM but has slower imaging speed, higher phototoxicity, and more stringent sample requirements [7].
- SMLM/STORM (Single Molecule Localization Methods): Optimal for ultra-high resolution imaging of fixed samples. Delivers extremely high resolution (molecular scale) but has very slow imaging speed, significant photobleaching issues, and complex sample preparation, making it less suitable for extensive live-cell studies [7].
What are the critical factors in maintaining cell viability during live-cell painting?
When implementing live cell painting with dyes like Acridine Orange (AO), consider these critical factors:
- Concentration Optimization: AO concentration must be carefully titrated for each cell line. While 10 μM works for MCF-7 cells, other lines may require different concentrations to avoid cytotoxicity or nonspecific staining [1].
- Environmental Control: Maintain proper temperature (37°C), CO₂ (5%), and humidity (83-95%) throughout imaging using an environmental chamber to ensure normal cell physiology [1].
- Photobleaching Management: AO is prone to photobleaching. Optimize exposure time, light intensity, and acquisition intervals to balance signal quality with cell health [1].
- Appropriate Controls: Include untreated controls and validate that any observed phenotypic changes are due to experimental perturbations rather than the staining or imaging process itself [1].
Quantitative Data Tables
Table 1: Photophysical Properties of Live-Cell Compatible Dyes
| Dye Class | Example Dyes | Emission Range (nm) | Lifetime Range | Quantum Yield | Primary Applications |
|---|---|---|---|---|---|
| TADF Probes | 4CzIPN, AI-Cz series | 450-650 [8] | Microseconds to milliseconds [8] | Varies by structure; optimized through molecular design [8] | FLIM, time-resolved imaging, organelle tracking [8] |
| Environment-Sensitive | Nile Red | 617-685 (spectrum shifts with polarity) [6] | Not specified | Environment-dependent [6] | Multiplex organelle imaging, lipid membrane studies [6] |
| Nucleic Acid/Acidic Compartment | Acridine Orange (AO) | Green (nuclei) & Red (acidic compartments) [1] | Not specified | Metachromatic - varies with binding [1] | Live cell painting, phenotypic profiling [1] |
| Red/NIR Viable Dyes | Not specified | Red & Near-Infrared [5] | Compatible with FLIM [5] | High for minimal photon dose [5] | Long-term timelapse, deep tissue imaging [5] |
Table 2: Performance Comparison of Super-Resolution Techniques for Live-Cell Imaging
| Technique | Practical Resolution | Imaging Speed | Phototoxicity | Live-Cell Compatibility | Multiplexing Capacity |
|---|---|---|---|---|---|
| SIM | ~100 nm [7] | High (fast imaging) [7] | Low [7] | Excellent [7] | Moderate (wide choice of dyes) [7] |
| STED | Higher than SIM [7] | Slow [7] | High [7] | Moderate (limited by phototoxicity) [7] | Limited (typically 2-3 colors) [9] |
| SMLM/STORM | ~20 nm (extremely high) [7] | Very slow [7] | High [7] | Poor (primarily for fixed cells) [7] | Challenging for live cells [7] |
| Spinning-Disk with Deep Learning | ~143 nm (with resolution enhancement) [6] | High [6] | Moderate [6] | Good [6] | High (15 structures from 1 dye) [6] |
Experimental Protocols
Protocol: Live Cell Painting with Acridine Orange for Phenotypic Screening
Purpose: To perform high-content analysis (HCA) and morphological profiling of live cells using Acridine Orange (AO) staining [1].
Materials and Reagents:
- MCF-7 cells (or your cell line of interest)
- RPMI-1640 medium supplemented with 10% FBS and 1% penicillin-streptomycin
- 0.1% trypsin-EDTA solution
- Acridine Orange (AO) stock solution (1 mM in distilled water, stored at -20°C)
- Black polystyrene microplates with μClear flat bottom (96-well)
- Fluorescence microscope equipped for live-cell imaging with environmental control (37°C, 5% CO₂)
- Filter sets: GFP (EX 469/35 nm, EM 525/39 nm) and PI (EX 531/40 nm, EM 647/57 nm) channels
Procedure:
- Cell Culture and Plating:
- Culture MCF-7 cells in complete medium until 80% confluency.
- Detach cells using 0.1% trypsin and count viable cells.
- Seed 8 × 10² viable cells per well in 96-well black μClear plates.
- Let plates rest in laminar flow hood for 20 minutes for even adhesion.
- Incubate for 24 hours at 37°C, 5% CO₂, and 95% humidity.
Staining Solution Preparation:
- Prepare 10 μM AO working solution in non-supplemented RPMI-1640 medium from 1 mM stock.
- Note: This concentration is optimized for MCF-7 cells; titration may be needed for other cell lines.
Staining Protocol:
- Carefully aspirate culture medium from each well.
- Add 100 μL of 10 μM AO working solution to each well.
- Incubate for appropriate time (optimize for your cell line).
- For immediate imaging, no wash step is required.
Image Acquisition:
- Image using a fluorescence microscope with environmental control maintained.
- Acquire images using both GFP and PI channel filter sets to capture AO's metachromatic staining (nucleic acids in green, acidic compartments in red).
- For time-course studies, set appropriate acquisition intervals to minimize phototoxicity.
Image Analysis:
- Use CellProfiler (version 4.2.5) or similar software for image analysis.
- Employ CellPose (version 2.2.3) for deep learning-based segmentation if needed.
- Extract multiparametric data including nuclear morphology, cytoplasmic organization, and vesicle distribution.
Protocol: Multiplexed Organelle Imaging with Nile Red and Deep Learning Segmentation
Purpose: To simultaneously image and segment multiple organelles in live cells using a single dye (Nile Red) combined with computational analysis [6].
Materials and Reagents:
- Nile Red dye
- Appropriate cell culture medium for your cell line
- Glass-bottom dishes or plates suitable for high-resolution microscopy
- Spinning-disk confocal microscope with high numerical aperture objective
- Setup for two emission channels: 617/73 nm and 685/40 nm
Procedure:
- Cell Staining:
- Culture cells to appropriate density on glass-bottom dishes.
- Stain live cells with Nile Red according to optimized concentration for your cell line.
- No wash steps are required after staining.
Microscope Setup:
- Use a spinning-disk confocal microscope with resolution of ~143 nm or better.
- Set up two emission detection channels: 617/73 nm (yellow channel) and 685/40 nm (red channel).
- Use 473 nm or 488 nm laser for excitation.
Image Acquisition:
- Acquire ratiometric images by collecting both emission channels simultaneously.
- For 3D structures, acquire z-stacks with appropriate step size.
- Maintain consistent imaging parameters across experiments for reproducible spectral ratios.
Ground Truth Generation (for training custom models):
- For each organelle type, transfer cells with organelle-specific GFP plasmids.
- Image the same cells with both GFP channel and Nile Red ratiometric channels.
- Use the GFP signal to create ground truth mask images for each organelle type.
Deep Learning Segmentation:
- Train Deep Convolutional Neural Networks (DCNN) using both intensity and ratiometric images as inputs and ground truth masks as targets.
- Alternatively, use pre-trained models and apply transfer learning for your specific cell type or microscope.
- Apply the trained network to segment up to 15 different subcellular structures from new Nile Red ratiometric images.
Validation:
- Validate segmentation accuracy by comparing with known organelle markers.
- Test robustness across different cell types, microscope systems, and imaging conditions.
Signaling Pathways and Workflows
Live-Cell Imaging Workflow Optimization
Multiplexed Organelle Imaging with Computational Segmentation
The Scientist's Toolkit: Research Reagent Solutions
Table 3: Essential Materials for Live-Cell Imaging Experiments
| Reagent Category | Specific Examples | Function/Application | Key Considerations |
|---|---|---|---|
| Live-Cell Dyes | Acridine Orange (AO) [1] | Metachromatic staining of nucleic acids (green) and acidic compartments (red) for live cell painting | Concentration must be optimized per cell line; prone to photobleaching |
| Environment-Sensitive Probes | Nile Red [6] | Stains multiple membrane-associated organelles; emission shifts with lipid polarity enable multiplexing | No wash required; enables ratiometric imaging; compatible with deep learning segmentation |
| TADF Materials | 4CzIPN, AI-Cz series [8] | Time-resolved imaging with long lifetimes suppresses autofluorescence | Pure organic composition; requires protection from oxygen quenching |
| Targeting Moieties | TPP (mitochondria) [7], Morpholine (lysosomes) [7] | Directs probes to specific organelles based on chemical properties | Must be incorporated into probe design; specificity depends on cellular context |
| Cell Culture Materials | Black μClear plates [1], Environmental chambers [1] | Maintain cell viability during imaging; optimize optical properties | Environmental control (37°C, 5% CO₂) critical for long-term imaging |
| Computational Tools | CellProfiler [1], CellPose [1], Deep Convolutional Neural Networks [6] | Image analysis, segmentation, and phenotypic profiling | Training data quality determines segmentation accuracy; transfer learning enables adaptation |
FAQs on Dye Properties and Experimental Optimization
1. What are the primary causes of phototoxicity in live-cell imaging, and how can I minimize it? Phototoxicity is caused by the generation of reactive oxygen species (ROS) when fluorescent dyes are excited by light, particularly at shorter wavelengths [10]. This can disrupt cellular function, compromise data quality, and lead to experimental artifacts. Minimization strategies include:
- Use Lower Energy Light: Select dyes excited by longer wavelengths (red and near-infrared spectrum), which are less energetic and penetrate more deeply with reduced scattering [11] [10].
- Optimize Imaging Parameters: Use the lowest laser intensity and shortest exposure time necessary to obtain a clear signal. Reducing the frame rate during time-lapse imaging also helps [11].
- Choose Gentler Imaging Modalities: For long-term live imaging, techniques like light sheet fluorescence microscopy or spinning disk confocal are preferred over more phototoxic super-resolution methods [11].
2. How can I improve the signal stability of dyes during long-term time-lapse experiments? Signal instability, or photobleaching, occurs as dyes permanently lose their fluorescence upon repeated excitation [11]. To improve stability:
- Select Photostable Dyes: Choose dyes known for high photostability, such as many Alexa Fluor dyes [12].
- Employ Anti-Photobleaching Strategies: Use camera binning to enhance the signal-to-noise ratio and ensure your imaging system is perfectly aligned [11].
- Use Specialized Media: Switch to phenol red-free media or specialized live-cell imaging solutions like FluoroBrite DMEM to reduce background fluorescence and light-induced damage [13] [1].
3. What factors influence dye permeability, and how can I label intracellular targets effectively? Dye permeability is determined by its molecular size, charge, and hydrophobicity. Small, lipophilic dyes often pass through membranes easily [14]. For challenging targets:
- Use Cell-Permeant Formulations: Many commercially available dyes (e.g., CellTracker, MitoTracker) are designed to be cell-permeant [13].
- Leverage Advanced Delivery Technologies: For impermeable dyes, use delivery peptides like the cell-penetrating peptide (rR)3R2, which can transport conjugated dyes and recognition units directly into the cytosol [15].
- Validate Specificity: Always perform control experiments to confirm that the dye is labeling its intended target and not exhibiting nonspecific binding [14].
4. Can I substitute dyes in a standard panel like Cell Painting, and what are the performance implications? Yes, dye substitutions are possible and sometimes necessary. Research shows that substituting MitoTracker with MitoBrilliant or standard phalloidin with Phenovue phalloidin 400LS in the Cell Painting assay has minimal impact on the overall performance of the phenotypic profile [4]. These alternatives can offer advantages such as better spectral separation or compatibility with specific experimental setups [4].
Troubleshooting Guides
Problem: High Cell Death During or After Live-Cell Imaging
| Potential Cause | Diagnostic Steps | Corrective Action |
|---|---|---|
| Dye Cytotoxicity | Check viability in stained but unilluminated controls. Test different dye batches. | Titrate dye concentration to the lowest effective dose [11]. Consider using dyes with tunable cytotoxicity via counterion pairing [10]. |
| Excessive Phototoxicity | Observe morphological signs of stress (e.g., blebbing) immediately after illumination. | Shift to longer-wavelength dyes [11]. Reduce light intensity and exposure time [11]. Use a gentler imaging modality (e.g., light sheet) [11]. |
| Poor Environmental Control | Monitor temperature and CO₂ levels on the stage. Check for media evaporation. | Use an on-stage incubator. For long experiments without CO₂ control, use HEPES-buffered media or a larger media volume [11]. |
Problem: High Background Noise or Non-Specific Staining
| Potential Cause | Diagnostic Steps | Corrective Action |
|---|---|---|
| Over-labeling | Perform a dose-response curve to measure signal-to-noise ratio. | Optimize dye concentration and incubation time [11]. Ensure adequate washing steps post-staining [14]. |
| Dye Aggregation | Check for uneven staining or punctate signals that don't match expected organelle morphology. | Use dyes formulated for aqueous solutions. Include dispersing agents in the buffer if needed. |
| Autofluorescence | Image an unstained control under the same settings. | Use glass-bottom dishes instead of plastic. Use phenol red-free and low-fluorescence media [11]. Select dyes with emissions in spectral regions with low cellular autofluorescence [10]. |
Problem: Unstable or Fading Signal (Photobleaching)
| Potential Cause | Diagnostic Steps | Corrective Action |
|---|---|---|
| High Excitation Energy | Check if signal decays rapidly during acquisition. | Lower laser power or shorten exposure time [11]. Use a more photostable dye (e.g., Alexa Fluor, SiR dyes) [11] [12]. |
| Prolonged Exposure | Signal fades over the course of a long time-lapse. | Increase the time interval between image acquisitions. Use a sensitive camera to allow for lower light levels [11]. |
| Oxidative Environment | Compare bleaching rates in different media. | Use imaging media lacking reactive components. Consider commercial anti-fade reagents (note: many are for fixed cells only). |
Quantitative Dye Property Data
Table 1: Properties of Selected Live-Cell Imaging Dyes and Suggested Concentrations
| Dye Name | Target | Typical Working Concentration | Key Properties & Considerations |
|---|---|---|---|
| MitoTracker Deep Red [13] | Mitochondria | 50-250 nM | Cell-permeant; accumulates in active mitochondria; covalently binds after fixation. |
| LysoTracker Deep Red [13] | Lysosomes | 50-100 nM | Accumulates in acidic compartments; use at lower concentrations to avoid osmotic disruption. |
| CellMask Orange Actin [13] | Actin Cytoskeleton | As per mfr. protocol (e.g., 1:1000) | Live-cell compatible; allows tracking of actin dynamics over 24+ hours. |
| CellEvent Caspase-3/7 [13] | Apoptosis | 0.5-5 µM | Fluorogenic; activated by caspase-3/7; minimal background; compatible with long-term imaging (48-72 hrs). |
| Acridine Orange (AO) [1] | Nucleic Acids / Acidic Vesicles | 10 µM (optimize per cell line) | Metachromatic; emits green for DNA/RNA, red in acidic compartments; cost-effective; prone to photobleaching. |
| TMRM/TMRE [13] | Mitochondrial Membrane Potential | 20-200 nM | Cationic, potentiometric; distribution is potential-dependent; reversible binding. |
| Hoechst 33342 [13] | Nuclear DNA | 1-5 µg/mL | Cell-permeant; minimal cytotoxicity at recommended concentrations; end-point or short-term use. |
Table 2: Impact of Counterion Pairing on Heptamethine Cyanine Dye (Cy+) Toxicity [10]
| Counterion Paired with Cy+ | Relative Cytotoxicity (Dark) | Relative Phototoxicity (Upon Illumination) | Suggested Application Profile |
|---|---|---|---|
| Iodide (I⁻) | High | High | Not recommended for live-cell imaging. |
| Hexafluorophosphate (PF₆⁻) | Intermediate | High | Potential for Photodynamic Therapy (PDT). |
| Tetrakis(pentafluorophenyl)borate (TPFB⁻) | Low | Low | Ideal for live-cell imaging due to minimal dark toxicity and phototoxicity. |
Detailed Experimental Protocols
This protocol provides a cost-effective method for live-cell phenotypic profiling using a single dye.
Workflow Overview
Key Materials & Reagents
- Cells: MCF-7, Huh-7, PNT1A, or PC3 cell lines are validated [1].
- Dye: Acridine Orange (AO), prepare a 1 mM stock in distilled water and store at -20°C [1].
- Media: FluoroBrite DMEM or non-supplemented RPMI 1640 for imaging [1].
- Plates: 96-well black polystyrene microplate with μClear flat bottom [1].
- Microscope: Fluorescence microscope with environmental control (37°C, 5% CO₂) and standard GFP (EX 469/35 nm, EM 525/39 nm) and RFP (EX 531/40 nm, EM 647/57 nm) filter sets [1].
Procedure in Detail
- Cell Seeding: Seed cells at an optimal density (e.g., 8 x 10² viable MCF-7 cells per well) in a 96-well plate. Use a randomized plate layout to minimize batch effects. Incubate for 24 hours to allow adherence [1].
- Staining Solution Preparation: Dilute the 1 mM AO stock in non-supplemented, serum-free imaging medium to create a 10 µM working solution. Note: This concentration is optimized for MCF-7 cells and must be empirically determined for other cell lines. [1]
- Staining: Carefully aspirate the culture medium from the wells and add 100 µL of the 10 µM AO working solution. Protect the plate from light.
- Incubation: Incubate the plate for 20-30 minutes at 37°C, 5% CO₂ to allow cellular uptake and staining.
- Imaging: Image the cells immediately without washing. AO exhibits metachromatic fluorescence: it emits green (~525 nm, nuclei/nucleoli) when bound to DNA/RNA and red (~647 nm, acidic vesicles) in acidic compartments like lysosomes. Acquire images using both GFP and RFP filter sets [1].
This protocol outlines a strategy for labeling intracellular endogenous proteins with dyes that are normally cell-impermeable.
Conceptual Workflow
Key Materials & Reagents
- Probe: Synthesized conjugate consisting of:
- Cells: BSC-1, HeLa, or NIH/3T3 cells [15].
- Validation Reagents: Cells expressing fluorescent protein-tagged markers (e.g., GFP-Actin) for co-localization studies [15].
Procedure in Detail
- Probe Design and Synthesis: Construct the probe via solid-phase peptide synthesis, linking the CPP, a spacer (e.g., 6x glycine), the recognition unit, and the fluorophore [15].
- Cell Incubation: Incubate live cells with the probe (e.g., 5-30 minutes). The (rR)3R2 CPP delivers the conjugate directly into the cytosol, avoiding vesicular entrapment [15].
- Washing and Validation: After incubation, wash cells carefully to remove excess probe and reduce non-specific membrane binding. Use trypan blue to quench any extracellular fluorescence [15].
- Specificity Confirmation: Image the cells and perform co-localization analysis with a known marker (e.g., GFP-Actin). A high Pearson's coefficient (e.g., >0.85) confirms specific labeling of the intended target [15].
The Scientist's Toolkit: Essential Research Reagents
Table 3: Key Reagent Solutions for Live-Cell Phenotypic Screening
| Item | Function/Application | Example Products / Components |
|---|---|---|
| FluoroBrite DMEM | A low-fluorescence imaging medium that reduces background autofluorescence while supporting cell health during live imaging [13] [1]. | Gibco FluoroBrite DMEM [13]. |
| HEPES-Buffered Saline (HBS) | Helps maintain physiological pH during imaging outside a CO₂-controlled environment [11]. | Various suppliers. |
| Cell-Penetrating Peptides | Enables delivery of otherwise impermeable dyes and recognition units into the cytosol of live cells [15]. | (rR)3R2 peptide [15]. |
| On-Stage Incubator | Maintains precise temperature, CO₂, and humidity control on the microscope stage for long-term live-cell imaging [13] [11]. | EVOS Onstage Incubator, Invitrogen HCA Onstage Incubator [13]. |
| Viability Indicator | Distinguishes live from dead cells in real-time; often cell-impermeant nucleic acid stains [13]. | SYTOX Green/Orange/Deep Red stains [13]. |
| Dye Elution Buffer | Enables iterative staining cycles by removing fluorescent signals while preserving cellular morphology (primarily for fixed cells) [2]. | 0.5 M L-Glycine, 1% SDS, pH 2.5 [2]. |
Troubleshooting Guides & FAQs
Frequently Asked Questions (FAQs)
Q1: Is ChromaLIVE truly non-toxic for long-term live cell cultures? Yes, ChromaLIVE is confirmed to be non-toxic and biologically inert. RNA sequencing and proteomics data show unperturbed gene expression patterns in contrast to alternative live cell dyes. The dye has been successfully used in sensitive long-term cultures, including a 3-week culture of iPSC-derived neurons and a 6-week culture of patient-derived prostate cancer organoids without affecting cell health [16].
Q2: What should I do if my fluorescence signal is weak or unstable? ChromaLIVE is designed for stable fluorescence over long periods (weeks). If you experience instability, it is likely due to abnormal exposure to the microscope's light source. Under normal exposure, intensity remains constant. The dye is present in excess in the culture medium, so any photo-bleached molecules are replaced by molecules from the medium. Ensure you are not using an abnormally high amount of light, as this would affect cell health before affecting dye signal [16].
Q3: Can I use ChromaLIVE with my existing GFP-labeled cell line? Yes, ChromaLIVE is compatible with GFP. It is a multichromatic dye excited at 488nm and 561nm. The 488nm excitation channel has a long-Stokes shift emission in the red, making it compatible with your GFP fluorophore [16] [17].
Q4: How do I handle the dye after fixation for downstream assays? Fluorescence signal can be either retained or removed after fixation, depending on your needs. To retain signal, use the ChromaLIVE Fix additive with 4% PFA. To remove the signal entirely, fix and permeabilize cells without the ChromaLIVE Fix additive [16].
Q5: My cells are staining slowly. When should I add the dye? ChromaLIVE can be added at the cell seeding stage, which is highly recommended. If added later, staining kinetics can vary by cell type. A preliminary test is recommended, as optimal staining can take up to 12 hours depending on the cell type (e.g., it stabilizes after 12 hours in U2OS cells) [16] [17].
Troubleshooting Common Experimental Issues
| Problem | Possible Cause | Solution |
|---|---|---|
| Weak Fluorescence Signal | Incorrect dye dilution; Slow staining kinetics. | Confirm 1:1000 dilution in culture medium; Allow up to 12 hours for staining stabilization [16] [17]. |
| High Background Fluorescence | Dye fluorescing in media. | Remember dye only fluoresces upon incorporation into cellular membranes; no washing is needed or recommended [18] [16]. |
| Abnormal Cell Morphology | Dye toxicity; Compound effect. | Confirm use of ChromaLIVE, which is non-toxic. Compare to negative control (DMSO) to isolate compound effects [16] [17]. |
| Signal Loss During Experiment | Extreme photo-bleaching. | Check microscope light source exposure; dye in medium constantly replaces incorporated molecules [16]. |
| Poor Cell Segmentation | Lack of nuclear counterstain. | Use a compatible nuclear stain like NucleoLIVE or Hoechst 33342 for better segmentation in analysis [16] [17]. |
Optimized Experimental Protocols
Detailed Protocol for Kinetic Live-Cell Assay in MCF-7 Cells
This protocol is adapted for a multi-day kinetic assay to study phenotypic changes in response to compounds [17].
Day 0: Cell Seeding and Staining
- Dye Preparation: Warm the ChromaLIVE tube to room temperature. Gently spin it down. Dilute 10 µL of the dye into 10 mL of your culture medium (e.g., RPMI 1640 + 10% FBS) to achieve a 1:1000 dilution. Vortex thoroughly [17].
- Cell Seeding: Harvest and count MCF-7 cells. Resuspend cells in the pre-prepared dye-medium mixture at a density of 80,000 cells/mL. Seed a 96-well imaging plate with 100 µL per well (8,000 cells/well). Incubate overnight at 37°C and 5% CO₂ [17].
Day 1: Compound Treatment and Initial Imaging
- (Optional) Nuclear Stain: For better cell segmentation, add Hoechst 33342 to a final concentration of 100 ng/mL and incubate for at least 3 hours [17].
- Compound Treatment: Prepare your test compounds in dose-response curves (e.g., 1:10 serial dilutions). Add 12.5 µL of each compound or negative control (e.g., 0.1% DMSO) to the designated wells.
- Image Acquisition: Begin kinetic imaging. A suggested timeline for MCF-7 cells is 3h, 6h, 24h, and 48h post-treatment. Ensure your imaging system maintains temperature and CO₂ control for live cells [17].
Instrument Setup and Imaging Parameters
ChromaLIVE requires imaging at a minimum of two wavelengths [17]. The table below details the necessary channels.
| Channel Name | Excitation Wavelength | Emission Filter / Acquisition | Key Purpose |
|---|---|---|---|
| ChromaLIVE488_Yellow | 488 nm | 593/40 nm | Primary channel for morphological detail, compatible with GFP [16] [17]. |
| ChromaLIVE488_Red | 488 nm | 692/40 nm | Provides complementary information with a longer Stokes shift [17]. |
| ChromaLIVE561 | 561 nm | 593/40 nm | Captures distinct staining patterns from a different excitation [17]. |
| DAPI (Optional) | 405 nm | 447/60 nm | Used for nuclear staining (e.g., Hoechst) for cell segmentation [17]. |
Experimental Workflow for Live-Cell Painting
Research Reagent Solutions
This table lists the essential materials and their functions for successfully implementing ChromaLIVE-based assays, as derived from the cited protocols and studies.
| Item | Function / Application in Assay | Example & Source |
|---|---|---|
| ChromaLIVE Dye | Non-toxic, multi-chromatic dye for live-cell phenotypic profiling; fluoresces upon incorporation into cellular membranes. | Saguaro Biosciences [16]. |
| ChromaLIVE Deep Red | Spectral variant for multiplexing, compatible with NucleoLIVE nuclear dye. | Saguaro Biosciences [19] [16]. |
| NucleoLIVE / Hoechst | Nuclear counterstain for cell segmentation in image analysis. | Hoechst 33342 (Invitrogen, ref: H1399) [17]. |
| Cell Line | Model system for assay development and compound testing. | MCF-7 cells [17]. |
| Culture Medium | Standard cell growth medium. | RPMI 1640 complemented with 10% FBS [17]. |
| 96-well Imaging Plate | Optically clear bottom plate for high-content imaging. | Greiner Bio-One Black μClear plate (ref: 655090) [17]. |
| Control Compounds | Well-annotated compounds for assay validation and phenotype reference. | Staurosporine (Apoptosis), Thapsigargin (ER stress), Rapamycin (Autophagy) [20] [17]. |
Quantitative Data Reference
The following table consolidates key quantitative information from the search results to aid in experimental design and data interpretation, particularly for dose-response studies in MCF-7 cells.
| Phenotype / Mechanism | Control Compound | Concentration Range (Serial Dilution) | Key End-Point (in MCF-7) | Informative Kinetic Time Points |
|---|---|---|---|---|
| Apoptosis | Staurosporine | 5 pM - 5 µM | 24 hours | 3h, 6h, 12h, 24h [17] |
| Apoptosis | Actinomycin D | 1 pM - 1 µM | 72 hours | 12h, 24h, 48h, 72h [17] |
| ER Stress | Thapsigargin | 1 pM - 1 µM | 24 hours | 3h, 6h, 12h, 24h [17] |
| ER Stress | Tunicamycin | 10 pM - 10 µM | 24 hours | 3h, 6h, 12h, 24h [17] |
| Autophagy | Rapamycin | 10 pM - 10 µM | 72 hours | 12h, 24h, 48h, 72h [17] |
Troubleshooting Guides & FAQs
This section addresses common experimental challenges in live-cell phenotypic screening and provides solutions leveraging the properties of MitoBrilliant dyes.
Frequently Asked Questions
Q: My mitochondrial dye shows high background fluorescence and appears to stain other cellular compartments. What is the cause?
- A: This is typically a result of using too high a dye concentration. Most mitochondrial dyes, including MitoTracker and MitoBrilliant, are effective in the 50–200 nM range [21]. Higher concentrations can saturate mitochondria and lead to non-specific staining of other membranes [22]. We recommend performing a concentration gradient experiment to identify the optimal level for your specific cell type.
Q: Our facility does not permit flow cytometry with live cells. Can I fix cells after staining with my mitochondrial dye?
- A: This depends entirely on the specific dye you use. Dyes like MitoTracker Red CMXRos are retained upon fixation, making this possible [23]. However, other dyes like MitoTracker Red FM and MitoTracker Green FM are not retained after fixation [21] [24]. For a reliable, fixable dye, MitoBrilliant 646 (Cat. No. 7700) is explicitly designed for this purpose, enabling high-quality imaging after fixation [25] [26].
Q: I need to track mitochondria over time in live cells, but my dye becomes toxic and affects cell health. Are there better options?
- A: Yes, some traditional mitochondrial dyes can exhibit phototoxicity and impair mitochondrial function over time [21] [22]. The MitoBrilliant dyes, built on Janelia Fluor technology, are noted for their brightness and low toxicity, allowing for long-term imaging with minimal interference to normal cell functions [26].
Q: How does the mitochondrial membrane potential (ΔΨm) affect my choice of dye?
- A: This is a critical consideration.
- For assessing ΔΨm dynamics, use potential-dependent dyes like MitoBrilliant Live 646 or Live 549. These dyes accumulate in active mitochondria and disperse upon membrane potential loss, providing a dynamic readout [25] [26].
- For labeling the mitochondrial network independently of its energetic state (e.g., in fixed cells or after potential disruption), use a potential-independent dye like MitoBrilliant 646. Its localization becomes insensitive to ΔΨm changes after staining [26].
- A: This is a critical consideration.
Q: Can MitoBrilliant dyes be integrated into high-content screening platforms like Cell Painting?
- A: Absolutely. A 2025 study evaluated MitoBrilliant as a substitute for MitoTracker in Cell Painting assays and found it performed effectively, enabling robust phenotypic profiling without compromising assay performance [27].
Dye Comparison & Selection Data
Selecting the appropriate mitochondrial dye is crucial for experimental success. The tables below summarize key characteristics and applications to guide your choice.
Table 1: Quantitative Properties of MitoBrilliant Dyes
| Product Name | Catalog Number | Abs/Em (nm) | Molecular Weight | Recommended Stock Solution | Final Working Concentration |
|---|---|---|---|---|---|
| MitoBrilliant 646 | 7700 | 655 / 668 [25] | 493.6 [25] | 1 mM in DMSO [25] | 50 - 200 nM [25] |
| MitoBrilliant Live 646 | 7417 | 648 / 662 [25] | 445.1 [25] | 1 mM in DMSO [25] | 50 - 200 nM [25] |
| MitoBrilliant Live 549 | 7693 | 550 / 568 [25] | 417.0 [25] | 1 mM in DMSO [25] | 50 - 200 nM [25] |
Table 2: Functional Comparison of Mitochondrial Dyes
| Dye Name | ΔΨm Dependent? | Live Cell Use | Fixed Cell Use | Key Characteristics & Applications |
|---|---|---|---|---|
| MitoBrilliant 646 | No* [26] | Yes [26] | Yes [26] | "Universal" dye; ideal for ICC/IHC, super-resolution microscopy (STED) [26]. |
| MitoBrilliant Live 646/549 | Yes [26] | Yes [26] | No [25] | For dynamic live-cell imaging & tracking ΔΨm changes; flow cytometry [25] [26]. |
| MitoTracker Red CMXRos | Information Missing | Yes | Yes [23] | Can be used prior to fixation for certain applications [23]. |
| MitoTracker Red FM | Information Missing | Yes | No [21] | Not retained after fixation [21]. |
| MitoTracker Green FM | Information Missing | Yes | No [24] | Recommended for live-cell imaging only; fixation inhibits staining [24]. |
Note: For MitoBrilliant 646, the initial recruitment into live mitochondria is driven by ΔΨm, but after staining, its localization becomes insensitive to membrane potential changes [26].
Experimental Protocols
The following protocols are adapted from the manufacturer's guidelines for using MitoBrilliant dyes [25].
Staining Protocol for Live-Cell Imaging
Objective: To label the mitochondrial network in adherent cells for live-cell imaging.
Workflow Diagram:
Materials:
- MitoBrilliant dye of choice
- High-quality, anhydrous DMSO
- Pre-warmed (37°C) cell culture medium or buffer
- Cells seeded on an imaging-appropriate dish
Procedure:
- Stock Solution Preparation: Prepare a 1 mM stock solution by adding the recommended volume of DMSO to one vial of lyophilized MitoBrilliant dye (see Table 1 for volumes) [25]. Aliquot and store protected from light at -20°C or below; use within one month [25].
- Working Solution Preparation: Dilute the 1 mM DMSO stock in pre-warmed (37°C) culture medium or buffer to a final concentration between 50 and 200 nM [25]. Protect from light and use the solution on the same day.
- Staining: Replace the cell culture medium with the dye working solution.
- Incubation: Incubate cells for 30 to 60 minutes at 37°C in the dark. Longer incubation times may result in brighter staining [25].
- Washing (Recommended): Carefully aspirate the staining solution. Rinse the cells once with warm 1x PBS to reduce background signal.
- Imaging: Add fresh, pre-warmed culture medium and proceed with live-cell imaging immediately.
Staining Protocol for Flow Cytometry with Suspension Cells
Objective: To label the mitochondrial network in cells in suspension for analysis by flow cytometry.
Materials:
- MitoBrilliant dye of choice
- High-quality, anhydrous DMSO
- Pre-warmed (37°C) cell culture medium or buffer
- Single-cell suspension
Procedure:
- Stock & Working Solution: Prepare as described in the live-cell imaging protocol (Steps 1-2).
- Cell Preparation: Create a single-cell suspension and pellet cells by gentle centrifugation. Carefully resuspend the cell pellet in the pre-warmed dye working solution at a density of approximately 1 x 10^6 cells/mL [25].
- Incubation: Incubate for 30 to 60 minutes at 37°C in the dark [25].
- Washing: Pellet the cells by gentle centrifugation and carefully aspirate the supernatant.
- Resuspension: Resuspend the cell pellet in fresh, pre-warmed medium or an appropriate buffer for flow cytometry analysis.
Staining Protocol for Fixed-Cell Imaging (MitoBrilliant 646 Only)
Objective: To label the mitochondrial network for subsequent imaging after chemical fixation.
Workflow Diagram:
Materials:
- MitoBrilliant 646 (Cat. No. 7700) [25]
- Materials from the live-cell staining protocol
- Fixative (e.g., 4% Paraformaldehyde (PFA) in PBS)
Procedure:
- Staining: Follow the Live-Cell Imaging Protocol (Steps 1-5) to stain cells with MitoBrilliant 646 prior to fixation.
- Fixation: Fix cells immediately after staining. For HeLa cells, incubate with freshly prepared, pre-warmed 4% PFA at 37°C for 10-20 minutes [25]. Note: Optimal fixation conditions may require optimization for different cell types.
- Rinsing: Rinse the fixed cells several times with PBS to remove residual fixative.
- Permeabilization (Optional): If subsequent immunostaining for other targets is required, permeabilize cells by incubating in PBS containing 0.05% Triton X-100 for 10 minutes [25].
- Imaging: The cells are now ready for imaging or further processing for immunohistochemistry/immunocytochemistry (IHC/ICC) [26].
The Scientist's Toolkit: Essential Research Reagents
Table 3: Key Reagents for Mitochondrial Staining Experiments
| Reagent | Function in the Protocol | Notes for Optimization |
|---|---|---|
| MitoBrilliant Dyes | Fluorescently labels the mitochondrial network. | Choice depends on application (live/fixed) and need for ΔΨm sensitivity (see Table 2). |
| Dimethyl Sulfoxide (DMSO) | High-quality solvent for creating concentrated stock solutions. | Use anhydrous DMSO to prevent hydrolysis and ensure dye stability. Aliquot stock solutions to avoid freeze-thaw cycles [25]. |
| Paraformaldehyde (PFA) | Cross-linking fixative for preserving cellular structure. | Use only with MitoBrilliant 646. Fresh preparation is recommended for best results [25]. |
| Triton X-100 | Detergent for permeabilizing fixed cell membranes. | Allows antibodies to access intracellular targets in multi-color experiments. Use after fixation [25]. |
| Phenol Red-Free Medium | Imaging medium for fluorescence microscopy. | Reduces background autofluorescence, improving signal-to-noise ratio during live-cell imaging [24]. |
| Carbonyl cyanide m-chlorophenyl hydrazone (CCCP/FCCP) | Mitochondrial uncoupler; depolarizes ΔΨm. | Essential for use as a positive control to validate the ΔΨm-dependent behavior of "Live" dyes [21]. |
Protocol Development and Dye Titration for Robust Assays
Step-by-Step Guide to Titrating Dye Concentrations
Why Titration is Critical for Success
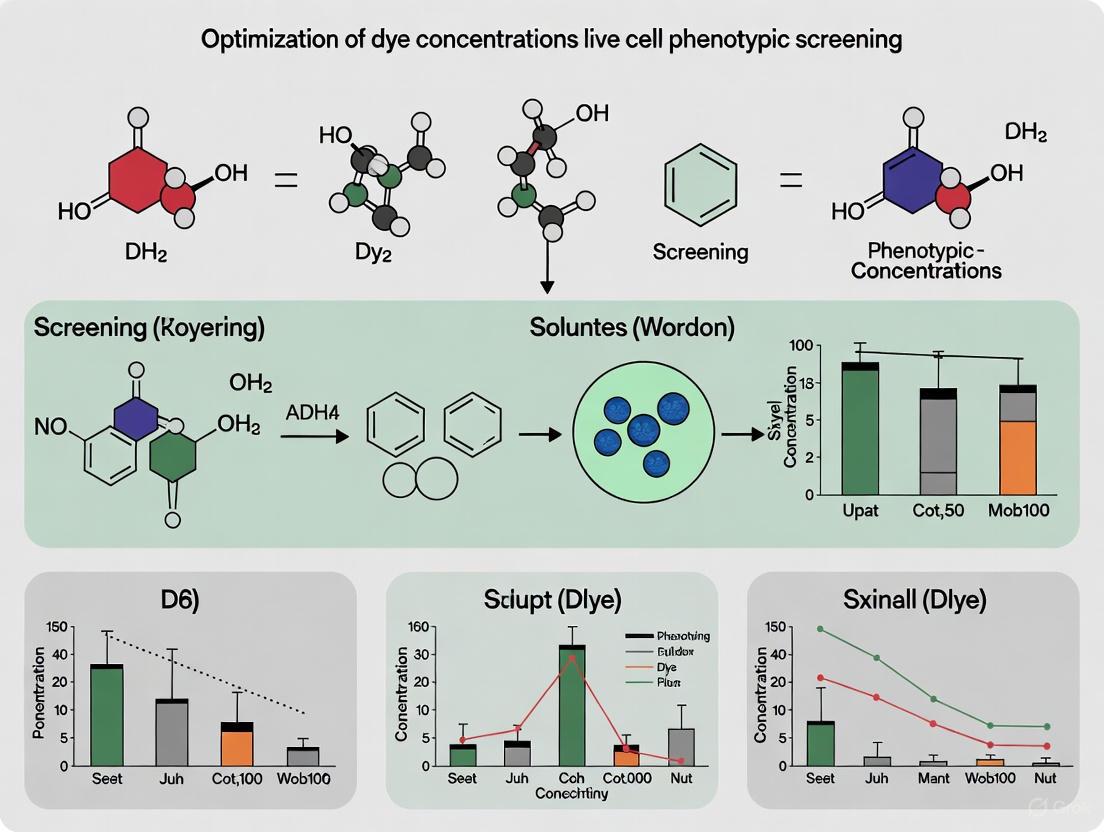
Accurate dye titration is a foundational step in live cell phenotypic screening. Using suboptimal concentrations can lead to misleading data, failed experiments, and wasted resources. Proper titration ensures a high signal-to-noise ratio, minimizes cytotoxicity, and guarantees that the morphological data captured is both accurate and biologically relevant [4] [1].
This guide addresses the most common challenges researchers face and provides proven methodologies to optimize your staining protocols.
FAQ: Resolving Common Dye Titration Challenges
1. What should I do if my stain shows no signal or a signal that is too low?
A weak signal often indicates that the dye concentration is too low, the imaging settings are incorrect, or the target is not accessible.
- Primary Causes & Solutions:
- Low Dye Concentration: The most common cause. You must perform a concentration gradient titration for every new dye and cell line [28] [29].
- Incorrect Imaging Settings: Verify that your microscope's filter sets and lasers are compatible with the dye's excitation and emission spectra [28]. Far-red dyes, in particular, may not be visible to the eye and require a CCD camera for detection.
- Intracellular Target Inaccessibility: For intracellular targets, ensure your cells are properly permeabilized to allow dye entry [28].
2. How can I reduce high background or non-specific staining?
High background fluorescence can obscure specific signals and is frequently caused by non-specific binding, autofluorescence, or excessive dye concentration.
- Primary Causes & Solutions:
- Excessive Dye Concentration: A frequent culprit. Titrating to find the lowest effective concentration can dramatically reduce background [28] [30].
- Cell Autofluorescence: This is a universal challenge, especially in certain primary cells. Use far-red or near-infrared dyes, which are less affected by autofluorescence, which is highest in blue/green wavelengths [28] [30]. Commercial autofluorescence quenchers are also available.
- Insufficient Washing: Increase the number or volume of wash steps. Adding a low concentration of detergent (e.g., 0.1% Tween-20) to the wash buffer can help remove unbound dye [30] [29].
3. Why is my signal unstable or fading quickly?
Signal loss, or photobleaching, can occur during imaging or between measurements.
- Primary Causes & Solutions:
- Photobleaching: Use mounting media with antifade reagents for fixed cells [28]. For live-cell imaging, select photostable dyes, such as rhodamine-based derivatives, and minimize light exposure [28] [1].
- Dye Instability: Some dyes have inherent stability limitations. For example, in the Cell Painting PLUS assay, staining intensities for all dyes were only stable for up to 24 hours after staining, with some dyes like LysoTracker showing significant signal decay after that [2]. Plan your imaging schedule accordingly.
4. How do I prevent fluorescence cross-talk (bleed-through) in multiplexed experiments?
Cross-talk happens when a dye's signal is detected in a channel assigned to another dye, common when dyes have overlapping emission spectra.
- Primary Causes & Solutions:
- Spectral Overlap: Choose dyes with well-separated emission spectra. Use online tools like a Fluorescence Spectra Viewer to plan your panel [28].
- Insufficient Unmixing: Acquire single-stain control samples for each dye to set up compensation on your flow cytometer or to create spectral libraries for unmixing on your microscope [28] [30].
- Sequential Imaging: Advanced methods like the Cell Painting PLUS (CPP) assay image each dye in a separate channel sequentially, after iterative staining and elution cycles, to achieve perfect spectral separation [2].
Experimental Protocol: A Standard Dye Titration Workflow
The following procedure provides a robust methodology for determining the optimal working concentration for a fluorescent dye in your specific experimental system.
Objective: To identify the dye concentration that yields the strongest specific signal with the lowest background and no observable cytotoxicity.
Materials:
- Cell culture seeded in a multi-well plate (e.g., 96-well black-walled, clear-bottom plate)
- Fluorescent dye stock solution
- Appropriate culture medium (without phenol red for imaging)
- Phosphate-Buffered Saline (PBS)
- Fixative (e.g., 4% PFA) if performing fixed-cell staining
- Permeabilization buffer (if required for intracellular targets)
- High-content imaging system or fluorescence microscope
Methodology:
- Prepare Dilutions: Prepare a series of dye dilutions in culture medium or an appropriate buffer. A typical range might be 1:10 serial dilutions, or a 2-fold dilution series covering a broad range (e.g., from 10 µM down to 0.01 µM). Always include a negative control (no dye).
- Apply to Cells: Aspirate the medium from your cell culture plate and add the different dye concentrations to replicate wells.
- Incubate: Incubate the plate under your standard experimental conditions (e.g., 37°C, 5% CO₂) for the predetermined time. For live-cell dyes, this is typically 15-60 minutes.
- Wash: Carefully aspirate the dye solution and wash the cells 2-3 times with pre-warmed PBS or culture medium to remove unbound dye.
- Image: Add fresh imaging medium and immediately acquire images using your high-content imager. Use the exact same imaging settings (exposure time, laser power, gain) across all wells to allow for direct comparison.
- Analyze: Quantify the mean fluorescence intensity and the background intensity for each well. Calculate the signal-to-background ratio for each dye concentration.
The workflow for this protocol is summarized in the following diagram:
Data Interpretation and Titration Optimization
After running the titration experiment, analyze the results to find the optimal concentration. The table below summarizes the key parameters to assess.
| Dye Concentration | Signal Intensity | Background Intensity | Signal-to-Background Ratio | Cytotoxicity | Assessment |
|---|---|---|---|---|---|
| Very Low | Weak | Low | Low | None | Insufficient staining. |
| Low | Good | Low | High (Ideal) | None | Often the optimal range. |
| Medium | Strong | Moderate | High | None | Acceptable, but may increase background. |
| High | Saturated | High | Low | Possible | Excessive, leads to non-specific binding. |
- Ideal Concentration: Select the concentration that provides a strong signal with minimal background, resulting in the highest signal-to-background ratio without causing cytotoxicity. This is often the "sweet spot" just before the background begins to rise significantly [28] [29].
- Cytotoxicity Check: For live-cell assays, always confirm cell health after staining and incubation. Use a viability dye or inspect cell morphology to ensure the dye itself is not toxic at the working concentration [1].
The Scientist's Toolkit: Essential Reagent Solutions
The following reagents are critical for successful implementation of dye titration and live-cell phenotypic profiling.
| Reagent / Solution | Function / Purpose |
|---|---|
| Acridine Orange (AO) | A metachromatic, live-cell compatible dye that stains nucleic acids and acidic compartments (e.g., lysosomes), enabling multiparametric imaging of nuclei, cytoplasm, and vesicle distribution [1]. |
| LysoTracker Dyes | Live-cell compatible dyes that accumulate in acidic organelles like lysosomes. Note: Signal can be unstable over time in fixed-cell protocols [2]. |
| MitoBrilliant / MitoTracker | Fluorescent dyes designed to label mitochondria, used in both standard and live-cell profiling to assess metabolic state and organelle morphology [4]. |
| Phenovue phalloidin 400LS | A long stoke-shifted actin dye that helps isolate actin features from Golgi or plasma membrane signals, allowing for greater multiplexing capacity [4]. |
| ChromaLive Dye | A live-cell compatible dye enabling real-time assessment of compound-induced morphological changes [4]. |
| TrueBlack Lipofuscin Autofluorescence Quencher | A reagent used to quench tissue and cellular autofluorescence, a major source of background in many cell types and tissues [28]. |
| Dye Elution Buffer | A specialized buffer (e.g., 0.5 M Glycine, 1% SDS, pH 2.5) used in iterative staining assays to remove dye signals while preserving cellular morphology for subsequent staining rounds [2]. |
| FluoroBrite DMEM / Phenol Red-Free Medium | An imaging medium with low autofluorescence, essential for maintaining cell health while minimizing background during live-cell imaging [1]. |
Adapting Staining Protocols from Fixed to Live-Cell Assays
Frequently Asked Questions (FAQs)
FAQ 1: What are the fundamental differences in stain selection for fixed versus live-cell assays? The core difference lies in membrane permeability and cytotoxicity. For fixed-cell assays, dyes that covalently bind or require membrane permeabilization are acceptable. For live-cell assays, you must use cell-permeant, non-toxic, and photostable dyes that don't interfere with normal cellular functions. Probes must function without fixation and remain viable for duration of imaging [31] [5]. Red and near-infrared viable dyes are often preferred for live-cell work to minimize phototoxicity and autofluorescence [5].
FAQ 2: How should dye concentration and incubation conditions be optimized for live cells? Optimization requires balancing signal intensity with cell health. Key steps include:
- Concentration Titration: Start with manufacturer's recommended concentration and perform a matrix of serial dilutions.
- Incubation Time: Determine the minimal time needed for sufficient signal, typically 20-30 minutes [32].
- Staining Buffer: Use physiologically compatible buffers. Saline (0.85% NaCl) produces minimal staining artifacts compared to water or growth media for some yeast viability stains [33].
- Wash Steps: Include steps to remove unbound dye to reduce background fluorescence [31].
FAQ 3: What specific challenges arise with multiplexing in live-cell imaging? Multiplexing in live cells is constrained by:
- Spectral Overlap: Requires careful selection of fluorophores with distinct emission spectra.
- Phototoxicity: Cumulative light exposure across multiple channels can stress cells.
- Dye-Dye Interactions: Potential for chemical interactions between different live-cell probes. Advanced solutions include fluorescence lifetime imaging (FLIM) for dye unmixing and sequential acquisition to minimize light exposure [5].
FAQ 4: How can photobleaching and phototoxicity be minimized during live imaging?
- Use Antifade Reagents: For live-cell imaging, add ProLong Live Antifade Reagent to cell media [31].
- Reduce Illumination: Lower laser power, use neutral density filters, and minimize exposure time [31].
- Select Stable Dyes: Choose photostable dyes like Alexa Fluor dyes [31].
- Optimized Imaging: Use white laser combined with hybrid detectors and tune acquisition intervals to balance temporal resolution with cell health [5].
FAQ 5: How is viability assessment different between fixed and live-cell endpoints? Fixed-cell endpoints (e.g., post-staining with PI) provide a snapshot of membrane integrity at a single timepoint. Live-cell assays can track viability kinetics and distinguish between different states of cell health. For example, SYTO 9/PI staining in yeast can identify an intermediate "damaged" population that differs from both live and dead cells, providing more nuanced information than colony-forming unit (CFU) assays [33].
Troubleshooting Guides
Table 1: Common Live-Cell Staining Problems and Solutions
| Problem | Potential Causes | Recommended Solutions |
|---|---|---|
| High Background Fluorescence | Excessive dye concentration, insufficient washing, non-specific binding | Optimize dye concentration; include wash steps; use background suppressors like BackDrop Suppressor [31]. |
| Poor Signal-to-Noise Ratio | Low dye permeability, suboptimal instrument settings, photobleaching | Titrate dye concentration and staining time; adjust instrument gain; use more photostable dyes [31]. |
| Cellular Toxicity / Morphological Changes | Dye cytotoxicity, excessive light exposure, incompatible staining buffer | Test dye toxicity in unstained controls; reduce light dose; use physiologically compatible buffers like 0.85% saline [33] [31]. |
| Unspecific / Aberrant Staining | Dye aggregation, over-incubation, non-specific antibody binding (if applicable) | Centrifuge dye stock before use to remove aggregates; optimize incubation time; use charge-blocking reagents like Image-iT FX Signal Enhancer [31]. |
| Inconsistent Staining Between Repeats | Variable dye solubility, inconsistent cell handling, dye degradation | Prepare fresh dye working stocks; standardize cell handling protocols; protect dyes from light [33]. |
Table 2: Quantitative Staining Parameters for Common Live-Cell Dyes
| Dye / Assay | Target / Application | Exemplary Optimized Concentration | Incubation Time & Conditions | Key Considerations |
|---|---|---|---|---|
| SYTO 9 / PI (FungaLight) | Yeast viability (membrane integrity) | SYTO 9: 33.4 µM; PI: 0.2 mM [33] | 15-30 min in 0.85% saline buffer, protected from light [33] | Distinguishes live, damaged, and dead populations; faster than CFU but measures viability earlier in death process [33]. |
| CellTrace Violet | Cell proliferation (dye dilution) | 5 µM in PBS [32] | 20 min at 37°C, stop with complete medium [32] | Covalently binds intracellular proteins; evenly distributed to daughter cells; avoid fixation pre-staining [32]. |
| Incucyte Nuclight Reagents | Nuclear labeling for proliferation | N/A (Lentiviral transduction) | N/A (Stably expressed) | Non-perturbing, enables direct nuclear count in co-cultures; multiplex with caspase-3/7 or Cytotox dyes [34]. |
| Red/NIR Viable Dyes | General live-cell labeling (low phototoxicity) | Varies by specific dye | Optimized for multi-labeling [5] | Ideal for long-term imaging; use FLIM for unmixing; reduced phototoxicity [5]. |
The Scientist's Toolkit: Research Reagent Solutions
Table 3: Essential Reagents for Live-Cell Staining Adaptation
| Reagent | Function & Principle | Example Application |
|---|---|---|
| Viability Stains (SYTO 9/PI) | Membrane integrity-based live/dead discrimination. SYTO 9 enters all cells; PI enters only membrane-compromised cells and quenches SYTO 9 [33]. | Post-stress survival quantification in yeast via flow cytometry [33]. |
| Proliferation Dyes (CellTrace Violet) | Covalent binding to intracellular amines; fluorescence halves with each cell division [32]. | Tracking distinct generations of proliferating cells via flow cytometric dye dilution [32]. |
| Background Suppressors | Reduce non-specific binding of charged fluorescent dyes to cellular components [31]. | Blocking non-specific signal in live-cell imaging applications. |
| Antifade Reagents (ProLong Live) | Antioxidants and free radical scavengers that reduce photobleaching in live cells [31]. | Extending dye stability during long-term time-lapse imaging without affecting cell health. |
| Physiological Staining Buffers | Provide an isotonic, non-stressful environment for dye incubation [33]. | Resuspending cells during staining to minimize artifacts and maintain viability. |
Experimental Workflow Visualization
The Cell Painting PLUS (CPP) assay is an advanced methodological expansion of the classic Cell Painting technique. It uses iterative staining-elution cycles to significantly increase multiplexing capacity, allowing for the staining and separate imaging of at least seven fluorescent dyes that label nine distinct subcellular compartments [2]. This approach overcomes a key limitation of traditional Cell Painting, where signals from different organelles (e.g., RNA and ER, or Actin and Golgi) are often merged in the same imaging channel, compromising organelle-specificity [2]. CPP provides more flexible, customizable, and information-rich phenotypic profiling for basic research, drug discovery, and toxicology.
Frequently Asked Questions (FAQs)
1. How does Cell Painting PLUS fundamentally differ from traditional Cell Painting? CPP introduces an iterative staining-elution cycle, allowing sequential staining, imaging, and dye removal. This enables the use of more dyes, with each dye imaged in a separate channel. In contrast, traditional Cell Painting typically uses a fixed set of dyes with intentional channel merging, which can limit specificity and multiplexing capacity [2].
2. What is the primary challenge solved by the staining-elution step? The elution step efficiently removes fluorescent signals from a previous staining cycle while preserving the fine morphological details of the cellular structures. This makes the iterative re-staining of the same sample possible, thereby breaking the spectral limit of standard microscopy and expanding the number of organelles that can be profiled [2].
3. Can I customize the dyes used in the CPP assay? Yes, a key advantage of CPP is its flexibility. The protocol can be adapted to use different fluorescent dyes or even antibodies tailored to specific research questions, provided the elution buffer is optimized for the new reagents [2].
4. My lysosomal dye signal is weak or decreases rapidly. What could be the cause? Lysosomal dyes, such as LysoTracker, are sensitive to the acidic pH of the organelle and are typically applied to live cells. In fixed-cell assays, signal instability can occur. It is crucial to image within 24 hours of staining to ensure robustness, as lysosomal dye signals have been observed to decrease significantly after day 2 [2].
5. Are there alternatives for the standard mitochondrial and actin dyes? Yes, research shows that substituting MitoTracker with MitoBrilliant or phalloidin with Phenovue phalloidin 400LS has minimal impact on Cell Painting assay performance. Phenovue phalloidin 400LS offers the additional benefit of freeing up a fluorescence channel for another dye [4].
Troubleshooting Guide
| Problem | Potential Cause | Recommended Solution |
|---|---|---|
| Weak or Fading Signal | Photobleaching from intense light exposure [31]. | Use antifade mounting reagents (e.g., ProLong Live for live cells, ProLong Diamond for fixed samples); reduce laser power/illumination time [31]. |
| High Background Fluorescence | Non-specific dye binding; unwashed unbound dye [31]. | Optimize dye concentration and staining time; include thorough wash steps; use background suppressors like BackDrop Suppressor [31]. |
| Incomplete Dye Elution | Suboptimal elution buffer conditions; insufficient elution time. | Use the optimized CPP elution buffer (0.5 M L-Glycine, 1% SDS, pH 2.5) and ensure recommended elution time. Re-optimize buffer for any custom dyes [2]. |
| Loss of Morphology After Elution | Elution buffer is too harsh. | Systematically test and adjust the pH, ionic strength, and detergent concentration of the elution buffer for the specific dye-cell line combination [2]. |
| Signal Crosstalk Between Channels | Emission bleed-through; dye cross-excitation [2]. | Image dyes sequentially rather than simultaneously; characterize spectral properties of all dyes beforehand to identify potential conflicts [2]. |
| Dim Signal in One Channel | Low dye concentration; insufficient exposure time. | Titrate dye concentration for optimal signal-to-noise. Refer to established concentration ranges and adjust exposure times during acquisition [2]. |
Research Reagent Solutions
The following table details key reagents for implementing the Cell Painting PLUS assay, based on the core protocol and potential substitutions.
| Reagent Category | Specific Example(s) | Function in the Assay |
|---|---|---|
| Dyes for Organelles | MitoTracker, Phalloidin (Actin), LysoTracker, Concanavalin A (ER), Nuclear stains [2]. | Highlight specific subcellular structures to generate morphological profiles. |
| Alternative Dyes | MitoBrilliant (mitochondria), Phenovue phalloidin 400LS (actin), ChromaLive (live-cell) [4]. | Substitute for standard dyes; can offer improved performance, channel separation, or live-cell compatibility. |
| Elution Buffer | 0.5 M L-Glycine, 1% SDS, pH 2.5 [2]. | Removes bound fluorescent dyes after imaging while preserving cellular morphology for the next staining cycle. |
| Antifade Reagents | ProLong Live (live cells), ProLong Diamond (fixed samples) [31]. | Reduces photobleaching, preserving fluorescence signal intensity during imaging and storage. |
| Live-Cell Dyes | Acridine Orange (AO), Hoechst 33342 [1]. | Enables live-cell phenotypic profiling by staining nucleic acids and acidic compartments without fixation. |
Experimental Workflow and Protocol
The CPP assay is built around a core cycle of staining, imaging, and elution. The diagram below illustrates the complete multi-cycle workflow.
Diagram Title: Cell Painting PLUS Iterative Workflow
Detailed Staining and Elution Protocol
Key Reagent: Elution Buffer
- The core of the CPP protocol is an efficient dye elution buffer composed of 0.5 M L-Glycine and 1% SDS, pH 2.5. This buffer is designed to remove the signals of all dyes except for one (e.g., the Mito dye in the referenced study), which can then be used as a reference channel for image registration across cycles [2].
Step-by-Step Procedure:
- Cell Preparation: Seed cells in an imaging-compatible microplate (e.g., a 96-well black polystyrene plate with a clear bottom) and culture until the desired confluency is reached [1].
- Fixation: Fix cells with a standard fixative like paraformaldehyde (PFA) to preserve cellular morphology [2].
- First Staining Cycle:
- Apply the first panel of dyes (e.g., targeting Plasma Membrane, Actin, RNA, Nucleoli, and Lysosomes).
- Incubate, then wash to remove unbound dye.
- First Imaging Cycle: Image each dye from the first panel sequentially in separate channels to avoid spectral crosstalk.
- First Elution Step: Apply the elution buffer to the cells to remove the fluorescent signals from the first set of dyes.
- Second Staining Cycle: Apply the second panel of dyes (e.g., targeting DNA, ER, Mitochondria, and Golgi apparatus).
- Note: The mitochondrial dye signal is often preserved and not eluted, to serve as a reference for image registration [2].
- Second Imaging Cycle: Sequentially image the second panel of dyes.
- Data Integration: Use computational image registration (e.g., with specialized software like the "4i stitcher") to align the image stacks from both cycles into a single, multi-channel dataset representing all nine subcellular structures [35].
Quantitative Data Reference
For researchers looking to implement or adapt this protocol, the table below summarizes key quantitative information from the foundational CPP study.
| Parameter | Specification / Value | Notes / Context |
|---|---|---|
| Multiplexing Capacity | ≥7 dyes, 9 organelles [2] | Includes plasma membrane, actin, RNA, nucleoli, lysosomes, DNA, ER, mitochondria, Golgi. |
| Core Elution Buffer | 0.5 M L-Glycine, 1% SDS, pH 2.5 [2] | Efficiently elutes most dyes; mitochondrial dye can be retained for registration. |
| Signal Stability Window | Up to 24 hours [2] | Staining intensities remain stable (deviation < ±10%) for 24h post-staining. |
| Dye Concentration & Cost | Similar to traditional CP per dye [2] | Additional costs are primarily from extra dyes (e.g., lysosomal dye). |
| Image Registration | Mitochondrial channel as reference [2] | The Mito dye signal is often not eluted, providing a stable anchor for aligning images from multiple cycles. |
Integrating Dye Staining with High-Content Imaging Systems
Frequently Asked Questions
1. What is the primary cause of high background staining in fluorescent assays, and how can it be reduced? High background, or non-specific staining, is frequently caused by cell or tissue autofluorescence, cross-reactivity of secondary antibodies, or an excessively high concentration of the primary antibody [28] [36]. To reduce it, include an unstained control to gauge autofluorescence levels and use autofluorescence quenchers [28]. Ensure you perform adequate blocking and always titrate your primary and secondary antibodies to find the optimal concentration that minimizes background while preserving signal [28] [37]. Using highly cross-adsorbed secondary antibodies can also prevent cross-reactivity in multi-color experiments [28].
2. I am getting weak or no specific signal. What should I check first? First, verify that your primary antibody is validated for your specific application (e.g., IHC, flow cytometry) and species [28] [37]. Confirm the antibody has been stored correctly and is not past its expiration date [37]. Next, perform an antibody titration experiment, as the concentration may be too low [28]. For intracellular targets, ensure your protocol includes a permeabilization step to make the epitope accessible [28]. Finally, always run a positive control sample known to express the target to confirm the entire detection system is functioning correctly [36] [37].
3. How can I minimize fluorescence cross-talk in multi-color experiments? Cross-talk between channels can be minimized by choosing fluorescent dyes that are spectrally well-separated [28]. For every experiment, include single-stain controls and image them in all channels to identify and correct for any bleed-through [28]. On confocal microscopes, optimize your imaging settings to limit cross-excitation during scanning and adjust emission cut-offs for the different dyes [28]. Additionally, for multi-color flow cytometry, ensure you apply appropriate fluorescence compensation as per your cytometer's protocol [28].
4. What are the best practices to prevent photobleaching during image acquisition? To prevent photobleaching, use a mounting medium that contains an antifade reagent [28]. Furthermore, select photostable fluorescent dyes for your experiments. Rhodamine-based dyes, for example, are generally more photostable than some blue fluorescent dyes [28].
5. Why is my staining uneven or patchy across the tissue section? Uneven staining is often a result of inconsistent reagent coverage during incubation or the drying out of tissue sections [37]. Always use a humidified chamber for long incubation steps and ensure liquid reagents fully cover the tissue section [37]. Also, check that tissue sections are properly adhered to the slide and have not folded [37].
Troubleshooting Guides
Problem 1: No Staining or Very Weak Signal
| Possible Cause | Recommended Solution | Key Experimental Controls |
|---|---|---|
| Unvalidated or Inactive Primary Antibody | Confirm antibody is validated for your specific application and species. Use a positive control tissue/cell line. Aliquot antibodies for storage and avoid freeze-thaw cycles [28] [36] [37]. | Include a positive control sample with known target expression [37]. |
| Suboptimal Antibody Concentration | Perform a titration experiment. Test a range of concentrations (e.g., 1:50 to 1:200) starting from the datasheet's recommendation [28] [37]. | Use a positive control to validate the titration series [36]. |
| Inaccessible Intracellular Target | For intracellular or cytoplasmic domain targets, add a permeabilization step (e.g., with Triton X-100) to your protocol [28]. | Check antibody datasheet for epitope location and recommended application protocols [28]. |
| Inefficient Antigen Retrieval (IHC) | Optimize heat-induced epitope retrieval (HIER). Test different buffers (e.g., Citrate pH 6.0, Tris-EDTA pH 9.0), temperatures, and incubation times [36] [37]. | Use a positive control tissue to validate the antigen retrieval protocol [37]. |
| Inactive Detection System | Test the enzyme-substrate system separately. For HRP, place a drop of enzyme on nitrocellulose and dip in substrate; a colored spot should form [36]. | Test all components of your detection system independently. |
Problem 2: High Background Staining
| Possible Cause | Recommended Solution | Key Experimental Controls |
|---|---|---|
| High Antibody Concentration | Titrate both primary and secondary antibodies to find a concentration that provides a strong specific signal with minimal background [28] [37]. | Include a secondary-only control to identify non-specific binding of the secondary antibody [28]. |
| Insufficient Blocking | Block with normal serum from the secondary antibody host species (e.g., 2-10%) [36] [37]. For endogenous peroxidases/biotin, use H₂O₂ or an avidin/biotin blocking kit [36] [37]. | Use an unstained control to assess autofluorescence [28]. |
| Cross-reactive Secondary Antibody | Use highly cross-adsorbed secondary antibodies to minimize cross-reactivity, especially in multi-color experiments or complex tissues [28]. | Perform a primary-only control where applicable. |
| Tissue Autofluorescence | Use autofluorescence quenchers like TrueBlack or Sudan Black [28] [37]. Alternatively, choose near-infrared fluorescent dyes (e.g., Alexa Fluor 647) that emit outside common autofluorescence wavelengths [36]. | Include an unstained control to determine the level of autofluorescence [28]. |
| Hydrophobic Interactions | Add a gentle detergent like 0.05% Tween-20 to wash buffers and antibody diluents to reduce non-specific sticking [37]. | - |
| Over-development of Chromogen | Monitor chromogen development (e.g., DAB) under a microscope and stop the reaction as soon as a strong specific signal appears [37]. | - |
Problem 3: Fluorescence Photobleaching
| Possible Cause | Recommended Solution |
|---|---|
| Lack of Antifade Reagent | Use an antifade mounting medium such as EverBrite [28]. |
| Use of Unstable Dyes | Select photostable dyes (e.g., many rhodamine-based dyes) over those known to bleach quickly, such as some blue fluorescent dyes [28]. |
| Excessive Light Exposure | Minimize sample exposure to light during preparation and imaging. Use lower light intensity or shorter exposure times during acquisition where possible. |
Experimental Protocols & Data
Cell Painting Assay Workflow
The Cell Painting assay is a powerful, high-content morphological profiling method that uses a multiplexed set of fluorescent dyes to label multiple cellular compartments [38] [39]. The typical workflow is as follows [38]:
- Plate cells: Seed cells into 96- or 384-well multi-well plates at the desired confluency.
- Apply perturbation: Treat cells with the compounds, genetic modifiers, or other perturbations to be tested.
- Fix, permeabilize, and stain: After treatment, cells are fixed, permeabilized, and stained with the dye cocktail.
- Image acquisition: Seal the plate and image on a high-content screening (HCS) system, acquiring images from every well.
- Image analysis: Use automated software to identify individual cells and extract ~1,500 morphological features (size, shape, texture, intensity) to generate a rich morphological profile for each cell population [39].
Cell Painting Experimental Workflow
Optimizing Dye and Antibody Concentrations
A critical step in assay optimization is determining the right concentration for your dyes and antibodies. The table below summarizes typical starting points and key considerations.
| Reagent Type | Typical Starting Concentration | Key Considerations & Titration Range |
|---|---|---|
| Primary Antibody | ~1 µg/mL [28] | Perform titration (e.g., 1:50 to 1:500); too high causes background, too low gives weak signal [28] [37]. |
| Secondary Antibody | ~1 µg/mL (cell staining) [28] | Titrate alongside the primary antibody. Extremely high concentrations can paradoxically inhibit signal [36]. |
| Cell Painting Dyes | As per kit protocol [38] | Follow manufacturer's instructions in validated kits (e.g., Image-iT Cell Painting Kit) [38]. |
| Nuclear Stains (DAPI) | Manufacturer's recommendation | Reduce concentration if bleed-through into other channels is observed [28]. |
The Scientist's Toolkit: Research Reagent Solutions
| Item | Function / Application |
|---|---|
| Image-iT Cell Painting Kit | A pre-optimized kit containing a set of six fluorescent dyes to stain the nucleus, nucleolus, ER, Golgi, mitochondria, actin cytoskeleton, and plasma membrane for high-content morphological profiling [38]. |
| TrueBlack Lipofuscin Autofluorescence Quencher | Used to quench tissue autofluorescence, a major source of background in tissue sections and some primary cells [28]. |
| Highly Cross-Adsorbed Secondary Antibodies | Minimize cross-reactivity in multi-color staining experiments, ensuring that secondary antibodies bind only to their intended primary antibody [28]. |
| Antifade Mounting Medium (e.g., EverBrite) | Preserves fluorescence signal during microscopy by reducing photobleaching [28]. |
| Avidin/Biotin Blocking Kit | Blocks endogenous biotin or lectins in tissue samples to prevent high background when using biotin-streptavidin based detection systems [36]. |
| Peroxidase Suppressor | Blocks endogenous peroxidase activity in tissues, which is essential when using HRP-based detection systems to prevent high background [36]. |
| Alexa Fluor Dyes | A family of bright, photostable fluorescent dyes commonly used in cell painting and fluorescence microscopy. Near-infrared Alexa Fluor dyes (e.g., 647, 750) are useful for avoiding tissue autofluorescence [36]. |
Troubleshooting Logic Pathway
The following diagram provides a structured approach to diagnosing and resolving the most common issues encountered when integrating dye staining with high-content imaging.
Troubleshooting Logic Pathway
Core Concepts in Quantitative Morphological Phenotyping
What is Quantitative Morphological Phenotyping (QMP) and why is it used in live-cell screening?
Quantitative Morphological Phenotyping (QMP) is an image-based method that captures morphological features at both the cellular and population levels. In the context of live-cell phenotypic screening, it comprehensively captures the biological impact of chemical and genetic perturbations. This approach is massively parallel and "hypothesis-free," allowing the cellular system itself to indicate which perturbations are relevant, often leading to less biased and unexpected biological insights compared to traditional hypothesis-driven research [40] [41]. For drug discovery, phenomic profiling is valuable for compound target identification, mechanism of action (MoA) prediction, hit extension, and hit triaging [3].
What are the key considerations when choosing a cell model for a screening assay?
The choice of cell model is critical and should be driven by the biological question. The main options are immortalized cell lines, primary cells, and induced pluripotent stem cells (iPSCs). A compromise between feasibility and biological relevance is often necessary. iPSCs are particularly promising as they can be differentiated into relevant cell types (e.g., dopaminergic neurons, astrocytes) and can be derived from patients, creating genetically faithful human disease models. It is vital to understand that no in vitro system will fully display the complexity of an intact organism, and not all insights will translate to in vivo models or human patients [40].
Troubleshooting Guides & FAQs
Image Acquisition and Quality
FAQ: My fluorescence images are too dark or dim. What can I do to improve brightness?
Dim images can result from insufficient excitation energy or inefficient light gathering. To optimize brightness [42]:
- Ensure proper filter selection: Use the correct excitation filter for your fluorophore and a barrier filter that effectively blocks unwanted wavelengths while allowing the emission light to pass.
- Use high Numerical Aperture (N.A.) objectives: In reflected light fluorescence, image intensity is proportional to the fourth power of the objective's N.A. A 40X objective with an N.A. of 1.0 will yield an image over five times brighter than one with an N.A. of 0.65.
- Check your light source: Ensure mercury or xenon burners are properly aligned and have not exceeded their lifespan (typically 100-300 hours).
- Consider lower magnification eyepieces (e.g., 8X instead of 10X) to increase image brightness.
- Use oil-immersion objectives to minimize light loss from reflections.
FAQ: My stitched slide-scan image has distinct lines or vignetting between tiles. What is the cause and solution?
Uneven illumination or vignetting can be caused by several factors [43]:
- Light source issues: If the problem is visible in all channels, the light source may need centering and alignment, or the liquid light guide may need replacement (recommended every two years).
- Bleaching of adjacent sites: Fluorophores in overlapping tile areas can be bleached by the light source before the image is captured. To mitigate this:
- Investigate tissue preparation protocols to improve fluorophore stability.
- Reduce exposure time or illumination intensity, balancing signal against bleaching.
- Increase the overlap percentage in your scan settings (typically 10-25%).
- Use background correction or image illumination correction tools.
- Out-of-focus areas: If darker areas are out of focus, use the focus map's heat map to check for large Z-height differences and add more focus sites to your map.
FAQ: My image is unclear, blurred, or has insufficient contrast. How can I fix this?
Unclear images can be due to several optical issues [42]:
- Dirty objectives or filters: Clean all optical elements carefully.
- Incorrect filter combinations: Verify that the exciter and barrier filter sets are correct for your fluorophore.
- Incorrect iris diaphragm adjustment: Ensure the aperture and field iris diaphragms are opened correctly.
- Use of an unsuitable filter cube: Change to a cube designed for your specific dye.
Data Analysis and Quantification
FAQ: What are the general steps for extracting quantitative features from a 2D image of a complex branching structure?
A general, automated framework for analyzing 2D images involves several key procedures [44]:
- Image Pre-processing: Convert the original color image to an 8-bit grayscale image. Apply thresholding (e.g., Otsu's method) to create a binary image, then use morphological operations (opening and closing) to remove noise and fill holes.
- Skeletonization: Reduce the binary image to a single-pixel-wide skeleton using a thinning method that preserves the topology and connectivity of the original structure.
- Skeleton Graph Generation: Use the skeleton image to generate a graph representation, detecting critical features such as junctions, terminals, and branches.
- Morphological Measurements: Quantify features from the pre-processed image, skeleton, and skeleton graph. These can include junction thickness, branch length, branch angle, and terminal spacing.
FAQ: What is the QMorF protocol and when is it used?
The Quantitative Morphology Field (QMorF) protocol quantifies the morphological features of a cellular structure and displays them as a distribution heat map. It is particularly useful for analyzing tissue images showing clear cellular features, such as during morphogenesis. The morphology is quantified by fitting 2D cross-sections of cells to ellipses and characterizing these ellipses. Coarse-graining statistical measurements are then performed over a micro-image stack to reveal underlying mechanical forces and developmental clues, improving measurement statistics [45].
Experimental Protocols
Protocol 1: Live-Cell Phenomic Profiling for Mechanism of Action Studies
This protocol outlines the steps for phenomic profiling of small molecules using a panel of reporter cell lines, based on a large-scale study profiling 1,008 compounds [3].
- Objective: To capture the phenotypic response of cells to compound treatment for MoA prediction and target identification.
- Key Materials:
- Compound Library: A collection of well-annotated reference compounds and tool molecules.
- Reporter Cell Line Panel: A panel of cell lines (e.g., A549, HepG2, WPMY1) engineered to express fluorescent markers for organelles (e.g., nucleus, mitochondria) and signaling pathways to capture diverse biological processes.
- Procedure:
- Cell Seeding and Treatment: Seed reporter cells into multi-well plates. Treat with compounds at multiple concentrations (e.g., 4 concentrations) to assess dose-dependent responses. Include a DMSO control.
- Live-Cell Imaging: Incubate for a set period (e.g., 24 hours). Image live cells using a high-content imaging system without fixing to capture dynamic physiological states.
- Image Analysis and Segmentation: Use automated software to segment cells based on fluorescent markers (e.g., a BFP nuclear marker) to identify nuclear and cellular boundaries.
- Feature Extraction: For each cell, extract hundreds of morphological features related to size, shape, intensity, and texture.
- Data Aggregation and Feature Selection: Aggregate single-cell data to the well level. Use feature selection algorithms (e.g., minimum Redundancy Maximum Relevance - mRMR) to identify a compact, informative subset of features (e.g., 22-58 features) that capture the phenotypic diversity. This subset is the "imaging signature."
- MoA Analysis and Distinction: Compare imaging signatures of unknown compounds to the reference set. Calculate activity metrics and use ranking methods (e.g., Area Under the Receiver Operating Characteristic Curve - AUC-ROC) to determine if an MoA class is distinguishable from others.
Diagram 1: Live-cell phenomic profiling workflow.
Protocol 2: Quantitative Morphology Field (QMorF) Analysis
This protocol details the steps for performing QMorF analysis on a stack of tissue section images [45].
- Objective: To quantify the morphological features of a cellular structure and visualize the distribution as a heat map.
- Key Materials:
- Tissue samples (e.g., feather rachis).
- Materials for paraffin wax embedding, sectioning, and staining.
- Microscope with camera.
- MATLAB software with Image Processing Toolbox.
- Procedure:
- Tissue Sectioning and Imaging:
- Fix and dehydrate the tissue sample using a graded ethanol series.
- Infiltrate with paraffin wax and embed in a mold.
- Section the sample using a microtome (0.5-10 μm thickness) and mount sections on microscope slides.
- Deparaffinize and seal the slides.
- Acquire a stack of micro-images from a localized region of the tissue using a microscope.
- Image Pre-processing (in MATLAB):
- Apply a Gaussian filter (
imgaussfilt) to reduce noise. - Complement the image gray level (
imcomplement). - Enhance contrast using Contrast-Limited Adaptive Histogram Equalization (
adapthisteq). - Binarize the image (
im2bw). - Use morphological operations to remove small noise objects (
bwareaopen), isolate noise (imopen), and close broken mesh networks (imclose).
- Apply a Gaussian filter (
- Fitting Elliptical Objects:
- Identify and record the edge pixels of cellular pore patches (
bwboundaries). - Fit the cellular pore into an elliptical object based on randomly sampled edge pixels (
fit_ellipse).
- Identify and record the edge pixels of cellular pore patches (
- Calculation of the Quantitative Morphology Field:
- Perform coarse-graining by sampling fitting objects within a window in the cross-sectional image.
- Average the quantified morphology over the stack of aligned images.
- Output the spatial distribution of the averaged measurement as an intuitive heat map.
- Tissue Sectioning and Imaging:
Diagram 2: QMorF analysis steps.
Data Presentation
Table 1: Distinguishing Mechanisms of Action (MoAs) via Phenomic Profiling
The ability to distinguish a compound's MoA from others is a key metric for a profiling assay. In a large-scale study, MoAs with an AUC-ROC ≥ 0.9 were considered distinguishable. The table below summarizes the performance based on a library of 1,008 compounds [3].
| MoA Category | Example MoA (Number of Compounds) | Distinguishability (AUC-ROC) | Key Findings from Profiling Study |
|---|---|---|---|
| Highly Distinguishable | Microtubule Polymerization Inhibitors (≥5 compounds) | ≥ 0.9 | Profiling at multiple concentrations improved MoA resolution more than including replicates at a single concentration. |
| Moderately Distinguishable | HSP90 Inhibitors (≥3 compounds) | < 0.9 | Screening additional cell lineages and fluorescent markers increased distinguishable MoAs, but the effect plateaued. |
| Poorly Distinguishable | Various (Many MoAs had ≤ 6 compounds) | Low | 41 of 83 testable MoAs were accurately distinguished. Many MoAs remain hard to distinguish, suggesting need for assay design improvements. |
Table 2: The Impact of Dye and Plasticizer Concentration on Sensor Film Performance
Optimizing chemical concentrations is crucial in developing sensor films, such as those for wound pH monitoring. The table below summarizes optimization results for a PVA-PEG-Bromothymol Blue (BTB) halochromic film, using bird-inspired metaheuristic algorithms [46].
| Material | Function | Concentration Range Studied | Optimal Concentration (via Parrot Optimizer) | Impact on Film Performance |
|---|---|---|---|---|
| Bromothymol Blue (BTB) | Synthetic pH-sensitive dye | 0.01 - 0.05% | 0.02% | Significantly affected response time (p=0.01). Optimal concentration led to a 23.15% faster color transition. |
| Polyethylene Glycol (PEG) | Plasticizer | 6 - 10% | 6% | No significant effect on response time (p>0.05). Influences moisture content and polymer backbone arrangement. |
The Scientist's Toolkit: Research Reagent Solutions
Table 3: Essential Materials for Image-Based Morphological Screening
| Reagent / Material | Function / Application | Key Considerations |
|---|---|---|
| Reporter Cell Lines (e.g., A549, HepG2, WPMY1) | Engineered to express fluorescent organelle/pathway markers; provide the biological system for live-cell screening. | Select cell lineages from different backgrounds to maximize phenotypic coverage. Ensure markers do not perturb cellular localization or function [3]. |
| Induced Pluripotent Stem Cells (iPSCs) | Can be differentiated into disease-relevant cell types (e.g., neurons, glia); provide a physiologically relevant human disease model [40]. | Protocols for differentiation are complex and require specific instructive factors. Validation of the model's relevance to in vivo biology is critical. |
| High Numerical Aperture (NA) Objectives | Microscope lenses that gather light; crucial for image brightness and resolution in fluorescence microscopy [42]. | In reflected light fluorescence, image intensity is proportional to the fourth power of the NA. Use planapochromat or planfluorite objectives for best chromatic correction and minimal autofluorescence. |
| Fluorescent Dyes & Markers | Label specific cellular structures or pathways to enable visualization and quantification. | Choose dyes with high stability and sensitivity. Balance illumination intensity and exposure time to minimize bleaching. Synthetic dyes often offer superior performance over natural dyes [46]. |
| Bio-Mordants (e.g., pomegranate rind, sumac) | Natural, bio-based agents used to fix dyes to tissues or materials; an alternative to metal mordants [47]. | Offer environmentally friendly and medically beneficial properties (e.g., anti-bacterial). Can be used to optimize dyeing processes in material science for sensors [47]. |
| Metaheuristic Optimization Algorithms (e.g., Parrot Optimizer, Genetic Algorithm) | Computational tools used to optimize complex, non-linear experimental parameters, such as chemical concentrations in polymer films [46]. | More effective than traditional methods for highly non-linear problems. Useful for fine-tuning parameters like dye and plasticizer concentration to achieve desired response times [46]. |
Solving Common Problems and Enhancing Signal-to-Noise
Troubleshooting Guide: Common Signs of Phototoxicity
Q: What are the common indicators of phototoxicity in my live-cell imaging experiments?
Phototoxicity manifests through specific, observable changes in cell health and morphology. If you observe the following in your samples, phototoxicity is likely affecting your data:
- Plasma Membrane Blebbing: The formation of bulges or blebs on the cell surface is a classic sign of cellular stress and damage [48].
- Cell Detachment and Shrinking: Unhealthy cells may round up and detach from the culturing vessel substrate [48].
- Altered Organelle Morphology: Enlarged mitochondria or the appearance of large vacuoles within the cytoplasm are key indicators [48].
- Catastrophic Fate Changes: A clear decrease in cell division rates or the induction of apoptosis are consequences of photodamage [49].
- Signal Degradation: A dimming or loss of fluorescence signal over time can indicate fluorophore photobleaching, a process linked to phototoxic pathways [48].
The table below summarizes these symptoms and their implications for your experiment.
Table 1: Identifying Phototoxicity: Symptoms and Consequences
| Observed Symptom | Description | Impact on Experiment |
|---|---|---|
| Membrane Blebbing | Bulging or blistering of the cell membrane [48]. | Compromised cellular integrity; non-physiological cell behavior. |
| Cell Detachment | Cells round up and lose adhesion to the culture surface [48]. | Data loss from dead cells; skewed analysis of cell population. |
| Altered Organelles | Enlarged mitochondria or large vacuoles become visible [48]. | Indicates severe cellular stress; disrupted metabolic processes. |
| Impaired Proliferation | Slow or halted cell division post-imaging [49]. | Inability to study long-term dynamics like growth or differentiation. |
| Fluorescence Dimming | Irreversible loss of fluorescence signal (photobleaching) [48]. | Poor data quality; inability to track targets over time. |
Frequently Asked Questions (FAQs)
Q: What are the primary molecular causes of phototoxicity in live-cell imaging?
Phototoxicity arises from the interaction of light with cellular components, primarily through two mechanisms:
- Reactive Oxygen Species (ROS) Generation: Upon illumination, fluorescent molecules (exogenous dyes or endogenous molecules like flavins) can be excited to reactive states. These can interact with molecular oxygen to produce ROS, such as singlet oxygen and superoxides. ROS readily oxidize and damage proteins, lipids, and DNA, disrupting normal cell function [50] [49].
- Direct Photodamage: Shorter-wavelength light, particularly UV, can directly cause damage such as DNA strand breaks and thymidine dimerizations, which can lead to mutations and cell death [49].
Q: How can I adjust my imaging hardware to minimize phototoxicity?
Optimizing your microscope setup is one of the most effective ways to reduce photodamage:
- Use Sensitive Detectors: Employ cameras with high quantum efficiency (e.g., back-illuminated sCMOS or EMCCD). This allows you to use lower light intensities while still capturing a good signal [51].
- Reduce Illumination Intensity and Time: Use the lowest laser power or exposure time that provides an acceptable signal-to-noise ratio [48]. Techniques like "active blanking" ensure the laser only illuminates the sample during camera exposure [51].
- Shift to Longer Wavelengths: Where possible, use red-shifted or near-infrared (NIR) fluorophores. Longer-wavelength light is less energetic and generates less ROS, thereby improving cell viability [48] [51] [49].
- Consider Microscope Modality: Camera-based confocal systems (e.g., spinning disk confocal) can be less phototoxic than point-scanning systems for live-cell imaging because they distribute light more efficiently and acquire images faster [51].
Q: What experimental and sample preparation parameters can I optimize?
- Choose Fluorophores Wisely: Select bright, photostable fluorophores. Be aware that some dyes, like RuBpy, are known photosensitizers that can significantly increase ROS production [50].
- Optimize Dye Concentration: Using the minimum necessary dye concentration for adequate detection can reduce the total number of photoactive molecules in the cell, thereby limiting ROS generation. This is a critical parameter to titrate in the context of phenotypic screening.
- Utilize Environmental Control: Maintain cells at optimal temperature, pH, and CO₂ levels during imaging. Cells under suboptimal conditions are more susceptible to photodamage [49].
- Minimize Frame Rate and Z-sections: Acquire images at the slowest acceptable frame rate and limit the number of Z-planes to reduce the total light dose delivered to the sample [49].
Experimental Protocols for Validating and Mitigating Phototoxicity
Q: How can I systematically test and validate phototoxicity in my experimental setup?
Before running critical experiments, it is good practice to conduct a phototoxicity validation assay. The following protocol uses cell division as a sensitive, label-free readout of cellular health [49].
Protocol 1: Label-Free Mitotic Index Assay
- Sample Preparation: Plate the cell line you routinely use for imaging.
- Apply Imaging Conditions: Subject one group of cells to your proposed live-cell imaging regimen (with the intended light dose, wavelength, and frequency). Keep a control group in the same environment but without light exposure.
- Post-Imaging Incubation: Return both groups to the incubator and allow them to grow for a period equivalent to one or more cell doubling times (e.g., 24-48 hours).
- Fix and Stain: After the incubation, fix the cells and stain nuclei with a standard dye like Hoechst or DAPI.
- Quantify and Compare: Under a standard microscope, count the total number of cells and the number of cells in mitosis (identifiable by condensed chromosomes) in both the imaged and control groups.
- Analysis: Calculate the mitotic index (number of dividing cells / total cells) for each group. A statistically significant reduction in the mitotic index of the imaged group indicates that your imaging parameters are causing phototoxicity and delaying cell cycle progression [49].
Q: Is there a method to directly measure ROS production during imaging?
Yes, you can use fluorescent ROS sensors to qualitatively assess one of the main drivers of phototoxicity.
Protocol 2: Detecting Reactive Oxygen Species (ROS)
- Load ROS Sensor: Incubate your cells with a cell-permeable, fluorescent ROS indicator (e.g., H₂DCFDA, CellROX).
- Establish a Baseline: Acquire an initial image to establish the baseline fluorescence of the probe.
- Apply Stressful Imaging: Expose the cells to the high-light-dose regimen you are testing for toxicity.
- Monitor Fluorescence Increase: The fluorescence intensity of these probes will increase in the presence of ROS. A rapid and strong increase in signal is a direct indicator of significant ROS generation during your imaging protocol [50] [49].
The Scientist's Toolkit: Research Reagent Solutions
Table 2: Essential Reagents and Tools for Mitigating Phototoxicity
| Tool / Reagent | Function / Description | Utility in Phototoxicity Reduction |
|---|---|---|
| Red-Shifted Fluorophores | Fluorescent probes excited by longer wavelength (red/NIR) light. | Lower energy illumination reduces ROS generation and increases cell viability [48] [51]. |
| ROS Indicators | Chemical probes (e.g., H₂DCFDA) that become fluorescent upon oxidation. | Enable direct measurement of ROS production from imaging protocols, allowing for parameter optimization [50] [49]. |
| Highly Sensitive Cameras | Detectors with high Quantum Efficiency (e.g., back-illuminated sCMOS). | Allow for lower excitation light intensities while maintaining image quality [51]. |
| Live-Cell Incubation Chambers | Systems to maintain precise temperature, CO₂, and humidity during imaging. | Keeps cells healthy, making them more resilient to unavoidable photostress [49]. |
| Photostable Dyes | Fluorophores engineered to resist photobleaching (e.g., some silica nanoparticle-doped dyes). | Reduced photobleaching rates are often correlated with lower ROS production [50]. |
Visualizing Phototoxicity Mechanisms and Mitigation Strategies
The following diagram illustrates the core mechanisms through which light causes photodamage and the primary strategies to mitigate it.
Mechanisms and Mitigation of Phototoxicity
This workflow outlines a systematic approach to troubleshooting phototoxicity in a live-cell imaging experiment.
Systematic Troubleshooting Workflow
Optimizing Buffer Conditions and Blocking Agents to Reduce Non-Specific Binding
In live cell phenotypic screening and other immunoassays, non-specific binding (NSB) is a fundamental challenge that can compromise data quality by increasing background noise and reducing the signal-to-noise ratio. Effective blocking—the process of saturating unoccupied binding sites on surfaces like membranes or cells—is therefore not merely a procedural step but a critical determinant of experimental success. This guide provides targeted troubleshooting and best practices for selecting and optimizing blocking agents and buffer conditions, framed within the context of modern phenotypic research.
FAQs: Understanding Blocking Agents and Buffer Conditions
1. What is the primary purpose of a blocking step in immunoassays? The blocking step is imperative for saturating the high-affinity protein-binding sites on surfaces like nitrocellulose or PVDF membranes after protein transfer in western blotting, or on cellular structures in imaging. This prevents detection antibodies and other reagents from binding non-specifically, thereby improving the assay's signal-to-noise ratio by reducing background interference [52] [53]. Inadequate blocking results in high background, while excessive blocking can mask specific antigen-antibody interactions [52].
2. How do I choose between protein-based and non-protein-based blocking agents? The choice depends on your specific application, target, and detection system.
- Protein-based blockers (e.g., BSA, non-fat milk, serum) are common and effective but can contain interfering substances. BSA is preferred for detecting phosphoproteins or when using biotin-streptavidin systems, as milk contains endogenous phosphoproteins and biotin [52] [54].
- Non-protein blockers (e.g., PVP, commercial synthetic buffers) are inert and ideal for situations where protein interactions must be avoided, such as when detecting small proteins or when background from protein-based blockers is too high [54] [53]. Fish gelatin is another alternative with low cross-reactivity for mammalian systems [55].
3. Why is Tween-20 used in buffers, and what is the optimal concentration? Detergents like Tween-20 are added to blocking and wash buffers to further reduce non-specific binding by disrupting hydrophobic interactions. Typical concentrations range from 0.05% to 0.2% (v/v) [52]. The exact amount should be optimized, as too much Tween-20 (e.g., >0.2%) can wash away weak-binding antibodies [52]. Including Tween-20 in the blocking buffer itself, not just the wash buffers, can significantly reduce blot-to-blot variability and background [56].
4. What are the special considerations for blocking in fluorescent detection methods? For fluorescent western blotting or imaging, it is crucial to use high-quality, filtered buffers to prevent particles from creating fluorescent artifacts [52] [54]. Furthermore, you should limit the use of detergents like Tween-20 during blocking steps, as they can auto-fluoresce and increase non-specific background. Phosphate-based buffers (PBS) can also interfere with some detection systems and increase background; Tris-buffered saline (TBS) is often recommended for fluorescent assays [52] [54].
5. My background is still high after blocking. What should I do? If you continue to encounter high background, consider these troubleshooting steps:
- Increase blocking efficiency: Increase the concentration of your blocking agent or extend the incubation time and/or temperature [53].
- Re-evaluate your buffer: Ensure you are using the appropriate buffer (TBS vs. PBS) and an optimal concentration of Tween-20 [52] [56].
- Change your blocking agent: Your current blocker may be incompatible with your antibody or detection system. Empirically test different blockers (e.g., switch from milk to BSA or a commercial blocker) [52] [53].
- Include additional controls: Use Fc receptor blocking reagents or normal serum when working with cells to prevent non-specific antibody binding [57] [58].
Troubleshooting Guide
| Problem | Possible Causes | Recommended Solutions |
|---|---|---|
| High Background Signal | Incomplete blocking; antibodies binding to proteins in blocking buffer; too much primary/secondary antibody; dead cells or cellular debris [57] [54]. | Increase blocking buffer concentration or incubation time; switch to a different blocking agent (e.g., BSA or casein); optimize antibody concentrations through titration; use a viability dye to gate out dead cells [57] [54] [53]. |
| Poor or Faint Signal | Blocking buffer is interfering with antigen-antibody binding; target protein abundance is low; insufficient antibody binding [54]. | Reduce the concentration of the blocking agent; eliminate detergents from the blocking buffer; use a brighter fluorochrome for low-abundance targets; increase antibody concentration or incubation time [57] [54]. |
| Non-Specific Bands | Insufficient blocking; primary antibody cross-reactivity; antibody concentration too high [54]. | Increase blocking stringency (longer time, higher concentration); add Tween-20 to the blocking buffer; perform an antibody titration to find the optimal dilution; ensure antibody specificity using a blocking peptide [54] [53]. |
| Weak Signal in Flow Cytometry | Inadequate fixation/permeabilization; dim fluorochrome paired with low-abundance target; incorrect laser/PMT settings on cytometer [57]. | Optimize fixation/permeabilization protocol (e.g., use ice-cold methanol); use the brightest fluorochrome (e.g., PE) for low-density targets; ensure cytometer settings match the fluorochrome's excitation/emission spectra [57]. |
Comparison of Common Blocking Agents
Selecting the right blocking agent is system-dependent. The following table summarizes key characteristics of standard agents to guide your selection [52] [54] [53].
| Blocking Agent | Typical Concentration | Benefits | Limitations | Ideal Use Cases |
|---|---|---|---|---|
| Non-Fat Dry Milk | 2-5% | Inexpensive, readily available, contains multiple protein types for effective blocking [52] [53]. | Contains biotin and phosphoproteins; can mask some antigens [52] [54]. | General, cost-effective western blotting where phosphoproteins or biotin are not targets [52]. |
| Bovine Serum Albumin (BSA) | 2-5% | Lacks phosphoproteins and biotin; good for phospho-specific detection and biotin-streptavidin systems [52] [54]. | More expensive than milk; generally a weaker blocker, which can lead to more non-specific binding [52]. | Detecting phosphoproteins; biotin-streptavidin detection systems; storing reused antibodies [52]. |
| Purified Casein | 1-2% | Single-protein buffer, fewer cross-reactions than milk or serum; good for high-sensitivity work [52] [54]. | More expensive than non-fat milk [52]. | Replacing milk when it causes high background or interferes with antigen-antibody binding [52]. |
| Fish Gelatin | 1-5% | Low cross-reactivity with mammalian antibodies; remains liquid at low temperatures [53] [55]. | May not be as effective as BSA or milk in some cases; limited availability [55]. | Blocking when working with mammalian samples and mammalian-derived antibodies [53]. |
| Normal Serum | 2-10% | Effective at blocking Fc receptors in cells, reducing non-specific antibody binding [54] [58]. | Can be expensive; contains immunoglobulins that may cross-react [53]. | Immunocytochemistry/immunofluorescence (ICC/IF) to prevent secondary antibody binding to Fc receptors [58]. |
| Soymilk (Non-Fat) | ~10% | Inexpensive, casein-free, and biotin-free; can offer superior blocking with short incubation times [56]. | Less commonly used; performance may vary. | An economical and effective alternative to commercial buffers; useful for routine immunoblotting [56]. |
| Commercial Blocking Buffers | As per mfr. | Serum- and biotin-free; often allow for rapid blocking (<15 min); consistent performance [52]. | More expensive than homemade solutions. | Optimizing a new system; when traditional blockers give high background or mask antigens [52]. |
Experimental Protocols for Optimization
Protocol 1: Standard Western Blot Blocking and Optimization
This protocol outlines a standard blocking procedure with steps for systematic optimization [52] [54].
Materials:
- Blocking agent (e.g., BSA, non-fat dry milk, casein)
- Tris-Buffered Saline (TBS) or Phosphate-Buffered Saline (PBS)
- Tween-20 detergent
- Rocking platform
Method:
- Preparation of Blocking Buffer: Dissolve your chosen blocking agent at 3-5% (w/v) in TBS or PBS. Add Tween-20 to a final concentration of 0.05-0.1% (v/v). Mix thoroughly and filter the solution to remove any particulate matter [54].
- Blocking Incubation: After protein transfer, incubate the membrane in the blocking buffer for 30 minutes to 1 hour at room temperature with gentle rocking. For more challenging targets, overnight incubation at 4°C can enhance blocking efficiency [54].
- Washing: After blocking, wash the membrane three times with TBST or PBST (buffer with 0.1% Tween-20) for 5-10 minutes each to remove excess blocker [54].
Optimization Steps:
- To Troubleshoot High Background: Increase the blocker concentration to 5%, extend the blocking time to 2 hours, or increase the temperature to 37°C [54] [53].
- To Troubleshoot Faint Signal: Reduce the blocker concentration to 1-2%, or prepare the blocking buffer without Tween-20 to prevent potential disruption of antibody-antigen binding [54].
- Agent Comparison: If results are suboptimal, test different blocking agents (e.g., milk vs. BSA vs. a commercial buffer) while keeping all other conditions constant to identify the best performer for your system [52].
Protocol 2: Blocking for Live-Cell Phenotypic Screening (Cell Painting)
While Cell Painting typically involves fixation, this protocol highlights key considerations relevant to live-cell contexts and dye selection to minimize non-specific signals [4] [2].
Materials:
- Live-cell compatible dyes (e.g., ChromaLive, MitoBrilliant)
- Appropriate cell culture medium
- High-content imaging system
Method and Considerations:
- Dye Selection: When adapting the standard Cell Painting assay for live-cell tracking, select dyes that are cell-permeable and compatible with live cells, such as ChromaLive or MitoBrilliant, to replace standard dyes like MitoTracker [4].
- Buffer and Condition Optimization: For live-cell imaging, the "blocking" step is often replaced by careful optimization of dye concentration and incubation conditions to ensure specific organelle labeling while minimizing non-specific accumulation.
- Validation: Test the performance of substitute dye sets against the standard panel. Studies show that while individual dye substitutions (e.g., MitoBrilliant for MitoTracker) may have minimal impact, live-cell compatible dyes can exhibit distinct performance profiles across different compound classes [4]. Later time points in live-cell imaging often provide more distinct phenotypic profiles [4].
- Multiplexing Expansion: For expanded multiplexing, approaches like the Cell Painting PLUS (CPP) assay use iterative staining and elution cycles. This allows more dyes to be used in separate channels, improving organelle-specificity and reducing spectral crosstalk, which is a form of non-specific signal [2].
Diagram Title: Blocking Agent Optimization Workflow
The Scientist's Toolkit: Research Reagent Solutions
| Item | Function & Application |
|---|---|
| Bovine Serum Albumin (BSA) | A purified protein blocking agent ideal for phosphoprotein detection and biotin-streptavidin systems due to lack of interfering phosphoproteins and biotin [52] [54]. |
| Non-Fat Dry Milk | A cost-effective, general-purpose blocking agent containing casein and other milk proteins. Avoid with phospho-specific antibodies or biotin systems [52] [53]. |
| Tween-20 | A non-ionic detergent added to blocking and wash buffers (0.05-0.2%) to reduce hydrophobic interactions and minimize non-specific binding [52] [54]. |
| Casein (Purified) | A single-protein blocker providing fewer chances for cross-reaction than mixed protein solutions like milk. A high-performance replacement for milk [52]. |
| Fish Gelatin | A blocking agent with low cross-reactivity with mammalian antibodies, useful for experiments involving mammalian samples and antibodies [53] [55]. |
| Commercial Blocking Buffers | Specialty formulations (e.g., StartingBlock, SuperBlock) are often serum- and biotin-free, provide rapid blocking, and offer consistency for challenging targets [52] [56]. |
| Soymilk (Non-Fat) | An inexpensive, animal-free, and effective alternative blocking agent that can provide high signal-to-noise ratios with short blocking times [56]. |
| Normal Serum | Used as a blocking agent in ICC/IF to block Fc receptors on cells, preventing non-specific binding of secondary antibodies [54] [58]. |
Strategies for Maintaining Signal Intensity Over Extended Time Courses
Core Principles for Signal Preservation
Why does my fluorescent signal fade over time, and how can I prevent it?
Signal intensity degradation during live-cell imaging primarily results from photobleaching and phototoxicity, which generate damaging free radicals [59]. The key principle is to maximize signal-to-noise ratio while minimizing light exposure [59]. Three fundamental strategies include: (1) using the lowest possible light intensity that provides usable signal, (2) limiting exposure time through hardware-triggered shutters, and (3) selecting optimal fluorophores and imaging hardware [59] [60]. The irradiance in spinning disk confocal microscopy can be ~1000 times higher than direct sunlight at specific wavelengths, creating significant stress on living cells [59].
How does microscope choice affect long-term signal stability?
Microscope selection critically influences signal preservation. Spinning disk confocal microscopes cause less ground-state depletion than laser scanning confocals because excitation light spreads over thousands of pinholes scanning rapidly across the specimen [59]. This prevents fluorophore populations from remaining in the excited state, enabling more efficient photon collection with reduced damage. Additionally, light sheet microscopy approaches that limit excitation to the imaged focal plane show promise for reducing photobleaching in developmental biology, though high-NA implementations remain limited for intracellular dynamics [59].
Troubleshooting FAQ: Common Experimental Challenges
What should I do if my signal is too weak despite using recommended dye concentrations?
- Re-evaluate your fluorophore: "Re-select a brighter fluorophore" if the current dye provides insufficient signal [60]. Consider environment-sensing dyes like merocyanines that change fluorescence properties based on local environment, as these can provide stronger signals in specific cellular compartments [61].
- Optimize sample mounting: Ensure samples are "mounted as close as possible to the distal end of the coverslip" using clean, sterilized coverslips [60].
- Upgrade detection hardware: Use "high numerical aperture, minimally corrected oil-immersion clean objective lenses" and ensure fluorescent filter sets precisely match your fluorophore [60]. Camera binning can increase signal intensity when resolution requirements permit [59].
How can I reduce high background fluorescence without washing steps?
- Modify imaging medium: "Use a phenol red-free medium" to minimize autofluorescence [60].
- Implement optimized labeling: "Use sufficient containment and controls for good antibody staining" to improve signal-to-noise ratio [60].
- Utilize novel dye properties: Employ dyes like the ChromaLive dye that "only gets fluorescent when incorporated into cellular membranes," enabling minimal-wash workflows [62].
- Control environmental light: "Turn off the room light" and prevent stray light from entering through microscope eyepieces [60].
My cells die or become unhealthy during time-lapse imaging - what solutions exist?
- Minimize phototoxicity: Use "a camera with the highest possible sensitivity" and turn off excitation light between image captures [60]. Remember that "shorter wavelength excitation light" causes more damage [60].
- Maintain physiological conditions: Employ environmental chambers that "consistently provide the right environment, including temperature and humidity" mimicking standard physiological conditions [60].
- Prevent contamination: "Sterilize to ensure that containers or equipment used are free of bacteria" [60].
- Consider dye toxicity: Select "nontoxic dye" options specifically validated for live-cell imaging [62].
Quantitative Optimization Data
Table 1: Microscope Irradiance Comparison for Live-Cell Imaging
| Microscope Type | Typical Irradiance | Comparative Sunlight | Impact on Signal Preservation |
|---|---|---|---|
| Spinning Disk Confocal | ~100 W/cm² (100×) | ~1000× total solar irradiance | Reduced ground-state depletion |
| Laser Scanning Confocal | Orders of magnitude higher | Significantly higher than spinning disk | High photobleaching risk |
| Widefield Epifluorescence | Similar to spinning disk (varies by source) | Similar to spinning disk | Moderate photobleaching |
| Light Sheet Microscopy | Limited to focal plane | Substantially reduced out-of-focus exposure | Minimal overall photodamage |
Table 2: Signal Optimization Reagent Solutions
| Reagent Type | Specific Examples | Function in Signal Maintenance |
|---|---|---|
| Background Inhibitors | Phenol-red free media [60] | Reduce extracellular background fluorescence |
| Dye Stabilizers | ChromaLive dye stabilizers [62] | Reduce signal loss over time |
| Environment-Sensing Dyes | Merocyanine dyes (mero87, mero81) [61] | Change fluorescence properties with target binding |
| Vital Dyes | YOYO-1 [63] | Detect specific cell states without fixation |
| Density Reagents | Iodixanol (OptiPrep) [63] | Enable minimal-wash protocols |
Advanced Methodologies for Signal Maintenance
How can I implement minimal-wash protocols for extended imaging?
The Dye Drop method uses sequential density displacement with iodixanol to perform multi-step assays without traditional washing steps [63]. Each solution is slightly denser than the last, flowing to well bottoms and displacing previous solutions with minimal mixing or cell disturbance [63]. This approach reduces cell loss—particularly of delicate mitotic or dying cells—and enables more accurate long-term observation while cutting reagent volumes and costs by approximately 50% [63].
What fluorophore properties should I prioritize for long-term imaging?
- Photostability: Select dyes with proven resistance to photobleaching, such as merocyanine derivatives showing "photostability greater than Cy5" [61].
- Environment sensitivity: Dyes whose fluorescence properties change with local environment (e.g., merocyanines with solvent-dependent lifetime changes) enable detection without concentration-dependent artifacts [61].
- Low toxicity: "Nontoxic dye" options permit extended observation without affecting cell physiology [62].
- Brightness: Prioritize fluorophores with high quantum yields and extinction coefficients at available laser wavelengths [61] [59].
Experimental Protocols for Signal Preservation
Protocol: Dye Drop Cell Viability Assay for Long-Term Observation
- Cell Preparation: Culture cells under optimal conditions in 384-well plates [63].
- Dye Application: Add viability dyes (e.g., YOYO-1) in culture medium [63].
- Density Displacement Steps: For each solution change:
- Prepare new solution with slightly higher iodixanol concentration
- Add along well edges using multichannel pipettes
- Allow dense solution to gently displace previous solution [63]
- Imaging: Capture images with minimal light exposure using hardware-triggered shutters [59].
- Analysis: Quantify viability and signal intensity at single-cell resolution [63].
Protocol: FLIM Biosensor Imaging for Quantitative Measurements
- Biosensor Selection: Choose environment-sensitive dyes like mero87-CBD that show lifetime changes upon target binding [61].
- Validation: Confirm lifetime difference between bound and unbound states using in vitro assays [61].
- Cell Introduction: Microinject biosensor into cells [61].
- Phasor FLIM Imaging: Collect lifetime data and analyze using phasor approaches to visualize lifetime changes without complex fitting routines [61].
- Quantification: Determine activated target concentration based on lifetime signatures [61].
Visualization of Optimization Strategies
Research Reagent Solutions for Signal Maintenance
Table 3: Essential Reagents for Extended Time-Course Live-Cell Imaging
| Reagent Category | Specific Products/Examples | Key Function | Implementation Tips |
|---|---|---|---|
| Environment-Sensing Dyes | Merocyanine dyes (mero87, mero81) [61] | Fluorescence lifetime changes with target binding | Screen multiple dyes for optimal response to your target |
| Non-Toxic Live Cell Dyes | ChromaLive dye [62] | Fluorescence upon membrane incorporation enables no-wash protocols | Use without washing steps for automation workflows |
| Density Reagents | Iodixanol (OptiPrep) [63] | Enables density displacement washing in Dye Drop method | Create concentration series for sequential application |
| Background Suppressors | Phenol red-free media [60] | Reduces background autofluorescence | Essential for dim signals or long exposures |
| Vital Reporters | YOYO-1 [63] | Identifies dead/dying cells in viability assays | Use at minimal concentrations to avoid toxicity |
| Fluorescent Proteins | H2B-mCherry [63] | Stable nuclear markers for cell tracking | Select bright, photostable variants for long-term imaging |
Correcting for Spectral Crosstalk and Emission Bleed-Through
This guide provides troubleshooting and best practices for researchers working with multi-color fluorescence experiments, particularly in the context of live-cell phenotypic screening.
FAQs and Troubleshooting Guides
Q1: What is spectral bleed-through and how does it affect my data?
Spectral bleed-through (also called crosstalk) occurs when the fluorescence emission from one fluorophore is detected in the channel reserved for another fluorophore [64]. This artifact can lead to:
- False co-localization: Making it appear that two distinct cellular structures or molecules are in the same location when they are not [64].
- Overestimated binding: In techniques like dual-color fluorescence cross-correlation spectroscopy (dcFCCS), it can cause false-positive or overestimated cross-correlation amplitudes [65].
- Compromised quantitative measurements: Severely impacting the accuracy of FRET, FCS, and other quantitative assays [65] [66] [64].
Q2: How can I prevent bleed-through during experimental design?
Prevention is the most effective strategy. The table below summarizes key considerations.
Table 1: Strategies for Preventing Spectral Crosstalk
| Strategy | Description | Practical Tip |
|---|---|---|
| Fluorophore Selection | Choose dyes or fluorescent proteins with well-separated emission spectra [67] [64]. | For two-color imaging, select a pair like Alexa Fluor 488 and Alexa Fluor 633, which have virtually no spectral overlap [64]. |
| Filter Optimization | Use filter sets that are specifically matched to your fluorophores to maximize signal separation [68] [66]. | Review filter specifications to ensure they minimize cross-excitation and emission bleed-through [68]. |
| Microscope Setup | Utilize hardware capabilities to separate signals during acquisition [66] [64]. | On confocal systems, use sequential scanning (multitracking) where each laser line excites only one fluorophore at a time [64]. |
| Balanced Labeling | Adjust labeling conditions so fluorescence intensities from different probes are similar [64]. | Reserve the brightest and most photostable fluorophores for the least abundant cellular targets [64]. |
Q3: I have existing data with crosstalk. How can I correct it?
For standard fluorescence microscopy images, linear unmixing is a powerful computational approach. This technique requires knowing the emission fingerprint—the unique emission spectrum—of each fluorophore in your sample [66]. The workflow is as follows:
For binding quantification in dcFCCS, a mathematical correction can be applied using the bleed-through ratio (κ), which is determined from a calibration measurement with only the "green" fluorophore present [65]:
κ = (Count Rate in Red Channel) / (Count Rate in Green Channel)
This κ value, along with the apparent count rates and correlation amplitudes from your experiment, can be used to calculate the true cross-correlation amplitude [65].
Q4: What are the best practices for live-cell phenotypic screening?
In live-cell studies, minimizing light exposure and acquisition time is critical for cell health. To manage crosstalk under these constraints:
- Prioritize Sequential Scanning: Although it slightly increases acquisition time, it drastically reduces crosstalk compared to simultaneous scanning [66] [64].
- Use Ratiometric Probes: Where possible, use probes that change their emission properties in response to a biological signal, as this often reduces the need for multiple fluorophores.
- Validate with Controls: Always include single-label control samples to measure the level of bleed-through under your exact imaging conditions [66].
The Scientist's Toolkit: Key Reagents and Materials
Table 2: Essential Reagents for Multi-Color Fluorescence Experiments
| Item | Function | Application Note |
|---|---|---|
| Alexa Fluor Dyes | A series of bright, photostable synthetic dyes covering the visible and near-IR spectrum [64]. | Ideal for fixed-cell imaging. Choose pairs with large separation in emission maxima (e.g., Alexa Fluor 488 & 647) to minimize crosstalk [64]. |
| Fluorescent Proteins (FPs) | Genetically encoded tags for live-cell imaging (e.g., EGFP, mCherry, mCherry) [69] [66]. | Spectral overlap is common (e.g., EGFP & EYFP). Use advanced techniques like spectral imaging or carefully selected filter sets to separate them [66]. |
| Spectral Reference Samples | Samples labeled with a single, known fluorophore [66]. | Used to record the "emission fingerprint" for each fluorophore, which is essential for linear unmixing algorithms [66]. |
| Bleed-Through Control Samples | Biological or synthetic samples prepared with each fluorophore used in the experiment individually. | Critical for quantifying the bleed-through ratio (κ) for mathematical correction methods in quantitative spectroscopy [65]. |
| Cell Painting PLUS Dyes | A curated set of dyes for multiplexed cellular profiling, designed for sequential staining and imaging [70]. | Enables high-plex imaging by staining and eluting cycles, ensuring each dye is imaged in a separate channel to avoid crosstalk entirely [70]. |
Adapting Protocols for Different Cell Lines and Seeding Densities
Troubleshooting Guides
FAQ 1: How do I adapt dye concentrations for different cell types in live-cell proliferation tracking?
Problem: A dye concentration optimized for one cell line produces signals that are too dim, too toxic, or fade too quickly when applied to a different cell line.
Solution: Systematically titrate the dye and validate performance for each new cell type. The optimal concentration must provide a bright initial signal without affecting cellular health or function.
Detailed Methodology:
- Prepare a dye stock solution according to the manufacturer's instructions.
- Create a dilution series of the dye. For example, test concentrations spanning 0.5 µM to 10 µM, depending on the dye and cell sensitivity [71].
- Label separate aliquots of your cells with each dye concentration in the series. Use consistent cell numbers and labeling conditions (time, temperature).
- Analyze initial staining using flow cytometry or microscopy to assess the brightness and uniformity of the label.
- Culture the labeled cells for several days, tracking cell viability and growth rate using a hemocytometer or automated cell counter. Compare to unlabeled controls.
- Monitor dye dilution over 72+ hours by flow cytometry to ensure the signal remains detectable through multiple generations without transferring to adjacent cells [72] [71].
- Select the optimal concentration that provides bright, uniform staining, maintains cell viability and proliferation rate equivalent to controls, and allows tracking for the desired number of generations.
Key Quantitative Data for Common Dyes: Table 1: Titration and Performance of Common Cell Tracking Dyes
| Dye Name | Recommended Concentration Range | Key Performance Considerations | Spectral Profile |
|---|---|---|---|
| CellTrace Violet | 1 - 10 µM [71] | Minimal cell-to-cell transfer; minimal impact on viability at 5 µM [71] | Excited by 405 nm laser [71] |
| CFSE | 0.5 - 1 µM [71] | Concentrations >2 µM can induce toxicity; significant initial fluorescence loss [71] | Excitation/Emission: 492/517 nm [71] |
| CellTrace Far Red | ~1 µM [71] | Minimal effects on viability; stable fluorescence over time [71] | Excited by 633/635 nm laser [71] |
FAQ 2: How does seeding density impact phenotypic stability and assay outcomes?
Problem: Cellular morphology, differentiation state, or response to treatment changes unpredictably when cells are seeded at different densities.
Solution: Seeding density is a critical variable that must be optimized and tightly controlled to ensure phenotypic stability and reproducible results, especially in primary cells or differentiated cultures.
Detailed Methodology for Optimization:
- Define the assay output. Determine the primary readout (e.g., high-content imaging profiles, sulfate incorporation, expression of differentiation markers) [73].
- Design a density experiment. Seed cells across a range of densities. For a 96-well plate, test densities from 2,000 to 50,000 cells/well, adjusting based on cell size and growth rate.
- Perform the assay. Conduct your phenotypic screen or differentiation protocol across the different seeding densities.
- Quantify the output. For chondrocyte differentiation, measure sulfate incorporation and collagen/proteoglycan expression. For high-content screening, extract morphological profiles [74] [73].
- Identify the optimal density. Select the density that maintains phenotypic stability (e.g., high expression of type II collagen in chondrocytes) and provides a robust assay window without causing over-confluence or poor cell health [73].
Key Data on Seeding Density Effects: Table 2: Impact of Seeding Density on Phenotypic Stability
| Cell Type / Context | Low Seeding Density Effect | High Seeding Density Effect | Primary Readout |
|---|---|---|---|
| Pig Articular Chondrocytes [73] | Dedifferentiation; expression of smaller, non-aggregating proteoglycans; increased type I collagen. | Stabilized differentiated phenotype; expression of large, aggregating proteoglycans; extensive type II collagen matrix. | Collagen type, Proteoglycan size & aggregation |
| General High-Content Screening [74] [75] | Increased cell spreading; potential loss of tissue-specific morphology. | Maintained cell-cell contacts; may mimic native tissue organization more closely. | Morphological profiles, Protein localization |
The Scientist's Toolkit: Research Reagent Solutions
Table 3: Essential Reagents for Live-Cell Phenotypic Screening
| Reagent Category | Specific Examples | Function in Live-Cell Assays |
|---|---|---|
| Cell Proliferation Dyes | CellTrace Violet, CFSE, CellTrace Far Red [71] | Covalently bind intracellular proteins; dilution via partitioning upon cell division allows generational tracing. |
| Viability Indicators (Live) | Calcein AM [13] | Cell-permeant dye converted by esterases to a fluorescent product retained in live cells. |
| Viability Indicators (Dead) | SYTOX Green, YOYO-1 [13] | Cell-impermeant nucleic acid stains that only enter cells with compromised membranes. |
| Apoptosis Sensors | CellEvent Caspase-3/7 [13] | Fluorogenic substrates that become fluorescent upon cleavage by activated caspases in apoptotic cells. |
| Organelle Trackers | MitoTracker dyes (structure), TMRM (membrane potential) [13] | Accumulate in specific organelles (e.g., mitochondria) to report on localization, abundance, and function. |
| Plasma Membrane Stains | CellMask dyes [13] | Label the plasma membrane for studies of cell morphology, outlining, and internalization processes. |
| Cytoskeletal Stains | CellMask Actin Tracking Stain, Tubulin Tracker [13] | Label F-actin or microtubule networks to monitor cytoskeletal dynamics and organization. |
| BacMam Labels | CellLight GFP-BacMam 2.0 [13] | Enable efficient, tunable, and long-term fluorescent labeling of specific cellular structures in live cells. |
Experimental Workflow Visualizations
Optimizing Dye and Seeding Density
Dye Optimization Troubleshooting
Assessing Assay Performance and Cross-Method Correlation
Establishing Benchmark Concentrations (BMCs) for Toxicity and Phenotypic Change
This technical support guide provides troubleshooting and best practices for researchers establishing Benchmark Concentrations (BMCs) in high-throughput phenotypic profiling, with a focus on optimizing dye concentrations for live-cell and fixed-cell applications.
Frequently Asked Questions (FAQs)
FAQ 1: What is the core purpose of calculating a Benchmark Concentration (BMC) in phenotypic screening? The BMC is a calculated dose or concentration of a substance associated with a specific, predetermined change (the Benchmark Response or BMR) in the phenotypic profile compared to the background level. The lower confidence bound of the BMC (BMDL) is typically used as a Point of Departure (PoD) for quantitative risk assessment, as it is considered more statistically robust than traditional methods like the No-Observed-Adverse-Effect Level (NOAEL) [76] [77].
FAQ 2: Our Cell Painting assay yields inconsistent phenotypic profiles. What are the key dye-related factors we should optimize? Inconsistent profiles often stem from suboptimal dye protocols. Key factors to optimize include:
- Dye Concentration and Signal Stability: Ensure dye concentrations and imaging exposure times are balanced to achieve optimal signal intensity without saturation. Note that staining intensities for some dyes, such as LysoTracker and Concanavalin A (ER), can change over time. Imaging should be conducted within 24 hours of staining to ensure data robustness [2].
- Spectral Crosstalk: When expanding multiplexing capacity, systematically investigate emission bleed-through and cross-excitation between dyes. For example, RNA dyes may show bleed-through into other channels. Sequential staining and imaging of dyes in separate channels can mitigate this issue and improve organelle-specificity [2].
- Cell Health and Seeding Density: A significant inverse relationship has been observed between cell seeding density and the magnitude of phenotypic effect sizes (e.g., Mahalanobis distance). Optimize and consistently control cell density across experiments, as it can directly influence the calculated BMC [78].
FAQ 3: When adapting a Cell Painting protocol from a 384-well to a 96-well plate format, what aspects require the most attention? Successful adaptation hinges on protocol consistency and replication. Key aspects include:
- Reagent Volumes and Imaging: Adjust staining and washing volumes appropriately for the larger well size.
- Cell Seeding: Ensure uniform cell seeding across the plate. One study successfully adapted a 384-well protocol to 96-well plates by seeding U-2 OS cells at a density of 5,000 cells/well [78].
- Replication: Incorporate a sufficient number of biological replicates. Performing four independent exposure experiments is recommended to demonstrate intra-laboratory consistency and ensure robust BMC calculations [78].
FAQ 4: Which hit identification strategies are most effective for BMC analysis in high-dimensional profiling data? Strategies based on multiconcentration analysis generally outperform single-concentration methods. The following approaches, listed from highest to lowest hit detection rate, are effective for modeling concentration-response data for BMC determination [79]:
- Feature-level and category-based curve fitting.
- Global modeling of all features.
- Fitting of distance metrics (e.g., Mahalanobis distance). Strategies relying solely on signal strength or profile correlation at a single concentration detect fewer active hits. Approaches using distance metrics also have a lower likelihood of identifying false-positive hits associated with assay noise [79].
Troubleshooting Guides
Issue 1: Poor or Inconsistent Staining of Cellular Organelles
| Problem Description | Possible Cause | Solution |
|---|---|---|
| Weak or absent signal for a specific dye. | Inappropriate dye concentration; low laser power or acquisition time during imaging. | Titrate dye concentrations to find the optimal level. Systematically optimize image acquisition settings (e.g., z-offsets, laser power, acquisition times) for each cell type [80] [2]. |
| High background or non-specific signal. | Incomplete washing after staining; spectral crosstalk between dyes. | Follow strict washing protocols. Check for dye cross-excitation and emission bleed-through; use sequential staining and imaging if needed [2]. |
| Staining intensity deteriorates over time. | Photobleaching; instability of the dye complex. | Image plates promptly after staining, ideally within 24 hours, to ensure signal stability [2]. Store stained plates in the dark. |
Issue 2: Problems with Cell Segmentation and Feature Extraction
| Problem Description | Possible Cause | Solution |
|---|---|---|
| Software fails to identify individual cells accurately. | Incorrect segmentation parameters; atypical cell morphology due to toxicity. | Optimize cell segmentation parameters (e.g., adjustment of nuclear and cytoplasmic boundaries) for each specific cell type used in your lab [80]. |
| Extracted features show high variance in control wells. | Uneven cell seeding density; contamination; edge effects in microplates. | Standardize and optimize cell seeding density. Use quality control measures to include only wells with acceptable cell counts and morphology. |
Issue 3: Low Effect Size or High Variability in BMC Calculations
| Problem Description | Possible Cause | Solution |
|---|---|---|
| The calculated Mahalanobis distance is low, even at high compound concentrations. | The selected morphological features are not sensitive to the biological perturbation. | Ensure the assay captures relevant biology by using multiple, biologically diverse cell lines [80]. Use multivariate distance metrics that aggregate changes across many features [78]. |
| BMC values are inconsistent between experimental replicates. | Insufficient number of biological replicates; high variability in cell culture conditions. | Conduct multiple independent biological replicates (e.g., n=4). Strictly control culture conditions, passage numbers, and seeding density, which is a known source of variance [78]. |
Experimental Protocols
Protocol 1: Adapting Cell Painting for BMC Determination in a 96-Well Format
This protocol is adapted from a study that successfully replicated high-throughput phenotypic profiling in a medium-throughput laboratory setting [78].
Key Materials:
- Cell Line: U-2 OS human osteosarcoma cells (or your cell line of choice).
- Plate: PhenoPlate 96-well microplates.
- Staining Dyes: A set to label nucleus, endoplasmic reticulum, Golgi apparatus, cytoskeleton, and mitochondria [81] [78].
- Imaging: High-content imaging system (e.g., Opera Phenix).
- Analysis Software: Image analysis platform (e.g., Columbus) capable of extracting hundreds of morphological features.
Methodology:
- Cell Seeding: Seed U-2 OS cells at a density of 5,000 cells/well in 100 µL of growth medium. Incubate for 24 hours prior to chemical exposure [78].
- Chemical Exposure:
- Prepare stock solutions of test chemicals in DMSO.
- Serially dilute chemicals to create an 8-point concentration series, typically spaced by half-log units.
- Prepare exposure media by adding treatment solutions to the culture medium at 0.5% v/v. Include vehicle controls (0.5% DMSO).
- Remove growth medium from the assay plate and replace it with exposure media.
- Expose cells for 24 hours.
- Cell Painting and Fixation:
- Fix cells with 4% paraformaldehyde for 20-30 minutes.
- Permeabilize cells (if required for dyes used).
- Stain cells according to your established Cell Painting protocol, using the optimized dye concentrations.
- Image Acquisition: Image the stained plates using a high-content imager. Acquire multiple fields per well to ensure a robust cell count.
- Feature Extraction and Data Analysis:
- Use image analysis software to extract ~1,300 morphological features (related to intensity, texture, shape) at the single-cell level.
- Normalize feature values to the vehicle control.
- Perform multivariate analysis (e.g., Principal Component Analysis) and calculate a summary metric, such as the Mahalanobis distance, for each treatment condition relative to the control.
- BMC Modeling:
- Fit the concentration-response data for the Mahalanobis distance (or other summary metrics) using appropriate statistical models.
- Calculate the BMC for a predetermined BMR (e.g., one standard deviation from the control mean) and its lower confidence limit (BMDL) [78].
Protocol 2: Iterative Staining for Expanded Multiplexing (Cell Painting PLUS)
For researchers requiring higher organelle-specificity, the Cell Painting PLUS (CPP) assay uses iterative staining-elution cycles [2].
Workflow Overview:
Key Steps:
- Fixation: Fix cells with paraformaldehyde to preserve cellular structures.
- Iterative Staining & Elution:
- First Cycle: Stain with a set of dyes (e.g., for Lysosomes, DNA, RNA). Image each dye in a separate channel.
- Dye Elution: Apply an elution buffer (e.g., 0.5 M L-Glycine, 1% SDS, pH 2.5) to remove the fluorescent signals while preserving cellular morphology.
- Second Cycle: Re-stain the same cells with a second set of dyes (e.g., for Mitochondria, Actin, ER). Image these dyes in their own separate channels.
- Image Registration: Use a reference channel (e.g., a dye that withstands elution, like MitoTracker) to align image stacks from different cycles into a single composite image for each well.
- Analysis: Proceed with feature extraction and BMC modeling as in Protocol 1. This method provides more specific organelle data, which can enhance phenotypic profiling [2].
The Scientist's Toolkit: Research Reagent Solutions
| Item | Function in the Assay | Application Note |
|---|---|---|
| Hoechst 33342 | Labels nuclear DNA. A staple for identifying nuclei and quantifying nuclear morphology and count. | Used in both standard Cell Painting and CPP assays [81] [2]. |
| Phalloidin (e.g., Alexa Fluor 568) | Labels F-actin, staining the cytoskeleton. Crucial for detecting changes in cell shape and structure. | Part of the core dye set; often imaged combined with Golgi stains in standard CP [81]. |
| MitoTracker Deep Red | Labels mitochondria in a membrane potential-dependent manner. Used to assess mitochondrial health and morphology. | In CPP, this dye can be used as a reference that persists through elution cycles [81] [2]. |
| Concanavalin A (e.g., Alexa Fluor 488) | Binds to mannose residues, labeling the endoplasmic reticulum (ER). | Signal intensity may increase over the first 48 hours post-staining; image within 24h for consistency [2]. |
| Wheat Germ Agglutinin (WGA) | Binds to glycoproteins on the plasma membrane and Golgi apparatus. | Often combined with Phalloidin in a single imaging channel in standard CP to maximize throughput [81]. |
| SYTO 14 | Green fluorescent nucleic acid stain that labels cytoplasmic RNA and nucleoli. | Can exhibit spectral crosstalk; sequential imaging in CPP improves specificity [2]. |
| LysoTracker | Accumulates in acidic compartments like lysosomes. Used live or in fixed-cell compatible formats. | In live-cell applications, it indicates lysosomal mass and pH; signal intensity can decrease over time [2]. |
| Elution Buffer | Removes fluorescent dyes from fixed cells while preserving morphology, enabling iterative staining. | A typical formulation is 0.5 M L-Glycine, 1% SDS, pH 2.5 [2]. |
Logical Pathway for BMC Determination
The following diagram outlines the key decision points and steps in establishing a BMC from a phenotypic profiling assay.
Validating Dye Performance Against a Panel of Reference Compounds
Frequently Asked Questions (FAQs)
Q1: Why is it important to use a panel of reference compounds for dye validation? A panel of reference compounds with known and diverse mechanisms of action (MOA) is crucial because it tests the dye's ability to detect a wide spectrum of biological activities. Validation relies on quantitative metrics like percent replicating and percent matching to ensure the dye can reliably group similar biological perturbations and distinguish different ones, which is the foundation of a robust phenotypic screen [82].
Q2: What are the key metrics for quantitatively validating dye performance? The two primary metrics are [82]:
- Percent Replicating: The frequency with which technical replicates of the same treatment cluster together in a morphological feature space. A high value indicates low technical variation and high assay robustness.
- Percent Matching: The frequency with which different treatments known to impact the same biological pathway (e.g., share an MOA) cluster together. A high value confirms the dye's sensitivity to biologically relevant phenotypes.
Q3: Our live cell dye shows unexpected toxicity. What could be the cause? Unexpected toxicity can often be linked to the chemical nature of the dye itself or its concentration. Traditional dyes may not be fully biocompatible. It is recommended to seek out and validate novel dyes specifically reported as nontoxic and designed for live-cell applications. Additionally, ensure you are using the minimum effective concentration as determined by a dose-response validation [62].
Q4: We are getting weak signal intensity from our live cell dye. What steps should we take? First, verify that the dye concentration is optimal. If the signal is still weak, consider using a dye that is engineered to become highly fluorescent only upon incorporation into cellular membranes, which can provide a stronger, more specific signal with minimal background, often without the need for wash steps [62].
Troubleshooting Guide
| Problem | Potential Cause | Recommended Solution |
|---|---|---|
| High technical variation (Low Percent Replicating) | Inconsistent cell culture, staining, or imaging conditions. | Standardize protocols across replicates and operators. Use automated liquid handling where possible [82]. |
| Failure to group similar MOAs (Low Percent Matching) | Dye concentration is too high or too low, causing loss of phenotypic resolution. | Titrate the dye and re-validate using the panel of reference compounds [82]. |
| Unexpected cell death or morphology | Dye toxicity. | Switch to a dye confirmed to be nontoxic for live-cell imaging [62]. |
| High background fluorescence | Incomplete washing or dye aggregation. | For compatible dyes, use a no-wash protocol. Otherwise, optimize wash steps and solvent conditions [62]. |
Experimental Protocol: Validating Dye Concentration
This protocol outlines how to titrate and validate a dye's optimal working concentration using a panel of reference compounds.
1. Preparation of Reference Compound Plate (JUMP-MOA Plate)
- Objective: Create a standardized plate containing 90 or more compounds with known, diverse mechanisms of action (e.g., cytoskeletal disruptors, kinase inhibitors, DNA damaging agents) [82].
- Method: Dispense compounds into a multi-well plate (e.g., 384-well) with multiple replicates per compound and include DMSO-only vehicle controls.
2. Cell Seeding and Treatment
- Seed the desired cell line (e.g., U-2 OS or A549) at an appropriate density in assay plates.
- Allow cells to adhere and grow under standard culture conditions.
- Treat cells with the prepared reference compound plate.
3. Dye Staining and Titration
- Prepare a range of dye concentrations (e.g., 1:2 serial dilutions).
- Apply the different dye concentrations to the treated cells according to the staining protocol, ensuring all other conditions remain constant. For live-cell dyes, this may involve adding the dye directly to the media, sometimes without a wash step [62].
4. Image Acquisition and Feature Extraction
- Acquire high-content images using a confocal or other suitable microscope across all five channels (if using a multi-color stain like Cell Painting) [82].
- Use image analysis software to segment cells and nuclei, and extract thousands of morphological features (e.g., size, shape, texture, intensity) from each cell.
5. Data Analysis and Metric Calculation
- Aggregate single-cell data to create well-level profiles.
- For each dye concentration, calculate the percent replicating and percent matching metrics [82].
- Percent Replicating Calculation: For each compound treatment, calculate the Pearson correlation of all replicate pairs. The percent replicating is the fraction of these pairs whose correlation is above the 95th percentile of a null distribution of random well pairs.
- Percent Matching Calculation: For pairs of compounds with a shared MOA, calculate the fraction of pairs whose correlation is above the 95th percentile (for similar phenotypes) or below the 5th percentile (for opposite phenotypes) of the null distribution.
6. Optimal Concentration Selection
- The dye concentration that yields the highest percent replicating and percent matching scores is identified as the optimal, cost-effective concentration for future screens. An example of successful optimization is the reduction of phalloidin concentration fourfold without sacrificing performance [82].
Quantitative Data from Optimization Studies
The following table summarizes key changes from the quantitative optimization of the Cell Painting assay by the JUMP Consortium, which can serve as a benchmark for dye validation studies [82].
| Protocol Parameter | Previous Version | Optimized Version (v3) | Rationale for Change |
|---|---|---|---|
| MitoTracker Stain | Unintentionally 375 nM | 500 nM | Ensure consistent, effective mitochondrial labeling. |
| Phalloidin (F-actin) | 5 μl/ml (33 nM) | 1.25 μl/ml (8.25 nM) | Cost savings with no performance loss. |
| Hoechst (DNA) | 5 μg/ml | 1 μg/ml | Cost savings with no performance loss. |
| SYTO 14 (RNA) | 3 μM | 6 μM | Improved signal intensity. |
| Concanavalin A (ER) | 100 μg/mL | 5 μg/mL | Significant cost savings. |
| Staining Volume | 30 μl/well | 20 μl/well | Cost savings on reagents. |
The Scientist's Toolkit: Essential Research Reagents
| Item | Function in Validation |
|---|---|
| Panel of Reference Compounds | A collection of compounds with known, diverse mechanisms of action used to challenge and benchmark the dye's performance [82]. |
| Nontoxic Live-Cell Dye | A fluorescent probe that changes intensity or pattern in response to physiology without harming cells, enabling kinetic imaging [62]. |
| MitoTracker Deep Red | A dye that stains mitochondria; optimal concentration validated at 500 nM [82]. |
| Phalloidin (e.g., conjugated to Alexa Fluor 488) | A stain for F-actin filaments; concentration can be reduced to 8.25 nM for cost efficiency [82]. |
| Hoechst 33342 | A cell-permeant nuclear stain; concentration can be reduced to 1 μg/ml [82]. |
| SYTO 14 Green Fluorescent Nucleic Acid Stain | A stain for cytoplasmic RNA; concentration was increased to 6 μM for better signal [82]. |
| Concanavalin A (e.g., conjugated to Alexa Fluor 568) | A stain for the endoplasmic reticulum and golgi apparatus; concentration was drastically reduced to 5 μg/mL [82]. |
Experimental Workflow for Dye Validation
The following diagram illustrates the key stages in the dye validation process.
Decision Process for Dye-Related Issues
This flowchart helps troubleshoot common problems encountered during dye validation and use.
Comparing Live-Cell Dye Profiles with Fixed-Cell Counterparts
Technical Support Center
Troubleshooting Guides
Guide 1: Addressing Poor Signal-to-Noise Ratio in Live-Cell Imaging
Problem: Fluorescent signal is weak or background is too high during live-cell imaging, making it difficult to distinguish specific cellular structures.
Solutions:
- Dye Concentration Optimization: Titrate dye concentrations. The following table summarizes recommended starting concentrations based on recent studies:
| Dye Type | Recommended Starting Concentration | Solvent | Incubation Time |
|---|---|---|---|
| MitoTracker analogs (e.g., MitoBrilliant) | 50-100 nM | DMSO | 15-30 min at 37°C |
| Actin stains (e.g., Phalloidin conjugates) | 1:200 - 1:500 dilution | Aqueous buffer | 30-60 min at 37°C |
| Cell-permeable nuclear stains (e.g., NucSpot Live) | 1-5 µM | DMSO | 15-20 min at 37°C |
| Lipid membrane stains (e.g., CellBrite dyes) | 1:1000 - 1:2000 dilution | Complete medium | 10-20 min at 37°C |
- Incubation Conditions: Ensure proper temperature (37°C) and physiological pH (7.4) during staining. Use pre-warmed media and avoid serum-containing buffers if they cause dye precipitation.
- Wash Steps: Perform gentle but thorough washing with dye-free imaging medium. For no-wash dyes, optimize concentration to minimize background while retaining signal.
- Validation: Confirm dye localization using known organelle markers and compare with fixed-cell counterparts when possible [4] [83].
Expected Outcomes: With optimized conditions, specific subcellular structures should be clearly visible with minimal cytoplasmic background. Live-cell dyes should show expected dynamics (e.g., mitochondrial movement, membrane trafficking).
Guide 2: Managing Dye Toxicity and Photostability Issues
Problem: Cells show morphological changes or die during extended live-cell imaging, or fluorescence fades quickly.
Solutions:
- Toxicity Mitigation:
- Use non-cytotoxic dye variants specifically designed for live-cell imaging (e.g., NucSpot Live, MitoView, ViaFluor stains) [83].
- Reduce exposure time and light intensity when possible.
- Include viability controls using membrane-impermeant dyes (e.g., propidium iodide, SYTOX dyes) to confirm cell health [84].
- Photostability Enhancement:
Validation: Compare cell viability and proliferation rates between stained and unstained control cells over the intended imaging duration.
Guide 3: Resolving Discrepancies Between Live and Fixed-Cell Staining Patterns
Problem: Cellular structures show different staining patterns or localization when comparing live versus fixed cells.
Solutions:
- Fixation Artifacts: Recognize that fixation can alter cellular morphology. Cross-validate critical findings using multiple fixation methods (e.g., compare formaldehyde vs. methanol fixation).
- Permeabilization Effects: For fixed-cell staining, optimize permeabilization conditions (detergent type, concentration, duration) to ensure proper dye access without destroying cellular structures.
- Dye Compatibility: Verify that live-cell dyes are compatible with fixation if subsequent fixed-cell imaging is planned. Some dyes (e.g., Thiazole Green, RedDot1) are not suitable for use after fixation [83].
Troubleshooting Workflow: Follow this logical pathway to diagnose staining discrepancies:
Frequently Asked Questions (FAQs)
Q1: Can I use the same dye concentrations for live and fixed-cell staining?
A: Generally not. Fixed cells often require different dye concentrations due to altered accessibility and the absence of active dye transport/sequestration mechanisms. For example, live-cell mitochondrial dyes (e.g., MitoTracker) typically rely on membrane potential for accumulation, while fixed-cell mitochondrial stains may use different targeting mechanisms. Always perform concentration titration for each application [4] [83].
Q2: How do I determine if a dye is suitable for long-term live-cell imaging?
A: Evaluate these key parameters:
- Cytotoxicity: Compare cell viability and proliferation between stained and unstained cells over the intended imaging period.
- Photostability: Measure fluorescence intensity decay under continuous illumination.
- Compartment fidelity: Confirm the dye remains in its target compartment throughout imaging.
- Functional interference: Verify that key cellular processes (e.g., division, motility) remain unaffected.
Refer to the following comparison of staining stability across dye classes:
| Dye Class | Typical Stability (Live Cells) | Fixability | Notes |
|---|---|---|---|
| Nuclear stains (Hoechst, NucSpot Live) | Several days | Yes | Stable for long-term imaging [83] |
| Membrane stains (CellBrite Steady) | ≥24 hours | Some variants | Even staining in complete medium [83] |
| Mitochondrial stains (MitoView, MitoBrilliant) | Days | No for some | Membrane potential-dependent [4] [83] |
| Lysosomal stains (LysoView, LysoTracker) | Days | No | pH-dependent; may fade faster [2] |
| Cytoplasmic dyes (Calcein-AM) | ≤24 hours | No | Short-term labeling only [83] |
Q3: What are the key considerations when transitioning from fixed-cell to live-cell imaging for phenotypic screening?
A: Key considerations include:
- Dye selection: Choose dyes with confirmed live-cell compatibility, low toxicity, and appropriate photostability [4] [83].
- Environmental control: Maintain physiological temperature, pH, and gas exchange during imaging.
- Timing: Account for dynamic processes - single timepoints may not capture relevant phenotypes.
- Validation: Establish correlation between live-cell endpoints and traditional fixed-cell readouts.
- Data complexity: Live-cell imaging generates larger, more complex datasets requiring specialized analysis tools.
Q4: How can I expand multiplexing capability while maintaining live-cell compatibility?
A: Consider these approaches:
- Spectral separation: Use dyes with distinct excitation/emission spectra to minimize crosstalk.
- Sequential staining: Stain different compartments at different times based on dye kinetics.
- Advanced dyes: Employ newly developed dyes like those in the ChromaLive series that offer improved multiplexing capacity [4].
- Iterative approaches: For fixed cells, methods like Cell Painting PLUS enable iterative staining-elution cycles to significantly expand multiplexing capacity, though this is not compatible with live cells [2].
Experimental Protocols for Dye Validation
Protocol 1: Side-by-Side Comparison of Live vs. Fixed-Cell Dye Performance
Purpose: Systematically evaluate how staining patterns, intensity, and subcellular localization differ between live and fixed-cell conditions.
Materials:
- Cultured cells (appropriate cell line for your research)
- Live-cell imaging medium (physiological buffer with nutrients)
- Fixation reagent (e.g., 4% formaldehyde in PBS)
- Permeabilization buffer (if required for fixed cells)
- Test dyes (selected based on target structures)
- High-content imaging system with environmental control
Methodology:
- Cell Preparation: Plate cells in multi-well plates suitable for imaging. Grow to 60-70% confluence.
- Live-Cell Staining:
- Replace medium with pre-warmed live-cell imaging medium.
- Add live-cell dyes at optimized concentrations.
- Incubate at 37°C with 5% CO₂ for manufacturer-recommended time.
- For no-wash dyes, proceed directly to imaging. For others, perform gentle washes with pre-warmed medium.
- Image live cells using appropriate environmental control.
- Fixed-Cell Staining:
- Fix parallel cultures with 4% formaldehyde for 15 minutes at room temperature.
- Permeabilize with 0.1% Triton X-100 if required for dye access.
- Apply fixed-cell compatible dyes using manufacturer's protocol.
- Image using same settings as live cells.
- Image Analysis:
- Quantify staining intensity, pattern, and subcellular localization.
- Compare signal-to-noise ratios between conditions.
- Assess structural preservation using morphological metrics.
Expected Results: Systematic differences in staining patterns between live and fixed cells that inform optimal dye selection for specific applications [85] [83].
Protocol 2: Dye Toxicity and Functional Interference Assessment
Purpose: Quantitatively evaluate how staining protocols affect cell health and function.
Materials:
- Cell culture with appropriate growth medium
- Candidate dyes across different classes
- Viability indicators (e.g., propidium iodide, Calcein-AM)
- Metabolic activity assay (e.g., MTT, PrestoBlue)
- Time-lapse imaging system
Methodology:
- Staining Regimen: Apply dyes to parallel cultures at recommended concentrations.
- Viability Tracking: Include membrane-impermeant dyes (e.g., propidium iodide) to identify dead cells.
- Functional Assessment:
- Monitor cell division through time-lapse imaging.
- Track cell motility using live-cell tracking.
- Assess metabolic activity at endpoint using standardized assays.
- Control Groups: Include unstained controls and cells treated with known cytotoxic compounds as benchmarks.
- Data Collection: Collect data at multiple timepoints (immediately, 4h, 24h post-staining).
Analysis: Compare viability, proliferation rates, and metabolic activity between stained and control cells. Dyes causing >20% reduction in viability or proliferation may require optimization [83] [84].
Research Reagent Solutions
The following table details essential materials for live-cell and fixed-cell imaging experiments:
| Category | Specific Products | Key Features | Primary Applications |
|---|---|---|---|
| Nuclear Stains | Hoechst 33342, NucSpot Live 488/650, DAPI | Cell-permeant (live), fixable, low toxicity | Nuclear visualization, cell counting [83] |
| Membrane Stains | CellBrite Steady, CellBrite Cytoplasmic, MemBrite Fix | Uniform staining, fixable options, long-term tracking | Membrane dynamics, cell tracing [83] |
| Mitochondrial Stains | MitoView, MitoBrilliant, MitoTracker analogs | Membrane potential-dependent, various colors | Mitochondrial morphology, function [4] [83] |
| Actin Stains | Phenovue phalloidin 400LS, Phalloidin conjugates | Fixable, high specificity, long Stokes shift | Cytoskeletal organization, morphology [4] |
| Viability Indicators | SYTOX dyes, Propidium iodide, Calcein-AM | Membrane integrity-based, metabolic activity | Cell health assessment, toxicity [83] [84] |
| Specialized Dyes | LysoView, LipidSpot, SynaptoGreen/Red | Organelle-specific, functional probes | Lysosomes, lipid droplets, vesicles [83] |
Experimental Workflow for Dye Evaluation
The following diagram illustrates the comprehensive workflow for systematically evaluating and optimizing dye performance in live versus fixed-cell applications:
Evaluating Phenotypic Distinctiveness Across Different Compound Classes
Frequently Asked Questions (FAQs)
Q1: What is phenotypic distinctiveness and why is it challenging to measure? Phenotypic distinctiveness refers to the ability to distinguish a compound's morphological profile not just from negative controls, but from all other active compounds in a screening dataset. This is challenging due to the high dimensionality of profiling data, technical variation, and the fact that some compound classes may produce overlapping or similar phenotypic responses [4] [86]. The mAP (mean average precision) framework addresses this by treating profile evaluation as an information retrieval problem, assessing whether a compound's replicates reliably cluster together when ranked against all other active treatments [86].
Q2: Can I substitute dyes in the standard Cell Painting panel without affecting distinctiveness? Research indicates that some individual dye substitutions have minimal impact. For example, replacing the standard mitochondrial dye with MitoBrilliant or substituting phalloidin with Phenovue phalloidin 400LS showed comparable performance in separating biological replicates [4]. However, the live-cell compatible ChromaLive dye exhibited distinct performance profiles across different compound classes compared to the standard fixed-cell panel, with later time points providing better distinctiveness [4].
Q3: How does live cell painting compare to fixed cell methods for evaluating distinctiveness? Live Cell Painting (LCP) offers superior biological relevance by capturing cells in their physiological state and provides additional kinetic data [87]. However, temporal factors affect distinctiveness - later time points often show better separation between compound classes [4]. Fixed cell methods like standard Cell Painting and Cell Painting PLUS benefit from established multiplexing but lack temporal resolution [2] [78].
Q4: What are the advantages of Cell Painting PLUS for phenotypic profiling? Cell Painting PLUS significantly expands multiplexing capacity through iterative staining-elution cycles, allowing labeling of at least nine subcellular compartments in separate imaging channels [2]. This improves organelle-specificity and diversity of phenotypic profiles compared to standard Cell Painting, where signals from multiple organelles are often merged in the same channel [2]. The separate imaging reduces spectral crosstalk, potentially enhancing phenotypic distinctiveness.
Troubleshooting Guides
Problem 1: Poor Separation Between Compound Classes
Symptoms: Low phenotypic distinctiveness scores; compounds with different mechanisms of action cluster together in dimensionality reduction plots.
| Potential Cause | Solution | Reference |
|---|---|---|
| Suboptimal dye panel | Consider expanding organelle coverage with Cell Painting PLUS or testing dye substitutions that better highlight relevant biology | [2] [4] |
| Insufficient feature specificity | Use dyes in separate imaging channels rather than merging signals; this improves organelle-specificity of profiles | [2] |
| Inappropriate evaluation metric | Implement the mAP framework to specifically assess phenotypic distinctiveness against all other active compounds | [86] |
Problem 2: Technical Variability Masking Biological Signals
Symptoms: High background noise, poor replicate consistency, batch effects overwhelming biological variation.
| Potential Cause | Solution | Reference |
|---|---|---|
| Photobleaching | Use antifade reagents (ProLong Live for live cells; ProLong Diamond for fixed cells); reduce light exposure | [31] |
| Autofluorescence | Include unstained controls; use charge-based blockers like Image-iT FX Signal Enhancer; choose longer wavelength channels | [31] [88] |
| Cell density effects | Standardize seeding density, as significant inverse relationships between density and phenotypic measures have been observed | [78] |
Problem 3: Live Cell Imaging Challenges
Symptoms: Rapid photobleaching, poor viability, weak signal-to-noise ratio in temporal data.
| Potential Cause | Solution | Reference |
|---|---|---|
| Phototoxicity | Optimize imaging intervals; use lower light intensity; add ProLong Live Antifade Reagent to media | [31] |
| Dye sensitivity | Test alternative live-cell compatible dyes like ChromaLive; ensure proper washing of unbound dye | [4] [31] |
| Temporal resolution | Capture later time points (often show better distinctiveness); ensure consistent environmental control | [4] |
Experimental Protocols
Protocol 1: Implementing the mAP Framework for Distinctiveness Assessment
Purpose: Systematically evaluate phenotypic distinctiveness across compound classes using information retrieval principles [86].
Workflow:
- Profile Generation: Generate morphological profiles for all compounds including multiple biological replicates
- Distance Calculation: Compute pairwise distances between all profiles using appropriate metrics
- Retrieval Evaluation: For each compound, rank all other profiles by similarity to its replicates
- mAP Calculation: Calculate mean average precision - the ability to retrieve same-compound replicates before others
- Statistical Testing: Assign significance to mAP scores to filter truly distinctive phenotypes
Protocol 2: Cell Painting PLUS for Enhanced Multiplexing
Purpose: Expand phenotypic profiling capacity through iterative staining-elution cycles [2].
Key Steps:
- Initial Staining: Label first set of organelles (e.g., plasma membrane, actin, RNA, nucleoli)
- Imaging: Capture each dye in separate channels
- Elution: Apply elution buffer (0.5 M L-Glycine, 1% SDS, pH 2.5) to remove dyes while preserving morphology
- Re-staining: Label second set of organelles (e.g., lysosomes, nuclear DNA, ER, mitochondria, Golgi)
- Image Registration: Combine image stacks using reference channel (e.g., Mito dye)
- Feature Extraction: Generate organelle-specific morphological features
Critical Notes:
- Complete imaging within 24 hours after staining for signal stability
- Characterize fluorescence properties of each dye in your specific experimental setting
- Mito dye signal remains through elution and serves as registration reference [2]
Research Reagent Solutions
Essential materials and their functions for phenotypic distinctiveness studies:
| Reagent Category | Specific Examples | Function | Distinctiveness Consideration |
|---|---|---|---|
| Standard Dyes | MitoTracker, Phalloidin, Concanavalin A | Labels mitochondria, actin cytoskeleton, ER | Balanced multiplexing but channel merging may reduce specificity [2] |
| Alternative Dyes | MitoBrilliant, Phenovue phalloidin 400LS | Direct substitutions with minimal performance impact | Enables channel separation; Phenovue 400LS accommodates additional 568 nm dye [4] |
| Live-Cell Dyes | ChromaLive | Real-time assessment in physiological conditions | Captures kinetic data; temporal progression improves distinctiveness [4] [87] |
| Antifade Reagents | ProLong Live (live cells), ProLong Diamond (fixed) | Reduces photobleaching, preserves signal | Critical for maintaining signal integrity across multiple imaging cycles [31] |
| Signal Enhancers | Image-iT FX Signal Enhancer | Blocks non-specific binding due to charge interactions | Reduces background, improves signal-to-noise ratio [31] [88] |
| Elution Buffers | Glycine-SDS buffer (pH 2.5) | Removes dye signals between staining cycles | Enables Cell Painting PLUS multiplexing; preserves morphology [2] |
Advanced Methodological Framework
The diagram below illustrates the complete experimental and computational workflow for evaluating phenotypic distinctiveness:
Correlating Morphological Profiles with Transcriptomic and Proteomic Data
Foundations of Multi-Modal Data Integration
Core Concepts and Rationale
Integrating morphological profiling with transcriptomic and proteomic data creates a powerful framework for understanding cellular responses to perturbations in phenotypic screening research. This multi-modal approach enables researchers to connect observable cellular structures with underlying molecular mechanisms, providing a systems-level view of biological processes.
Key Integration Challenges: Several technical and biological factors complicate data integration:
- Temporal Disconnects: Protein and transcript abundance often exhibit poor correlation (typically ~0.4 Spearman correlation) due to differing half-lives and post-transcriptional regulation [89] [90].
- Measurement Limitations: Transcriptomic and proteomic data are often collected from different cell populations, averaging biological signals across heterogeneous samples [89].
- Technical Variability: Different sample preparation requirements and platform-specific artifacts create integration barriers across omics layers [91].
Integration Methodologies
Network-Based Integration: The GENIE3 random forest method has demonstrated superior performance for building unified feature association networks that maximize edges between different data types (transcripts, proteins, morphological features) without sacrificing network quality [92].
Ratio-Based Profiling: Emerging approaches using common reference materials enable more reproducible integration by scaling absolute feature values of study samples relative to concurrently measured reference samples, facilitating cross-platform and cross-omics comparisons [91].
Troubleshooting Guides
Dye Optimization and Validation
Table 1: Troubleshooting Dye-Related Issues in Live Cell Phenotypic Screening
| Problem | Possible Causes | Solutions | Validation Approach |
|---|---|---|---|
| Poor correlation between morphological and molecular profiles | Spectral overlap in dye emission; suboptimal dye concentrations | Implement iterative staining-elution cycles (CPP assay); use dyes with distinct emission spectra; validate organelle-specificity | Compare feature extraction from separate vs. merged channels; assess signal-to-noise ratio [2] [4] |
| Inconsistent staining in live-cell experiments | Photobleaching; cytotoxicity; suboptimal dye concentration | Optimize dye concentration for each cell line; use photostable dyes (e.g., MitoBrilliant, Phenovue phalloidin 400LS); include viability markers | Test multiple concentrations with control perturbations; measure staining intensity stability over 24 hours [4] [1] |
| Incompatibility between fixed and live-cell profiling | Fixation artifacts; differential dye accessibility | Develop parallel protocols using live-cell compatible dyes (e.g., ChromaLive, acridine orange); establish matched fixation procedures | Compare phenotypic profiles generated from live vs. fixed cells using the same perturbations [4] [1] |
| Limited multiplexing capacity | Spectral overlap of traditional Cell Painting dyes | Implement Cell Painting PLUS with iterative staining-elution; incorporate near-infrared reagents; use spectral unmixing | Assess number of distinct organelles resolved; quantify emission bleed-through [2] [93] |
Data Integration Challenges
Table 2: Troubleshooting Multi-Omics Data Integration Issues
| Problem | Possible Causes | Solutions | Validation Approach |
|---|---|---|---|
| Poor transcript-protein correlation | Biological regulation (translation efficiency, degradation); technical variability | Implement paired sampling protocols; analyze ribosome-associated mRNA; use ratio-based profiling with reference materials | Calculate correlation for housekeeping genes; assess consistency in pathway-level patterns [89] [90] [91] |
| Batch effects across data modalities | Different platforms; sample processing variations; temporal drift | Implement common reference materials (e.g., Quartet Project); use ratio-based quantification; apply batch correction algorithms | Evaluate separation of built-in controls; assess SNR metrics across batches [91] |
| Difficulty identifying coherent signatures | Biological complexity; insufficient sample size; analytical approach | Use network-based integration (GENIE3); focus on cell-type-specific signature genes; apply pathway enrichment analysis | Validate identified networks with orthogonal methods; assess functional coherence [90] [92] |
| Morphological profiles don't align with molecular data | Different sensitivity thresholds; temporal mismatches in responses | Collect time-course data; optimize feature extraction parameters; include positive controls with known mechanisms | Test compounds with established MoAs; assess consistency across biological replicates [2] [94] |
Experimental Protocols
Cell Painting PLUS (CPP) Assay Protocol
The CPP assay significantly expands multiplexing capacity through iterative staining-elution cycles, enabling profiling of nine subcellular compartments with improved organelle specificity [2].
Materials Required:
- Cell Painting PLUS dye set (plasma membrane, actin cytoskeleton, cytoplasmic RNA, nucleoli, lysosomes, nuclear DNA, ER, mitochondria, Golgi apparatus)
- CPP elution buffer (0.5 M L-Glycine, 1% SDS, pH 2.5)
- Paraformaldehyde (PFA) fixation solution
- Imaging-compatible multiwell plates
- High-content imaging system with minimum 5 fluorescence channels
Step-by-Step Procedure:
Cell Preparation and Fixation
- Seed cells in imaging plates and culture until 70-80% confluent
- Treat with experimental perturbations (compounds, genetic manipulations)
- Fix with 4% PFA for 15 minutes at room temperature
- Permeabilize with 0.1% Triton X-100 if required for intracellular dyes
First Staining Cycle
- Apply first dye combination (typically nuclear DNA, RNA, ER, actin)
- Incubate according to dye-specific protocols (typically 30-60 minutes)
- Image using appropriate channels with optimized exposure times
- Critical Step: Establish imaging parameters that avoid signal saturation while maintaining adequate dynamic range
Dye Elution
- Apply CPP elution buffer for 15-30 minutes at room temperature
- Verify complete dye removal by re-imaging same fields
- Note: Mitochondrial dye signal is preserved intentionally for image registration
Subsequent Staining Cycles
- Apply next dye set (typically lysosomes, Golgi, additional markers)
- Image using dedicated channels
- Repeat elution and staining cycles as needed for additional markers
Image Processing and Feature Extraction
- Register images from multiple cycles using mitochondrial channel as reference
- Extract morphological features for each subcellular compartment separately
- Generate unified phenotypic profiles incorporating all nine compartments
Protocol Optimization Tips:
- Validate elution efficiency for each dye combination using control wells
- Include reference compounds with known mechanisms in each experiment
- Establish quality control metrics for staining intensity and morphology preservation
- Process samples within 24 hours after staining to ensure signal stability [2]
Integrated Live-Cell Imaging and Molecular Profiling
This protocol enables correlative analysis of dynamic morphological changes with endpoint transcriptomic/proteomic measurements [1].
Workflow Integration Diagram:
Procedure Details:
Live-Cell Imaging Phase
- Seed cells in imaging-compatible plates (8×10² cells/well for 96-well format)
- Treat with experimental perturbations
- Stain with 10 μM acridine orange (AO) in non-supplemented medium [1]
- Acquire time-lapse images using GFP (469/35 nm ex, 525/39 nm em) and PI (531/40 nm ex, 647/57 nm em) filter sets
- Maintain environmental control (37°C, 5% CO₂) throughout imaging
Endpoint Sample Processing
- Partition cells for multi-omics analysis:
- RNA: Extract using standardized RNA-seq protocols
- Proteomics: Process using LC-MS/MS compatible protocols
- Include technical replicates for analytical variability assessment
- Partition cells for multi-omics analysis:
Data Integration
- Extract morphological features from time-lapse data (CellProfiler, CellPose)
- Process transcriptomic (RNA-seq alignment, quantification) and proteomic (MaxQuant, label-free quantification) data
- Apply ratio-based normalization using common reference materials when possible [91]
- Perform integrated network analysis using GENIE3 or similar approaches [92]
Frequently Asked Questions (FAQs)
Q1: What is the typical correlation we should expect between transcriptomic and proteomic data from the same samples? A: Generally low correlations (Spearman rank coefficient ~0.4) are commonly observed between mRNA and protein abundances from the same cells, with approximately 40% of RNA-protein pairs showing coherent expression [89] [90]. This discrepancy arises from biological regulation (differing half-lives, translation efficiency) rather than technical artifacts alone. Cell-type-specific signature genes involved in core functional processes typically show higher correlations.
Q2: How can we overcome spectral overlap limitations when expanding dye panels for morphological profiling? A: Multiple strategies exist: (1) Implement Cell Painting PLUS with iterative staining-elution cycles to image dyes separately [2]; (2) Incorporate near-infrared reagents to expand spectral range [93]; (3) Use dyes with distinct Stokes shifts (e.g., Phenovue phalloidin 400LS) [4]; (4) Apply computational spectral unmixing algorithms during image analysis.
Q3: What are the key considerations when designing experiments that integrate live-cell imaging with endpoint molecular profiling? A: Critical factors include: (1) Ensuring cell viability throughout live imaging (optimize dye concentrations, minimize phototoxicity); (2) Temporal alignment - molecular sampling should correspond to key phenotypic transitions; (3) Including reference perturbations with known mechanisms; (4) Planning sufficient material for all assays, as sample partitioning reduces available material per assay [1].
Q4: How can we address batch effects when integrating data collected across different platforms or laboratories? A: The most effective approach is implementing ratio-based profiling using common reference materials, such as those developed by the Quartet Project [91]. This involves scaling absolute feature values of study samples relative to concurrently measured reference samples, significantly improving reproducibility and cross-platform comparability.
Q5: What alternative dyes are available for live-cell phenotypic profiling that maintain compatibility with downstream molecular analyses? A: Several validated alternatives include: MitoBrilliant (mitochondria), Phenovue phalloidin 400LS (actin), and ChromaLive for live-cell applications [4]. Acridine orange provides a cost-effective option for live-cell imaging of nucleic acids and acidic compartments [1]. When substituting dyes, always validate against established standards using reference compounds.
Q6: How can we improve detection of subtle phenotypes that may not be apparent using standard morphological profiling? A: Consider these approaches: (1) Increase feature specificity by implementing Cell Painting PLUS to resolve organelles in separate channels [2]; (2) Incorporate kinetic profiling through live-cell imaging to capture dynamic responses [1]; (3) Combine morphological with molecular profiling to identify coherent signatures across data types; (4) Focus on subpopulation analysis rather than population averages.
The Scientist's Toolkit: Essential Research Reagents
Table 3: Key Reagent Solutions for Integrated Morphological-Molecular Profiling
| Reagent/Category | Specific Examples | Function/Application | Considerations |
|---|---|---|---|
| Live-Cell Dyes | Acridine Orange, ChromaLive, MitoBrilliant | Dynamic morphological profiling; viability assessment | Optimize concentration per cell line; monitor phototoxicity [4] [1] |
| Fixed-Cell Dyes | Traditional Cell Painting dyes, Phenovue phalloidin 400LS | High-resolution subcellular structure visualization | Balance between signal intensity and spectral overlap [2] [4] |
| Elution Buffers | CPP elution buffer (0.5 M Glycine, 1% SDS, pH 2.5) | Dye removal for iterative staining | Validate morphology preservation; optimize for each dye [2] |
| Reference Materials | Quartet Project references (DNA, RNA, protein) | Cross-platform normalization; batch effect correction | Implement ratio-based quantification [91] |
| Cell Lines | MCF-7/vBOS, U2OS, A549 (wild-type and p53 KO) | Assay development; perturbation testing | Characterize baseline morphology; document culture conditions [2] [93] |
Workflow Integration Framework
Multi-Omics Integration Strategy:
Quantitative Data Integration Standards
Table 4: Key Quantitative Metrics for Quality Control in Integrated Profiling
| Metric Category | Target Value | Calculation Method | Application Context |
|---|---|---|---|
| Transcript-Protein Correlation | Spearman rs ~0.4 (global); >0.6 (pathway-specific) | Pairwise correlation of abundance values | Assess biological coherence; identify regulated targets [90] |
| Signal-to-Noise Ratio (SNR) | >5 for robust feature detection | Ratio of biological signal to technical variability | QC for quantitative omics profiling [91] |
| Staining Intensity Stability | <10% deviation over 24 hours | Coefficient of variation across time points | Ensure morphological profiling reproducibility [2] |
| Mendelian Concordance | >99% for DNA variants | Inheritance pattern consistency in family designs | QC for genomic data quality [91] |
| Network Integration Score | Maximize cross-omics edges | Proportion of edges connecting different data types | Evaluate multi-omics network quality [92] |
Conclusion
Optimizing dye concentrations is not merely a technical step but a fundamental requirement for generating biologically relevant data in live-cell phenotypic screening. Success hinges on a holistic approach that integrates the selection of photostable, live-cell compatible dyes, rigorous titration and multiplexing protocols, proactive troubleshooting to preserve cell health, and robust validation against known benchmarks. As the field advances, future developments will likely focus on the creation of novel, brighter, and more photostable dyes, the deeper integration of AI and machine learning for image analysis and phenotypic clustering, and the standardized application of these optimized assays in drug discovery pipelines and toxicological risk assessment. By adhering to these optimized practices, researchers can fully leverage the power of live-cell imaging to uncover dynamic cellular responses and accelerate therapeutic development.
References
- 1. Image-Based Profiling in Live Cells Using Live Cell Painting [https://pmc.ncbi.nlm.nih.gov/articles/PMC12514141/]
- 2. Cell Painting PLUS: expanding the multiplexing capacity of ... [https://www.nature.com/articles/s41467-025-58765-8]
- 3. Tales of 1008 small molecules: phenomic profiling through ... [https://www.nature.com/articles/s41598-020-69354-8]
- 4. Alternate dyes for image-based profiling assays [https://www.sciencedirect.com/science/article/pii/S2472555225000619]
- 5. Optimizing live-cell imaging: From probe to FLIM-STED ... [https://bio-protocol.org/webinar/detail?number=577683940903485442]
- 6. Fast segmentation and multiplexing imaging of organelles ... [https://www.nature.com/articles/s41467-025-57877-5]
- 7. Advancements and perspectives on organelle-targeted ... [https://pubs.rsc.org/en/content/articlehtml/2025/sc/d5sc04640h]
- 8. Enhancing biological imaging with high-performance ... [https://pmc.ncbi.nlm.nih.gov/articles/PMC12494569/]
- 9. Cell Staining Dye in the Real World: 5 Uses You'll Actually ... [https://www.linkedin.com/pulse/cell-staining-dye-real-world-5-uses-youll-actually-see-2025-lumbf/]
- 10. Modulating cellular cytotoxicity and phototoxicity of ... [https://pmc.ncbi.nlm.nih.gov/articles/PMC6814864/]
- 11. Live-Cell Imaging Tips for Experimental Success [https://www.technologynetworks.com/analysis/how-to-guides/live-cell-imaging-tips-for-experimental-success-399704]
- 12. Fluorescent dyes: spectra, types & applications [https://www.baseclick.eu/science/glossar/fluorescent-dyes/]
- 13. Live-Cell Imaging | Thermo Fisher Scientific - US [https://www.thermofisher.com/us/en/home/life-science/cell-analysis/cellular-imaging/fluorescence-microscopy-and-immunofluorescence-if/microscopy-reagents-and-media/live-cell-imaging-reagents.html]
- 14. Guides for Live Cell Imaging Dyes [https://www.creative-bioarray.com/support/guides-for-live-cell-imaging-dyes.htm]
- 15. A general strategy for developing cell-permeable photo- ... [https://www.nature.com/articles/ncomms6573]
- 16. ChromaLIVE – Saguaro Bio [https://www.saguarobio.com/pages/chromalive-non-toxic-dye]
- 17. Protocol for ChromaLIVE™ Non-Toxic Dye [https://www.tocris.com/cn/resources/protocols/live-cell-imaging-dyes/protocol-chromalive-non-toxic-dye]
- 18. Painting: New nontoxic Live to probe Cell physiology in high... dye cell [https://pubmed.ncbi.nlm.nih.gov/39492484/]
- 19. FAQ - ChromaLIVE™ non-toxic dye [https://www.saguarobio.com/blogs/resources/chromalive-dye-faq]
- 20. Exploring Time-Dependent Phenotypic Changes [https://www.news-medical.net/health/Exploring-Time-Dependent-Phenotypic-Changes-with-Live-Cell-Painting.aspx]
- 21. MitoTracker™ Red FM - Special Packaging, 20 x 50 μg ... [https://www.thermofisher.com/store/v3/products/faqs/M22425]
- 22. MitoTracker: A useful tool in need of better alternatives [https://www.sciencedirect.com/science/article/pii/S0171933523000869]
- 23. MitoTracker™ Red CMXRos Dye, for flow cytometry - FAQs [https://www.thermofisher.com/order/catalog/product/M46752/faqs]
- 24. MitoTracker ® Green FM #9074 [https://www.cellsignal.com/products/buffers-dyes/mitotracker-green-fm/9074?srsltid=AfmBOorXJ0ijSCrzlV8b49hCL9K02pQDeX8NeCc68SokWFduZolwS_By]
- 25. MitoBrilliant™ Protocol [https://www.tocris.com/resources/protocols/mitobrilliant-probes/mitobrilliant-protocol]
- 26. MitoBrilliant Mitochondria Dyes [https://www.tocris.com/product-type/mitobrilliant]
- 27. Alternate dyes for image-based profiling assays [https://pubmed.ncbi.nlm.nih.gov/40885286/]
- 28. Troubleshooting Tips for Fluorescence Staining [https://biotium.com/tech-tips-protocols/troubleshooting-tips-for-fluorescence-staining/]
- 29. Troubleshooting in Fluorescent Staining [https://www.creative-bioarray.com/support/troubleshooting-in-fluorescent-staining.htm]
- 30. Flow Cytometry Troubleshooting Guide [https://fluorofinder.com/flow-cytometry-troubleshooting/]
- 31. Cell Imaging Support—Troubleshooting [https://www.thermofisher.com/us/en/home/technical-resources/technical-reference-library/cell-analysis-support-center/cell-imaging-support/cell-imaging-support-troubleshooting.html]
- 32. CellTrace Violet Cell Proliferation Kit Protocol [https://www.thermofisher.com/us/en/home/references/protocols/cell-and-tissue-analysis/protocols/celltrace-violet-cell-proliferation-protocol.html]
- 33. An Optimized LIVE/DEAD Assay Coupled with Flow ... [https://pmc.ncbi.nlm.nih.gov/articles/PMC12453624/]
- 34. Cell Proliferation Assays for Live-Cell Analysis [https://www.sartorius.com/en/applications/life-science-research/live-cell-assays/proliferation]
- 35. Expanding the multiplexing capacity of Cell Painting-based ... [https://zenodo.org/doi/10.5281/zenodo.14982928]
- 36. IHC Troubleshooting Guide [https://www.thermofisher.com/us/en/home/life-science/protein-biology/protein-biology-learning-center/protein-biology-resource-library/pierce-protein-methods/ihc-troubleshooting-guide.html]
- 37. Ultimate IHC Troubleshooting Guide: Fix Weak Staining & ... [https://www.atlasantibodies.com/knowledge-hub/blog/the-ultimate-ihc-troubleshooting-guide-from-weak-staining-to-high-background/]
- 38. Cell Painting High-Content Image Assay [https://www.thermofisher.com/us/en/home/life-science/cell-analysis/cell-structure/cell-painting-assay.html]
- 39. Cell Painting, a high-content image-based assay for ... [https://pmc.ncbi.nlm.nih.gov/articles/PMC5223290/]
- 40. Cell-Based Screening: Extracting Meaning from Complex ... [https://pmc.ncbi.nlm.nih.gov/articles/PMC4457442/]
- 41. Systematic data analysis pipeline for quantitative ... [https://www.sciencedirect.com/science/article/pii/S2001037024002460]
- 42. Optimization and Troubleshooting [https://evidentscientific.com/en/microscope-resource/knowledge-hub/techniques/fluorescence/troubleshoot]
- 43. Slide scanning: Troubleshooting for fluorescence microscopy [https://www.mbfbioscience.com/help/neurolucida/Content/Ribbons/Acquire/SlideScanLegacy/SlideScan_TroubleshootFluo.htm]
- 44. Quantitative morphological analysis of 2D images of complex ... [https://bmcresnotes.biomedcentral.com/articles/10.1186/s13104-017-2424-0]
- 45. A quantitative image-based protocol for morphological ... [https://pmc.ncbi.nlm.nih.gov/articles/PMC8271172/]
- 46. Optimization of Dye and Plasticizer Concentrations in ... [https://pmc.ncbi.nlm.nih.gov/articles/PMC12158268/]
- 47. Modeling and optimization of dyeing process of polyamide ... [https://www.nature.com/articles/s41598-024-64761-7]
- 48. Phototoxicity in Live-Cell Imaging and Ways to Reduce It [https://www.thermofisher.com/us/en/home/life-science/cell-analysis/cell-analysis-learning-center/molecular-probes-school-of-fluorescence/imaging-basics/protocols-troubleshooting/troubleshooting/photoxicity.html]
- 49. Between life and death: strategies to reduce phototoxicity in ... [https://pmc.ncbi.nlm.nih.gov/articles/PMC8114953/]
- 50. Photosensitive Fluorescent Dye Contributes to ... [https://pmc.ncbi.nlm.nih.gov/articles/PMC3936296/]
- 51. Overcoming Photobleaching and Phototoxicity in Imaging [https://www.oxinst.com/learning/view/article/how-to-overcome-photobleaching-and-phototoxicity-in-live-cell-imaging]
- 52. Blocking Buffers for Western Blot and ELISA [https://www.thermofisher.com/us/en/home/life-science/protein-biology/protein-biology-learning-center/protein-biology-resource-library/pierce-protein-methods/blocking-buffers-western-blot-elisa.html]
- 53. Non-Specific Binding: Why It Needs to be Blocked in ... [https://info.gbiosciences.com/blog/non-specific-binding-why-it-needs-to-be-blocked-in-western-blots]
- 54. Western blot blocking: Best practices [https://www.abcam.com/en-us/knowledge-center/western-blot/western-blot-blocking-methods]
- 55. Reducing Non-Specific Binding in Western Blots: Blocking ... [https://synapse.patsnap.com/article/reducing-non-specific-binding-in-western-blots-blocking-agent-comparison]
- 56. Soymilk: an effective and inexpensive blocking agent for ... [https://pmc.ncbi.nlm.nih.gov/articles/PMC3383026/]
- 57. Flow Cytometry Troubleshooting Guide [https://www.cellsignal.com/learn-and-support/troubleshooting/flow-cytometry-troubleshooting-guide?srsltid=AfmBOorpllCCNGEDTMIvApjbVUNO_0ObblYqHsYyWTX6M4-GL-7W3_VH]
- 58. ICC/IF Troubleshooting [https://www.antibodies.com/applications/immunofluorescence/immunofluorescence-troubleshooting]
- 59. Fluorescence Live Cell Imaging - PMC [https://pmc.ncbi.nlm.nih.gov/articles/PMC4198327/]
- 60. Live Cell Imaging Protocol & Troubleshooting - Creative Biolabs [https://www.creativebiolabs.net/live-cell-imaging.htm]
- 61. Live-cell biosensors based on the fluorescence lifetime of ... [https://pmc.ncbi.nlm.nih.gov/articles/PMC10985238/]
- 62. New nontoxic dye to probe cell physiology in high content ... [https://www.sciencedirect.com/science/article/pii/S2472555223000758]
- 63. Multiplexed and reproducible high content screening of live ... [https://www.nature.com/articles/s41467-022-34536-7]
- 64. Spectral Bleed-Through Artifacts in Confocal Microscopy [https://evidentscientific.com/en/microscope-resource/knowledge-hub/techniques/confocal/bleedthrough]
- 65. Correcting for Spectral Cross-Talk in Dual-Color ... [https://pmc.ncbi.nlm.nih.gov/articles/PMC3495304/]
- 66. Introduction to Spectral Imaging - Zeiss Campus [https://zeiss-campus.magnet.fsu.edu/articles/spectralimaging/introduction.html]
- 67. Bleed-Through in Fluorescence Imaging [https://www.thermofisher.com/us/en/home/life-science/cell-analysis/cell-analysis-learning-center/molecular-probes-school-of-fluorescence/imaging-basics/protocols-troubleshooting/troubleshooting/bleed-through.html]
- 68. 10 Tips for Successful High Content Screening (HCS) Assays [https://www.enzo.com/note/10-tips-for-successful-high-content-screening-hcs-assays/]
- 69. The fluorescent protein palette: tools for cellular imaging - PMC [https://pmc.ncbi.nlm.nih.gov/articles/PMC2910338/]
- 70. Cell Painting PLUS: expanding the multiplexing capacity of Cell... [https://pmc.ncbi.nlm.nih.gov/articles/PMC12022024/]
- 71. A Guide to Studying Cell Proliferation by Generational ... [https://www.thermofisher.com/us/en/home/references/newsletters-and-journals/bioprobes-journal-of-cell-biology-applications/bioprobes-73/bioprobes-73-cell-proliferation-generational-tracing.html]
- 72. Monitoring Cell Proliferation by Dye Dilution - PubMed Central [https://pmc.ncbi.nlm.nih.gov/articles/PMC5831513/]
- 73. Effect of seeding density on stability of the differentiated ... [https://pubmed.ncbi.nlm.nih.gov/3058725/]
- 74. Improving drug discovery with high-content phenotypic ... [https://pmc.ncbi.nlm.nih.gov/articles/PMC4844861/]
- 75. Scalable, compressed phenotypic screening using pooled ... [https://www.nature.com/articles/s41587-024-02403-z]
- 76. Use of the Benchmark Dose Approach in Toxicology Risk ... [https://biobide.com/content/bdm-approach-in-risk-assessment]
- 77. Benchmark doses (BMD) extrapolated from in vitro ... [https://www.sciencedirect.com/science/article/abs/pii/S2468111325000064]
- 78. replicating high-throughput phenotypic profiling in a ... [https://pmc.ncbi.nlm.nih.gov/articles/PMC12477089/]
- 79. Comparison of Approaches for Determining Bioactivity Hits ... [https://www.sciencedirect.com/science/article/pii/S2472555222066709]
- 80. Phenotypic Profiling of Reference Chemicals Across ... [https://pmc.ncbi.nlm.nih.gov/articles/PMC9710725/]
- 81. Cell painting, Phenotypic and Morphological Profiling [https://www.moleculardevices.com/applications/cell-imaging/cell-painting]
- 82. Optimizing the Cell Painting assay for image-based profiling [https://pmc.ncbi.nlm.nih.gov/articles/PMC10536784/]
- 83. Cellular Stains Selection Guides [https://biotium.com/technology/cellular-stains/cellular-stains-comparison-guides/]
- 84. A Comprehensive Resource for State-of-the-Art Flow ... [https://www.thermofisher.com/us/en/home/references/newsletters-and-journals/bioprobes-journal-of-cell-biology-applications/bioprobes-77/guidelines-flow-cytometry-cell-sorting-immunological-studies.html]
- 85. A Critical and Comparative Review of Fluorescent Tools for ... [https://pmc.ncbi.nlm.nih.gov/articles/PMC12034319/]
- 86. A versatile information retrieval framework for evaluating ... [https://www.nature.com/articles/s41467-025-60306-2]
- 87. SBI2 poster 2025 - Key Considerations for Live Cell ... [https://www.saguarobio.com/blogs/resources/sbi2-poster-2025-key-considerations-for-live-cell-painting-screens-a-reference-guide]
- 88. Immunofluorescence (IF) Troubleshooting Guide [https://www.cellsignal.com/learn-and-support/troubleshooting/if-troubleshooting-guide?srsltid=AfmBOooHOLqX3KgHDCg-OByWtbUNASD4OWsVu7r3sj5i0sV9508tAveP]
- 89. Integrated Analysis of Transcriptomic and Proteomic Data - PMC [https://pmc.ncbi.nlm.nih.gov/articles/PMC3637682/]
- 90. Integration of transcriptomic and proteomic data identifies ... [https://pmc.ncbi.nlm.nih.gov/articles/PMC6766718/]
- 91. Multi-omics data integration using ratio-based quantitative ... [https://www.nature.com/articles/s41587-023-01934-1]
- 92. Unified feature association networks through integration of ... [https://journals.plos.org/ploscompbiol/article?id=10.1371/journal.pcbi.1007241]
- 93. Accelerating Drug Discovery with Expanded Cell Painting [https://www.thermofisher.com/blog/life-in-the-lab/accelerating-drug-discovery-with-expanded-cell-painting/]
- 94. A more scalable alternative to cell painting in HCS [https://www.celtarys.com/science-highlights/cell-painting-high-content-screening.html]